- Best way to create a bootable USB stick from an ISO image on Linux
- Create a bootable USB stick with mintstick
- What happened under the hood?
- What about other Linux distributions?
- Share
- How to Install Etcher USB Image Writing Tool on Ubuntu 20.04
- Introduction to Etcher
- Advantages of Etcher
- Installing the Etcher application
- Step 1: Addition of Etcher to the repository
- Step 2: Verification of installed packages
- Step 3: Updating package list
- Accessing the Application
- Uninstalling the Etcher application
- Conclusion
- Search
- About This Site
- Latest Tutorials
- How to Install Etcher, the USB Writing Tool, on Ubuntu
- A Recap of Etcher Features
- How to Install Etcher on Ubuntu
Best way to create a bootable USB stick from an ISO image on Linux
Creating a bootable USB stick on Linux can sometimes be a pain, depending on the ISO image and how it is built.
The tech-savvy people comfortable using the command line would probably chose the dd (disk dump) command to copy the ISO to a USB stick:
$ sudo dd if=~/Downloads/KNOPPIX_V9.1DVD-2021-01-25-EN.iso of=/dev/sdd bs=4096But Knoppix is an excellent example that this is not enough. The chances are high that this USB stick will not boot (mostly due to a problem of internal naming of its own drive).
There are a bunch of alternatives, such as unetbootin, but here too I experienced boot issues with the stick – depending on the source image.
However with the program mintstick, which is part of every recent Linux Mint release, I have (so far) only made great experiences!
Create a bootable USB stick with mintstick
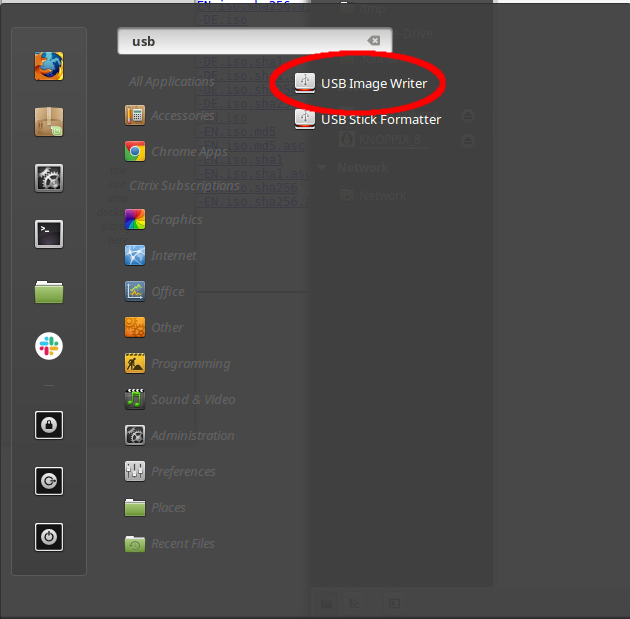
If you’re on a Linux Mint machine, simply enter «USB Image» in the menu and the «USB Image Writer» should show up in the list. Another way is to use a right-click on an ISO file and select «Make bootable USB stick» from the context menu.
Note: If it doesn’t show up, make sure you have the «mintstick» package installed.
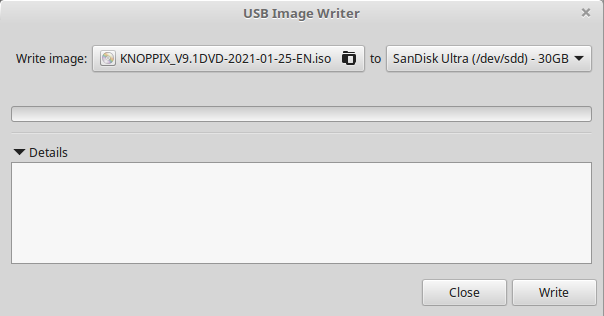
The program itself is very minimalistic and, honestly, there is no reason why it should offer a ton of options. Simply select the source ISO image and select the target drive (USB stick) and click on write. The program might ask for sudo permission before starting.
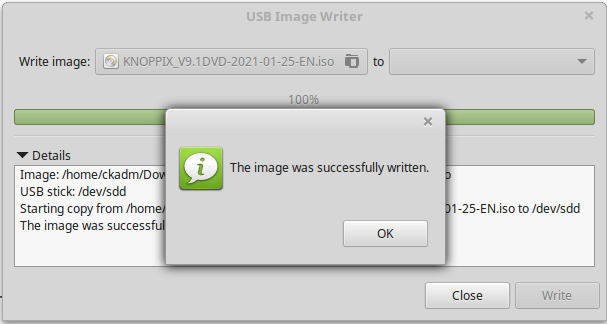
Once the ISO was written to the USB stick, the program informs and the USB Image Writer can be closed.
This works very well for all ISO images. I have yet to find an ISO where this did not work.
What happened under the hood?
By looking at the new partition table of our USB stick (/dev/sdd), we can see that three partitions were created:
ck@mint ~ $ sudo fdisk -l /dev/sdd Disk /dev/sdd: 28.7 GiB, 30752636928 bytes, 60063744 sectors Units: sectors of 1 * 512 = 512 bytes Sector size (logical/physical): 512 bytes / 512 bytes I/O size (minimum/optimal): 512 bytes / 512 bytes Disklabel type: dos Disk identifier: 0x6d716f2f Device Boot Start End Sectors Size Id Type /dev/sdd1 * 64 9126431 9126368 4.4G 0 Empty /dev/sdd2 9126432 9161247 34816 17M ef EFI (FAT-12/16/32) /dev/sdd3 9161248 9169439 8192 4M 83 LinuxThe first partition received the bootable flag. There is also a dedicated EFI partition (for UEFI boot support) and a 4MB small third partition which is a reiserfs formatted partition and serves as writable partition when using the booted stick. It will automatically extend to use the rest of the disk.
What about other Linux distributions?
The mintstick package can easily be installed on all other Debian-based Linux installations, including all Ubuntu derivatives.
One way is to add a PPA (Personal Package Archive) to the APT repository list. The «Linux Mint Daily Builds» PPA also contains the newest release of mintstick.
Another way is to directly download the deb package from the Linux Mint packages server and install the package using dpkg -i .
And another alternative is to clone the public code repository on GitHub and build your own deb package.
Share
Claudio has been writing way over 1000 articles on his own blog since 2008 already. He is fascinated by technology, especially Open Source Software. As a Senior Systems Engineer he has seen and solved a lot of problems — and writes about them.
How to Install Etcher USB Image Writing Tool on Ubuntu 20.04

Etcher is an open-source USB image writing tool that is extensively used all across the world. It is a tool that is available for many operating systems like Windows, Mac, and all of the major Linux platforms. In this article, we will provide users a walkthrough of how to install Etcher on the Ubuntu 20.04 system.
Introduction to Etcher
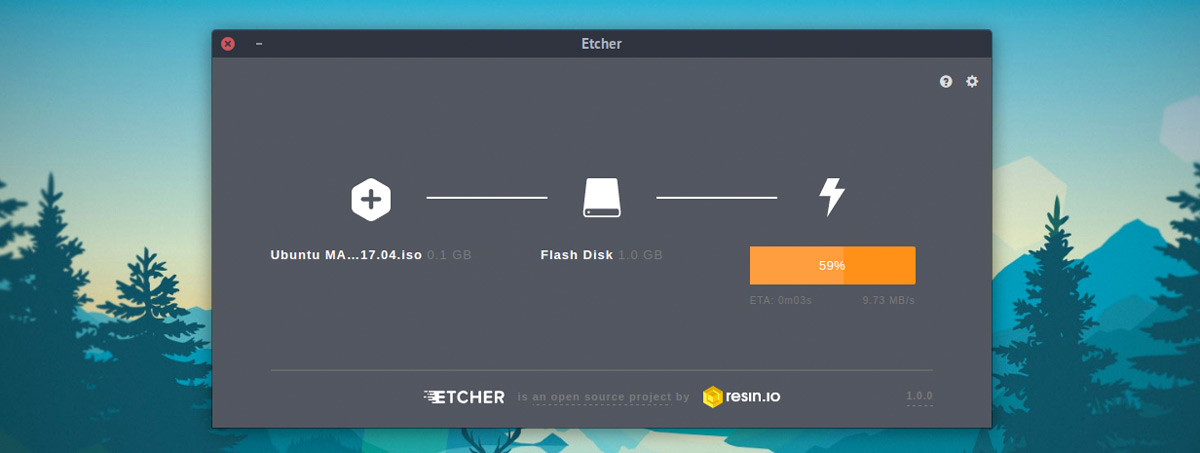
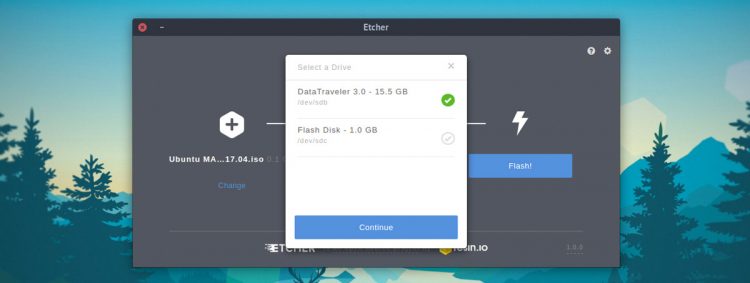
Etcher is the famous cross-platform tool available for all major operating systems. Users can follow the same methods on these operating systems like writing a .iso, .img or .zip files to their USB drives or any of their SD cards. Its main interface remains constant for all these OS and is very easy to use since it has only 3 steps on how to flash a .iso file to the USB drive. After opening up the application, simply choose an image and then select the drive, once done simply click on the Flash button, and that’s it! Yes, the setup also has a Validated Burning option to double-check the integrity to confirm the success of the operation.

Advantages of Etcher
Users can benefit from Etcher due to:
- Increased productivity since you do not require to write the images on any of the corrupted cards.
- Easy drive selection due to better visibility due to better UI and development.
- The best part of this application is that it burns the input file up to 50% faster.
- It is a cross-platform application
Installing the Etcher application
To install Etcher on the Ubuntu 20.04 system, you need to follow the steps given below:
Step 1: Addition of Etcher to the repository
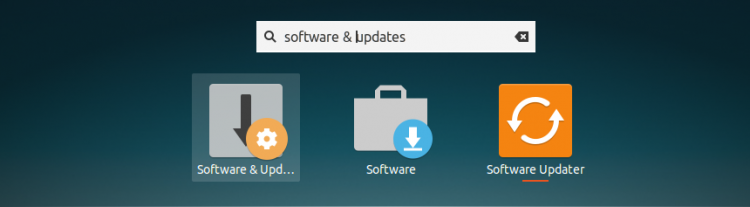
The foremost step in the installation of Etcher is to add it in your Software repository. Let’s access the Software & Updates application to perform this step. Go to the Applications of your system and then type Software & Updates. Once done, you will see the application in the available suggestions. Double click on it.

The Software & Updates window will open up just like the one displayed below. Here, you need to switch to the Other Software tab.

In the Other Software tab, we will be adding the required repo. Click on the Add option to add the Etcher repository.

A software-properties-gtk window will open up quite similar to the one displayed below. You need to type the following in the APT line field.
deb http://deb.etcher.io stable etcher

Then click on the Add Source button to add it as a source. The system might ask you to authenticate the process. Provide the password in the relevant Password field and then click on the Authenticate button to continue.

You can also add the repository via the terminal window using:
$ echo "deb https://deb.etcher.io stable etcher" | sudo tee /etc/apt/sources.list.d/balena-etcher.list
![]()
Since we already had added it so we received this as an output.

Step 2: Verification of installed packages
To verify that packages have correctly been installed from the repository users need to add this key. This method will help them to install Etcher as by default Ubuntu disables unsigned repositories. Here, in order to add the repository key using:
$ sudo apt-key adv --keyserver keyserver.ubuntu.com --recv-keys 379CE192D401AB61
![]()
A correct output will look like this:

Step 3: Updating package list
Now, we need to update the packages list and install etcher using:
$ sudo apt update && sudo apt install balena-etcher-electron
![]()
The installation process will begin and the system might prompt to ask for the permission of the user. Press the Y key from the keyboard and then hit the key.

After a while Etcher will be installed in your system.
Accessing the Application
To access the Etcher application, simply type Etcher in the search bar. You will see the Etcher option available, double click on it.

The application will open up just like the one displayed in the figure below:

Uninstalling the Etcher application
To uninstall the application, type the following command in the terminal window of your system:
$ sudo apt remove balena-etcher-electron
![]()
The system will prompt you to ask for your permission. Press the Y key from your keyboard and then hit the key.

This way, Etcher will be uninstalled from your system.
Conclusion
In this article, we explored the method of installation of the Etcher application on the Ubuntu 20.04 system. We also discussed the method of accessing the application and uninstalling the application. Users can easily make use of this utility as per their requirements.
Search
About This Site
Vitux.com aims to become a Linux compendium with lots of unique and up to date tutorials.
Latest Tutorials
How to Install Etcher, the USB Writing Tool, on Ubuntu
The latest version of the tool doesn’t add any dazzling new features but it does improve on the image writer’s core feature set. Y’know: the thing you actually use it for.
It’s developed by software company Balena who say the newest release is “more stable and reliable” than before.
Before I show you how to install Etcher on Ubuntu 18.04, 20.04, and later let’s recap what this tool is and why you might need it.
A Recap of Etcher Features
As you may know if you read our list of the best Electron apps, Etcher is a truly cross-platform tool. You can use it on Windows, macOS and Linux. Regardless of which OS you use Etcher can write .iso , .img and .zip files to USB drives and SD cards.
The main interface is simple to understand, and walks you though the three-step process of how to flash an .iso to USB. You open the app, select an image, select a drive (the built in drive picker is designed to avoid you making mistakes and overwriting a hard drive, etc), then hit the Flash button to, well, you know the rest!
A validated burning option is also available. This double-checks the integrity of the image being written to verify that it was successful. While this slows things down, it does mean you’re not left trying to boot from a dud drive.
- Support for creating multi-boot USBs
- Support for persistent storage on Ubuntu images
- Registered Etcher as handler for *.img and *.iso files
For command line fans an Etcher CLI is also available. This allows you to write images and validate flashes from the command line. And because the CLI tool doesn’t rely on the Electron framework it’s a smaller download and install size.
How to Install Etcher on Ubuntu
Etcher is free, open source software and is available to download for Windows, macOS and Linux from the Etcher.io website and from the Etcher GitHub releases page linked below:
Etcher’s Linux builds are available in various formats, but the AppImage package one especially popular.
What are AppImages? AppImages are self-contained runtimes that do not require ‘proper’ installation or root access. They do need to be given permission to run though:
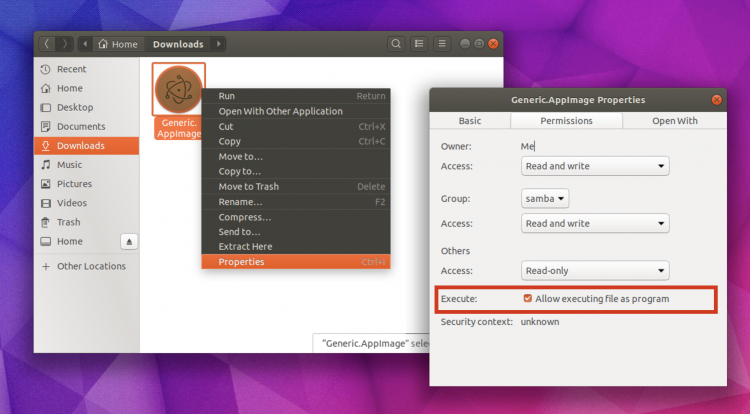
Because AppImages run on any Linux distro out there you only need to download it, give it permissions (see here) then double-click on it to run — simple!
If you prefer to install software in a traditional way (i.e. using apt) you can also install Etcher on Ubuntu from a repository.
I won’t lie; getting the repo set-up is a more involved than using the AppImage mentioned above, but it does ensure you get future Etcher updates automatically via Ubuntu’s built-in Software Updater tool.
To add the Etcher repo you need to open the Software & Updates app:
Select the ‘Other Software’ tab in Software & Updates [1]

Click ‘Add’ [2] and paste the following the entry field of the box that appears:
deb https://deb.etcher.io stable etcher
Click ‘Add Source’ [3] to confirm the change, then close Software & Updates. You’ll likely be prompted to update your software sources.
I did say it was pretty involved! If you’d rather save to, you can add the repo from the terminal. To do this run:
echo "deb https://deb.etcher.io stable etcher" | sudo tee /etc/apt/sources.list.d/balena-etcher.list
Whichever way you add the repo the next step is important: you must add the repository key.
Because it allows Ubuntu to verify that packages installed from the repository are made by who they say they are. You have to add this key to be able to install Etcher as Ubuntu disables unsigned repos by default.
To add the repository key open a Terminal window and paste the following command:
sudo apt-key adv --keyserver keyserver.ubuntu.com --recv-keys 379CE192D401AB61
Finally, update your packages list and proceed to install Etcher:
sudo apt update && sudo apt install balena-etcher-electron
That’s it; launch Etcher from the Applications grid (or your favourite Linux app launcher) and follow the on-screen instructions to create a bootable USB!
Home / Apps / How to Install Etcher, the USB Writing Tool, on Ubuntu