- How I recovered my Linux system using a Live USB device
- The problem
- Recovery mode with Fedora
- The solution
- Lessons learned
- Download
- Applying customizations
- Installation on a USB stick or internal disk
- Checking the downloaded file
- Checking the signature
- Errors during the boot process
- Writing the ISO image file to a DVD
- Online documentation
- System Rescue Homepage
- System and Networking Guides
- Project documentation
- For the impatient:
- Chapters about basic usage:
- Chapters about advanced usage:
- System tools included
- More information about this project
How I recovered my Linux system using a Live USB device
I have a dozen or so physical computers in my home lab and even more VMs. I use most of these systems for testing and experimentation. I frequently write about using automation to make sysadmin tasks easier. I have also written in multiple places that I learn more from my own mistakes than I do in almost any other way.
I have learned a lot during the last couple of weeks.
I created a major problem for myself. Having been a sysadmin for years and written hundreds of articles and five books about Linux, I really should have known better. Then again, we all make mistakes, which is an important lesson: You’re never too experienced to make a mistake.
I’m not going to discuss the details of my error. It’s enough to tell you that it was a mistake and that I should have put a lot more thought into what I was doing before I did it. Besides, the details aren’t really the point. Experience can’t save you from every mistake you’re going to make, but it can help you in recovery. And that’s literally what this article is about: Using a Live USB distribution to boot and enter a recovery mode.
The problem
First, I created the problem, which was essentially a bad configuration for the /etc/default/grub file. Next, I used Ansible to distribute the misconfigured file to all my physical computers and run grub2-mkconfig . All 12 of them. Really, really fast.
All but two failed to boot. They crashed during the very early stages of Linux startup with various errors indicating that the /root filesystem could not be located.
I could use the root password to get into «maintenance» mode, but without /root mounted, it was impossible to access even the simplest tools. Booting directly to the recovery kernel did not work either. The systems were truly broken.
Recovery mode with Fedora
The only way to resolve this problem was to find a way to get into recovery mode. When all else fails, Fedora provides a really cool tool: The same Live USB thumb drive used to install new instances of Fedora.
After setting the BIOS to boot from the Live USB device, I booted into the Fedora 36 Xfce live user desktop. I opened two terminal sessions next to each other on the desktop and switched to root privilege in both.
I ran lsblk in one for reference. I used the results to identify the / root partition and the boot and efi partitions. I used one of my VMs, as seen below. There is no efi partition in this case because this VM does not use UEFI.
# lsblk NAME MAJ:MIN RM SIZE RO TYPE MOUNTPOINTS loop0 7:0 0 1.5G 1 loop loop1 7:1 0 6G 1 loop ├─live-rw 253:0 0 6G 0 dm / └─live-base 253:1 0 6G 1 dm loop2 7:2 0 32G 0 loop └─live-rw 253:0 0 6G 0 dm / sda 8:0 0 120G 0 disk ├─sda1 8:1 0 1G 0 part └─sda2 8:2 0 119G 0 part ├─vg01-swap 253:2 0 4G 0 lvm ├─vg01-tmp 253:3 0 10G 0 lvm ├─vg01-var 253:4 0 20G 0 lvm ├─vg01-home 253:5 0 5G 0 lvm ├─vg01-usr 253:6 0 20G 0 lvm └─vg01-root 253:7 0 5G 0 lvm sr0 11:0 1 1.6G 0 rom /run/initramfs/live zram0 252:0 0 8G 0 disk [SWAP]The /dev/sda1 partition is easily identifiable as /boot , and the root partition is pretty obvious as well.
In the other terminal session, I performed a series of steps to recover my systems. The specific volume group names and device partitions such as /dev/sda1 will differ for your systems. The commands shown here are specific to my situation.
The objective is to boot and get through startup using the Live USB, then mount only the necessary filesystems in an image directory and run the chroot command to run Linux in the chrooted image directory. This approach bypasses the damaged GRUB (or other) configuration files. However, it provides a complete running system with all the original filesystems mounted for recovery, both as the source of the tools required and the target of the changes to be made.
Here are the steps and related commands:
1. Create the directory /mnt/sysimage to provide a location for the chroot directory.
2. Mount the root partition on /mnt/sysimage:
# mount /dev/mapper/vg01-root /mnt/sysimage3. Make /mnt/sysimage your working directory:
4. Mount the /boot and /boot/efi filesystems.
5. Mount the other main filesystems. Filesystems like /home and /tmp are not needed for this procedure:
# mount /dev/mapper/vg01-usr usr # mount /dev/mapper/vg01-var var6. Mount important but already mounted filesystems that must be shared between the chrooted system and the original Live system, which is still out there and running:
# mount --bind /sys sys # mount --bind /proc proc7. Be sure to do the /dev directory last, or the other filesystems won’t mount:
8. Chroot the system image:
The system is now ready for whatever you need to do to recover it to a working state. However, one time I was able to run my server for several days in this state until I could research and test real fixes. I don’t really recommend that, but it can be an option in a dire emergency when things just need to get up and running–now!
The solution
The fix was easy once I got each system into recovery mode. Because my systems now worked just as if they had booted successfully, I simply made the necessary changes to /etc/default/grub and /etc/fstab and ran the grub2-mkconfig > boot/grub2/grub.cfg command. I used the exit command to exit from chroot and then rebooted the host.
Of course, I could not automate the recovery from my mishap. I had to perform this entire process manually on each host—a fitting bit of karmic retribution for using automation to quickly and easily propagate my own errors.
Lessons learned
Despite their usefulness, I used to hate the «Lessons Learned» sessions we would have at some of my sysadmin jobs, but it does appear that I need to remind myself of a few things. So here are my «Lessons Learned» from this self-inflicted fiasco.
First, the ten systems that failed to boot used a different volume group naming scheme, and my new GRUB configuration failed to consider that. I just ignored the fact that they might possibly be different.
- Think it through completely.
- Not all systems are alike.
- Test everything.
- Verify everything.
- Never make assumptions.
Everything now works fine. Hopefully, I am a little bit smarter, too.
Download
You can also download previous versions, or beta versions if you want to have more recent versions of packages or to try the latest features. See here for Downloading and Building Sourcecode.
Applying customizations
Before you install SystemRescue on a boot device, you may want to apply your own customizations to the ISO image. This can be achieved easily through sysrescue-customize.
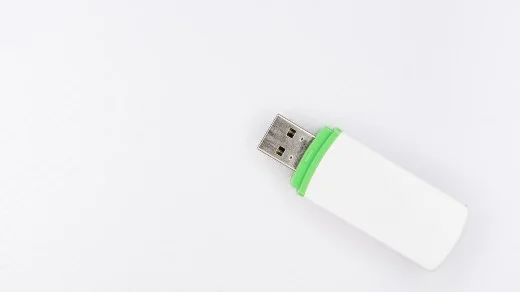
Installation on a USB stick or internal disk
It is possible to use SystemRescue without having a DVD drive as it can be installed on USB sticks, or on a local disk. In any case you will need to download the ISO image from the current page.
Checking the downloaded file
To confirm that the download was successful, you should download the checksum files and then run verification commands such as the following ones:
sha256sum --check systemrescue-x.y.z.iso.sha256 sha512sum --check systemrescue-x.y.z.iso.sha512 These command will recalculate the checksum on the downloaded file, and compare it with the expected checksums. These checksum programs are part of coreutils on Linux and should be pre-installed with most distributions.
You can download sha256sum.exe for windows, and you can run the command from a cmd.exe terminal.
Checking the signature
You can also verify the signature of the ISO image using GnuPG. The signature is located in the ASC file named after the ISO image that you can get from the main download links at the top of this page. You will also need the public signing key.
gpg --import gnupg-pubkey.txt gpg --verify systemrescue-x.y.z.iso.asc systemrescue-x.y.z.iso Errors during the boot process
Various issues can cause SystemRescue to hangs or fail with unexpected errors during the boot process. Please do not report these as bugs unless you have verified the frequent causes of these issues:
- Boot medias such as DVD, and USB stick are often unreliable and bad blocks will cause problems. You can try another media to see if it makes a difference, and you can enable verification when you burn/copy the ISO image to make sure data written to the device can be read and match the original.
- Damaged RAM will cause all type of programs to behave unexpectedly. Computers memory can be tested using program such as memtest which is included with SystemRescue.
- You will also get problems if the system runs out of memory. So make sure your computers has at least 2GB of memory if you start with the default boot options or 4GB if you cache the system into RAM.
Writing the ISO image file to a DVD
On Linux you can use either command line tools such as cdrecord/wodim or graphical tools such as k3b, brasero or xfburn.
Online documentation
Reading the Quick Start Guide is recommended if it is your first time using SystemRescue. You may also be interested in the Complete documentation for more details.
System Rescue Homepage
Description: SystemRescue (formerly known as SystemRescueCd) is a Linux system rescue toolkit available as a bootable medium for administrating or repairing your system and data after a crash. It aims to provide an easy way to carry out admin tasks on your computer, such as creating and editing the hard disk partitions. It comes with a lot of Linux system utilities such as GParted, fsarchiver, filesystem tools and basic tools (editors, midnight commander, network tools). It can be used for both Linux and windows computers, and on desktops as well as servers. This rescue system requires no installation as it can be booted from a CD/DVD drive or USB stick, but it can be installed on the hard disk if you wish. The kernel supports all important file systems (ext4, xfs, btrfs, vfat, ntfs), as well as network filesystems such as Samba and NFS.
System and Networking Guides
In addition to the Quick Start Guide and SystemRescue documentation here are other guides:
Project documentation
This project comes with good documentation. Here are the most important pages:
For the impatient:
Chapters about basic usage:
Chapters about advanced usage:
System tools included
- GNU Parted: creates, resizes, moves, copies partitions, and filesystems (and more).
- GParted: GUI implementation using the GNU Parted library.
- FSArchiver: flexible archiver that can be used as both system and data recovery software
- ddrescue : Attempts to make a copy of a block device that has hardware errors, optionally filling corresponding bad spots in input with user defined pattern in the copy.
- File systems tools (for Linux and Windows filesystems): format, resize, and debug an existing partition of a hard disk
- Ntfs3g: enables read/write access to MS Windows NTFS partitions.
- Test-disk : tool to check and undelete partition, supports reiserfs, ntfs, fat32, ext3/ext4 and many others
- Memtest: to test the memory of your computer (first thing to test when you have a crash or unexpected problems)
- Rsync: very-efficient and reliable program that can be used for remote backups.
- Network tools (Samba, NFS, ping, nslookup, …): to backup your data across the network
Browse the short system tools page for more details about the most important software included.
Browse the detailed package list for a full list of the packages.
It is possible to make custom versions of the system. For example, you can add your own scripts, make an automatic restoration of the system. It is also possible to create custom versions of SystemRescue.
You can use SystemRescue to backup data from an unbootable Windows computer, if you want to backup the data stored on a Windows computer that cannot boot any more.
It is very easy to install SystemRescue on a USB stick. That is very useful in case you cannot boot from the CD/DVD drive. You just have to copy several files to the stick and run syslinux. The install process can be done from Linux or Windows. Follow instructions from the manual for more details.
More information about this project
SystemRescue sources can be found on GitLab and these are licensed under the GPLv3 license.