- Share USB over IP on all operating systems
- USB device sharing with the aid of USB Network Gate
- Share USB over IP on Windows
- Share USB over IP on macOS
- Share USB over IP on Linux
- Как расшарить USB по сети в Linux
- Usb Network Gate
- Установка Usb Newtork Gate
- Раздача USB устройств по сети
- USBIp
- Установка usbip
- Настройка сервера
- Download USB Network Gate on your platform
- For Windows
- For macOS
- For Android
- Linux RPM-based
- Linux DEB-based
- ARM-based computers
- Electronic Team, Inc
- USB Network Gate for Linux Quick Starting Guide Print
- USB Network Gate for Linux Quick Starting Guide
- Sharing a USB device
- Connecting to a shared USB device remotely
Share USB over IP on all operating systems
USB Network Gate enables to access USB over IP from any network-attached computer. Here is the guide how to download the USB over IP software to the operating system of your choice and follow the steps outlined below to share USB devices over the Internet or any TCP/IP network.
The name TCP/IP is composed of the two protocols that are crucial for internet communication: the Transmission Control Protocol (TCP) and the Internet Protocol (IP). Actually, even more protocols are grouped under this term: The Internet Control Message Protocol (ICMP) and the User Datagram Protocol (UDP) also belong to this group. So, TCP/IP itself is not a specific technology, but a group of selected protocols. What they all have in common is that they have become standards for communication in networks.
Note: When speaking about TCP/IP, people sometimes also mean the complete Internet protocol family. Approximately 500 protocols that are used on the Internet are considered being part of this family.
USB device sharing with the aid of USB Network Gate
USB over TCP/IP allows you to access remote USB peripherals connected to real and virtual machines, which is critical for successful Infrastructure Management. However, using a hardware-based solution, like AnywhereUSB by Digi, the number of physical USB ports of your concentrator defines how many devices you can share at a time. Relying on an alternative software-based USB over IP tool (such as USB Network Gate) lifts those limitations. USB Network Gate is a great way to redirect any number of USB devices between two computers without additional hardware.
USB Network Gate was created to help you make all your USB devices accessible over the IP network from every machine, no matter the operating system. It works by transmitting USB I/O messages encapsulated into TCP/IP payloads, so you can use all features of a remote USB device like it’s locally attached to your machine.
Down the text, we’ll show you how to Share USB over IP on all operating systems.
Share USB over IP on Windows

Download and Install USB Network Gate on the Server machine, which is where the USB device is physically attached. The USB over IP software also needs to be installed on the machine that will remotely access the device and which is known as the Client computer.
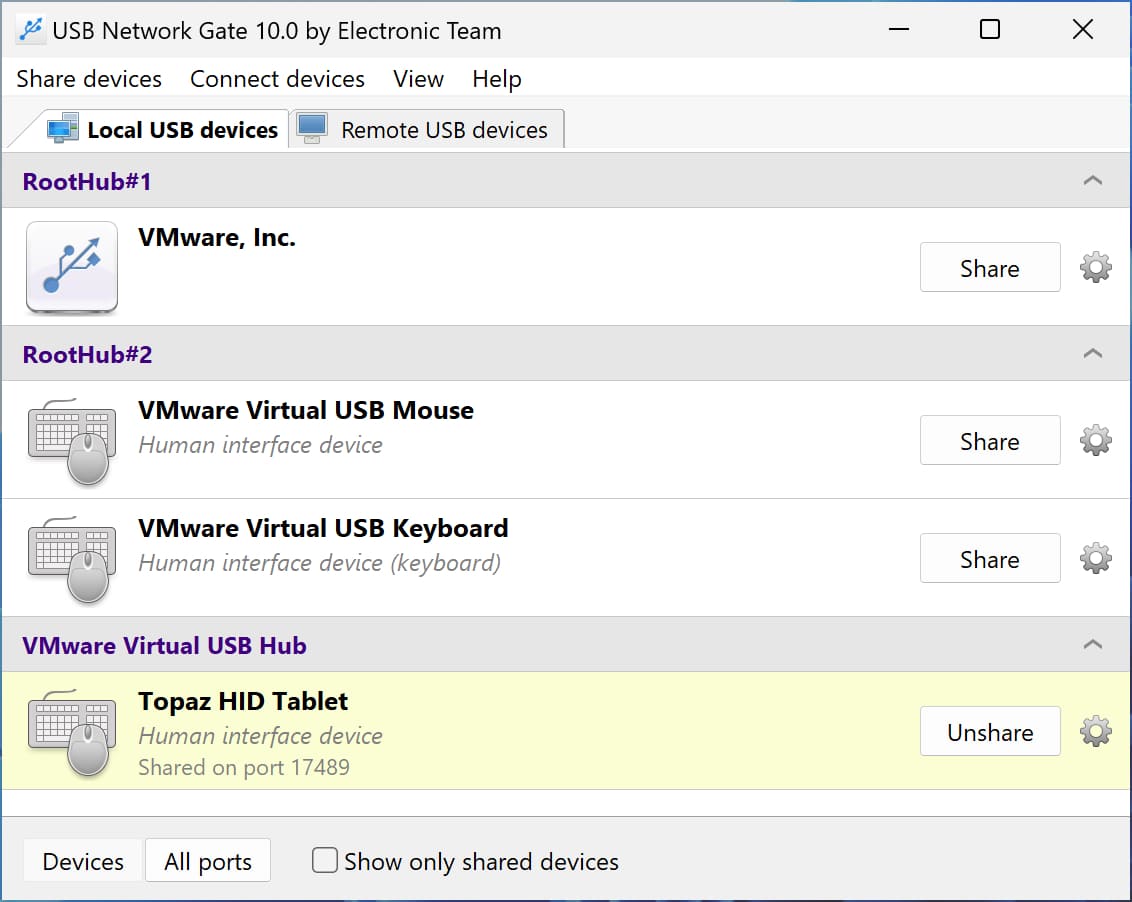
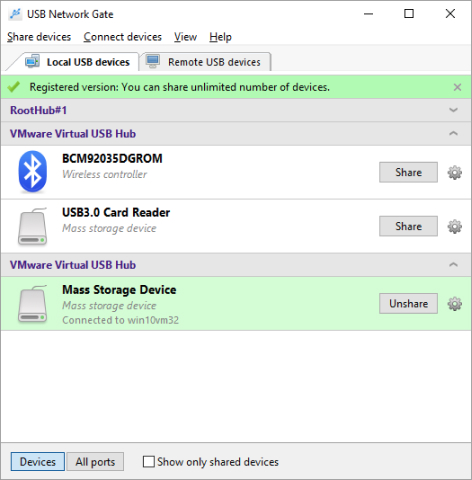
Launch the app on the Server. Choose the USB device to be shared from the displayed list and click the «Share» button.
Download and install USB Network Gate on the Client machine and launch the app. You will see the remotely shared device in the list of available devices. Simply click «Connect». The device will now be visible in the client computer’s Device Manager.

USB Network Gate supports these variations of the Windows OS:
• Windows 7 SP1 (32-bit and 64-bit)
• Windows 8 (32-bit and 64-bit)
• Windows 8.1 (32-bit and 64-bit)
• Windows 10 (32-bit and 64-bit)
• Windows 11
• Windows Server 2008R22012/2012R2/2016/2019/2022
• Windows on ARM 64-bit
USB Network Gate lets you use USB devices connected to other machines on your network as if they were plugged directly into your computer.
Share USB over IP on macOS
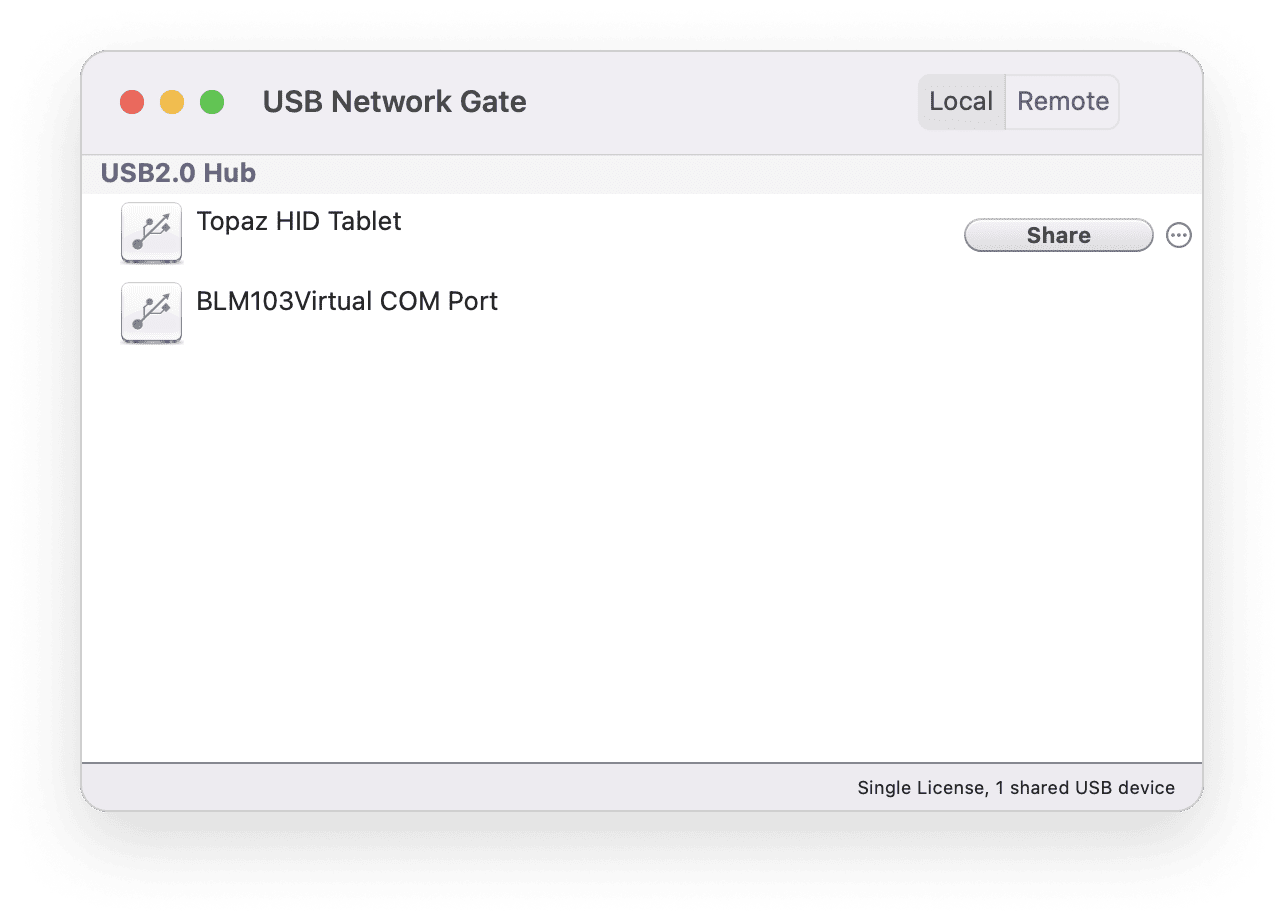
In order to share a USB device from a server running macOS, select the device to be shared from the USB devices that are physically attached to the host computer.
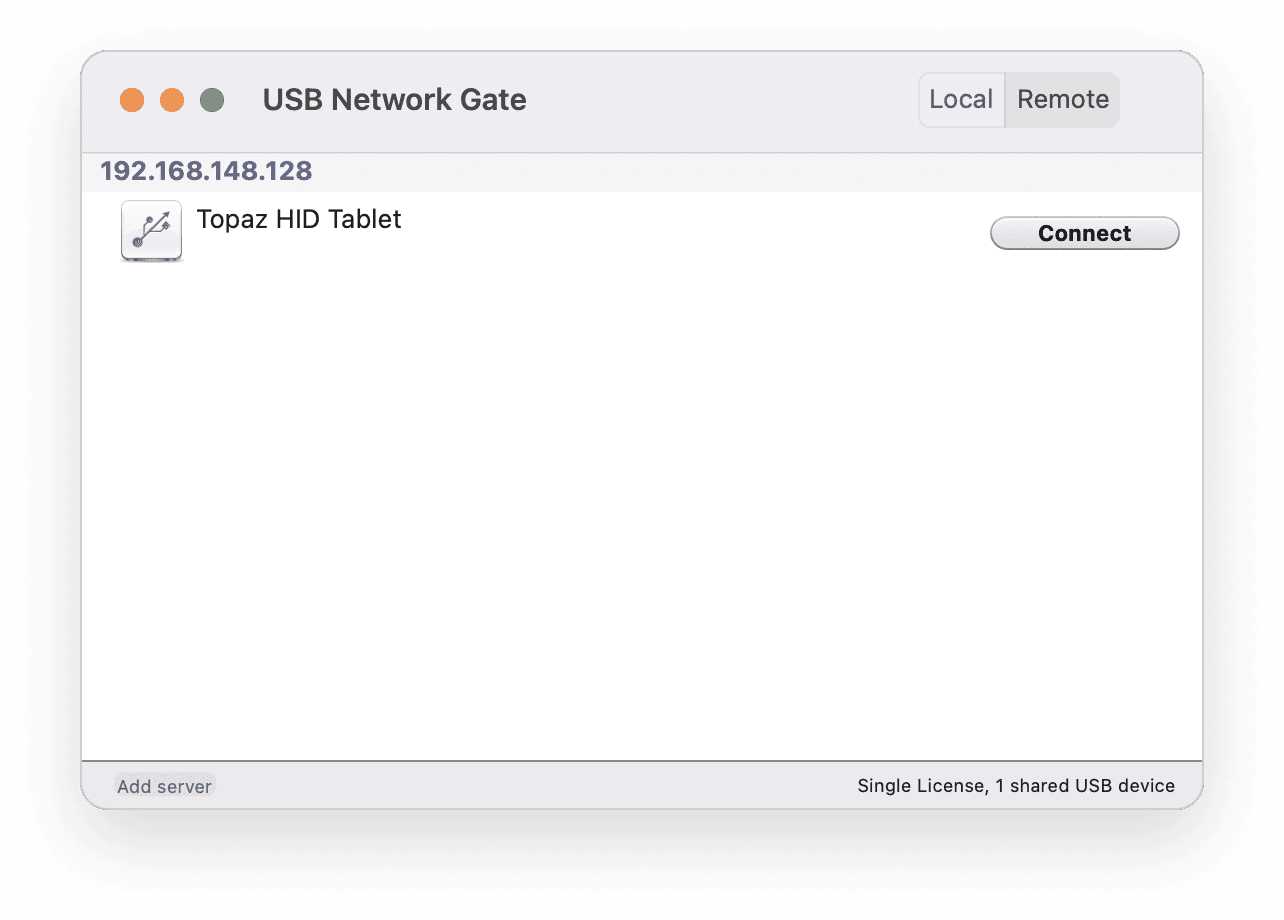
On the client machine, access the remote panel, select the device with which you want to establish connectivity and click » Connect «.
USB Network Gate requires one of these Mac operating systems:
• macOS Mojave 10.14
• macOS 10.15 Catalina
• macOS 11 Big Sur
• macOS 12 Monterey
• macOS 13 Ventura
Share USB over IP on Linux
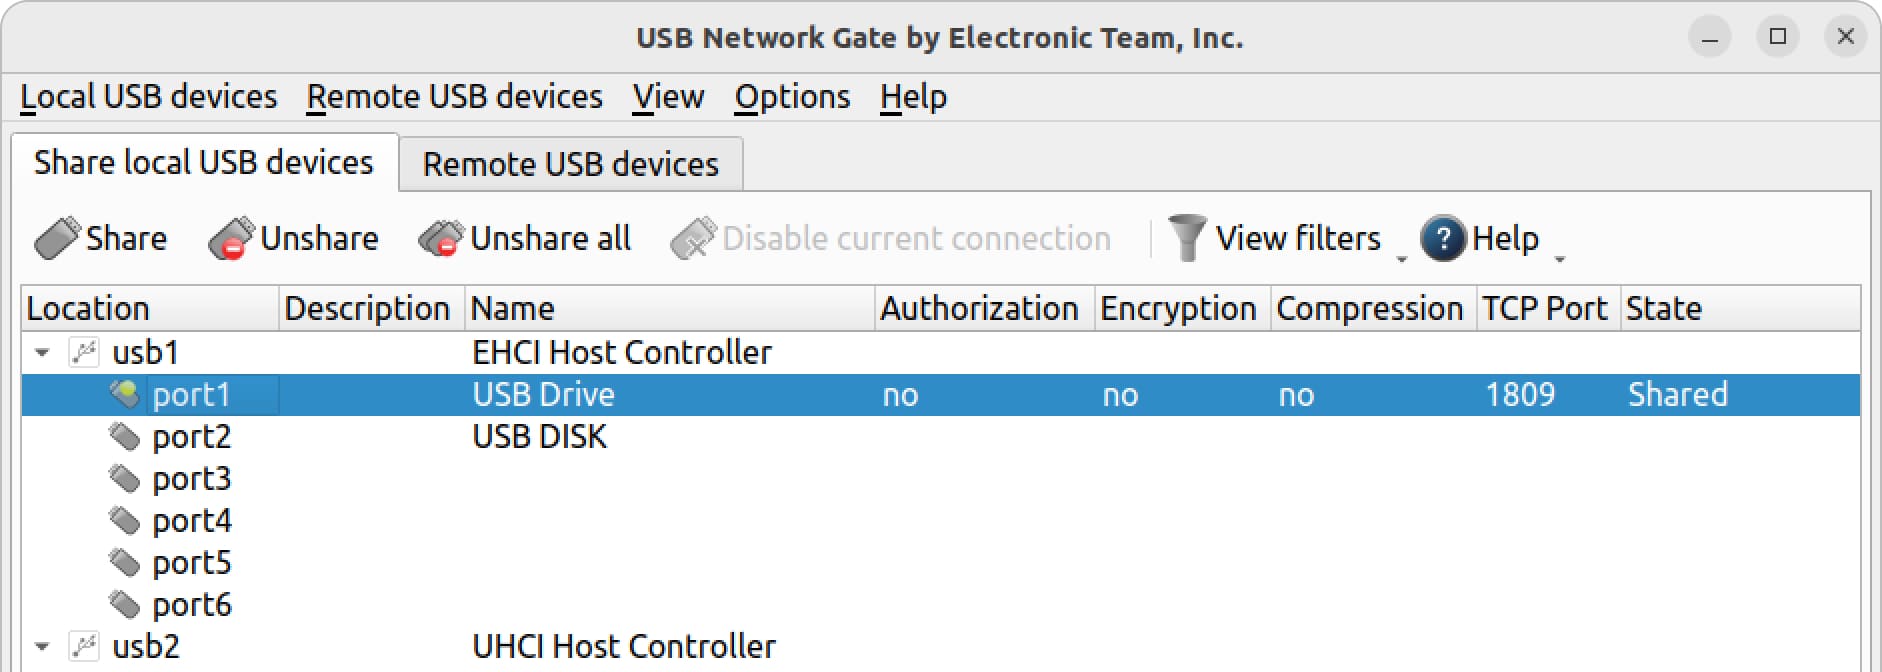
- Sharing USB devices on Linux requires you to access the «Share local USB devices» tab. Select the device and click «Share» .

USB Network Gate works with these Linux distributions:
• CentOS 7 and higher
• Fedora 33 and higher
• Ubunte 16.04 and higher
• Linex Mint 19.3
• Debian 10 and higher
• Kernel 2.6.32 and higher
• Raspberry Pi:
— Bullseye DEB
— Buster DEB
Note: This installation and usage method is also applicable to Raspberry Pi if you download the UNG version for Raspberry Pi.
Как расшарить USB по сети в Linux
Иногда бывает необходимо получить доступ к USB устройству подключенному к одному из компьютеров сети. Это может быть флешка данные из которой нужно скопировать на один из компьютеров или в виртуальную машину или же, как более сложный вариант — usb принтер который нужно сделать доступным по сети для нескольких устройств.
В этой статье мы рассмотрим несколько программ позволяющих реализовать такую возможность. Одной из них будет USB Network Gate. Это платная программа, но она позволяет расшарить устройства usb по сети в Linux очень быстро и просто. У программы удобный графический интерфейс и очень простая настройка. Также рассмотрим свободную альтернативу usbip, с помощью которой можно расшарить usb по сети в терминале. Начнем с коммерческой программы.
Usb Network Gate
Usb Network Gate — это программа от Elitma Software, позволяющая получить доступ к любым USB устройствам подключенным к вашему компьютеру через сеть. При чем это может быть не только локальная сеть но и интернет.
У программы кроме версии для Linux есть версии для Windows, Mac и даже приложение для Android. Лицензия с возможностью передать по сети один USB порт стоит $89.99 но у нее есть пробный период размером 14 дней. После окончанию пробного периода вы не можете расшаривать свои устройства, но зато можете подключать уже розданные.
Установка Usb Newtork Gate
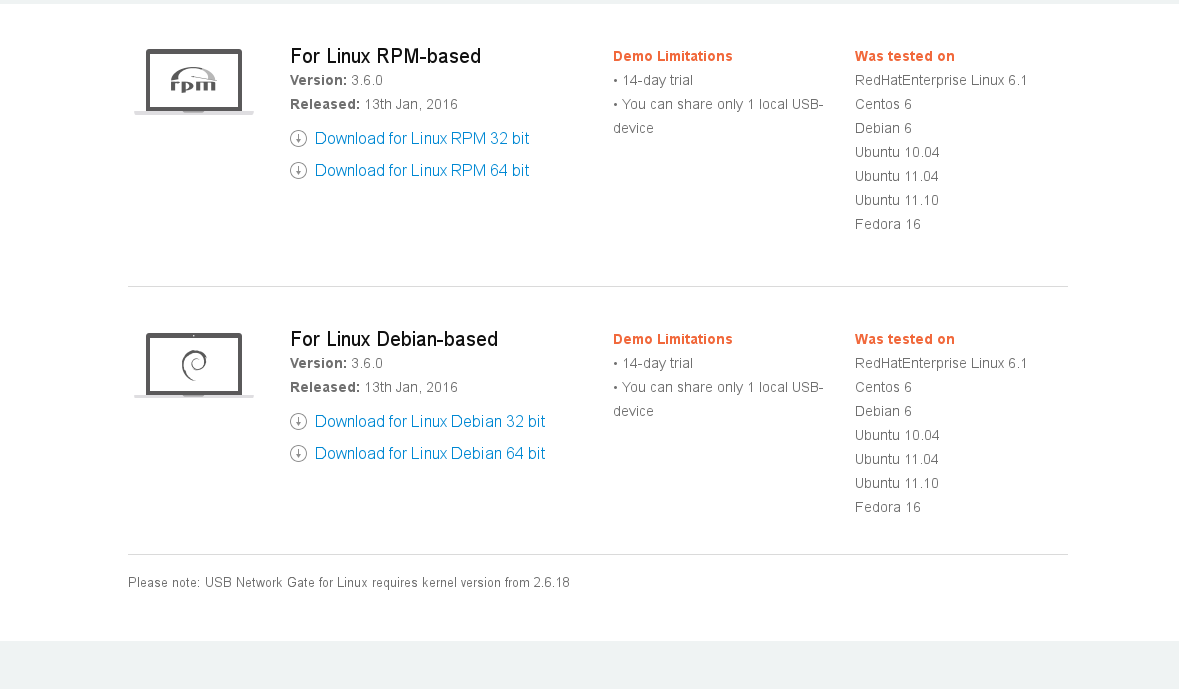
Установка USB Network Gate в Linux выполняется очень просто. Скачать установочный пакет для своего дистрибутива можно на официальном сайте.
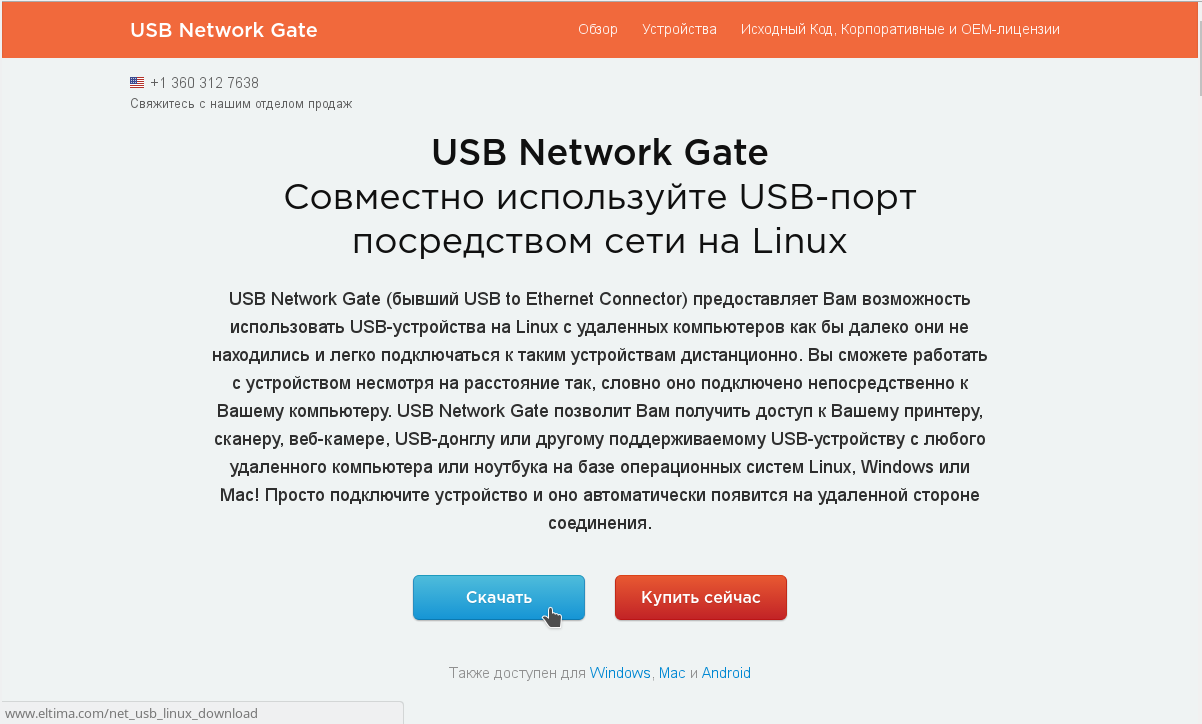
Здесь достаточно просто нажать кнопку скачать, а затем выбрать версию для своего дистрибутива:
После завершения загрузки, для установки перейдите в папку с файлом и выполните:
dpkg -i usb_network_gate.deb
rpm -i usb_network_gate.rpm
Для RedHat и других использующих rpm систем. Возможно для работы программы понадобится библиотека libudev.so.0, если такой версии библиотеки нет в вашей системе создайте ссылку на libudev.so.1 следующей командой:
ln -s /usr/lib/libudev.so.1 /usr/lib/libudev.so.0
Раздача USB устройств по сети
Запустить программу можно из главного меню или выполнив в терминале:
Главное окно программы выглядит вот так:
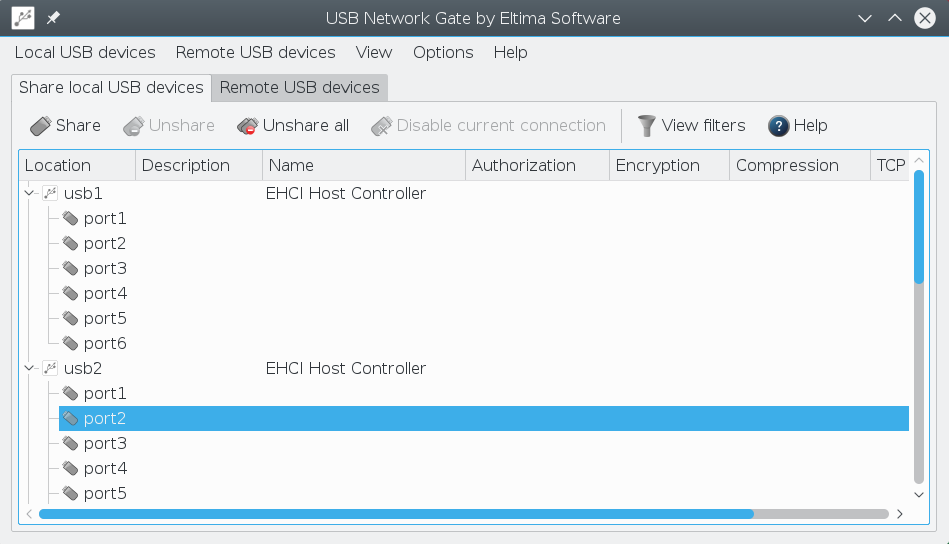
Чтобы расшарить USB устройство по сети достаточно кликнуть по нему правой кнопкой мыши и выбрать в контекстном меню пункт Share.
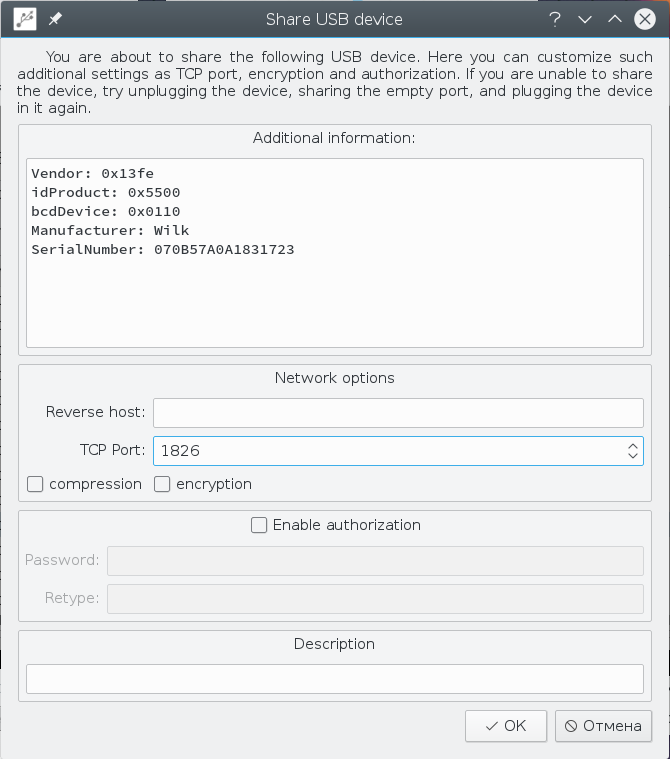
В открывшимся окне можно увидеть информацию об устройстве и указать дополнительные настройки, например стоит ли использовать шифрование, сжатие или пароль для аутентификации соединения:
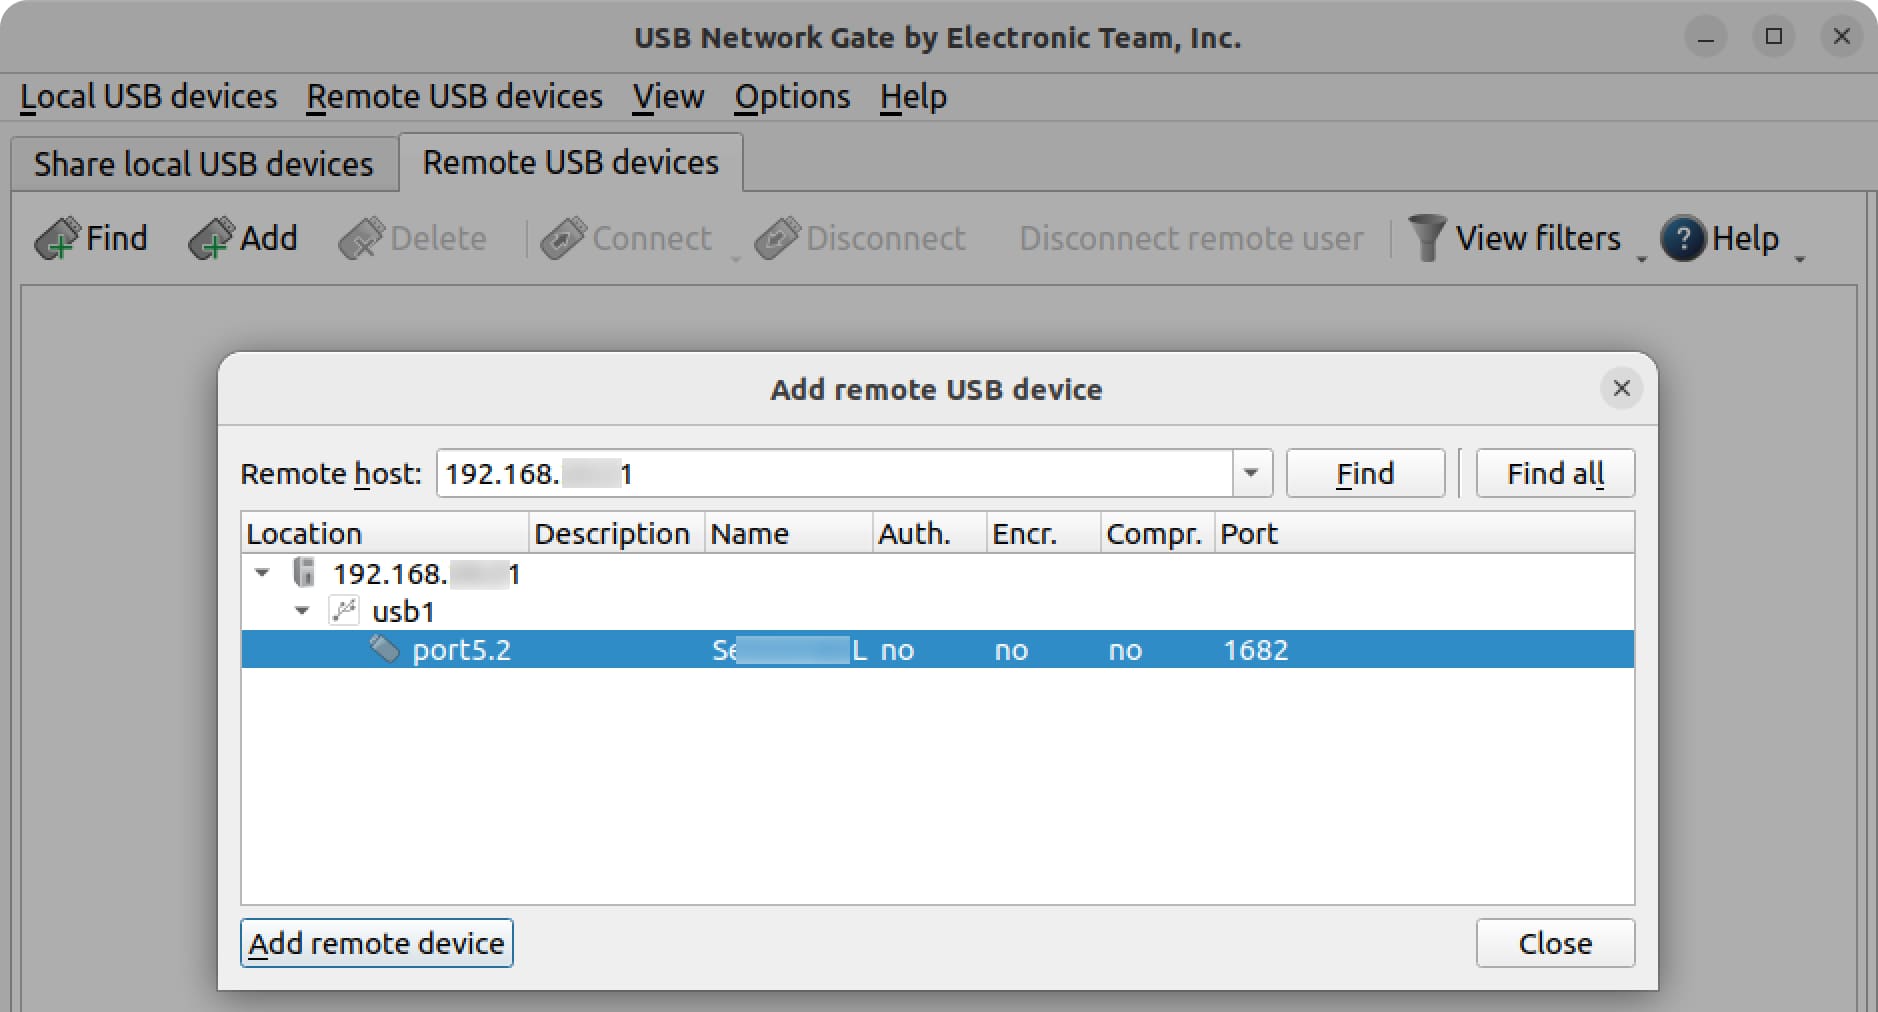
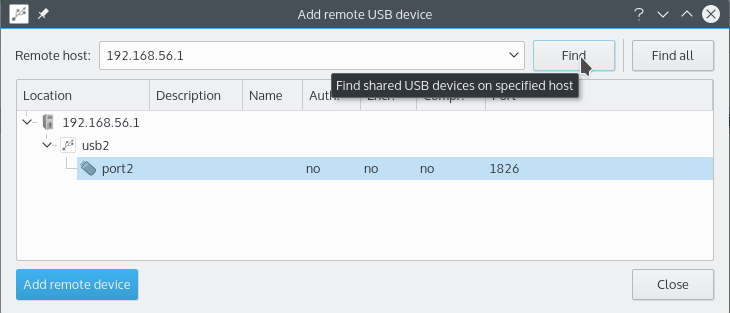
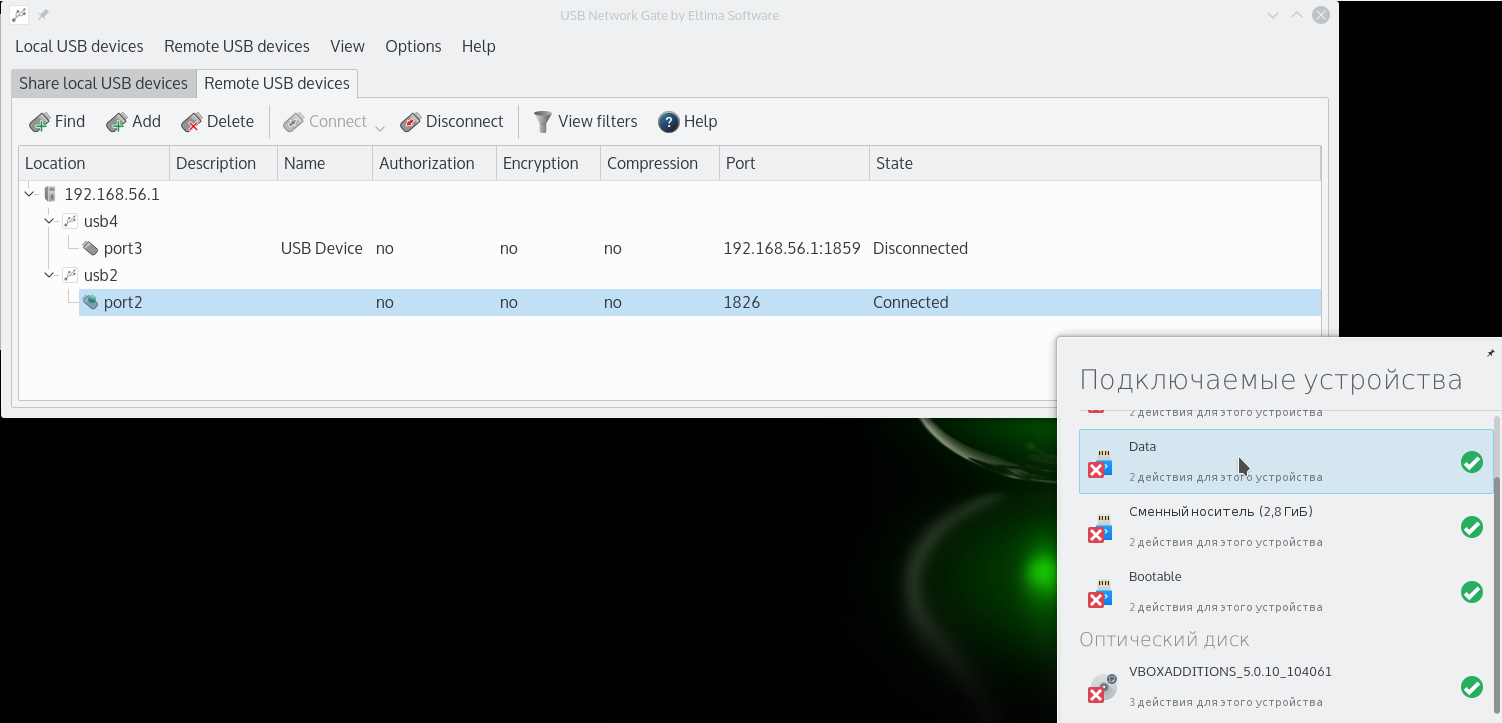
На удаленной машине, чтобы подключить наше устройство, сначала нужно его найти. Для этого перейдите на вкладку Remote USB Devices и нажмите кнопку Find:

В открывшимся окне, если компьютеры находятся в локальной сети можно просто нажать Find All, если же нет нужно указать ip адрес компьютера на котором расшаренно USB устройство, а затем нажать кнопку Find:
Дальше остается только добавить выбранное устройство с помощью кнопку Add remote device.
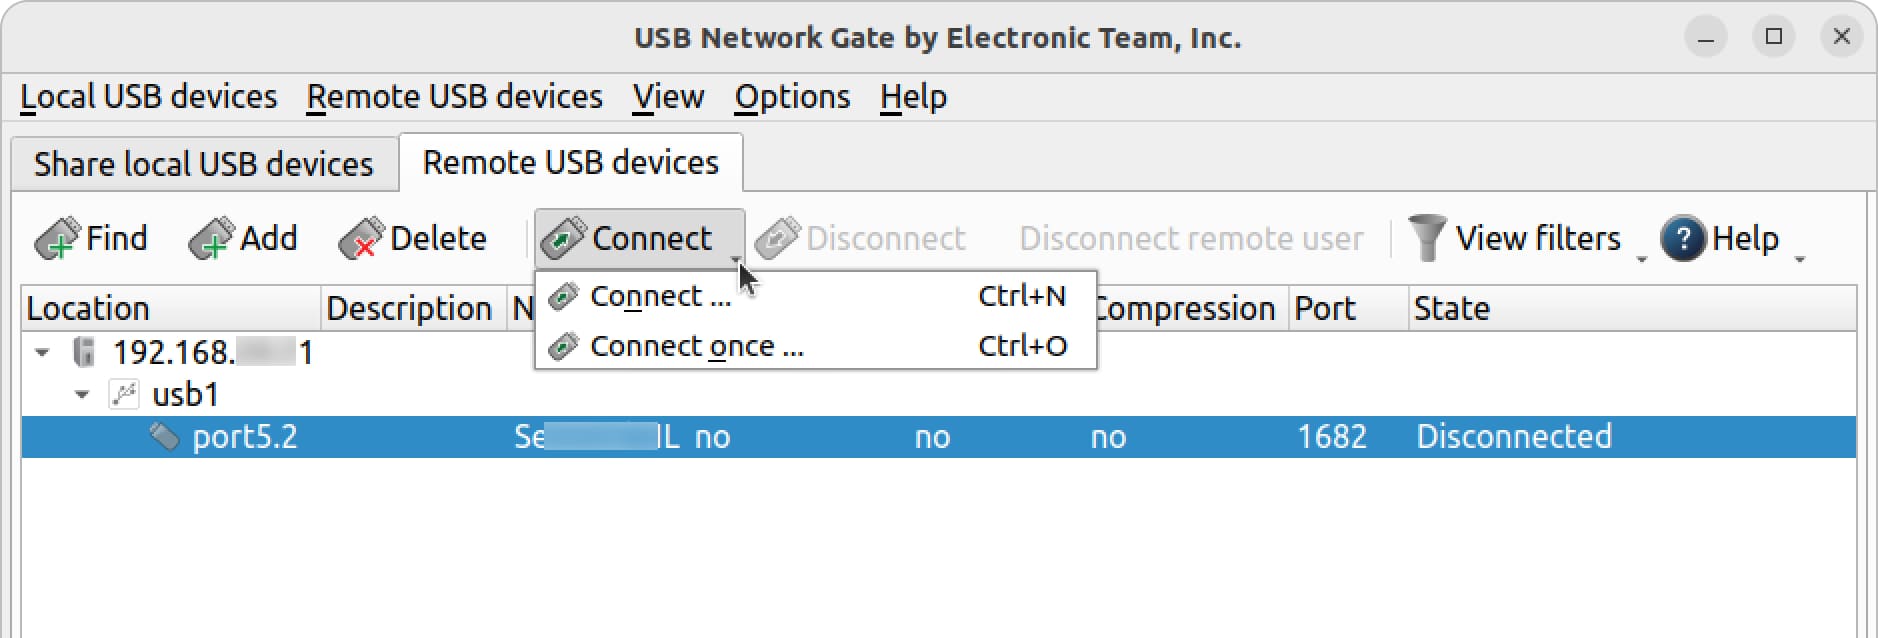
Чтобы подключить USB просто выберите в контекстном меню опцию Connect:

Дальше вы увидите, что состояние изменилось на Connected, а к системе было подключено новое USB устройство:
Чтобы его отключить просто выберите опцию Disconnect.
USBIp
Это бесплатная утилита с открытым исходным кодом для доступа к USB устройствам по сети. Она во многом проигрывает USB Network Gate, в основном через отсутствие графического интерфейса и сложной настройки.
Установка usbip
Устанавливается программа из официальных репозиториев:
sudo apt install linux-tools-generic
Нужно следить чтобы версия программы подходила к вашему ядру, потому что новые версии обычно не совсем совместимы со старыми версиями ядра. Например на данный момент для ядра 4.2 актуальна версия 2.0. Поэтому соблюдайте совместимость и все будет работать, а если не работает вы уже знаете в чем проблема.
Настройка сервера
Загрузим нужные модули ядра:
Программа готова к использованию. Теперь с помощью lsusb находим наше устройство:
Bus 002 Device 014: ID 13fe:5500 Kingston Technology Company Inc
Нам нужна пара VendorID:DeviceID, вот она: 13fe:5500. Теперь выполните:
— busid 2-2 (13fe:5500)
2-2:1.0 -> usb-storage
— busid 4-1 (0458:0708)
4-1:1.0 -> usbhid
4-1:1.1 -> usbhid
— busid 4-3 (09da:9090)
4-3:1.0 -> usbhid
4-3:1.1 -> usbhid
Программа просканирует все подключенные устройства и покажет и в нужном формате, вместе с их busid. Опция -l указывает что нужно сканировать локальные устройства. Как видите наше USB устройство первое в списке.
Теперь, когда мы знаем busid можно расшарить USB устройство по сети в Linux:
usbip: info: bind device on busid 2-2: complete
Готово, наше USB устройство расшарено, осталось подключить его на клиентской машине. Смотрим список доступных устройств:
sudo usbip list -r 192.168.56.1
Exportable USB devices
======================
— 192.168.56.1
2-2: Kingston Technology Company Inc. : unknown product (13fe:5500)
: /sys/devices/pci0000:00/0000:00:13.2/usb2/2-1
: (Defined at Interface level) (00/00/00)
После -r нужно указать ваш IP адрес. Осталось подключить наше устройство:
sudo usbip attach -r 192.168.56.1 -b 2-2
Чтобы отключить устройство нужно сначала узнать его порт:
И прекращаем шаринг устройства по сети на сервере:
Вот и все. Как видите работать с консольной программой намного сложнее, но для тех кто не хочет тратить деньги на лицензию, она станет отличным решением. Теперь вы сможете без проблем например расшарить принтер по сети в Linux или любое другое USB устройство не зависимо от используемого дистрибутива.
Обнаружили ошибку в тексте? Сообщите мне об этом. Выделите текст с ошибкой и нажмите Ctrl+Enter.
Download USB Network Gate on your platform
Available on Windows, Mac, Linux and Android.
Start a 14-day trial and share one local USB device for free.
For Windows
OS: Windows 7 SP1/8/8.1/10/11; Windows Server 2008 R2/2012/2012 R2/2016/2019/2022
Architectures: x86, x64, ARM64
For macOS

For Android

Linux RPM-based

Linux DEB-based

ARM-based computers


Request a custom version (ARM or MIPS) of USB Network Gate to integrate our technology in your product. Our developers will compile a customized package for your project.
Electronic Team, Inc
USB Network Gate for Linux Quick Starting Guide Print
Modified on: Mon, 13 Jul, 2020 at 5:39 PM
USB Network Gate for Linux Quick Starting Guide
To be able to use a USB device from any computer in your local network or over the Internet, you must download, install and configure USB Network Gate on both computers:
- The server system that has a USB device attached to it physically;
- The client system that is going to connect to the device remotely.
Sharing a USB device
To share a USB device on the server side:
2. Switch to the Share local USB devices tab.

3. Select the USB device you want to share and click Share:

4. Optionally, change the TCP port to be used in the connection, or enable encryption, authorization or traffic compression.

Connecting to a shared USB device remotely
1. Launch USB Network Gate.
2. Switch to the Remote USB devices tab.
3. Click Find on the main toolbar:

The Add remote USB device dialog will be invoked:

4. If you want to search for USB devices shared on a specific remote host, type in its IP address or network name and click Find. To find all shared USB devices available on your local network, use Find all.
5. If the search in the previous step yielded no results, probably one of the required network ports on your server is blocked by a firewall. In this case you can press the Add button on the toolbar and manually specify the TCP port on which your device is shared:

6. After adding the device to the list, select it and press Connect or Connect once to establish a connection (see the beginning of this section for the differences between these options).

If the device is protected by a password (see How to Secure Connection), it will be prompted.
Did you find it helpful? Yes No