- How to Turn A USB Wired Printer into Wireless WiFi Printer?
- Steps to Turn Wired USB Printer into Wireless WiFi Printer
- Step 1: Gather the Required Stuff
- Step 2: Prepare Raspberry Pi
- Step 3: Setup Raspberry Pi for Wireless Printing
- Step 4: Add Your Wired Printer to Convert it to Wireless
- Step 5: Start Printing Wirelessly on a Wired USb Printer
- Add Wireless Printer on Windows
- Add Wireless Printer on your Android Phone,
- Video Guide to Convert Wired Printer into Wireless
- How To Convert USB Printer to Wifi Printer
- Pre-requisite
- Wireless Print Server
- Router-Connected USB Printer Using Wireless Network
- Using Host Computer on Windows
- Conclusion
How to Turn A USB Wired Printer into Wireless WiFi Printer?
Wireless or WiFi printers are hassle-free and provide greater benefits than USB wired printers when it comes to printing documents. With Wireless printers, you can place the printer anywhere in your office and print documents or pictures not only from your PC but also from your Android devices wirelessly.
However, you don’t need to buy an expensive wireless printer or device to get these benefits. Instead, you can turn your old-school wired USB printer into a WiFi-enabled wireless printer using Raspberry Pi.
I had a Canon Pixma 2570 lying around that I bought 7 years ago. It still works perfectly fine but via USB cable. But now I have turned it into a WiFi-based wireless printer. It connects to my WiFi router and is available for everyone who is connected to my WiFi router at home.
Now I can print documents from any corner in my room directly from my Android phone, tablet, PC, or laptop. You can also achieve turn your wired printer into a true standalone WiFi printer, which can be placed in any corner of your house or office. All you need is a power source. No strings attached!
Steps to Turn Wired USB Printer into Wireless WiFi Printer
You can use this guide to turn your dumb wired printer into wireless and also fix your faulty wireless printer.
Step 1: Gather the Required Stuff
To convert a wired printer into wireless, you need a Raspberry Pi 3, Raspberry Pi 4 or you may also use a Raspberry Pie Zero with WiFi that will cost you just INR 1500 or $20 USD. You will also need an HDMI cable, a USB keyboard, and Mouse.
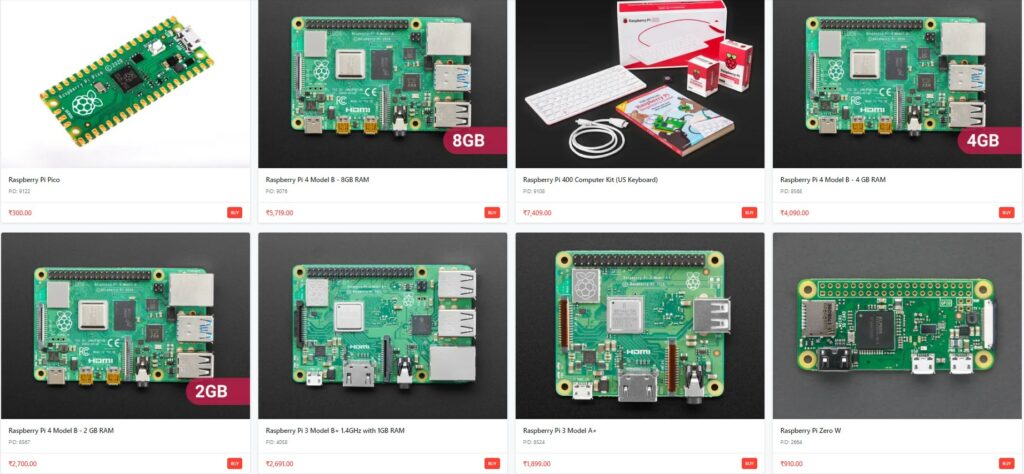
If you are going to use Raspberry Pi Zero, a Mini HDMI to HDMI converter and an OTG adapter will be required.
I will be using the Raspberry Pie 3 for this tutorial. However, all the steps will be the same for Raspberry Pi 4 and Raspberry Pi Zero W.
Step 2: Prepare Raspberry Pi
Download Raspberry PI OS with Desktop image and extract the downloaded Raspberry Pi OS Image. Also, download and install the Balena Etcher on your Windows or Mac machine. You may also use Rufus on Windows. Then follow these steps,

- Connect an 8GB or larger Micro SD card to your Windows or Mac PC or laptop.
- Launch Balena Etcher. Choose the extracted Raspberry Pi OS Image file, SD Card and click ‘Flash.’
- Wait for it to complete. It may take a while to finish.
- After this, disconnect the SD card from your system and insert it into the Raspberry Pi SD card slot.
- Connect Raspberry Pi to the power source and use an HDMI cable to connect the Raspberry Pi with a monitor or TV.
- Turn on the Power and let raspberry Pi boot.
Step 3: Setup Raspberry Pi for Wireless Printing
Once you have logged into Raspberry Pi, close everything and connect to a wireless or WiFi network. Then follow these steps,
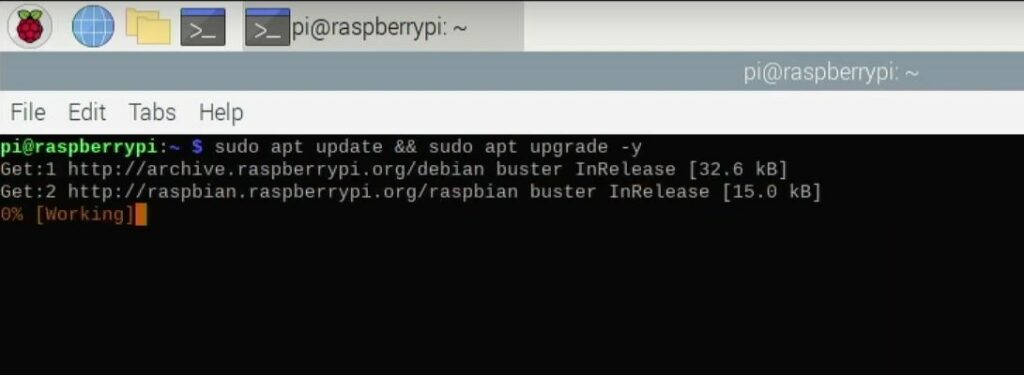
sudo apt update && sudo apt upgrade -y
- Press Enter. This will check and update or upgrade software if required. Follow the prompts to finish this.
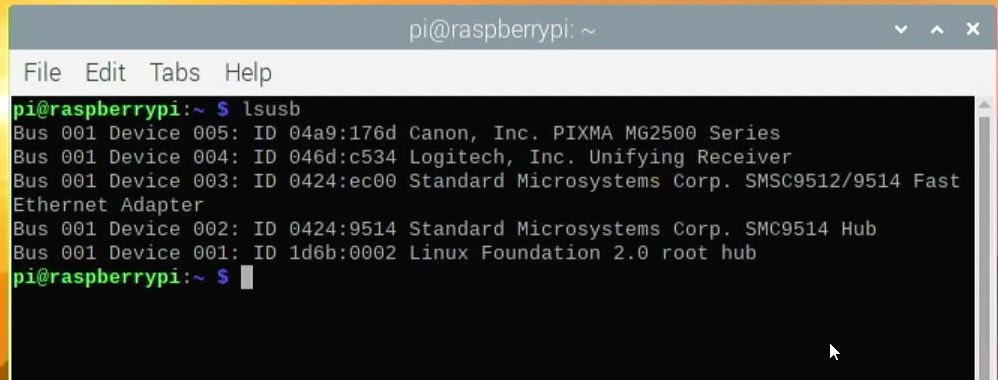
- Now turn on your Printer and connect the USB cable to the Raspberry Pi. If you have raspberry Pi Zero, use an OTG adapter.
- Then type and execute Lsusb in the terminal. It will display all the USB devices attached to Raspberry Pie, including your printer.
- Next, we will install SAMBA, which is an open source file sharing server. For this, run following command
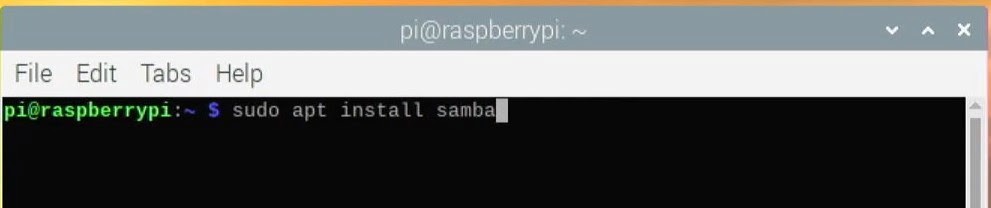
- Hit Enter when prompted.
- Once done, you need to add a default user, which is pi in our case, to admin group. For this, execute this command,
sudo usermod -a -G lpadmin pi
sudo /etc/init.d/cups restart

Step 4: Add Your Wired Printer to Convert it to Wireless
Now type ifconfig in Terminal and note the IP address of Raspberry Pi. You can assign Static IP to the Raspberry Pi from your Router. Then follow these steps,
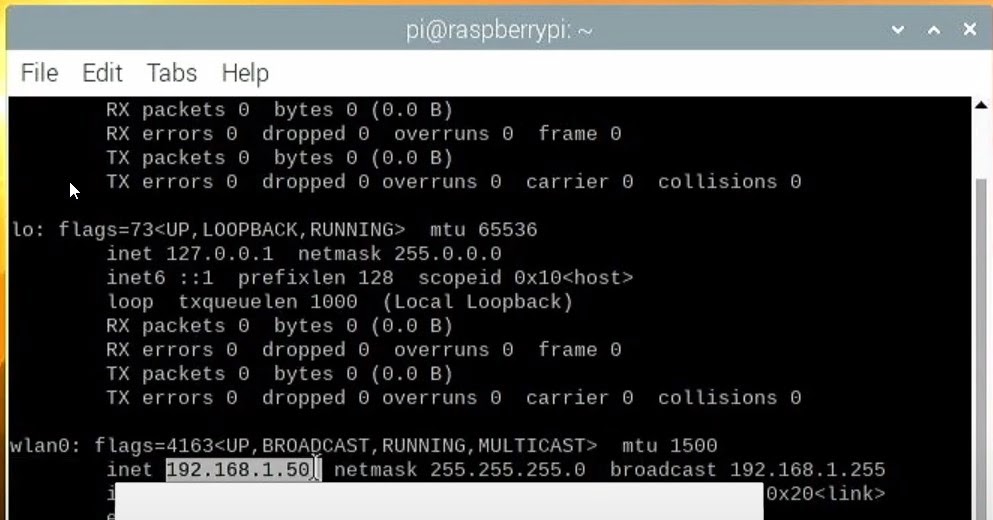
- Open Web browser on your Windows, Mac or Android/iPhone and enter the IP address of Raspberry pi followed by :631/admin. For instance, 192.168.1.53:631/admin
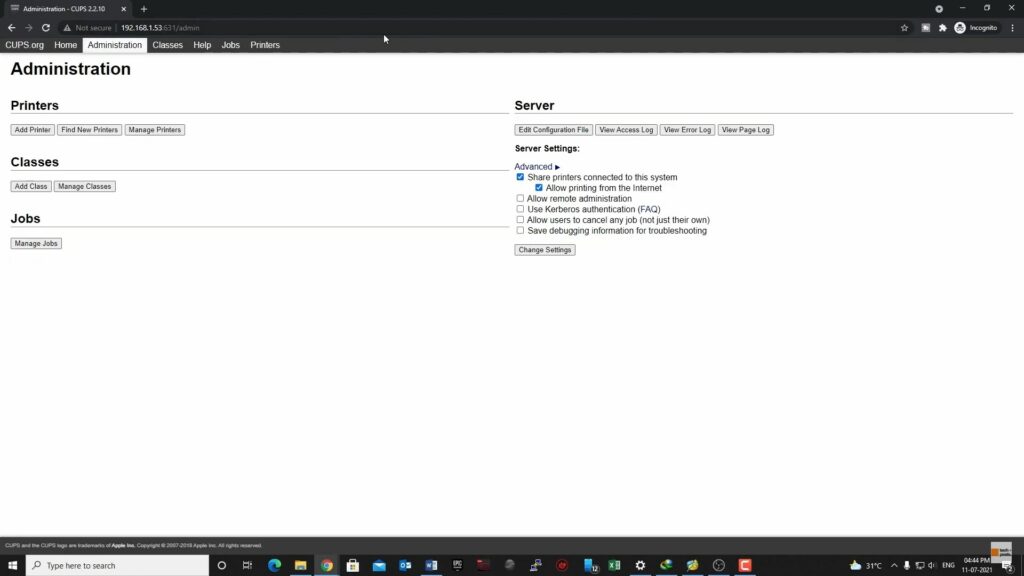
- This will take you to the admin page. Click ‘Add new printer.’
- Click the URL and then click ‘Advanced’ and click Proceed to this IP address.
- Enter your credentials that you use to log in to Raspberry Pi. By default, the username is pi and password is raspberry in lower characters.
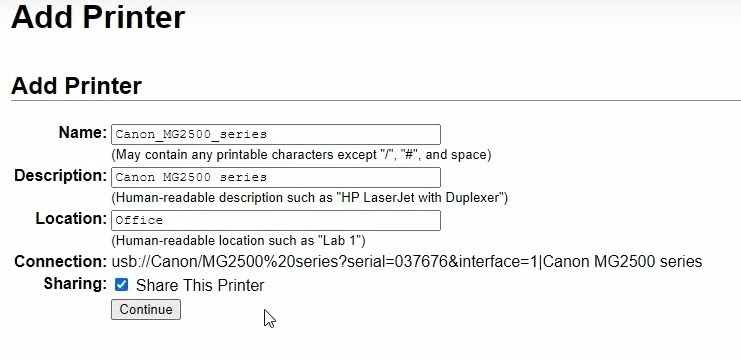
- Click “Add Printer’ again and then select your printer from the Local Printers list. You can also choose a network printer to make it wireless.

- Then Click ‘Continue’
- Confirm the printer details and then click ‘Share this Printer.’ Click ‘Continue.’
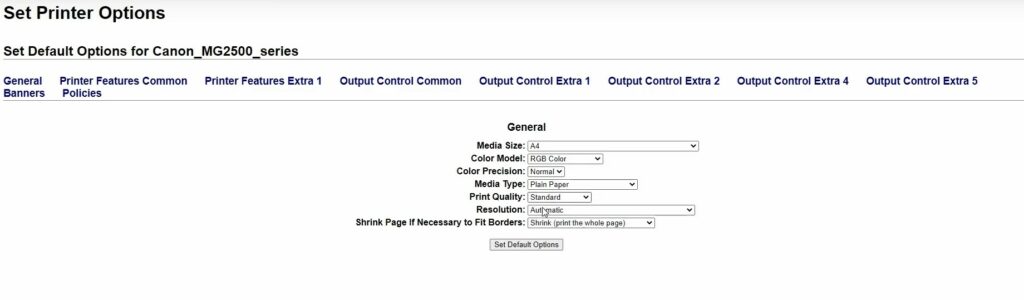
- It will load the device models. Choose the printer model from the list and Click ‘Add Printer.’
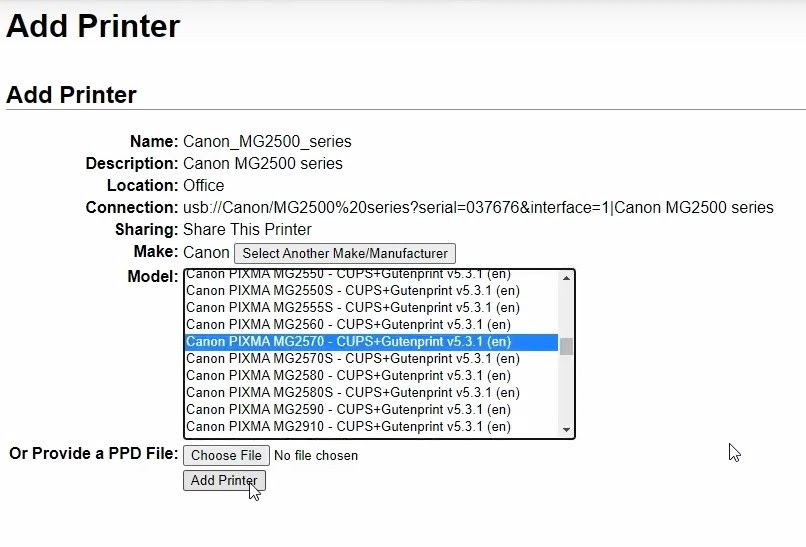
- Set the default printing options. And now your printer is ready to print wirelessly.
Step 5: Start Printing Wirelessly on a Wired USb Printer
You can now send print requests from your Windows, Mac, or Android wirelessly. But for this, you need to first add the printer to your system.
Add Wireless Printer on Windows
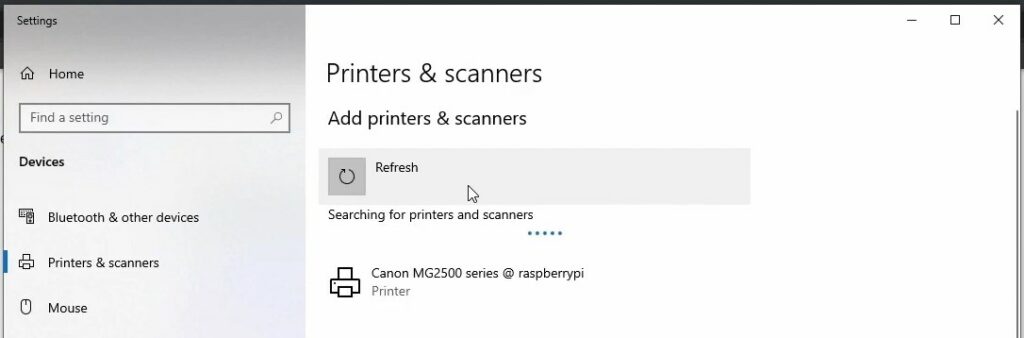
- Open Settings and go to Devices
- Click Printers and Scanners and then click ‘Add a Printer or scanner’
- The converted wireless printer will be listed with @raspberrypi at the end. Click on it to add it.
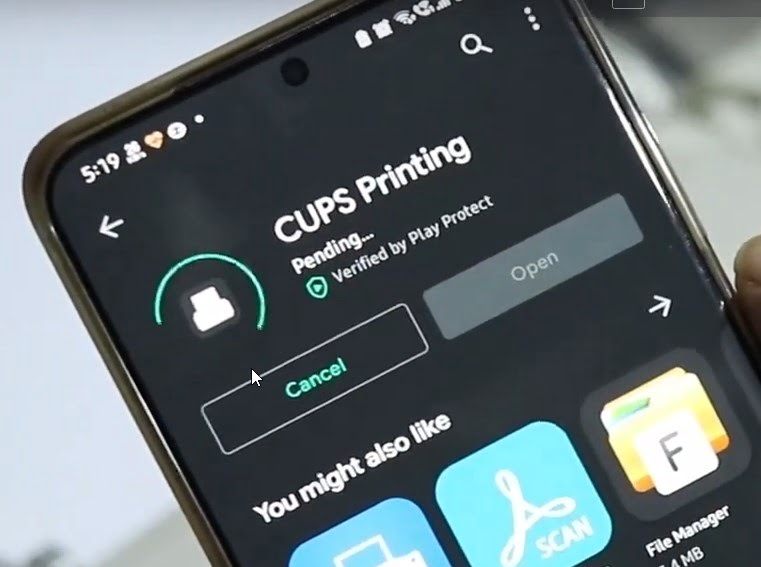
Add Wireless Printer on your Android Phone,
- install the Cups Printing app from the play store.
- Then search and go to Printing.In Samsung Android devices, this option is under Settings>Connections>More Connection Settings in your Android and enable CUPS Printing.
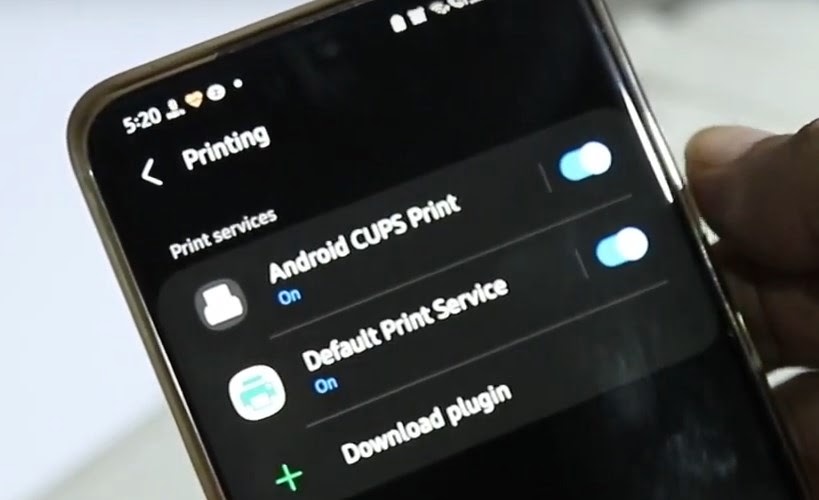
- If you tap on Cups Printing, you will see the wireless printer listed here.
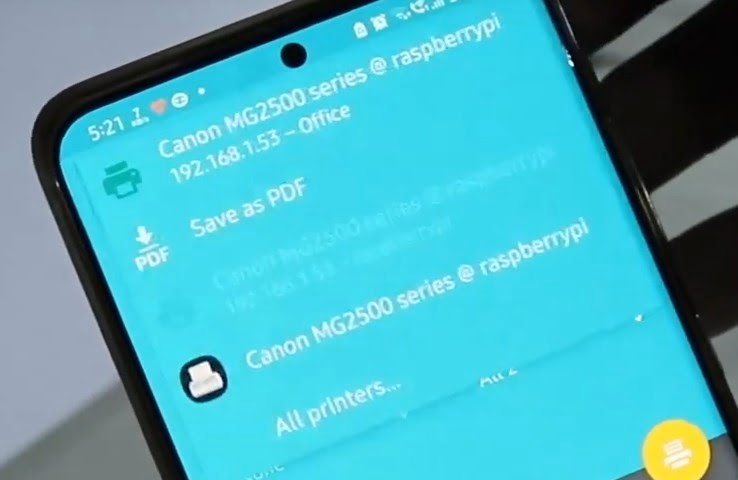
You can now open any document on your Android phone and print it by selecting the wireless printer from the list. Also, you can place your wired cum wireless printer in literally any corner of your house or office and print documents wirelessly from virtually any device.
Video Guide to Convert Wired Printer into Wireless
In case you are facing issues or errors while setting up or executing these steps, do let me know via the comments down below. I will be happy to help.
How To Convert USB Printer to Wifi Printer
We live in a modern world where all devices are connected wirelessly. Of course, this also means that the wireless-powered devices can be remotely connected. But what about devices that do not support wireless? Can you control them wirelessly?
Well, all of these questions are applicable for printers. However, if you have a USB printer that doesn’t support wireless connectivity, you may feel stuck. However, you can convert your USB printer to a WiFi printer. In this tutorial, we will take a look at different ways you can do it!
Pre-requisite
Before you get started, you need to have a working printer at your disposal. It would be best to have an internet-connected computer or a modem or router with a USB port. Lastly, it would be best if you also had an ethernet cable at your disposal.
Wireless Print Server
One of the easiest and most convenient ways to make your USB printer a wireless printer is to use a small device known as the wireless print server. It is a small box that offers the ability to make your wired printer wireless. All you need to do is put the printer in a place where it is accessible by everyone and from there. Once done, plug in the Wireless Print Server, and you are good to go!
To make sure the Wireless Print Server is working as intended, use the same wireless network for both. If both connect to different wireless networks, then the connection will not work. But, what happens if you have multiple HP printers or other brand printers? Will one Wireless Print Server work? Well, sadly, it won’t. So, you need to get each printer it’s Wireless Print server and connect them with a USB cable.
The USB-only printer has not transformed into a wireless one. In theory, you should be able to use the printer from anywhere in your house. Amazon.com offers a good collection of Wireless Print Server, and you can pick one according to your budget to get started.
Router-Connected USB Printer Using Wireless Network
The current generation router comes with a USB port on its back. If your router also has a USB port, then you can use it to your advantage. To make sure that your router has the port, check its back or side. You can use a USB to USB cable to connect your USB printer to the modem/router if you see one.
You can also opt for a USB to Ethernet adapter if needed. This is required only for routers that don’t have a USB port. The USB to ethernet adapter enables you to connect the printer to the router using the ethernet port. These adapters are easy to find from online shopping platforms such as eBay or Amazon. You can also check out your local store.
As the USB-to-USB cable or the USB to Ethernet cable are short, you need to place the printer near your router. Also, make sure that you do not bend the cable while connecting the two devices. Once both the devices are closed, now connect the cable according to the ports. In the case of a USB-to-USB cable, you can connect the cable to your printer or router in any order. However, for USB to Ethernet, you need first to plug the adapter to the router’s Ethernet port and then the other end to the router.
Next, you need to plug in the power cord to the printer and then power on the printer. Now, you need to wait for the printer to be identified by the router as a device. You should give at least five to ten minutes for the process to complete.
Now you need to attempt to connect to the printer from the host computer. For that, you need to follow the below-mentioned steps.
- Open the Start menu on your Windows
- Now go to Settings and then click on Devices.
- From there, click Printers and Scanners
- Now click on “Add a printer or scanner.”
- Next, select Wireless printer and Add Device.
If you are on a MAC, then you need to go to System Preferences >> Printers and Scanners >> Click on the Wireless printer icon on the left and then click Add.
Double-check if the printer is connected by going to the printer setup.
Using Host Computer on Windows
If you cannot connect your USB printers to Windows using the above method, you need to use your host computer to connect the printer. This will make your host computer act as a wireless source for the printer to work.
The steps to do so are as below:
- First, you need to connect your USB-connected printer to your computer using a USB cable.
- Power on the printer
- The computer should recognize the printer, and you need to follow the on-screen prompts. It may ask you to download the driver or install it yourself.
- Now click the Start button on Windows.
- Go to Control Panel and click on “Network and Internet.”
- Click on “Change Advanced Sharing Settings” on the left menu
- From there, toggle, “Turn on file and printer sharing.”
- Now click on “Save changes.”
- Again go back to “Control Panel” and select “View devices and printers.”
- From there, right-click on your connected printer.
- Next, click on Printer properties.
- In the Printer properties, you will find “Sharing.”
- Turn on “Share the printer” and “Render print jobs on client computers.”
To finally share the printer on the network, you need to try again connecting to the printer using WiFi with the same Wi-Fi network as the host computer. Go to “Start” >> “Settings” >> “Devices” >> “Printers and Scanners” and then “Add a printer or scanner”
You can do the same thing if you are using a MAC machine.
Conclusion
All these methods can be simple yet effective ways to make your printer print wirelessly. It doesn’t matter what brand you are using — it can be an HP printer or Brother printer, you can easily convert them to a wireless printer using the above methods. You can also use an optional Bluetooth adapter if everything fails. Most printers come with in-built Bluetooth, or you can use a cheap Bluetooth adapter for connecting the printer to your wireless router or host computer.
In case you are not able to, then it is recommended to buy new wireless-enabled printers. Right now, wireless printers are cheap, and you should find one within your budget.
Hedayat S
Hedayat is the new Editor-in-Chief of Rottenwifi and has been writing about computer networking since 2012. Hedayat’s strong background in computer science helped him cement his position in the ever-expanding tech blogging world. As a network engineer, systems administrator, and systems analyst during his decade-long career in Information Technology, he has a passion for the internet & technology in his DNA.
Blog.rottenwifi.com is a participant in the Amazon Services LLC Associates Program which means we may get paid commissions on editorially chosen products purchased through our links to retailer sites. All names, logos, brands, and images are trademarks or copyrighted materials of their respective owners. Amazon and the Amazon logo are trademarks of Amazon.com, Inc., or its affiliates.