How to Connect iPhone to Arch Linux
Troubles with iPhone and Arch Linux? iPhone and Linux never really go along very well. In this tutorial, I am going to show you how can you use iPhone in Antergos Linux. Since Antergos is based on Arch Linux, the same steps should be applicable to other Arch based Linux distros such as Manjaro Linux.
So, when I bought an iPhone 6S and when I connected it to Antergos Linux to copy some pictures, it was not detected at all. I could see that iPhone was being charged and I had allowed iPhone to ‘trust the computer’ but there was nothing at all detected. I tried to run dmseg but there was no trace of iPhone or Apple there. What is funny that libimobiledevice was installed as well, which always fixes iPhone mount issue in Ubuntu.
I am going to show you how I am using iPhone 6S, running on iOS 9 in Antergos. It goes more in command line way, but I presume since you are in Arch Linux zone, you are not scared of terminal (and you should not be as well).
Mount iPhone in Arch Linux
Step 1: Unplug your iPhone, if it is already plugged in.
Step 2: Now, open a terminal and use the following command to install some necessary packages. Don’t worry if they are already installed.
sudo pacman -Sy ifuse usbmuxd libplist libimobiledeviceStep 3: Once these programs and libraries are installed, reboot your system.
Step 4: Make a directory where you want the iPhone to be mounted. I would suggest making a directory named iPhone in your home directory.
Step 5: Unlock your phone and plug it in. If asked to trust the computer, allow it.
Step 6: Verify that iPhone is recognized by the system this time.
This should show you some result with iPhone and Apple in it. Something like this:
[ 31.003392] ipheth 2-1:4.2: Apple iPhone USB Ethernet device attached
[ 40.950883] ipheth 2-1:4.2: Apple iPhone USB Ethernet now disconnected
[ 47.471897] ipheth 2-1:4.2: Apple iPhone USB Ethernet device attached
[ 82.967116] ipheth 2-1:4.2: Apple iPhone USB Ethernet now disconnected
[ 106.735932] ipheth 2-1:4.2: Apple iPhone USB Ethernet device attached
This means that iPhone has been successfully recognized by Antergos/Arch Linux.
Step 7: When everything is set, it’s time to mount the iPhone. Use the command below:
Since we created the mount directory in home, it won’t need root access and you should also be able to see it easily in your home directory. If the command is successful, you won’t see any output.
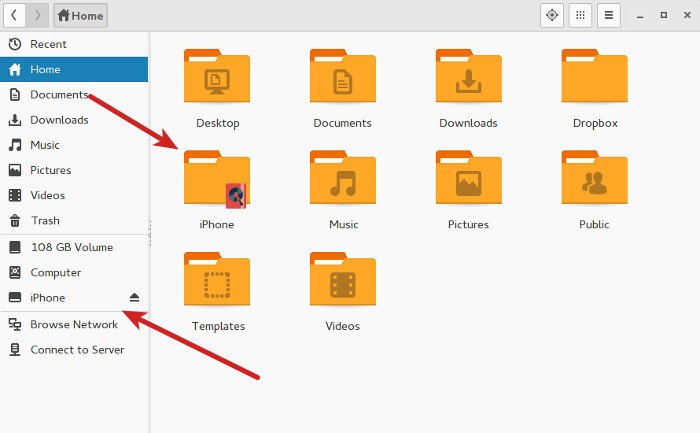
Go back to Files and see if the iPhone is recognized or not. For me, it looks like this in Antergos:
You can access the files in this directory. Copy files from it or to it.
Step 8: When you want to unmount it, you should use this command:
Worked for you?
I know that it is not very convenient and ideally, iPhone should be recognized as any other USB storage device but things don’t always behave as they are expected to. Good thing is that a little DIY hack can always fix the issue and it gives a sense of achievement (at least to me). That being said, I must say Antergos should work to fix this issue so that iPhone can be mounted by default.
Did this trick work for you? If you have questions or suggestions, feel free to drop a comment.
Access your iPhone on Linux with this open source tool
The iPhone and iPad aren’t by any means open source, but they’re popular devices. Many people who own an iOS device also happen to use a lot of open source, including Linux. Users of Windows and macOS can communicate with an iOS device by using software provided by Apple, but Apple doesn’t support Linux users. Open source programmers came to the rescue back in 2007 (just a year after the iPhone’s release) with Libimobiledevice (then called libiphone), a cross-platform solution for communicating with iOS. It runs on Linux, Android, Arm systems such as the Raspberry Pi, Windows, and even macOS.
Libimobiledevice is written in C and uses native protocols to communicate with services running on iOS devices. It doesn’t require any libraries from Apple, so it’s fully free and open source.
Libimobiledevice is an object-oriented API, and there are a number of terminal utilities that come bundled with it for your convenience. The library supports Apple’s earliest iOS devices all the way up to its latest models. This is the result of years of research and development. Applications in the project include usbmuxd, ideviceinstaller, idevicerestore, ifuse, libusbmuxd, libplist, libirecovery, and libideviceactivation.
Install Libimobiledevice on Linux
On Linux, you may already have libimobiledevice installed by default. You can find out through your package manager or app store, or by running one of the commands included in the project:
You can install libimobiledevice using your package manager. For instance, on Fedora or CentOS:
$ sudo dnf install libimobiledevice ifuse usbmuxd$ sudo apt install usbmuxd libimobiledevice6 libimobiledevice-utilsAlternatively, you can download and install libimobiledevice from source code.
Connecting your device
Once you have the required packages installed, connect your iOS device to your computer.
Make a directory as a mount point for your iOS device.
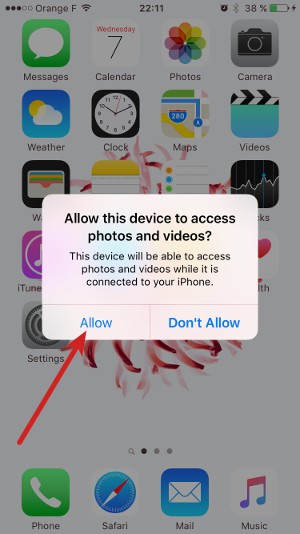
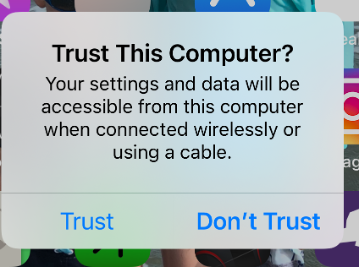
Your device prompts you to trust the computer you’re using to access it.
Figure 1: The iPhone prompts you to trust the computer.
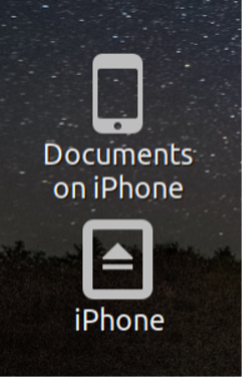
Once the trust issue is resolved, you see new icons on your desktop.
Figure 2: New icons for the iphone appear on the desktop.
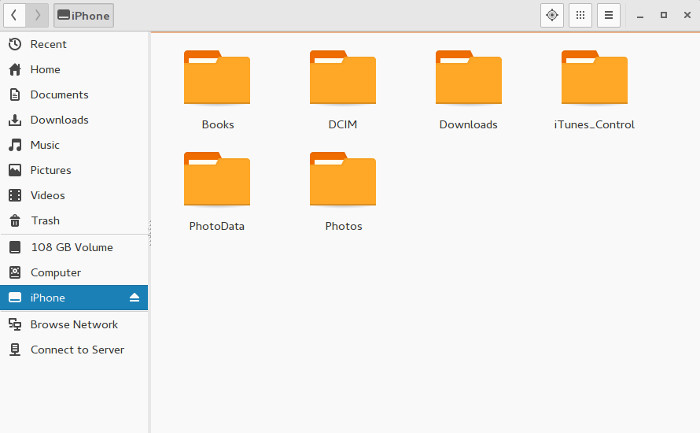
Click on the iPhone icon to reveal the folder structure of your iPhone.
Figure 3: The iPhone folder structure is displayed.
The folder I usually access most frequently is DCIM, where my iPhone photos are stored. Sometimes I use these photos in articles I write, and sometimes there are photos I want to enhance with open source applications like Gimp. Having direct access to the images instead of emailing them to myself is one of the benefits of using the Libimobiledevice utilities. I can copy any of these folders to my Linux computer. I can create folders on the iPhone and delete them too.
Find out more
Martin Szulecki is the lead developer for the project. The project is looking for developers to add to their community. Libimobiledevice can change the way you use your peripherals, regardless of what platform you’re on. It’s another win for open source, which means it’s a win for everyone.
Run the Linux command line on your iPad
The Linux command line on iOS? Yes, you can.
Restore an old MacBook with Linux
Don’t throw your old, slow MacBook into the recycling bin; extend its life with Linux Mint.
