- Гостевой сеанс
- Настройка
- Удаление гостевых пользователей после сбоя
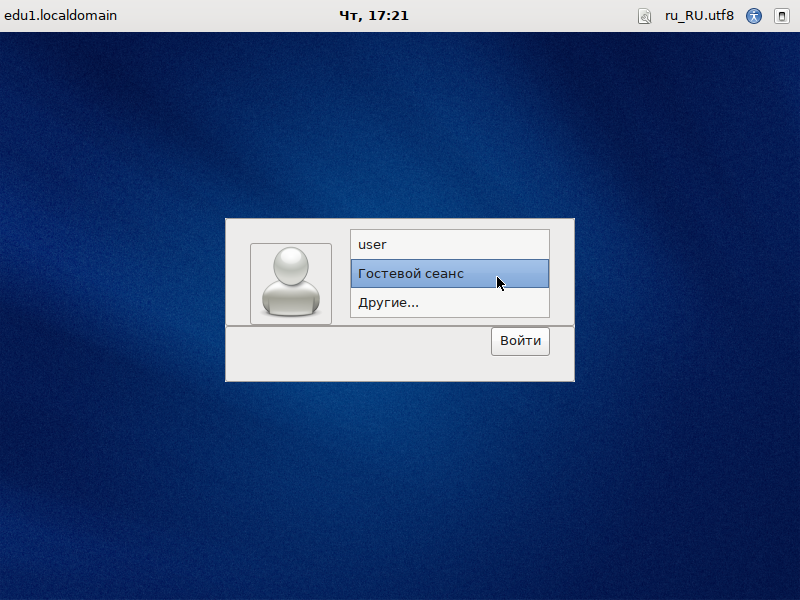
- Внешний вид после настройки
- Технические подробности
- Настройка гостевого сеанса Ubuntu.
- Хуки.
- Удобная настройка гостевого сеанса.
- Предупреждение при старте.
- Сохранение файлов на диск.
- Отключение гостевого сеанса Ubuntu.
- Create guest account in Gnome 3.X on Arch Linux
- 2 Answers 2
- How to add a guest account without a password?
- 5 Answers 5
- Method 1
- Method 2
Гостевой сеанс
Гостевой сеанс представляет собой однократный вход под создаваемым гостевым пользователем и при окончании сеанса удаляется как этот пользователь, так и его домашний каталог.
Вы можете включить гостевой вход в LightDM, установив пакет guest-account :
# apt-get install guest-account после этого перезапустите lightdm или компьютер.
Настройка
Включить гостевой сеанс в LightDM (включается автоматически при установке пакета):
Включить автоматический вход в гостевой сеанс в LightDM:
Выключить гостевой сеанс в LightDM (выключается автоматически при удалении пакета):
# systemctl restart lightdm
Удаление гостевых пользователей после сбоя
Если guest-account list возвращает имена гостевых пользователей (например, оставшихся после выключения электричества), очистить их можно командой
# guest-account list | xargs -n1 guest-account remove Внешний вид после настройки
Технические подробности
При создании сеанса, скрипт запуска сеанса берёт содержимое из /etc/skel (настройки всех пользователей), и из каталога /etc/guest-sessiion/skel (настройки именно гостя) , также при запуске он анализирует наличие скрипта /etc/guest-session/prefs.sh , при его наличии, запускает prefs.sh .
Каталог /etc/guest-session/ и скрипт /etc/guest-session/prefs.sh не входят ни в один пакет, так что ими может управлять системный администратор.
Настройка гостевого сеанса Ubuntu.
В Убунту есть возможность предоставить гостевой доступ к системе. Всяк входящий через гостевой доступ будет видеть систему как в первый раз, то есть любые изменения пропадут. В данной статье рассказывается как владельцу компьютера, предоставляющему гостевой доступ, настроить внешний вид и поведение.
Хуки.
При старте гостевого сеанса, создаётся временная учётная запись пользователя, чей домашний каталог располагается в /tmp. Чтобы контролировать сей процесс с релиза Ubuntu 11.04 есть пара хуков, помогающих контролировать домашнюю директорию пользователя:
- Если существует не пустой каталог /etc/guest-session/skel/ , то его содержимое копируется в домашнюю директорию временного пользователя. Иначе используется /etc/skel/ .
- Если существует /etc/guest-session/prefs.sh, то он используется /usr/sbin/guest-account для модифицирования содержимого домашней директории. Переменная $USER будет указывать на временную учётную запись вида guest-XXXXXX и $HOME на домашнюю папку, поэтому в /etc/guest-session/prefs.sh последней командой должна быть строка chown -R $USER: $HOME , которая сделает временную учётную запись владельцем своей домашней папки. Это не нужно применять с релиза Ubuntu 14.04.
- С релиза Ubuntu 14.04 если существует файл /etc/guest-session/auto.sh, то он будет выполнен через /usr/lib/lightdm/guest-session-auto.sh . Файл /etc/guest-session/auto.sh позволит указать какие программы запустить при старте гостевого сеанса.
Удобная настройка гостевого сеанса.
Использование дополнительного пользовательского аккаунта облегчает настройку гостевого сеанса.
- Добавьте новую учётную запись guest-prefs.
- Зайдите в учётную запись в guest-prefs и измените всё так, как хотите видеть неизменным в гостевой учётной записи. Смените рисунок, используемый в качестве обоев, смените программы, закреплённые в Unity Launcher и так далее.
- В Терминале создайте символическую ссылку
sudo mkdir /etc/guest-session
sudo ln -s /home/guest-prefs /etc/guest-session/skelТеперь при старте гостевого сеанса настройки будут браться из guest-prefs.
- Вместо имени guest-prefs можете взять любое другое.
- Трюк с символической сылкой работает только с релиза Ubuntu 12.04. В ранних релизах используйте в /etc/guest-session/prefs.sh копирование
cp -rT /home/guest-prefs $HOME
chown -R $USER: $HOME - Пользователя guest-prefs можно спрятать в экране приветствия и системного меню, чтобы не мозолил глаза.
Предупреждение при старте.
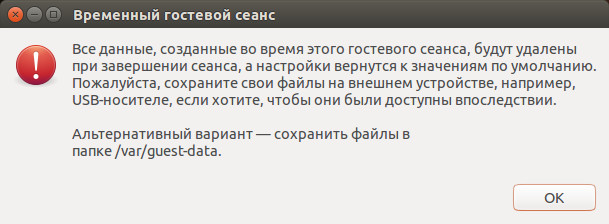
С релиза Убунту 14.04 при входе в гостевой сеанс показывается диалоговое предупреждение о временной природе данного сеанса и что все изменения пропадут при выходе. Окно держится на экране около 4 секунд и :
- если вы хотите увеличить задержку, то в в файле /etc/guest-session/prefs.sh укажите
echo «export DIALOG_SLEEP=8» >> $HOME/.profile - если хотите отключить появление окна
touch $HOME/.skip-guest-warning-dialog
Сохранение файлов на диск.
Если вы хотите дать гостям возможность сохранять данные в вашем компьютере, то нужно создать папку /var/guest-data/
sudo mkdir -m 0777 /var/guest-data
Упоминание для гостей, что они могут сохранять в неё данные, упоминается в диалоговом окне, если вы его не отключали.
Отключение гостевого сеанса Ubuntu.
Если вы хотите просто отключить возможность гостевого сеанса в вашей системы, то достаточно добавить строку allow-guest=false в файл /etc/lightdm/lightdm.conf до релиза Ubuntu 14.04, а с релиза 14.04 и выше во вспомогательные конфигурационные в каталоге /usr/share/lightdm/lightdm.conf.d/. Например, в /usr/share/lightdm/lightdm.conf.d/50-no-guest.conf
sudo sh -c ‘printf «[SeatDefaults]\nallow-guest=false\n» >/usr/share/lightdm/lightdm.conf.d/50-no-guest.conf’
Эта команда создаёт небольшой конфигурационный файл. Чтобы снова разрешить гостевой сеанс, просто удалите этот файл:
sudo rm /usr/share/lightdm/lightdm.conf.d/50-no-guest.conf
Дата последней правки: 2014-06-06 11:54:52
Create guest account in Gnome 3.X on Arch Linux
This is relevant. Perhaps even a dupe if the answer works for you: Create guest account with restricted access to applications.
I have no idea how Ubuntu does it. If you need «exactly like Ubuntu», you’ll have to edit your question and explain what that means. However, the links provided in the linked answer give the ways you can limit a user’s authority and are almost certainly how Ubuntu has implemented whatever they’ve implemented behind the scenes. Try it.
2 Answers 2
It turns out it’s quite simple with GDM. I assume you’re using GDM since you’re also using Gnome. First, create the guest user account with a blank password:
sudo useradd -d /tmp/guest -p $(openssl passwd "") guest The openssl passwd «» will return the hash of the empty string, thereby setting the password to blank.
Now, all you need are these two scripts:
This is executed after you log in and will create the /tmp/$guestuser ( /tmp/guest by default) directory and copy the default files from /etc/skel to it. To change the default username for the guest user, set guestuser to something else at the beginning.
#!/bin/sh guestuser="guest" ## Set up guest user session if [ "$USER" = "$guestuser" ]; then mkdir /tmp/"$guestuser" cp /etc/skel/.* /tmp/"$guestuser" chown -R "$guestuser":"$guestuser" /tmp/"$guestuser" fi exit 0 This is executed after you log out and will remove the /etc/$guestuser directory and all its contents. Make sure to set guestuser to the same value in both scripts.
#!/bin/sh guestuser="guest" ## Clear up the guest user session if [ "$USER" = "$guestuser" ]; then rm -rf /tmp/"$guestuser" fi exit 0 Finally, make the two scripts executable:
sudo chmod 755 /etc/gdm/PostLogin/Default /etc/gdm/PostSession/Default Now, just log out and you will see your new guest user. You can log in by selecting it and hitting Enter when prompted for a password. The guest user won’t be able to use sudo since that is the default for all users anyway. Only users explicitly mentioned in /etc/sudoers or those who are members of groups explicitly mentioned in sudoers (such as wheel or sudo , depending on your distribution) can use sudo .
If you are using a recent version of GDM, it may disable the login button while the password box is empty. To work around this you can tell GDM not to prompt for the password for specific groups. The caveat is that this will also bypass the session selection menu for members of that group. If you want to do this you should add this line at the beginning of /etc/pam.d/gdm-password :
auth sufficient pam_succeed_if.so user ingroup guest How to add a guest account without a password?
Sometimes I have friends in my house that want use my computer. How can they use a guest account without typing a password?
5 Answers 5
Method 1
user@ubuntu:~$ sudo adduser guest user@ubuntu:~$ sudo passwd -d guest This will add a user called «guest», then delete her password. You can log in from both the standard getty login prompt and graphical login managers like GDM. This works for me on Ubuntu 10.10.
However, apparently this doesn’t work for some people using Ubuntu. Thus:
Method 2
- Make a user.
- Open /etc/shadow: gksudo gedit /etc/shadow
- Find the line that starts with the user you just made. Notice the line has multiple fields separated by colons.
- Change the second field to: U6aMy0wojraho . In my case:
guest:$6$m4CpcgBw$i9XLGaUNToClOJ1X5Grug/COUjlkhoPv1:15048:0:99999:7.
guest:U6aMy0wojraho:15048:0:99999:7. The origin of this method is from the Ubuntu livecd. The default user (ubuntu) requires no login password. If you look at /etc/shadow on the livecd, U6aMy0wojraho is the encrypted form of the magic password used. I explain this to emphasize this is not a general linux solution, but something specifically Ubuntu.
There will be a guest account by default.Try clicking your username at the top-right corner and activate «Guest Session» under there. Also see the posts below,
Create a new user, without administration access, then click in: «No passwd at login». This may solve your problem, but you can log in, and at your name (at right up): Guest-session.
Here’s how I created Guest Account without password with tmpfs (RAM is used as disk space)
# Run these as root or prefix sudo useradd -c "Guest [click here]" guest ; # add a user named passwd guest ; # just give any password passwd -d guest ; # delete the password to make password less login UserID=$(id -u guest) ; # to set ownership of /home/guest directory GroupIP=$(id -g guest); # get the group id for home directory permission usermod -aG audio,plugdev,video,netdev,bluetooth guest ; # give device access (this is for debian) rm -rf /home/guest ; # in case there are files/directories mkdir -pv /home/guest ; # should mount if non empty but make sure it is empty echo "tmpfs /home/guest tmpfs rw,size=1024M,nosuid,uid=$UserID,gid=$GroupID 0 0" >> \ /etc/fstab mount /home/guest Now you can login with guest without password everytime and data is stored up to 1GB in RAM which will be deleted on system shutdown!