- Install GitHub Desktop App on Ubuntu 22.04 or 20.04 Linux
- Installing GitHub Desktop Client on Ubuntu 22.04 or 20.04
- 1. Update Packages
- 2. Add ShiftKey GPG Key
- 3. Add GitHub Desktop repository on Ubuntu
- 3. GitHub Desktop installation on Ubuntu 22.04 | 20.04
- 4. Install Flatpak
- 5. Use Flatpak to install the Linux GitHub Desktop app
- 6. Run Linux GitHub Desktop
- How to update the app on Linux
- Uninstall or Remove GitHub Desktop from Ubuntu
- FAQ:
- GitHub CLI quickstart
- About GitHub CLI
- Getting started
- Next steps
- Help and support
- Help us make these docs great!
- Как пользоваться GitHub на компьютере с Linux
- Установка git
- Синтаксис
- Создание проекта на локальном компьютере
- Отправка данных на GitHub
- Создание репозитория
- Заливаем проект в репозиторий на GitHub
- Получение файлов с GitHub
- Клонирование проекта
- Возможные ошибки
- 1. При попытке отправить данные на GitHub, получаем ошибку:
Install GitHub Desktop App on Ubuntu 22.04 or 20.04 Linux
GitHub Desktop is a free and open-source graphical user interface (GUI) to run on Windows or macOS for Git version control. In the words of GitHub, “GitHub Desktop is an open source Electron-based GitHub app. It combines both a local Git repository and the full feature set of the GitHub online platform”.
The Git client focuses on eliminating the need for developers to use the command line or browser interfaces for Git-related operations on Desktop systems.
It allows users to manage commits, pull requests, view project history, search through source code, connecting with various repositories but exclusively hosted on GitHub. Unlike SourceTree it doesn’t work with other platforms such as Gitlab for creating and deleting branches.
It was released in 2012 by GitHub and since then the app has gained considerable popularity among software developers who prefer to have a graphically visual tool instead of using the command line for their programming tasks.
Installing GitHub Desktop Client on Ubuntu 22.04 or 20.04
GitHub Desktop is officially not available as an installable package for Ubuntu Linux operating systems. However, being an open-source app, other developers have made it possible to install GitHub Desktop on Linux such as Ubuntu. After installing try running it by typing “ github-desktop ” in the terminal prompt which will launch the desktop app with all its features enabled including search files within remote repositories etc.
Overall, downloading GitHub Desktop comes with lots of benefits but its main purpose is to make your development process simpler easier, and more efficient while keeping version control capabilities in check. This makes development projects much easier allowing programmers to concentrate more on coding instead of struggling with commands without being sure what happened behind the scenes. However, if you are not an exclusive GitHub user then can try other best free and paid Git GUI clients.
Here in this tutorial, we will go through the simple steps for GitHub Desktop installation for Ubuntu Linux.
Before following this tutorial you would like to know What are the Advantages of Using a GitHub desktop app?
#1st way is using the Deb repository
1. Update Packages
On your Ubuntu Linux, first, run the system update command that ensures all the available package updates are installed on it. Further, this command will also refresh the package index cache of the default package manager i.e APT
sudo apt update && sudo apt upgrade2. Add ShiftKey GPG Key
As we know officially GitHub Desktop client app is not available for Linux systems including Ubuntu. Therefore, we are going for the project that is itself hosted on GiitHub – known as GitHub Desktop – The Linux Fork by ShiftKey.
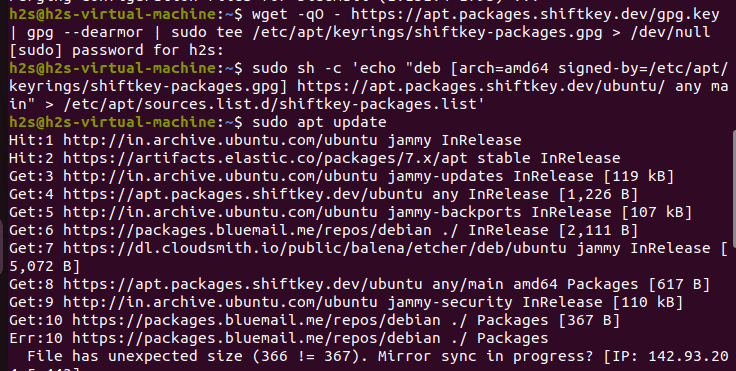
So, on your Ubuntu terminal execute the given command that will add the GPG key of the project, so that we can use the repository offered by the developers of this fork on our system.
wget -qO - https://mirror.mwt.me/shiftkey-desktop/gpgkey | gpg --dearmor | sudo tee /etc/apt/keyrings/mwt-desktop.gpg > /dev/null3. Add GitHub Desktop repository on Ubuntu
After adding the GPG key, let’s add the repository that offers the GitHub Desktop fork packages to install it on Ubuntu 22.04 or 20.04. The benefit of using a repository method instead of its Debian packages bundled as executable binary is we can easily get the future updates of the application by just running the system update and upgrade command.
sudo sh -c 'echo "deb [arch=amd64 signed-by=/etc/apt/keyrings/mwt-desktop.gpg] https://mirror.mwt.me/shiftkey-desktop/deb/ any main" > /etc/apt/sources.list.d/mwt-desktop.list'Don’t forget to run the system update command once again after adding the repository.
3. GitHub Desktop installation on Ubuntu 22.04 | 20.04
Finally, we have integrated all the necessary things we required to download GitHub Desktop App and start its installation on Ubuntu Linux. Now, let’s use Ubuntu’s APT, a built-in package manager, to finally get it on our Linux system.
sudo apt install github-desktop#2nd way using the Flatpak
4. Install Flatpak
Those who don’t want to use the repository method can go for Flatpak universal package manager. However, unlike Snap, it is not available to use on Ubuntu by default. Therefore, we have to install it manually. Here are the commands to follow.
Once the installation is completed, also add the Flathub remote repository that allows us to install various packages available in it on our Linux system.
flatpak remote-add --if-not-exists flathub https://flathub.org/repo/flathub.flatpakrepoCompleting the above two commands will enable the Flatpak successfully on our Ubuntu OS, however, it is important to reboot our system once. This helps this package manager to integrate itself properly into Linux.
5. Use Flatpak to install the Linux GitHub Desktop app
So, after restarting the system let’s use Flatpak to fetch and install the GitHub desktop release on Ubuntu 22.04 or 20.04 Linux via Flathub.
Here is the GitHub Desktop Flatpak Installation Command.
flatpak install -y flathub io.github.shiftey.Desktop6. Run Linux GitHub Desktop
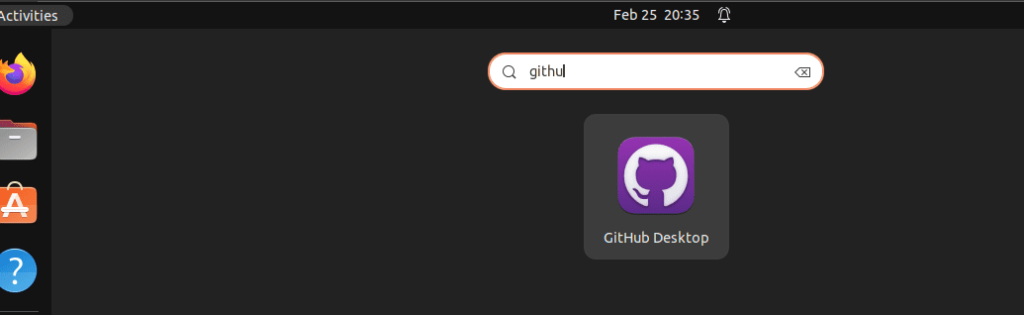
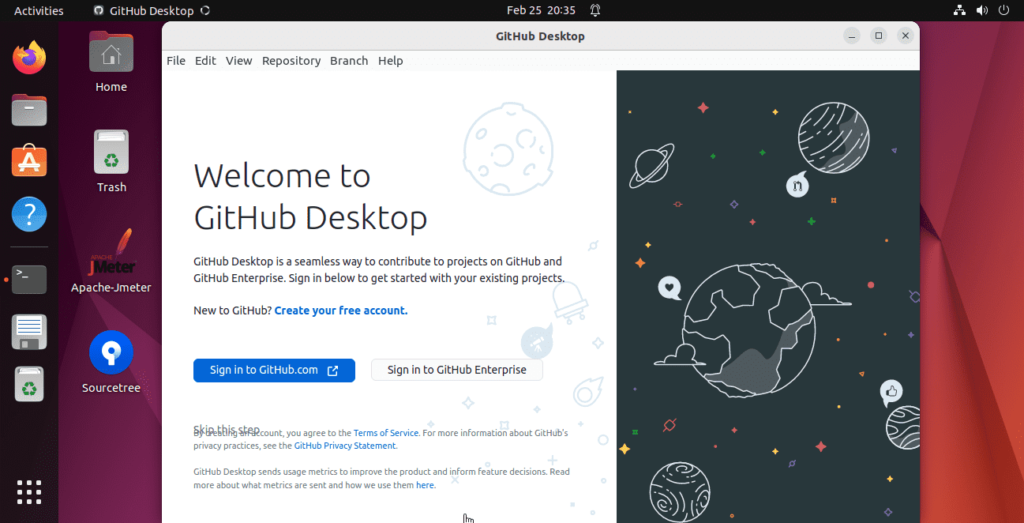
It doesn’t matter which method you have used, to run the application simply click on the Activities link of the Taskbar or press the Windows key on your keyboard to search GitHub. As its icon appears click to run the same.
Now, Login with GitHub.com or GitHub Enterprise as per your account to manage Git repositories directly on the Ubuntu Linux system. To learn further see how to log in and access your Git Repos On GitHub App.
Those who wish to start this Git GUI client application from the command terminal can use:
How to update the app on Linux
Depending upon the method you have used to install the GitHub Desktop app on Ubuntu we can use its corresponding method to install future updates for it.
Those who have used the repository method can simply run the system update command that is:
sudo apt update && sudo apt upgradeWhereas, Flatpak users need to run:
Uninstall or Remove GitHub Desktop from Ubuntu
Uninstalling or removing GitHub Desktop from Ubuntu is a fairly straightforward process.
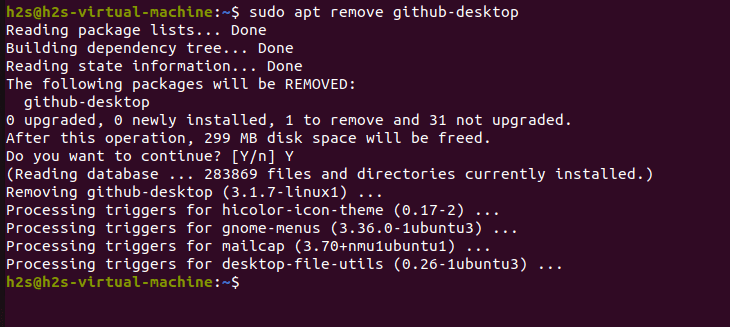
The first method to uninstall or remove GitHub Desktop from your Ubuntu system is to use the apt package manager. Open up the terminal window and type in:
sudo apt-get remove github-desktop.This command will uninstall all packages related to GitHub Desktop, including any configuration files and data stored in the system.
The second method is for Flatpak users, that is:
flatpak remove --delete-data io.github.shiftey.DesktopFAQ:
There are no special requirements to use GitHub Desktop on Ubuntu Linux, just add its repository and install it using the Apt package manager. We already have shown the steps in the tutorial.
Once the installation of the GitHub Desktop is completed on your Linux, access Ubuntu Terminal and run the command- github-desktop to open it.
Well, there is no GitHub desktop officially for Linux but voluntary there are developers offering it for Linux distros as well such as Ubuntu, RedHat, and OpenSuSE.
GitHub CLI quickstart
Start using GitHub CLI to work with GitHub in the command line.
About GitHub CLI
GitHub CLI is an open source tool for using GitHub from your computer’s command line. When you’re working from the command line, you can use the GitHub CLI to save time and avoid switching context.
Getting started
- Start working with GitHub in the command line. For example, find an issue to work on with gh issue status or gh issue list —assignee @me . Create a pull request with gh pr create . Review a pull request with gh pr checkout , gh pr diff and gh pr review .
Next steps
- Tell GitHub CLI which text editor to use for commands that open a text editor. For example, enter gh config set editor «code -w» to set your preferred text editor to Visual Studio Code. For more information, see gh config set .
- Define aliases for commands that you commonly run. For example, if you run gh alias set prd «pr create —draft» , you will then be able to run gh prd to quickly open a draft pull request. For more information, see gh alias .
- Create or add custom commands with GitHub CLI extensions. For more information, see «Using GitHub CLI extensions» and «Creating GitHub CLI extensions.»
- For more information about all of the commands that you can run with GitHub CLI, see «GitHub CLI reference.»
Help and support
Help us make these docs great!
All GitHub docs are open source. See something that’s wrong or unclear? Submit a pull request.
Как пользоваться GitHub на компьютере с Linux

Опубликовано: 15.03.2019
GitHub — один из используемых сервисов размещения проектов для совместной разработки. Он поддерживает контроль версий, возможность отслеживания изменений кода, сравнение строк, а также он бесплатен.
В данной статье приведены примеры использования сервиса на компьютере под управлением операционных систем семейства Linux. Мы рассмотрим, как создать проект на локальном компьютере и залить его на сервис с помощью командной строки. Рассмотренные варианты использования git также можно применять на desktop системах, запустив окно терминала.
Установка git
Управление выполняется с помощью приложения git. Если его нет в системе, установку можно выполнить из репозитория.
Если используем CentOS / Red Hat:
Если используем Ubuntu / Debian:
Если мы хотим воспользоваться сервисом с компьютера Windows или Mac OS, необходимо скачать и установить desktop версию с официального сайта.
Синтаксис
Команды имеют следующий синтаксис:
* полный перечень опций, команд и аргументов можно получить командой man git.
Создание проекта на локальном компьютере
Прежде чем отправить проект на GitHub, создаем его на нашем компьютере. Для этого переходим в каталог с файлами проекта:
Инициализируем проект для git:
Мы получим ответ похожий на:
Initialized empty Git repository in /projects/.git/
Это означает, что репозиторий git создан.
Теперь добавим файлы в репозиторий:
* данной командой мы добавили папку и ее содержимое в репозиторий git.
Отправка данных на GitHub
Теперь можно отправить данные на сервис. Для этого у нас должна быть зарегистрированная учетная запись и создан репозиторий на GitHub.
Создание репозитория
Переходим на портал github.com и входим в систему или проходим несложную регистрацию:

Проходим процесс подтверждения, что мы не робот. Затем завершаем несколько шагов регистрации, нажимая Submit. В итоге мы получим письмо на адрес электронной почты, которую указали при регистрации. Необходимо будем подтвердить email, перейдя в письме по кнопке Verify email address.
Создаем репозиторий. Для этого кликаем по иконке профиля и переходим в раздел Your repositories:

И кликаем по кнопке New. В следующем окне даем название репозиторию и нажимаем Create repository:

Мы увидим страницу с путем к репозиторию:

Заливаем проект в репозиторий на GitHub
Добавляем комментарий к нашему проекту:
git commit -m «Очередное изменение проекта» -a
* где Очередное изменение проекта — произвольный комментарий; параметр -a указывает, что комментарий нужно применить ко всем измененным файлам.
Теперь подключаемся к созданному репозиторию:
git remote add origin https://github.com/dmosktest/project1.git
* где dmosktest — логин, который был указан при регистрации на github, а project1 — название, которое мы задали, когда создавали репозиторий.
* удалить удаленный репозиторий можно командой git remote rm origin.
Закидываем проект на GitHub:
* где master — ветка проекта (веток может быть несколько).
В нашем проекте на GitHub должны появиться файлы проекта:

Получение файлов с GitHub
Для загрузки на компьютер файлов, создаем каталог с проектом и переходим в него:
Проводим начальную настройку локального репозитория:
Подключаемся к удаленному репозиторию:
git remote add origin https://github.com/dmosktest/project1.git
Скачиваем проект командой:
git pull https://github.com/dmosktest/project1.git master
Клонирование проекта
Например, использую наш репозиторий:
git clone https://github.com/dmosktest/project1.git
* данная команда создаст в текущей папке каталог project1 и инициализирует его как локальный репозиторий git. Также загрузит файлы проекта.
Возможные ошибки
1. При попытке отправить данные на GitHub, получаем ошибку:
error: src refspec master does not match any.
error: failed to push some refs to ‘https://github.com/dmosktest/project1.git’
* где dmosktest/project1.git — путь к нашему репозиторию.
Причина: проект ни разу не был зафиксирован (закоммичен).
Решение: добавляем комментарий к нашему проекту:
git commit -m «first commit»