- Wireshark — Shark in Wires | Network Protocol Analyzer in Kali Linux
- How to Install Wireshark Package in Kali Linux 2020.1
- Features
- Wireshark in Kali
- Step 1: Update APT
- Step 2: Install Wireshark
- Step 3: Check Command
- Wireshark GUI
- Conclusion
- About the author
- Younis Said
- Tutorial Install and Run Wireshark on Kali Linux
- How to Install and Run Wireshark on Kali Server
- What is Wireshark?
- Wireshark Features
- Installing Wireshark on Kali Linux
- How to Run Wireshark on Kali Linux
- FAQ
- Conclusion
Wireshark — Shark in Wires | Network Protocol Analyzer in Kali Linux
Wireshark is the most widely used network protocol analyzer tool formerly known as Ethereal. It is free and open-source. Wireshark is mostly used for network analysis and troubleshooting. It captures network traffics in real time and show them in human readable format.
We can use Wireshark to analyze the network traffic in order to find out which information is really flowing through a network. In this detailed tutorial we learn how we can use Wireshark in our Kali Linux system. So hang tight and read this very carefully.
Wireshark is comes preinstalled Kali Linux it can be opened by using wireshark command or from the Sniffing and Spoofing tab in the application menu.
| Wireshark in Kali Linux |
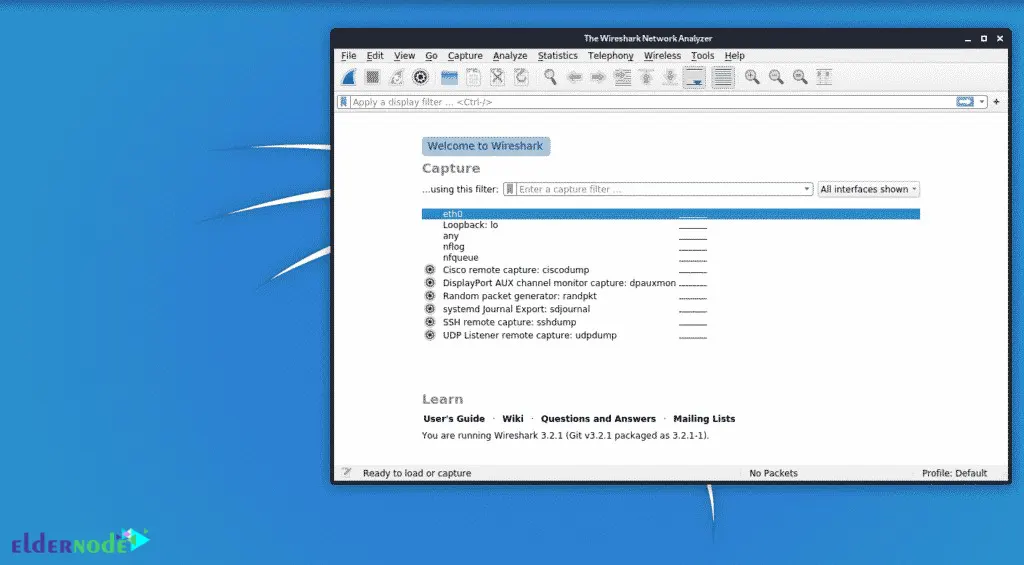
After opening the Wireshark we can see it as following screenshot:
Here we can select the interface we want to capture the traffic. We can double click on the interface name to start capturing traffic. We can use the filters to see general packet filtering while capturing the network traffic. For an example tcp.port eq 80 or tcp.port == 80 as shown following:
By applying the filter we can see only the traffic on port 80. If we want to view requests only from a selected IP, we can select the request and right click on it. Then, we navigate to «Apply as Filter».
Then we see that the filter has been applied.

Sometimes, we may want to look at the conversation happening between two hosts at the TCP level. Following the TCP stream is a feature that allow us to view all the traffic from X to Y and Y to X. Let’s try to use it. From the menu, we choose «Statistic» and then we click on «Conversations».

In the window that comes up, we switch to the TCP tab. Here we can see a list of IPs and the packets transferred between them. To view the TCP stream, we select one of the IPs and click on «Follow Stream».

Here we can see the data that was transferred via TCP.
Capture filters are used to capture traffic specific to the filter applied; for an example, if we only want to capture data from a particular host, we use the host x.x.x.x.
To apply a capture filter, we click on «Capture Options» and in the new window that opens we will see a field named «Capture Options». Here we can enter our filters:
Let suppose we are investigating an exploitation of HeartBleed in the network. We can use the following capture filter to determine if HeartBleed was exploited or not:
tcp src port 443 and (tcp[ ((tcp[12] & 0xF0) >> 4) *4] =0x18) and (tcp[((tcp[12] & 0xF00 >> 4) * 4 + 1] = 0x03) and (tcp[ ((tcp[12] & 0xF0) >> 4) *4 +2] <0x04) and ((ip[2:2] - 4 * (ip[0] & 0x0F) - 4 * ((tcp[12] & 0xF0) >>4) >69) )
There are lots of filters in Wireshark. The following links are very useful, these links contains a list of all filters in Wireshark. We need them when we are performing in-depth packet analysis.
https://wiki.wireshark.org/FrontPage
https://wiki.wireshark.org/CaptureFilters
In this tutorial we learned about Wireshark and it’s uses in our Kali Linux. It is the all in tool in network analyze. Read more tutorials in our blog and follow us on Twitter and Medium for quick updates. If you have anything to say the comment box is below, we always replay.
How to Install Wireshark Package in Kali Linux 2020.1
![]()
The most famous network protocol analyzer is Wireshark. The purpose of this tool is to see what is happening around your network. Wireshark provides all the details about the packets in movement in your network. This is a standard tool in many educational institutes and industries.
Features
- Inspection of thousands of protocols
- New features added with every update
- Live capturing of protocols
- Offline analysis
- Three-way handshake
- Maximum portability: Solaris, Linux, Windows, MAC OS X, FreeBSD, and other OS
- Graphical interface and Terminal mode “tshark utility”
- Analyzes VoIP protocols.
- Multi-platform data reading: Wi-Fi, Ethernet, HDLC, ATM, USB, Bluetooth, Frame Relay, Token Ring, and more
- Save results in CSV, XML, PostScript, and plain text documents
- Read and write a wide variety of captured file formats

Wireshark in Kali
By default, Wireshark is included in full images of Kali Linux. However, in minor images, Wireshark must be installed manually. In this tutorial, we will show you a step-by-step method for installing Wireshark in Kali Linux.
Step 1: Update APT
Always update your APT before installing; make it a habit. The term “sudo” stands for root privileges, so the system will ask for the root password. Enter the password, and the update will start.
Step 2: Install Wireshark
Here, you will be asked whether you wish to install Wireshark. Type “y” and hit enter, and the installation will begin.
Step 3: Check Command
Type in the following two commands to check the Wireshark utility in the system.

Figure 2 wireshark -h terminal command
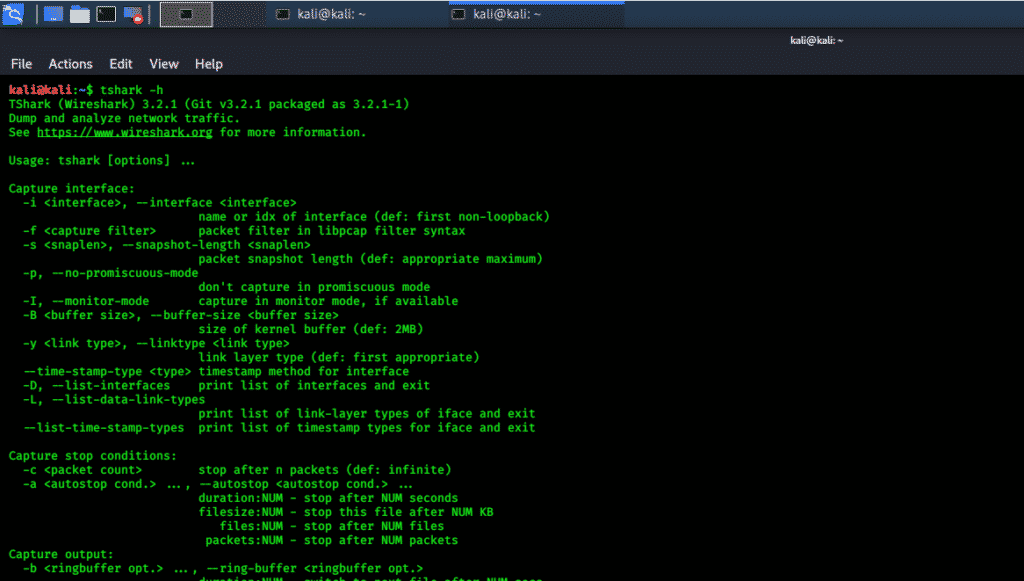
Figure 3 tshark -h terminal command
Wireshark GUI
You can also check the graphical interface of Wireshark. Click on the Kali Whisker menu and, in the search bar, type Wireshark and hit enter. You will then be asked for the root password. Enter the password, and the Wireshark window will open. The following snapshots depict this process.
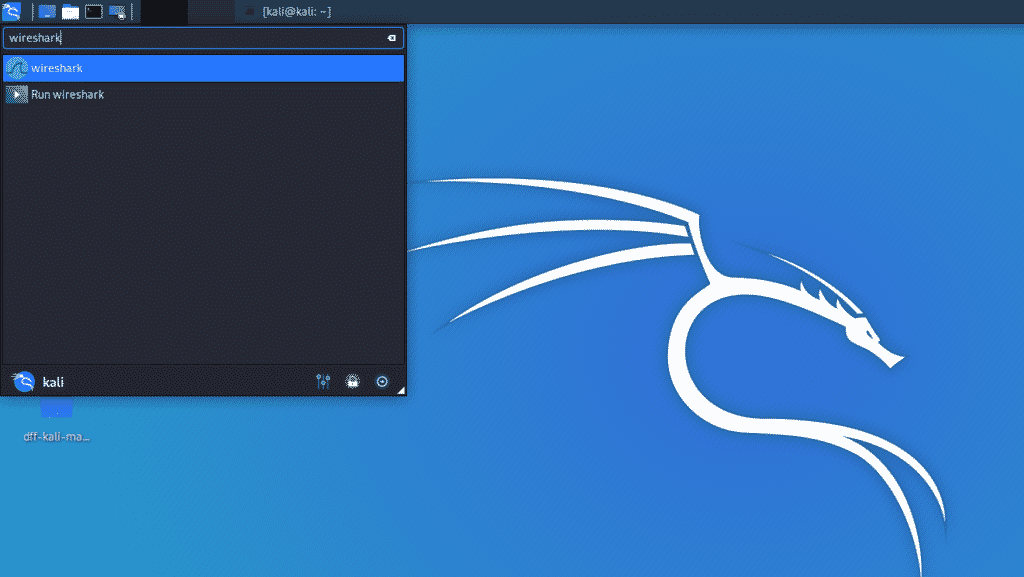
Figure 4 Wireshark GUI in Kali Whisker Menu

Figure 5 Kali GUI interface
Conclusion
I hope you found this an easy and simple tutorial for installing Wireshark. Wireshark is the best tool for network analysis and packet investigation. It is an open-source and freely available network analyzing tool.
About the author
Younis Said
I am a freelancing software project developer, a software engineering graduate and a content writer. I love working with Linux and open-source software.
Tutorial Install and Run Wireshark on Kali Linux

If you want to check and troubleshoot network problems, you can use Wireshark, a fully advanced application for capturing and analyzing network traffic. Few tools are as useful to IT professionals as Wireshark, a network packet capture tool. This article will teach you How to Install and Run Wireshark on Kali Linux. If you want to purchase a Linux VPS Server, you check out the packages offered on the Eldernode website.
How to Install and Run Wireshark on Kali Server
What is Wireshark?
Wireshark software is an open-source and free network traffic control software that is used in various fields such as security and network. It is used for various purposes such as network training, analysis, communication protocol development, and network troubleshooting. This software runs on various platforms including Windows, Linux, and Unix. You can capture network packets and display them at a granular level with the help of Wireshark software. This tool allows you to inspect and filter your network traffic, zoom in on the root cause of problems, and help with network analysis, and ultimately network security.
Wireshark was started by Gerald Combs in 1998 and a global organization of network professionals and software developers supports Wireshark and keeps it updated with new network technologies and encryption methods.
Wireshark Features
– Live capture and offline analysis
– Deep inspection of hundreds of protocols
– Decryption support for many protocols
– Read and write many different captures file formats
– Standard three-pane packet browser
In the continuation of this article from the Kali Linux training series, we intend to teach you How to Install Wireshark on Kali Linux.
Installing Wireshark on Kali Linux
Before starting the installation, update your system with the following command:
Then run the following command to install Wireshark:
sudo apt install wireshark-commonNow press “y” to begin the installation.
You can check the utility of Wireshark and analyze network traffic in the system using the following commands:
How to Run Wireshark on Kali Linux
You can check the graphical interface of the Wireshark from the following path:
Click on the Kali Wireshark menu –> Type Wireshark in the search bar –> Click Enter –> Enter the root password in the requested field.
This will open the Wireshark window. You can see this route in the pictures below:
FAQ
Conclusion
Wireshark is one of the best available tools for network analysis and packet investigation. You can know what is happening around your network with the help of this tool. This article taught you how to install and run Wireshark on Kali Linux. I hope you enjoy this tutorial and that it was useful for you.
Click on a star to rate it!
Average rating 4 / 5. Vote count: 1
No votes so far! Be the first to rate this post.