- Как установить VirtualBox в Ubuntu 20.04
- Установка VirtualBox из репозиториев Ubuntu
- Установка VirtualBox из репозиториев Oracle
- Установка пакета расширений VirtualBox
- Запуск VirtualBox
- Выводы
- How to Install VirtualBox on Ubuntu [Beginner’s Tutorial]
- Installing VirtualBox on Ubuntu and Debian-based Linux distributions
- Method 1: Install VirtualBox from Ubuntu Repository
- Method 2: Install VirtualBox using deb file from Oracle’s website
- Method 3: Install VirtualBox using Oracle’s repository
- How to remove VirtualBox from Ubuntu
Как установить VirtualBox в Ubuntu 20.04
VirtualBox — это кроссплатформенное программное обеспечение для виртуализации с открытым исходным кодом, которое позволяет запускать несколько гостевых операционных систем (виртуальных машин) одновременно. Обычно Virtualbox используется пользователями настольных компьютеров в качестве среды тестирования и разработки.
В этом руководстве мы покажем вам два способа установки VirtualBox в Ubuntu 20.04:
Пакет VirtualBox, доступный в репозитории Ubuntu multiverse, может быть не самой последней версией. Репозитории Oracle всегда содержат последнюю выпущенную версию.
Установка VirtualBox из репозиториев Ubuntu
Установка VirtualBox из репозиториев Ubuntu — простой процесс. Выполните следующие команды от имени пользователя root или пользователя с привилегиями sudo, чтобы обновить индекс пакета и установить VirtualBox и Extension Pack:
sudo apt updatesudo apt install virtualbox virtualbox-ext-pack
Это оно! Вы успешно установили VirtualBox на свой компьютер с Ubuntu и можете начать его использовать.
Установка VirtualBox из репозиториев Oracle
На момент написания этой статьи последней версией VirtualBox была версия 6.1.x.
Чтобы установить VirtualBox из репозиториев Oracle, выполните следующие действия:
- Импортируйте открытые ключи Oracle с помощью следующих команд:
wget -q https://www.virtualbox.org/download/oracle_vbox_2016.asc -O- | sudo apt-key add -wget -q https://www.virtualbox.org/download/oracle_vbox.asc -O- | sudo apt-key add -
echo "deb [arch=amd64] http://download.virtualbox.org/virtualbox/debian $(lsb_release -cs) contrib" |sudo tee -a /etc/apt/sources.list.d/virtualbox.list
sudo apt updatesudo apt install virtualbox-6.1
Установка пакета расширений VirtualBox
Пакет расширений VirtualBox предоставляет несколько полезных функций для гостевых машин, таких как виртуальные устройства USB 2.0 и 3.0, поддержка RDP, шифрование изображений и многое другое.
Загрузите файл пакета расширений, набрав:
wget https://download.virtualbox.org/virtualbox/6.1.8/Oracle_VM_VirtualBox_Extension_Pack-6.1.8.vbox-extpackКогда загрузка будет завершена, импортируйте пакет расширений с помощью следующей команды:
sudo VBoxManage extpack install Oracle_VM_VirtualBox_Extension_Pack-6.1.8.vbox-extpackВам будет представлена лицензия Oracle и предложено принять их условия.
Do you agree to these license terms and conditions (y/n)? Введите y и нажмите Enter . После завершения установки вы увидите следующий вывод:
0%. 10%. 20%. 30%. 40%. 50%. 60%. 70%. 80%. 90%. 100% Successfully installed "Oracle VM VirtualBox Extension Pack". Запуск VirtualBox
VirtualBox можно запустить из командной строки, набрав virtualbox или щелкнув значок VirtualBox ( Activities -> VirtualBox ).
Когда вы запускаете масштабирование в первый раз, появится следующее окно:
Выводы
Мы показали вам, как установить VirtualBox в Ubuntu 20.04. Теперь вы можете создать свою первую гостевую машину с Windows или Linux.
Для получения дополнительной информации о VirtualBox посетите официальную страницу документации VirtualBox .
Если вы хотите управлять своими виртуальными машинами из командной строки, ознакомьтесь с нашей статьей о том, как установить Vagrant на Ubuntu 20.04 .
Не стесняйтесь оставлять комментарии, если у вас есть вопросы.
How to Install VirtualBox on Ubuntu [Beginner’s Tutorial]
Oracle’s free and open-source offering VirtualBox is an excellent virtualization tool, especially for desktop operating systems. I prefer using it over VMWare Workstation in Linux, another virtualization tool.
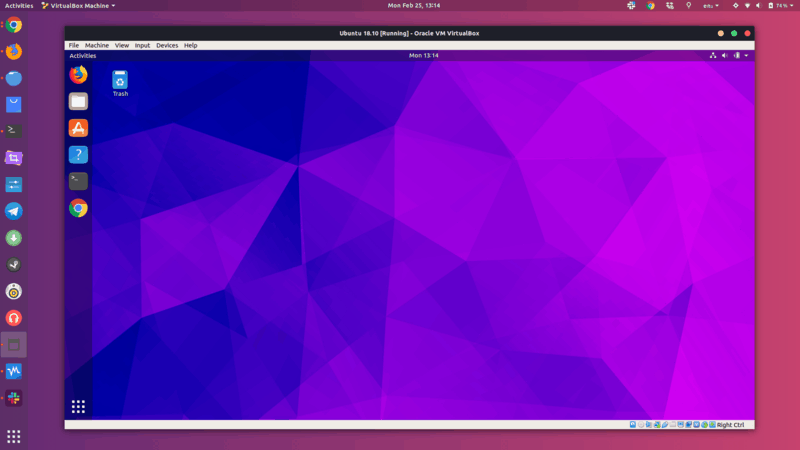
You can use virtualization software like VirtualBox for installing and using another operating system within a virtual machine.
You can also use VirtualBox for installing another Linux distribution within your current Linux system. Actually, this is what I use it for. If I hear about a nice Linux distribution, instead of installing it on a real system, I test it on a virtual machine. It’s more convenient when you just want to try out a distribution before making a decision about installing it on your actual computer.
In this beginner’s tutorial, I’ll show you various ways of installing Oracle VirtualBox on Ubuntu and other Debian-based distributions.
Installing VirtualBox on Ubuntu and Debian-based Linux distributions
The installation methods mentioned here should also work for other Debian- and Ubuntu-based Linux distributions such as Linux Mint, elementary OS, etc.
Method 1: Install VirtualBox from Ubuntu Repository
Pros: Easy installation
Cons: Installs older version
The easiest way to install VirtualBox on Ubuntu is to search for it in the Software Center and install it from there.
You can also install it from the command line using this command:
sudo apt install virtualbox
However, if you check the package version before installing it, you’ll see that the VirtualBox provided by Ubuntu’s repository is quite old.
For example, the current VirtualBox version at the time of writing is 6.0, but the one in Software Center is 5.2. This means you won’t get the newer features introduced in the latest version of VirtualBox.
Method 2: Install VirtualBox using deb file from Oracle’s website
Pros: Easily install the latest version
Cons: Can’t upgrade to newer version
If you want to use the latest version of VirtualBox on Ubuntu, the easiest way would be to use the deb file.
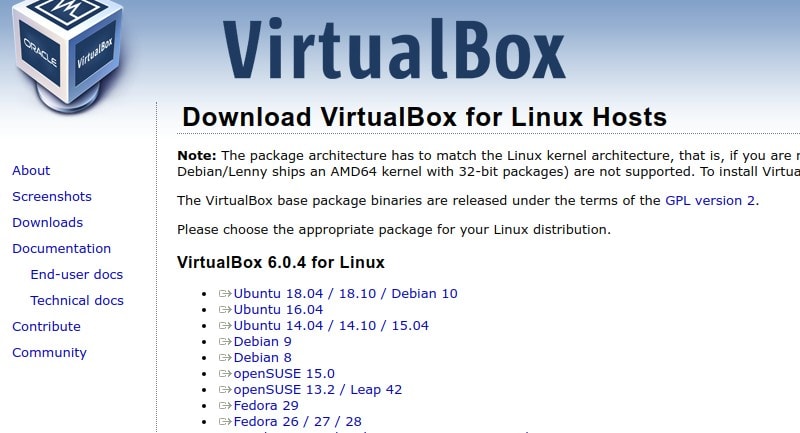
Oracle provides ready-to-use binary files for VirtualBox releases. If you look at its download page, you’ll see the option to download the deb installer files for Ubuntu and other distributions.
You just have to download this deb file and double click on it to install it. It’s as simple as that.
However, the problem with this method is that you won’t get automatically updated to newer VirtualBox releases. The only way is to remove the existing version, download the newer version and install it again. That’s not very convenient, is it?
Method 3: Install VirtualBox using Oracle’s repository
Pros: Automatically updates with system updates
Cons: Slightly complicated installation
This is the command line method, and it may seem complicated to you, but it has advantages over the previous two methods. You’ll get the latest version of VirtualBox, which will be automatically updated with future releases. That’s what you’re looking for, I presume.
To install VirtualBox using the command line, you add Oracle VirtualBox’s repository to your list of repositories. You then add its GPG key so that your system trusts this repository. Now when you install VirtualBox, it will be installed from Oracle’s repository instead of Ubuntu’s repository. If a new version is released, the VirtualBox install will be updated along with the system updates. Let’s see how to do that.
First, add the key for the repository. You can download and add the key using this single command.
wget -q https://www.virtualbox.org/download/oracle_vbox_2016.asc -O- | sudo apt-key add -The next step will work for Ubuntu only. If you’re using Linux Mint or some other distribution based on Ubuntu, replace $(lsb_release -cs) in the command with the Ubuntu version your current version is based on. For example, Linux Mint 19 series users should use bionic and Mint 18 series users should use xenial. Something like this:
sudo add-apt-repository “deb [arch=amd64] http://download.virtualbox.org/virtualbox/debian bionic contrib “
Now add the Oracle VirtualBox repository to the list of repositories using this command:
sudo add-apt-repository "deb [arch=amd64] http://download.virtualbox.org/virtualbox/debian $(lsb_release -cs) contrib"If you’ve read my article on checking your Ubuntu version, you probably know that ‘lsb_release -cs’ will print the codename of your Ubuntu system.
Note: If you see an add-apt-repository command not found error, you’ll have to install the software-properties-common package.
Now that you have the correct repository added, refresh the list of packages available through these repositories and install VirtualBox.
sudo apt update && sudo apt install virtualbox-6.0Tip: A good idea would be to type sudo apt install virtualbox – and hit tab to see the various VirtualBox versions available for installation – then select one of them by typing it completely.
How to remove VirtualBox from Ubuntu
Now that you’ve learned to install VirtualBox, I should also mention the steps for removing it.
If you installed it from the Software Center, the easiest way to remove the application is from the Software Center itself. You just have to find it in the list of installed applications and click the Remove button.
Another ways is to use the command line.
sudo apt remove virtualbox virtualbox-*Note that this will not remove the virtual machines and the files associated with the operating systems you installed using VirtualBox. That’s not an entirely bad thing, because you may want to keep them safe and use them later or in some other system.
I hope you were able to use one of these methods to install VirtualBox. I’d also advise installing VirtualBox Guest Additions on Ubuntu or whatever guest system you’re using in your VM to get a better and smoother experience.
I’ll also write about using it effectively in another article. For the moment, if you have any tips, suggestions or questions, feel free to leave a comment below.


