- How to Install and Configure Git on Linux Mint 20
- Installation Guide
- Step 1: Update and upgrade the existing packages
- Step 2: Install Git
- Step 3: Verify installation
- Configuration Guide
- Step 1: Set Global Username
- Step 2: Set Global User Email
- Step 3: Verify username and email
- Как установить git в Linux
- Все статьи о git
- How to Install Git on Linux Mint 21
- How To Install Git on Linux Mint 21
- How to Configure Git on Linux Mint 21
- Conclusion
- About the author
- Syeda Wardah Batool
- Установить git на linux mint
- Step 2: Install Git
- Step 3: Verify installation
- Configuration Guide
- Step 1: Set Global Username
- Step 2: Set Global User Email
- Step 3: Verify username and email
How to Install and Configure Git on Linux Mint 20
Git is a free and open-source distributed version control system created to manage everything from small to massive projects with speed and efficiency. It is a software that is designed to keep track of changes in files, usually used for work collaborations among programmers developing source code during software development.
In this document, we will learn how to install Git on our system with the help of a few easy-to-follow commands. We have used Linux Mint distribution for this purpose. We will also see how to configure git so that it can interact with GitLab. GitLab is an open-source DevOps platform that allows the user to develop, secure, and operate software in a single application.
Installation Guide
Step 1: Update and upgrade the existing packages
We will start with updating and upgrading the packages that already exist on our system.
To update the packages, run this command with sudo:

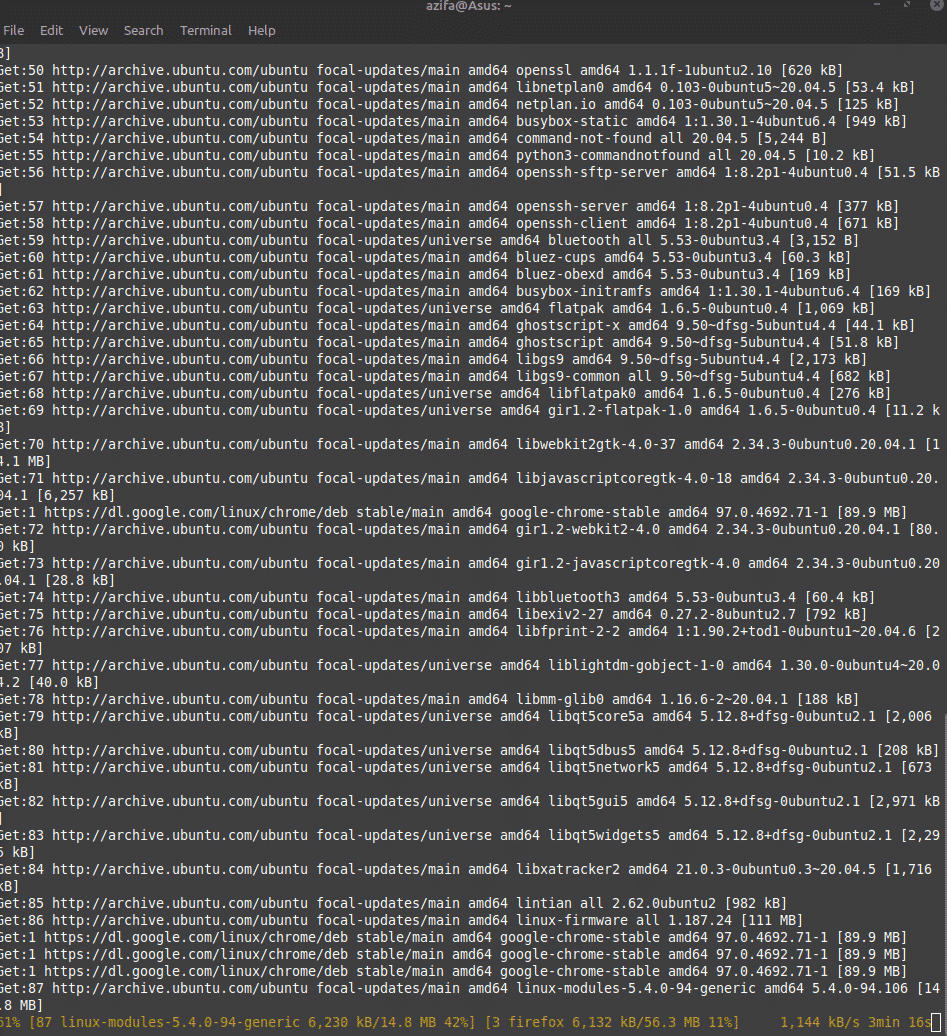
After this, all the packages will be updated. However, they still need to be upgraded. To do that, run the upgrade command with sudo as shown below:

This is how the terminal screen will appear after running the command:
Step 2: Install Git
Once all the packages are successfully upgraded, we will run a command to install Git.
This command will install Git:

After running the command, you will be informed that how much additional disk space will be used. It will use 38.4 MB of space. Type Y and hit enter to continue the installation process.

Step 3: Verify installation
After the installation is completed, you need to check if git is now installed on your system or not. Run the git version command to verify if git exists. This will also tell you the version number of the git you just installed on your system.

If you don’t see the above output, it means the installation didn’t happen properly. Try to reinstall it following the previous steps. Also, make sure your internet connection is fine before you try installing it again.
Configuration Guide
Now that we have verified that Git software exists on our system, let’s now configure it. We will do it using the terminal.
Step 1: Set Global Username
Following the command syntax mentioned below, set a username that will be needed while committing changes on the Git repository.
git config --global user.name "Your name"

Step 2: Set Global User Email
Next, set the user email that will also be required to commit changes on the Git repository. To do that, use this command syntax:
git config --global user.email “Your Email”
Step 3: Verify username and email
When you will run the command mentioned below, it will show you the username and email that you just set in the previous steps. Check carefully.


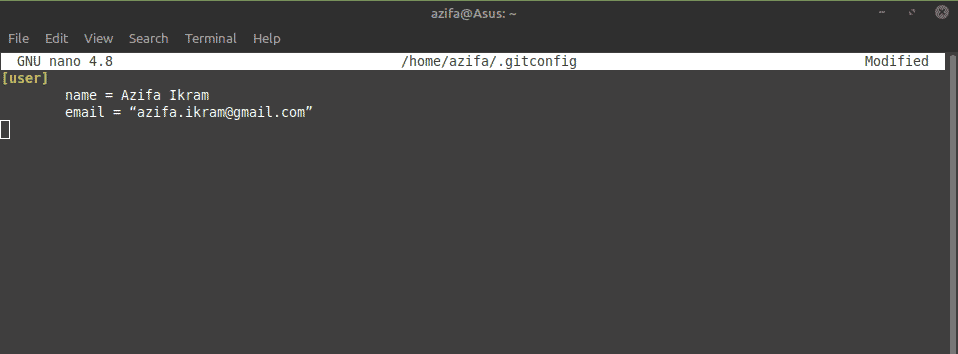
In case you find an error like a spelling mistake or something else, you can correct it by editing the git configuration file.
To do that run the command below. We have used a nano editor to open the file. Once the file is open, correct the mistake and save the file.

In this guide, you saw how straightforward is the installation process for Git on Linux Mint 20. The installation will take around less than 15 minutes. After this, you will be able to use git to push and pull your projects to GitLab or do whatever you like.
To see how you can configure and use Git on Debian, visit:
Karim Buzdar holds a degree in telecommunication engineering and holds several sysadmin certifications including CCNA RS, SCP, and ACE. As an IT engineer and technical author, he writes for various websites.
Как установить git в Linux
Давеча ставил git на Linux Mint и опять пришлось загуглить пару моментов. Чтобы больше не допускать таких стыдных страниц в своей биографии, фиксирую набор команд на бумаге, а заодно объясняю всем интересующимся, что я делал и зачем. Если Вы уже устанавливали гит хотя бы раз, ничего нового не узнаете. Но если только начинаете интересоваться им, то минимальный набор команд для начала работы будет полезен. Подробности ниже.
Итак, последовательность действий. Во-первых, гит нужно установить
sudo — в Mint или например, в Debian. Для своей ОС наберите подходящее слово для запуска команды из-под рута.
Гит поставили. Теперь нужно сгенерировать пару ключей: публичный и приватный. Запускаем
Убедимся, что ключи созданы, перейдем в каталог .ssh своей домашней папки и посмотрим, что в ней лежит
Увидим там 2 файла: id_rsa и id_rsa.pub. Все правильно, первый ключ приватный, который хранится на Вашей машине и никому не передается. Второй — публичный. Именно его Вы передаете третьим лицам или ресурсам, чтобы получить доступ в нужные репозитории.
Откроем файл id_rsa.pub и скопируем все его содержимое
Или же как крутые хакеры наберем следующее
cat ~/.ssh/id_rsa.pub | xclip -sel clip
Эта волшебная строка скопирует содержимое оного файла в буфер обмена — удобно. Конечно, если у Вас установлена утилита xclip. Если нет, не переживайте, установите ее — sudo apt-get install xclip — и запустите команду заново.
Вот теперь все готово. Ключ скопирован, можно отдавать его админам/коллегам-программистам или прописать его самим, если владелец проекта — это Вы.
Я по сугубо сектантским соображениям предпочитаю bitbucket. Добавляются ключи в нем на этой странице — https://bitbucket.org/account/user/username/ssh-keys/, кнопочка «Add key».
После того, как Ваш ключ будет добавлен, можно приступать к полноценной работе с репозиторием, для начала склонировав его
cd /path/to/your/projects/ git clone git@bitbucket.org:username/project_name.git
Однако, прежде чем погружаться в дебри нужного проекта, не забудьте прописать в настройках гита имя и email, что гит и коллеги могли Вас идентифицировать
git config --global user.name "Webdevkin" git config --global user.email webdevkin@gmail.com
git config —list покажет нам все настройки, сейчас в списке должны присутствовать 2 вышеуказанные настройки.
А вот теперь можно начинать клонировать проект, коммитить, пушить и делать другие страшные вещи. Что плохого можно сотворить с гитом и как именно это сделать, можно узнать из статьи Мой набор команд при работе с git. А у меня на этом все.
P.S. Статья получилась весьма капитанской, но я еще не забыл, что когда-то ставил git в самый первый раз, и некоторые очевидные вещи были непонятными, вроде тех же ключей.
Поэтому надеюсь, что статья была полезной. Если у Вас есть что добавить к этому небольшому вводному курсу, смело и дерзко пишите ниже в комментариях.
Все статьи о git
- Курс «Git для начинающих». Видеоуроки
- Git merge vs rebase для начинающих
- Git fork. Что такое форки и как с ними работать
- Как я перестал бояться и полюбил git
- Git bisect. Ищем баги с помощью гита
- 12 причин работать с гитом в командной строке
- Как склеить коммиты в git
- Мой набор команд при работе с git
- Как работать с git в Modx
- Как установить git в Linux Mint
- Визуализация истории git с помощью Gource
Анонсы статей, обсуждения интернет-магазинов, vue, фронтенда, php, гита.
Истории из жизни айти и обсуждение кода.
How to Install Git on Linux Mint 21
![]()
Git actively maintained a distributed version control system which is free of cost. This efficient platform was authored by Linus Torvalds in 2005. The main purpose behind developing Git was to help developers to create small to very large projects in collaboration with other developers. It allows the user to maintain and revert to the previous version of code or as Git repository saves all of the updated versions.
Git has two types of repositories i-e, remote and local. Git server contains a remote repository whereas each developer has a local repository in the system. This explains that not only code or project is saved on the server but each copy is also stored in the developer’s machine.
The above introduction is enough for the beginner if he’s using Git for the first time.
Let’s come to the installation and configuration process of Git on Linux Mint 21.
How To Install Git on Linux Mint 21
As Git is a worldwide platform, you can get it on most of the Linux Distributions. The installation process is quite easy if you follow the instructions and steps carefully.
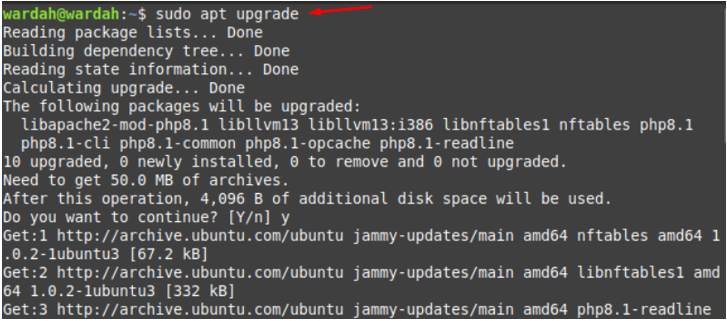
Before getting started, use the command to update all apt packages on Linux Mint:
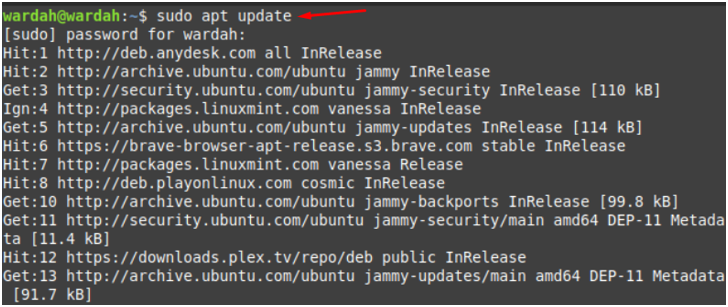
Keep in mind that for the updated packages, always update and upgrade your system. So, after updating all packages, next step is to upgrade system by using the command:
Now, execute the below-mentioned installation command of Git to get it on system:
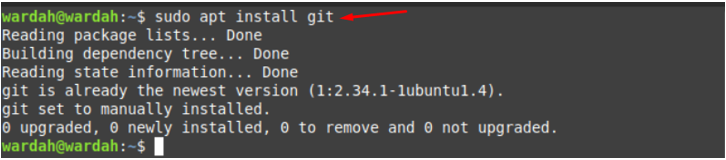
As according to the running process, git is successfully installed on the system, but to confirm it, run the version command. It will show you which updated version is installed:

So, you get Git installation successfully on Linux Mint 21 system.
How to Configure Git on Linux Mint 21
Next step is the configuration of Git repository which can be done by following the mentioned steps:
Step 1: Set-up the global name with the help of mentioned command:

Step 2: Set-up the email using command:

Step 3: Verify if our changes i-e name and email has made successfully through command:

As according to our output, global commit name and email has been added successfully.
Conclusion
Git is a famous open-source version control system that helps the coder to efficiently maintain code in collaboration with other developers. All developers work parallel using the Git repository and any time revert to the old version. Each version of code is stored in a repository, not only server repository but also copy of code is stored at developer’s system. This article has covered how to install Git on Linux mint 21 and what steps users should take to configure Git on the system.
About the author
Syeda Wardah Batool
I am a Software Engineer Graduate and Self Motivated Linux writer. I also love to read latest Linux books. Moreover, in my free time, i love to read books on Personal development.
Установить git на linux mint
We will start with updating and upgrading the packages that already exist on our system.
To update the packages, run this command with sudo:
After this, all the packages will be updated. However, they still need to be upgraded. To do that, run the upgrade command with sudo as shown below:
This is how the terminal screen will appear after running the command:
Step 2: Install Git
Once all the packages are successfully upgraded, we will run a command to install Git.
This command will install Git:
After running the command, you will be informed that how much additional disk space will be used. It will use 38.4 MB of space. Type Y and hit enter to continue the installation process.
Step 3: Verify installation
After the installation is completed, you need to check if git is now installed on your system or not. Run the git version command to verify if git exists. This will also tell you the version number of the git you just installed on your system.
If you don’t see the above output, it means the installation didn’t happen properly. Try to reinstall it following the previous steps. Also, make sure your internet connection is fine before you try installing it again.
Configuration Guide
Now that we have verified that Git software exists on our system, let’s now configure it. We will do it using the terminal.
Step 1: Set Global Username
Following the command syntax mentioned below, set a username that will be needed while committing changes on the Git repository.
git config --global user.name "Your name"
Step 2: Set Global User Email
Next, set the user email that will also be required to commit changes on the Git repository. To do that, use this command syntax:
git config --global user.email “Your Email”
Step 3: Verify username and email
When you will run the command mentioned below, it will show you the username and email that you just set in the previous steps. Check carefully.
In case you find an error like a spelling mistake or something else, you can correct it by editing the git configuration file.
To do that run the command below. We have used a nano editor to open the file. Once the file is open, correct the mistake and save the file.