- Installing the classic Jupyter Notebook interface#
- Prerequisite: Python#
- Installing Jupyter using Anaconda and conda#
- Alternative for experienced Python users: Installing Jupyter with pip#
- Installing the classic Jupyter Notebook interface#
- Prerequisite: Python#
- Installing Jupyter using Anaconda and conda#
- Alternative for experienced Python users: Installing Jupyter with pip#
- Установка Jupyter Notebook на Ubuntu 18.04
- Немного информации
- Как установить
- Как создать виртуальное окружение
- Как установить и запустить Jupyter
- How to Install Jupyter Notebook on Linux Mint 21
- How to Install Jupyter Notebook on Linux Mint 21
- How to Install Jupyter Notebook on Linux Mint 21 through Terminal
- How to Install Jupyter Notebook on Linux Mint 21 through GUI
- How to Uninstall Jupyter Notebook from Linux Mint 21
- Conclusion
- About the author
- Syeda Wardah Batool
Installing the classic Jupyter Notebook interface#
This section includes instructions on how to get started with Jupyter Notebook. But there are multiple Jupyter user interfaces one can use, based on their needs. Please checkout the list and links below for additional information and instructions about how to get started with each of them.
This information explains how to install the Jupyter Notebook and the IPython kernel.
Prerequisite: Python#
While Jupyter runs code in many programming languages, Python is a requirement for installing the Jupyter Notebook. The Python version required differs between Jupyter Notebook releases (e.g. Python 3.6+ for Notebook v6.3, and Python 3.7+ for Notebook v7) .
We recommend using the Anaconda distribution to install Python and Jupyter. We’ll go through its installation in the next section.
Installing Jupyter using Anaconda and conda#
For new users, we highly recommend installing Anaconda. Anaconda conveniently installs Python, the Jupyter Notebook, and other commonly used packages for scientific computing and data science.
Use the following installation steps:
- Download Anaconda. We recommend downloading Anaconda’s latest Python 3 version (currently Python 3.9).
- Install the version of Anaconda which you downloaded, following the instructions on the download page.
- Congratulations, you have installed Jupyter Notebook. To run the notebook:
Alternative for experienced Python users: Installing Jupyter with pip#
Jupyter installation requires Python 3.3 or greater, or Python 2.7. IPython 1.x, which included the parts that later became Jupyter, was the last version to support Python 3.2 and 2.6.
As an existing Python user, you may wish to install Jupyter using Python’s package manager, pip , instead of Anaconda.
First, ensure that you have the latest pip; older versions may have trouble with some dependencies:
Then install the Jupyter Notebook using:
(Use pip if using legacy Python 2.)
Congratulations. You have installed Jupyter Notebook. See Running the Notebook for more details.
Upgrading Jupyter Notebook
Установка Jupyter Notebook на Ubuntu 18.04
Ниже мы рассмотрим возможность установки веб-серверу под операционной системой Ubuntu приложения Jupyter Notebook и его подключения. Установка будет происходить при помощи языка программирования Python.
Немного информации
Jupyter Notebook является виртуальным приложением, у которого открыт исходный код. Оно помогает писать и делиться визуализацией, программным кодом и другими объектами. Поддерживается многими программными языками, в том числе Julia, Python, R, Руби, Haskell. Чаще всего используется для взаимодействия с большими объемами данных, статистической информацией и машинным обучением.
Jupyter Notebook состоит из файлов, которые также называются «записными книжками». В них содержится кодовая часть и результат ее выполнения. Результат может быть представлен другим пользователям и воспроизведен сторонними юзерами.
Как установить
Для начала потребуется сделать зависимость через репозиторий Ubuntu, необходимую виртуальной среде для языка Python. Перед этим следует обновить базу с локальными пакетами:
Потом устанавливается pip вместе с файлами заголовка Python, необходимых для создания зависимостей веб-приложения:
Как создать виртуальное окружение
Первым делом настраивается доступ пользователя для команды virtualenv:
Атрибут -Н показывает, что безопасность задается переменным окружения для домашнего каталога.
Затем нужно сделать и перейти в новую директорию, в которой будут храниться данные. Пусть названием служит каталог Serverspace:
Там, внутри каталога, создается виртуальная среда для Python. Рекомендуется придумывать имя среды, тесно связанное со сферой проекта. Например, Serverspace:
После таких процедур создастся окружение, в котором хранится Python и pip локальных версий. В последствии можно заняться настройками изолированных сред Python для веб-приложения.
До установки Jupyter понадобится активация виртуальной среды. Таким образом, название Serverspace следует заменить другим, более актуальным и понятным именем среды:
Как установить и запустить Jupyter
После активации виртуальной среды инсталлировать веб-приложение можно через локальный экземпляр:
Следующим образом можно подключить Jupyter Notebook на любой удаленной ПК либо веб-сервер через браузер с передаваемым токеном. Перед непосредственным запуском необходимо сделать открытие порта:
Более подробный пример команды:
Запустить приложение можно описанной ниже командой. В ней параметр —ip подскажет адреса, которые будут подключаться к виртуальному серверу Jupyter. Выставленные нули говорят о том, что подключиться можно с любым IP. Параметр —no-browser помогает провести запуск сервера без открытия браузеров. За указание портов для запуска отвечает —port=Port№. Непосредственное разрешение запуска включает —allow-root.
Обратите внимание: для суперпользователей команда дополняется еще одним параметром —allow-root, который вносится в самом конце.
Когда консоль будет запущена, на экране можно увидеть длинный путь с токеном. Далее необходимо перейти по данному адресу через браузер, заменив значения в скобках доменным именем либо реальным IP-адресом устройства.

В конце возникнет рабочая область, предназначенная для взаимодействия пользователя с Python.
How to Install Jupyter Notebook on Linux Mint 21
![]()
The Jupyter Notebook is an open standard, web-based interactive computational notebook. It is used to create, edit and share documents containing code, text, visualization, equations. Data content can be shared via email, Dropbox and other communication mediums. It is supported by 40 programming languages including Python, Julia and R. The name “Jupyter” also mentions the support of these three languages (Ju-Pyt-R).
The Jupyter notebook application can be used without internet access on the local desktop. This application is not limited to simple notepad documents, but also contains complicated data like, machine learning, data visualization and statistics modeling in it.
How to Install Jupyter Notebook on Linux Mint 21
We have two different approaches to install Jupyter Notebook on Linux Mint 21 system:
How to Install Jupyter Notebook on Linux Mint 21 through Terminal
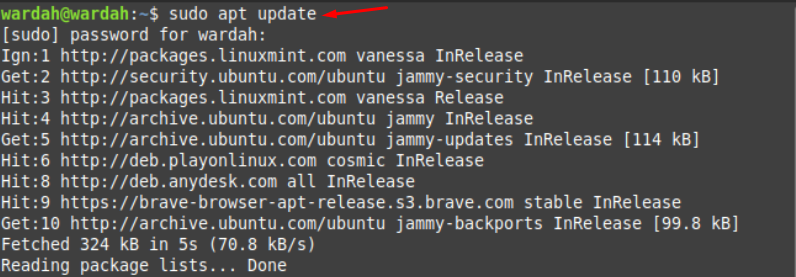
To install Jupyter notebook via terminal, update the apt repository first using command:
Now execute the installation command of Jupyter Notebook to let install it:
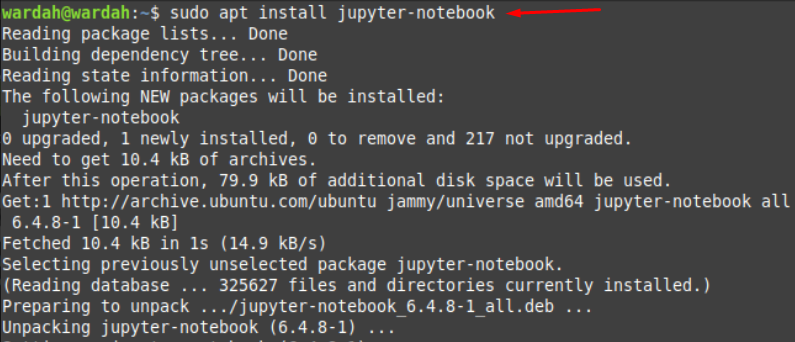
It will be installed successfully on the Linux Mint system with the help of the above-mentioned command. To verify its installation; type:

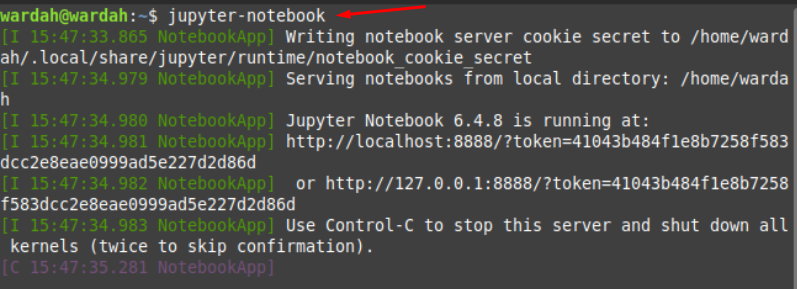
To launch Jupyter-Notebook, run:

How to Install Jupyter Notebook on Linux Mint 21 through GUI
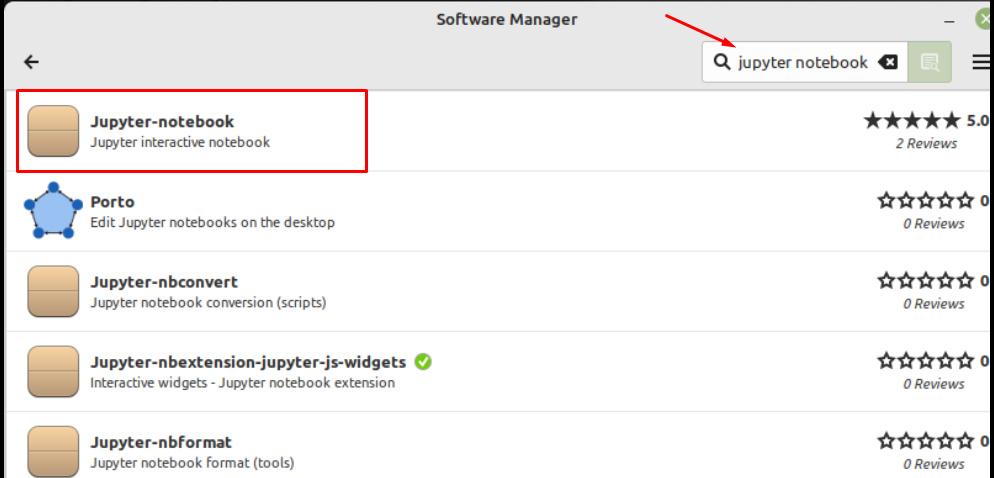
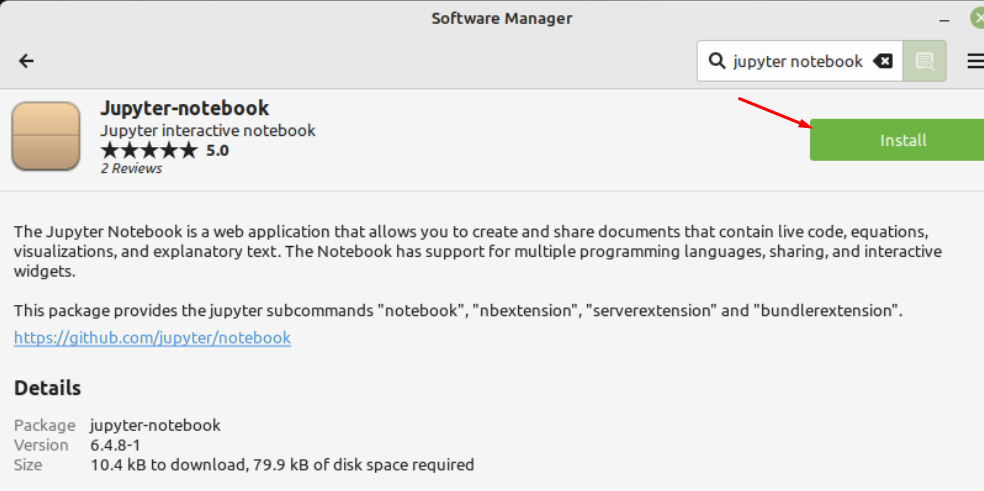
To install Jupyter-Notebook through GUI, open the software manager, search for the “Jupyter Notebook” in the search bar and select the first displayed option:
Click on the install button to begin downloading this application:
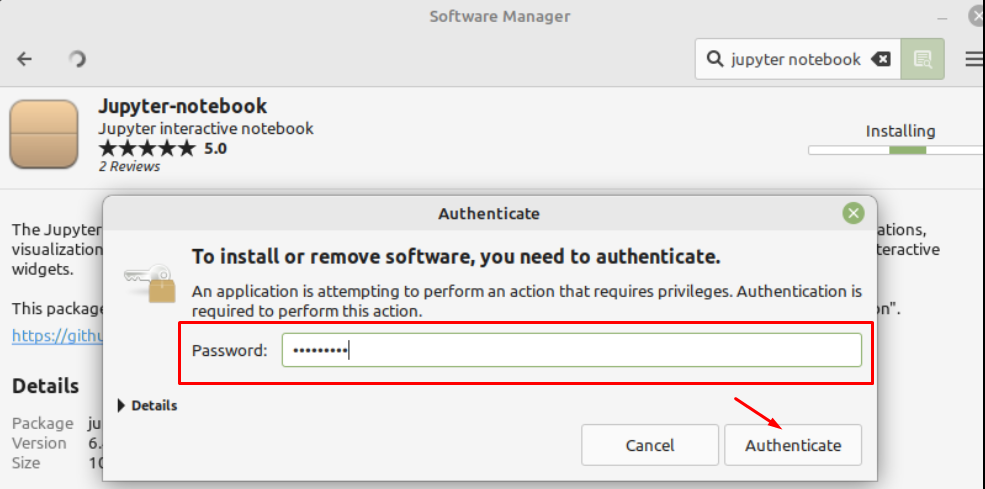
It will ask you to enter password you set for Linux Mint system; enter correct password and hit “Authenticate” button:
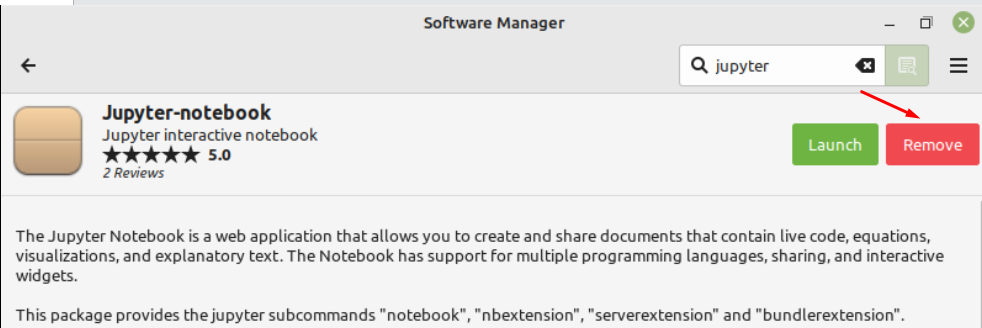
So, it is installed on Linux Mint 21 system, hit “Launch” to open it (you can also uninstall it by click on Remove button):

How to Uninstall Jupyter Notebook from Linux Mint 21
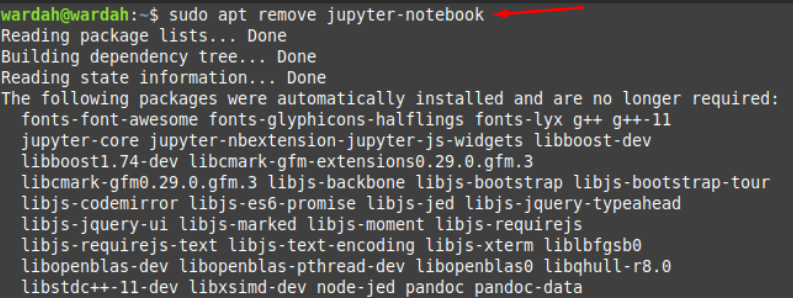
To delete/uninstall Jupyter Notebook from Linux Mint 21, run the given-below command:
You can also uninstall it through GUI, open the software manager, type jupyter in the search bar and hit first option:
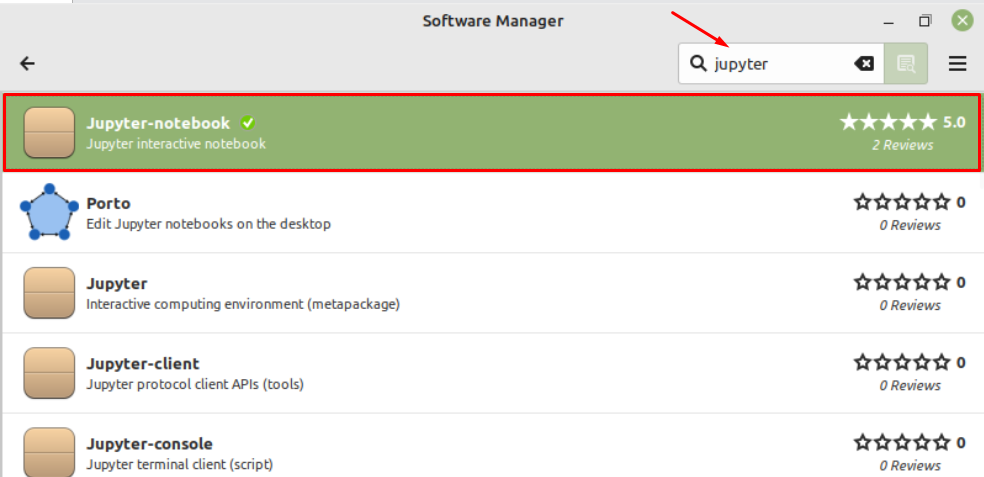
Click on Remove button to delete it from the Linux Mint system:
Conclusion
The Jupyter-Notebook is a free, open standard, web-based computational document used to run and share documents through the web. It is supported by many programming languages including Python, Julia, R, Java, Scala, Matlab and many others. This article has explained two approaches to install Jupyter-Notebook on system i-e, through terminal and GUI. Moreover, we have also seen its uninstalling command on the Linux Mint 21 system.
About the author
Syeda Wardah Batool
I am a Software Engineer Graduate and Self Motivated Linux writer. I also love to read latest Linux books. Moreover, in my free time, i love to read books on Personal development.