- Installing and Using AnyConnect on Ubuntu Desktop using the User Interface
- Objective
- Introduction
- AnyConnect Software Version
- Table of Contents
- Installing AnyConnect Secure Mobility Client v4.9.x
- Prerequisites
- Check these other articles out!
- Applicable Devices | Software Version
- Licensing Information
- Step 1
- Step 2
- Step 3
- Step 4
- Step 5
- Step 6
- Step 7
- Step 8
- Using AnyConnect Secure Mobility Client v4.9.x
- Step 1
- Step 2
- Step 3
- Step 4
- Step 5
- Step 6
- Conclusion
- RV34x: Installing and Using AnyConnect on Ubuntu Desktop
- Objective
- Introduction
- AnyConnect Software Version
- Table of Contents
- Installing AnyConnect Secure Mobility Client v4.9.x
- Prerequisites
- Check these other articles out!
- Applicable Devices | Software Version
- Licensing Information
- Step 1
- Step 2
- Step 3
- Step 4
- Step 5
- Step 6
- Step 7
- Step 8
- Step 9
- Using AnyConnect Secure Mobility Client v4.9.x
- Step 1
- Step 2
- Step 3
- Step 4
- Uninstalling AnyConnect Secure Mobility Client v4.9.x
- Step 1
- Step 2
- Step 3
- Conclusion
- AnyConnect App
Installing and Using AnyConnect on Ubuntu Desktop using the User Interface
The documentation set for this product strives to use bias-free language. For the purposes of this documentation set, bias-free is defined as language that does not imply discrimination based on age, disability, gender, racial identity, ethnic identity, sexual orientation, socioeconomic status, and intersectionality. Exceptions may be present in the documentation due to language that is hardcoded in the user interfaces of the product software, language used based on RFP documentation, or language that is used by a referenced third-party product. Learn more about how Cisco is using Inclusive Language.
Objective
The objective of this article is to guide you through installing and using AnyConnect VPN Client v4.9.x on Ubuntu Desktop version 20.04 using the User Interface (UI).
Introduction
AnyConnect Secure Mobility Client is a modular endpoint software product. It not only provides Virtual Private Network (VPN) access through Secure Sockets Layer (SSL) and Internet Protocol Security (IPsec) Internet Key Exchange version2 (IKEv2) but also offers enhanced security through various built-in modules.
AnyConnect Software Version
Table of Contents
Installing AnyConnect Secure Mobility Client v4.9.x
This toggled section provides details and tips for beginners.
Prerequisites
- You need to purchase client license(s) from a partner like CDW or through your company’s device procurement. There are options for 1 user (L-AC-PLS-3Y-S5) or packets of licenses including one year for 25 users (AC-PLS-P-25-S). Other license options available as well, including perpetual licenses. For more details on licensing, check out the links in the Licensing Information section below.
- Download the latest version of firmware available for your router.(Click here for step-by-step instructions on this process.)
- Ubuntu 20.04 (LTS), 18.04 (LTS), and 16.04 (LTS) .
Check these other articles out!
Applicable Devices | Software Version
Licensing Information
AnyConnect client licenses allow the use of the AnyConnect desktop clients as well as any of the AnyConnect mobile clients that are available. You will need a client license to download and use the Cisco AnyConnect Secure Mobility Client. A client license enables the VPN functionality and are sold in packs of 25 from partners like CDW or through your company’s device procurement.
Want to know more about AnyConnect licensing? Here are some resources:
Step 1
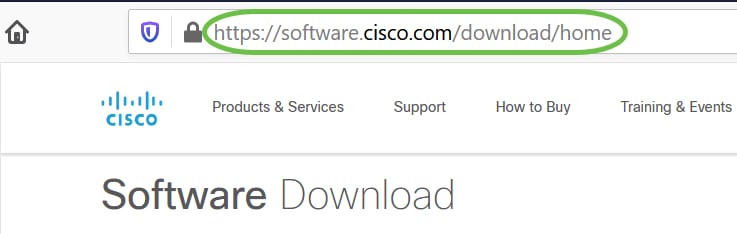
Open a web browser and navigate to the Cisco Software Downloads webpage.
Step 2
In the search bar, start typing ‘Anyconnect’ and the options will appear. Select AnyConnect Secure Mobility Client v4.x.
Step 3
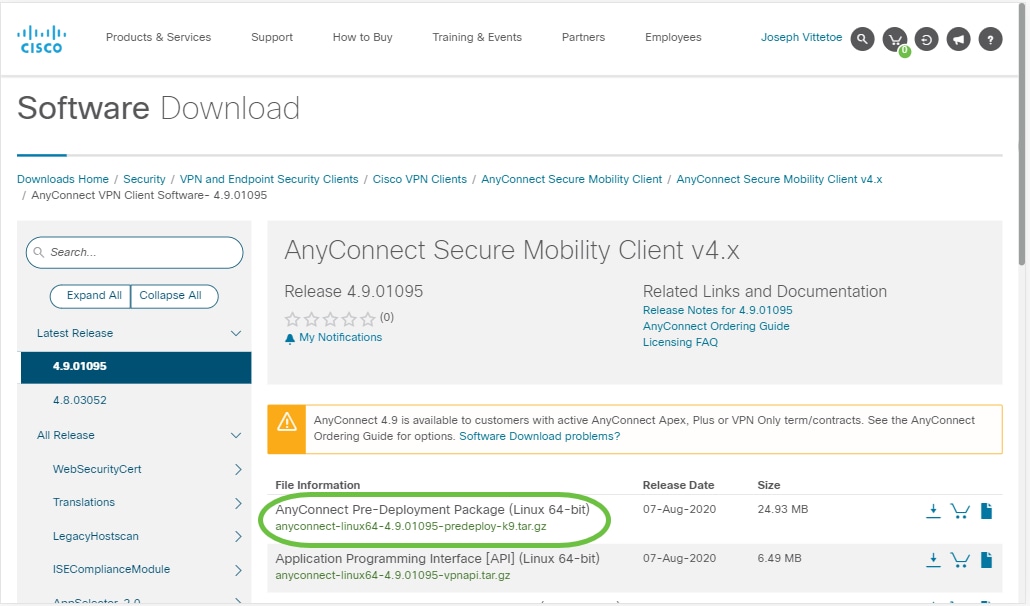
Download the Cisco AnyConnect VPN Client. Most users will select the AnyConnect Pre-Deployment Package (Linux 64-bit) option.
The images in this article are for AnyConnect v4.9.x, which was latest version at the time of writing this document.
If you purchased a license and you are unable to download AnyConnect, call +1 919-993-2724. Select option 2. You will need to know your Cisco ID (the one you use to log into Cisco.com) and the sales order number when you call. They will get that situation all straightened out.
Step 4
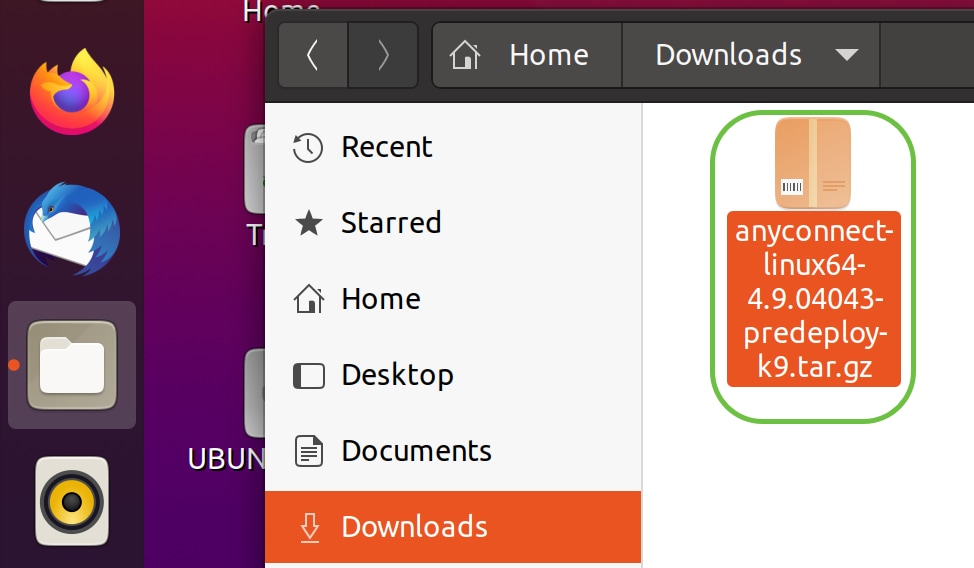
Navigate to the folder where you have downloaded the AnyConnect Client Package.
Step 5
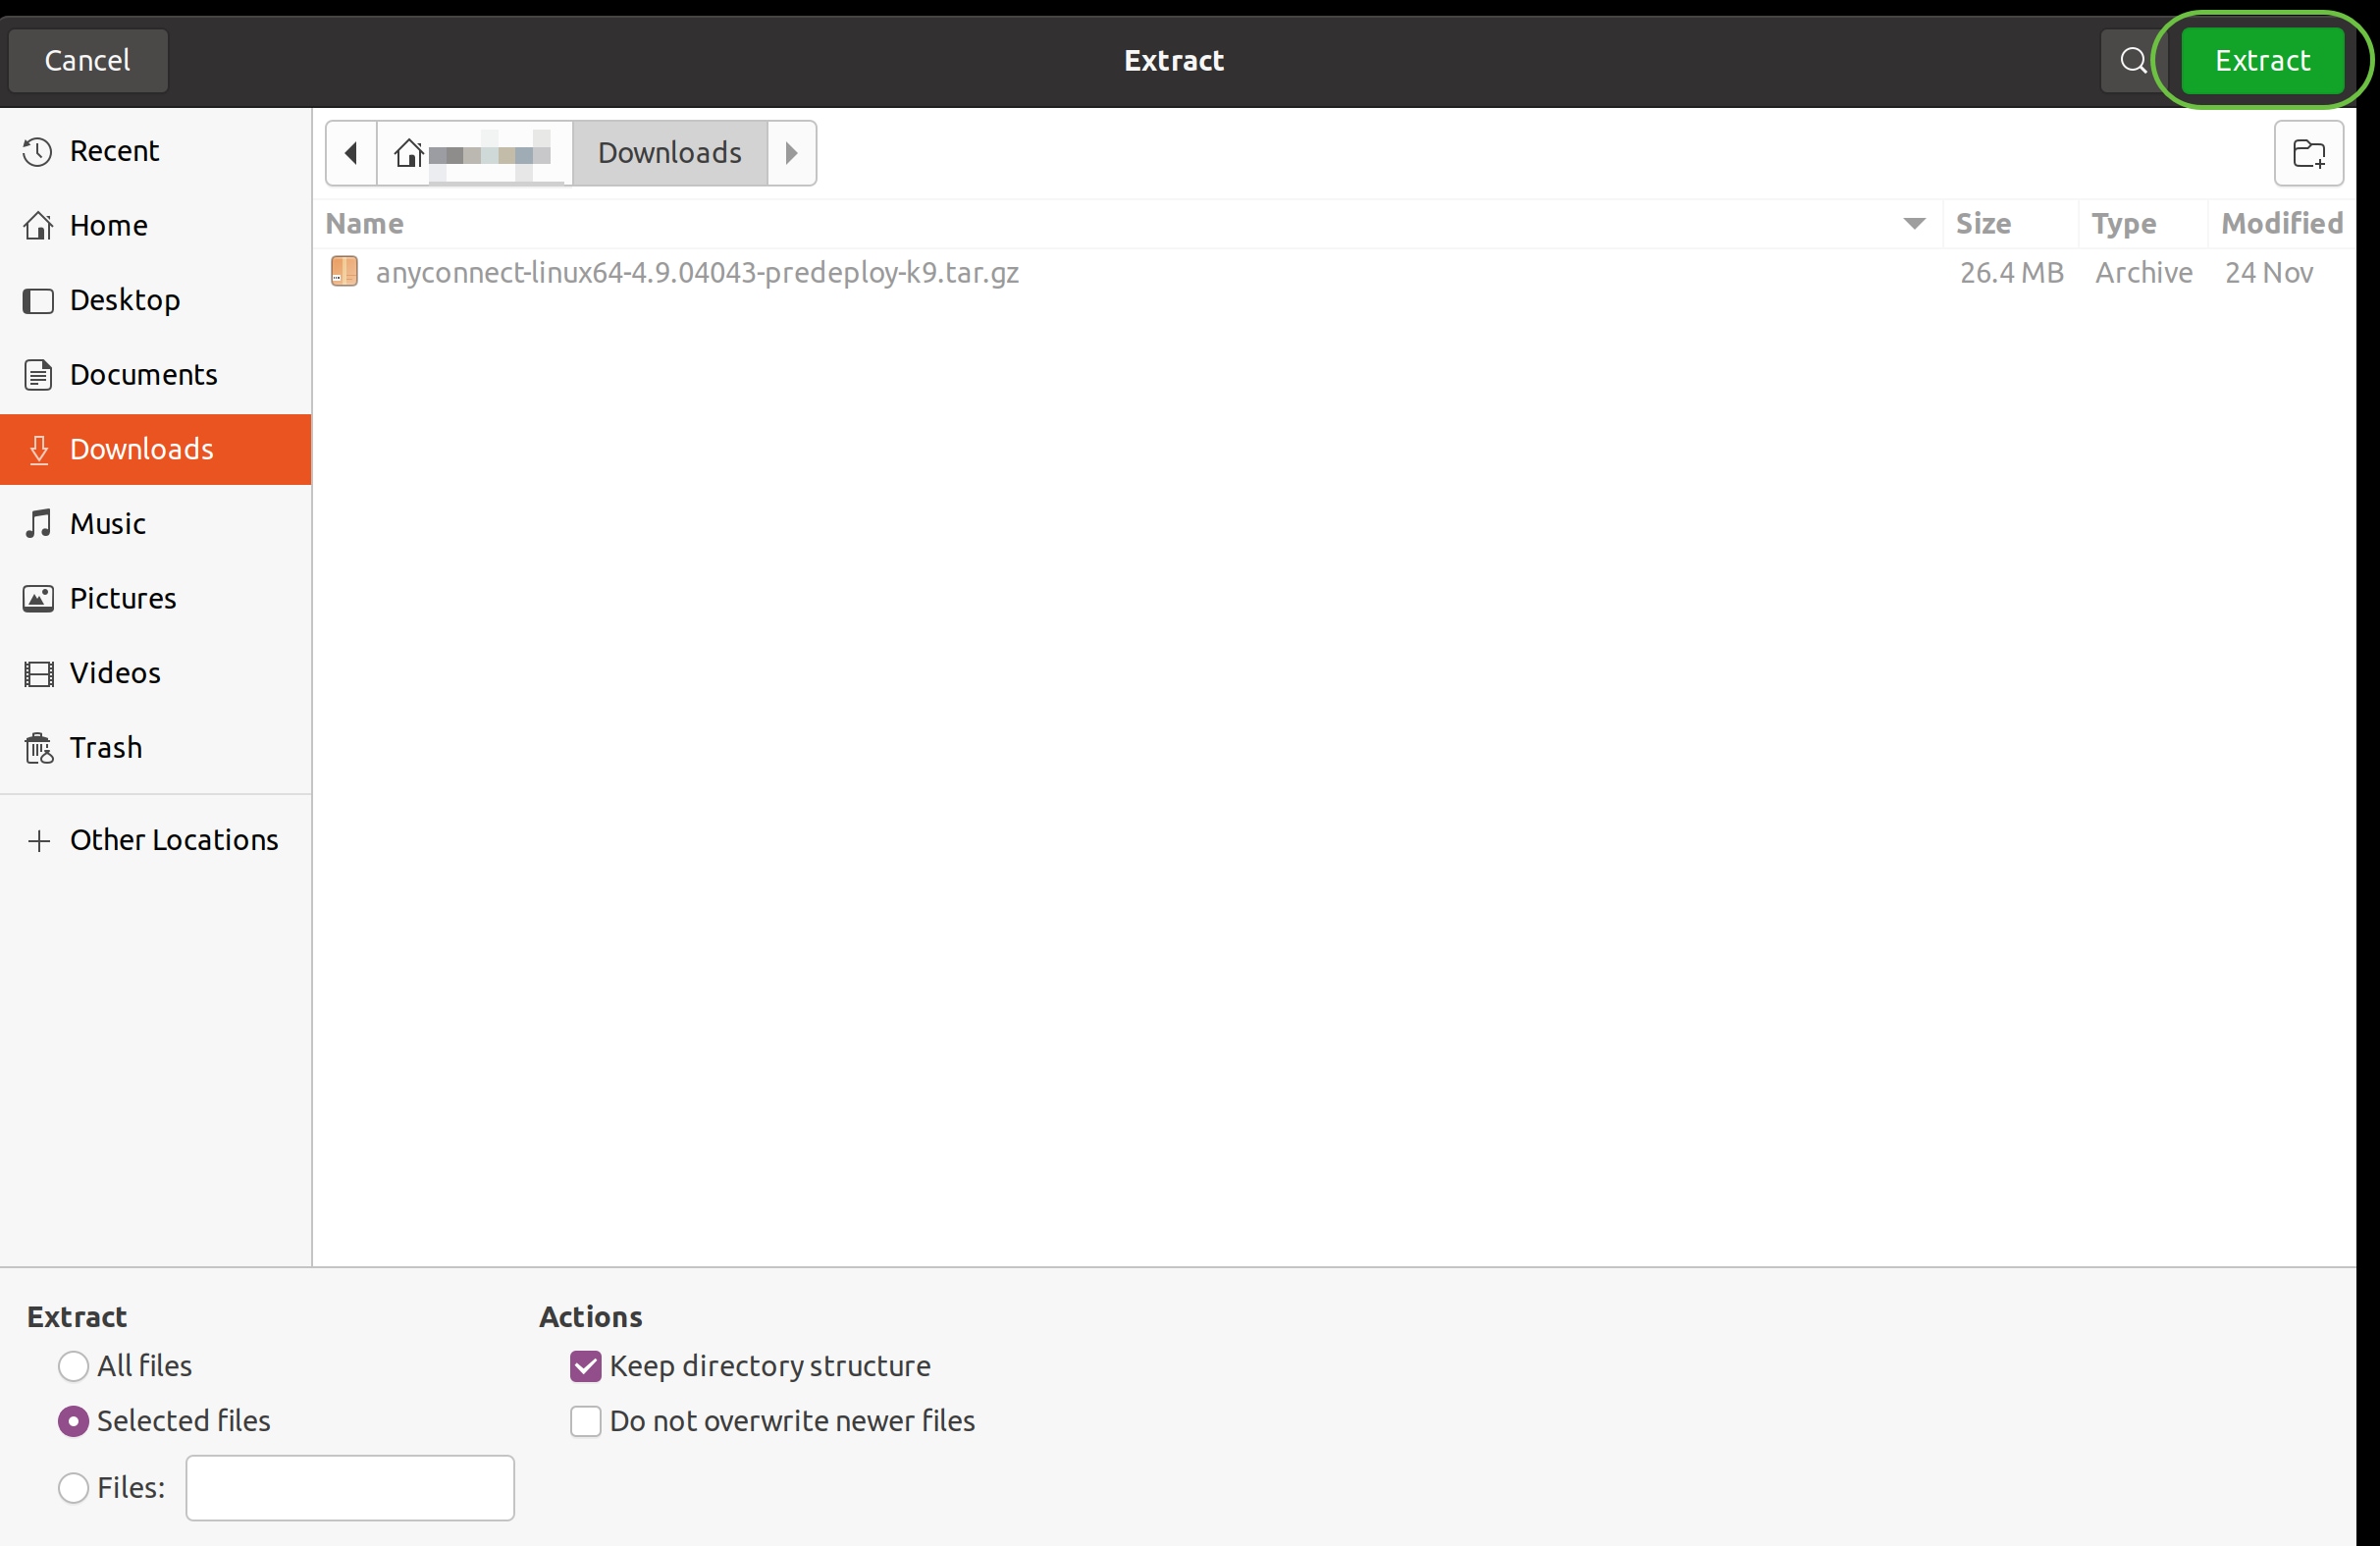
The initial download is a tarball archive (*.TAR, several files packed into one), which must be extracted. To extract the files, right- click on the AnyConnect archive and choose Open with Archive Manager. Click Extract.
Step 6
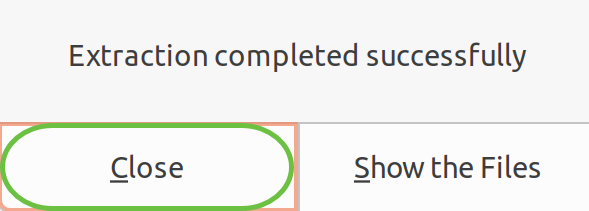
You will see a notification once the extraction is completed. Click Close.
Step 7
Locate the vpn_install.sh file in the extracted folder.
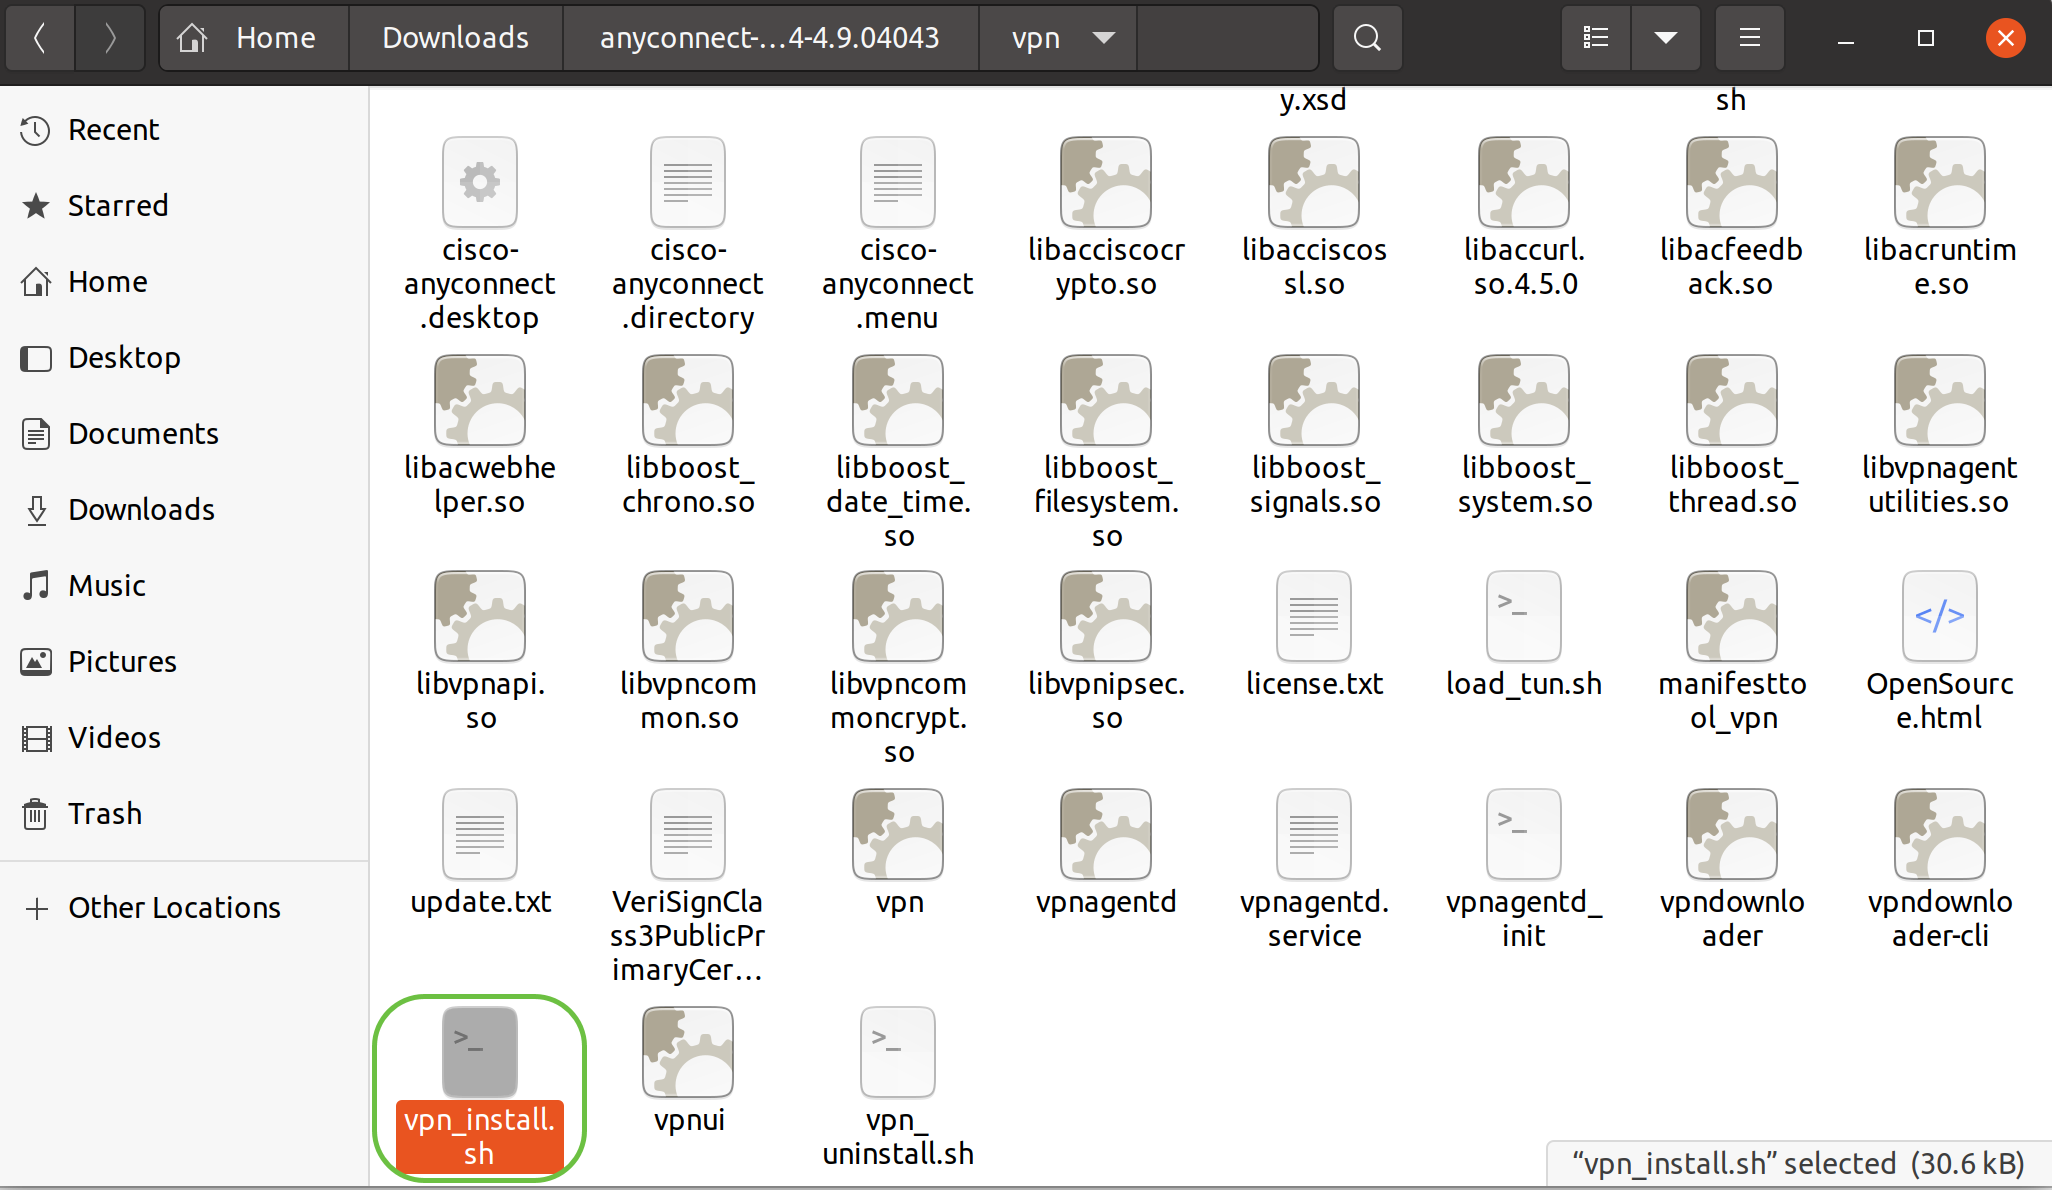
To run the AnyConnect install script, open a Linux Terminal by pressing Ctrl+Alt+T on your keyboard.
Type ‘sudo ./vpn_install.sh’. This will begin the installation process. For more details on the ‘sudo’ command, click here.

Step 8
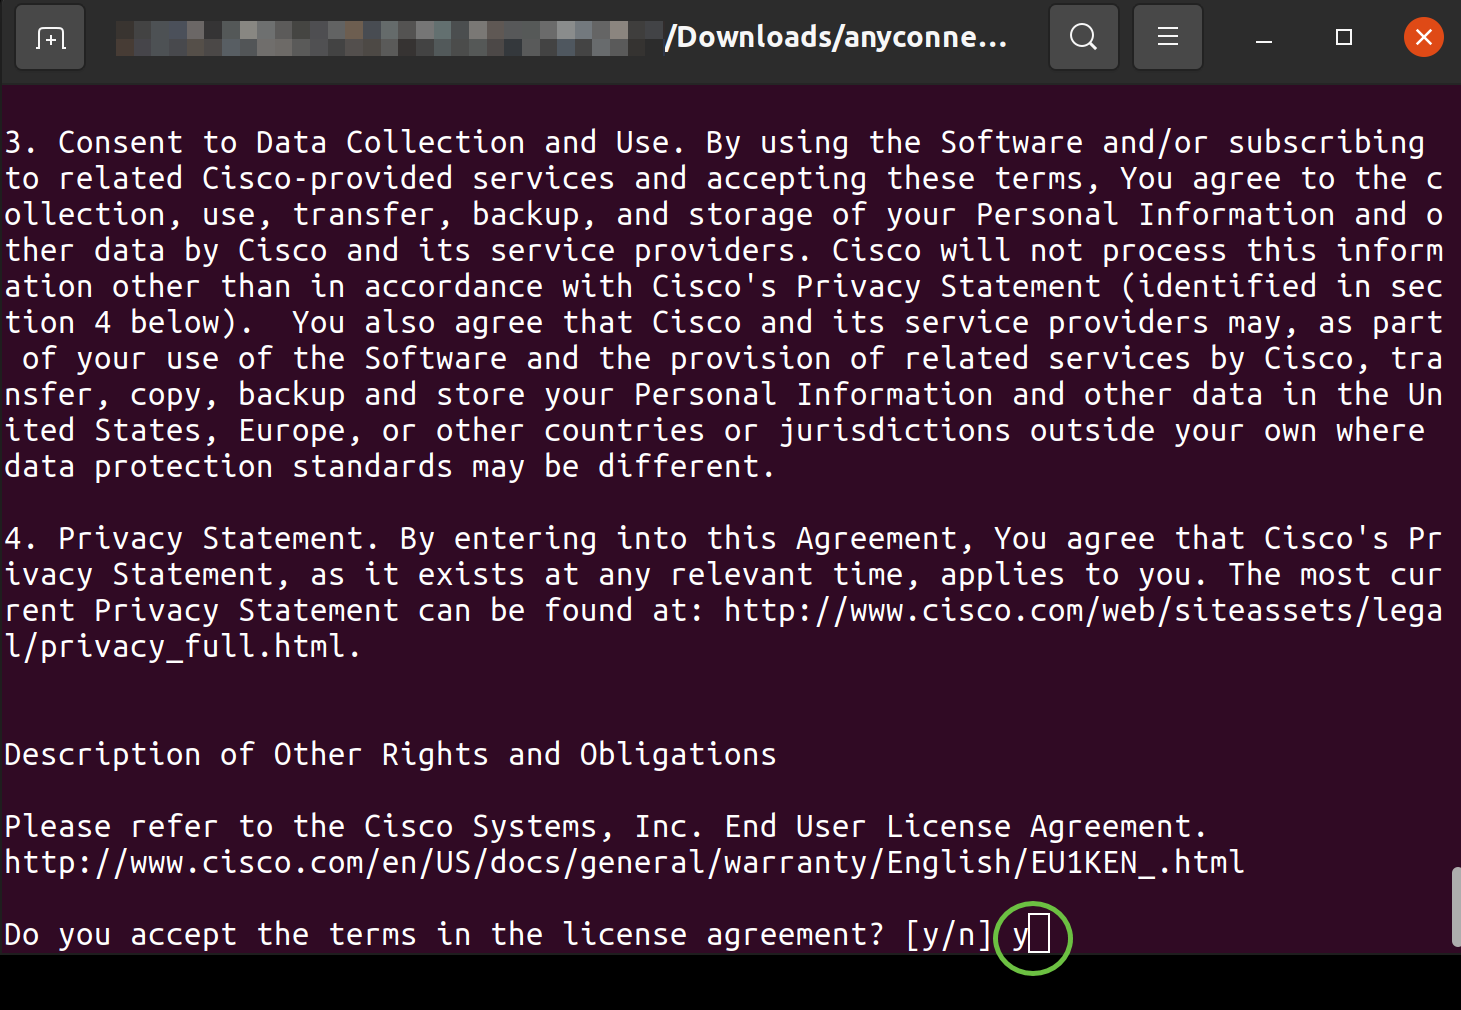
Accept the terms in the license agreement to complete the installation by typing ‘y’.
Using AnyConnect Secure Mobility Client v4.9.x
Step 1
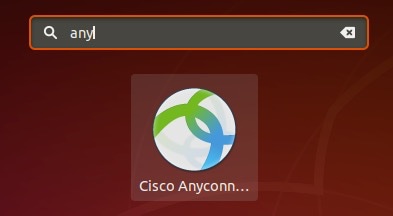
To access the AnyConnect app, click on the start icon (appears as nine dots on the lower left corner). Choose the Cisco Anyconnect app.

Alternatively, press Super+A (Super key is the windows icon key) on your keyboard to bring up the search bar. Start typing ‘Anyconnect’ and the app will appear.

Step 2
Click on the AnyConnect Secure Mobility Client icon.

Step 3
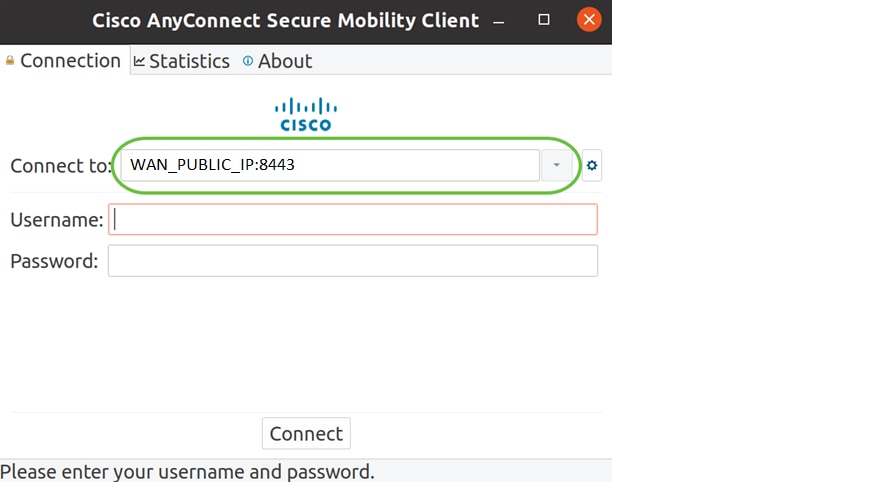
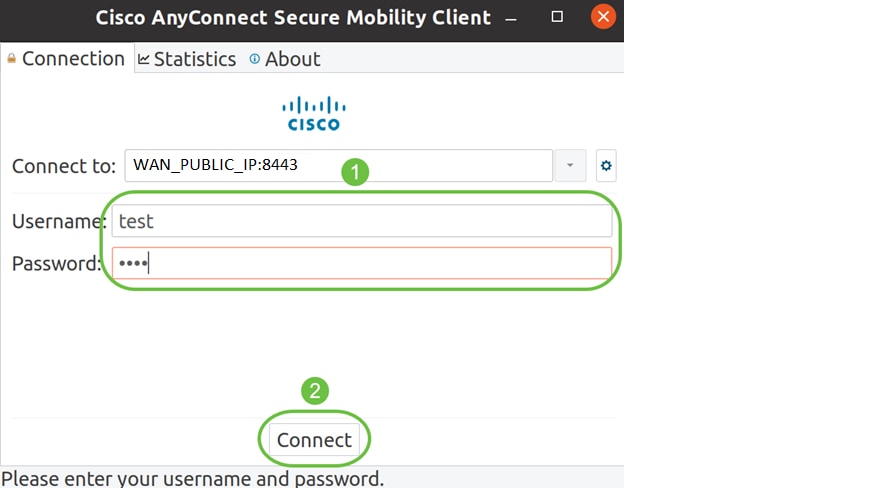
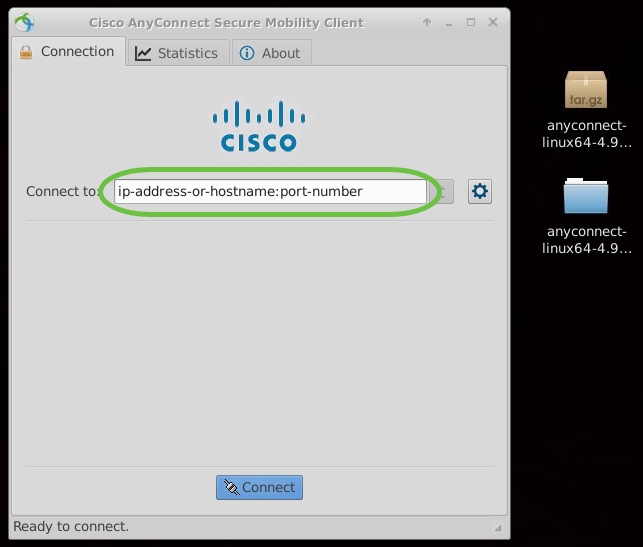
Enter the IP Address or Hostname of your desired server followed by the port number.
For RV340 family, the default port number is 8443.
Step 4
Enter your Username and Password in the fields provided. Click Connect.
Step 5
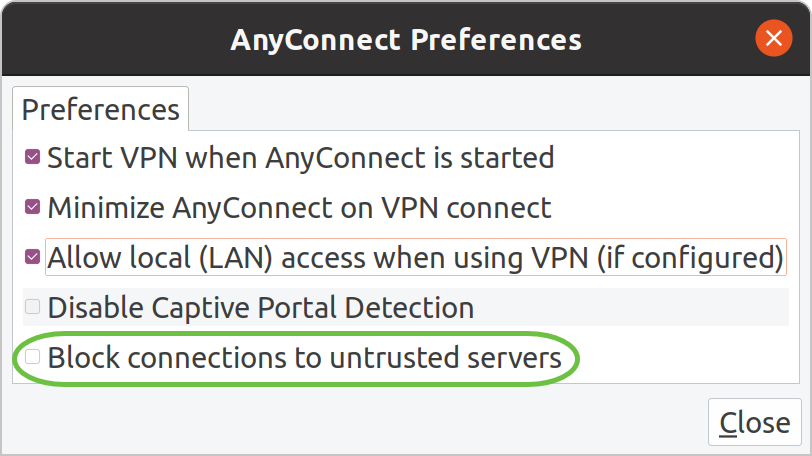
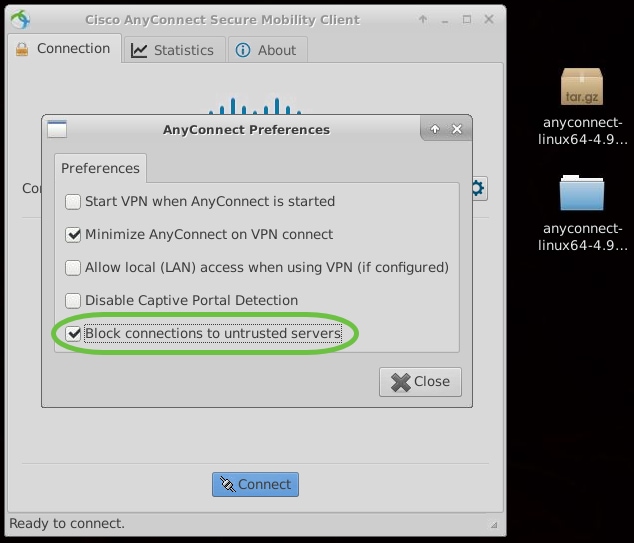
Some connections may not be secure using a trusted SSL certificate. By default, AnyConnect Client will block connection attempts to these servers.
Uncheck Block connections to untrusted servers under Preferences to connect to these servers.
Step 6
As soon as the connection is established, the login Banner will appear. Click Accept.
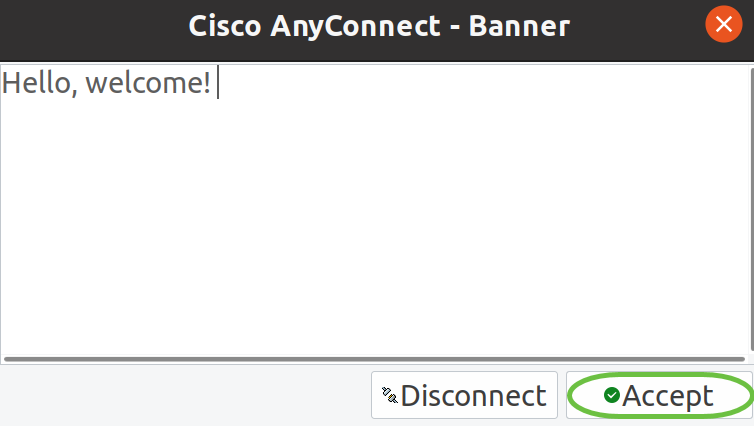
You will also see notification that the Cisco AnyConnect Secure Mobility Client is Connected.

Conclusion
There you have it! You have now successfully learned the steps to install and use the Cisco AnyConnect Secure Mobility Client v4.9.x on Ubuntu Desktop using the UI.
RV34x: Installing and Using AnyConnect on Ubuntu Desktop
The documentation set for this product strives to use bias-free language. For the purposes of this documentation set, bias-free is defined as language that does not imply discrimination based on age, disability, gender, racial identity, ethnic identity, sexual orientation, socioeconomic status, and intersectionality. Exceptions may be present in the documentation due to language that is hardcoded in the user interfaces of the product software, language used based on RFP documentation, or language that is used by a referenced third-party product. Learn more about how Cisco is using Inclusive Language.
Objective
The objective of this article is to guide you through installing, using, and the option of uninstalling AnyConnect VPN Client v4.9.x on Ubuntu Desktop.
This article is ONLY applicable to the Cisco Small Business RV34x series routers, not Enterprise products.
Introduction
AnyConnect Secure Mobility Client is a modular endpoint software product. It not only provides Virtual Private Network (VPN) access through Secure Sockets Layer (SSL) and Internet Protocol Security (IPsec) Internet Key Exchange version2 (IKEv2) but also offers enhanced security through various built-in modules. Follow the steps in this article to install the Cisco AnyConnect VPN Mobility Client on a Ubuntu Desktop. In this article, Ubuntu version 20.04 is used.
AnyConnect Software Version
Table of Contents
Installing AnyConnect Secure Mobility Client v4.9.x
This toggled section provides details and tips for beginners.
Prerequisites
- AnyConnect is a licensed product. You need to purchase client license(s) from a partner like CDW or through your company’s device procurement. There are options for 1 user (L-AC-PLS-3Y-S5) or packets of licenses including one year for 25 users (AC-PLS-P-25-S). Other license options available as well, including perpetual licenses. For more details on licensing, check out the links in the Licensing Information section below.
- Download the latest version of firmware available for your router.(Click here for step-by-step instructions on this process.)
- Ubuntu 20.04 (LTS), 18.04 (LTS), and 16.04 (LTS) .
Check these other articles out!
Applicable Devices | Software Version
Licensing Information
AnyConnect client licenses allow the use of the AnyConnect desktop clients as well as any of the AnyConnect mobile clients that are available. You will need a client license to download and use the Cisco AnyConnect Secure Mobility Client. A client license enables the VPN functionality and are sold in packs of 25 from partners like CDW or through your company’s device procurement.
Want to know more about AnyConnect licensing? Here are some resources:
Step 1
Open a web browser and navigate to the Cisco Software Downloads webpage.
Step 2
In the search bar, start typing ‘Anyconnect’ and the options will appear. Select AnyConnect Secure Mobility Client v4.x.
Step 3
Download the Cisco AnyConnect VPN Client. Most users will select the AnyConnect Pre-Deployment Package (Linux 64-bit) option.
The images in this article are for AnyConnect v4.9.x, which was latest version at the time of writing this document.
If you purchased a license and you are unable to download AnyConnect, call Cisco Global Service Relations at +1 919-993-2724. Select option 2. You will need to know your Cisco ID (the one you use to log into Cisco.com) and the sales order number when you call. They will get that situation all straightened out.
Step 4
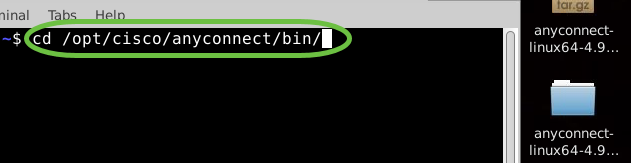
Open the Terminal by pressing Ctrl+Alt+T on your keyboard. To navigate to the folder where you have downloaded the AnyConnect Client Package, use the command, ‘cd directory name’. For more information on the ‘cd’ command, click here.
In this example, the file is placed on the Desktop.
The directory may be different based on the location of the AnyConnect file download. For long filenames or paths, start typing some characters and press the tab key on your keyboard. The filename will auto-populate. If it doesn’t even after you press tab twice, it indicates that you need to type more number of unique characters. Alternately, you can use the ‘ls’ command to list the files in your current directory.
![Open the Terminal by pressing Ctrl+Alt+T on your keyboard. Use the command cd [directory name].](https://www.cisco.com/c/dam/en/us/support/docs/smb/routers/cisco-rv-series-small-business-routers/images/Kmgmt-785-AnyConnect-Linux-Ubuntu-image2.png)
Step 5
The initial download is a tarball archive (several files packed into one), which must be extracted. The command ‘tar xvf filename’ will extract the contents to the same directory in which the initial file is located.
For more information on the ‘tar’ command, click here.
![Use command tar xvf [filename] to extract files.](https://www.cisco.com/c/dam/en/us/support/docs/smb/routers/cisco-rv-series-small-business-routers/images/Kmgmt-785-AnyConnect-Linux-Ubuntu-image3.png)
Step 6
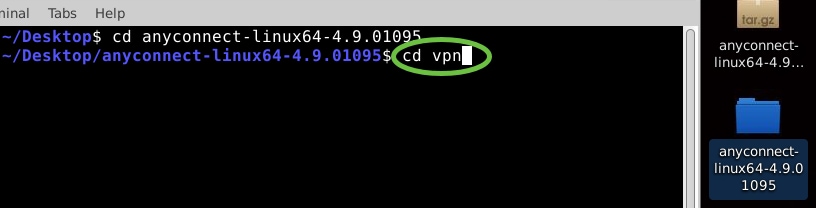
Once the folder is extracted, use the ‘cd directory name’ command again to navigate into the folder.
![Use cd [directory name].](https://www.cisco.com/c/dam/en/us/support/docs/smb/routers/cisco-rv-series-small-business-routers/images/Kmgmt-785-AnyConnect-Linux-Ubuntu-image4.png)
Step 7
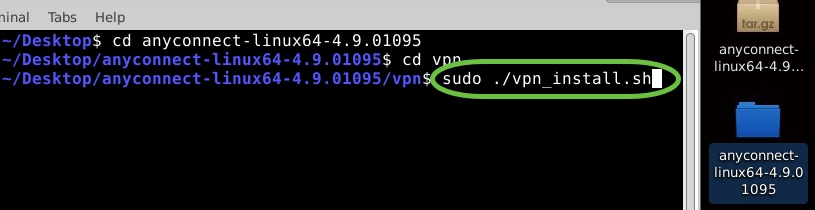
After navigating into the main folder, ‘cd’ into the vpn sub-folder.
Step 8
To run the AnyConnect install script, type ‘sudo ./vpn_install.sh’. This will begin the installation process using superuser permissions.
For more details on the ‘sudo’ command, click here.
Step 9
Accept the terms in the license agreement to complete the installation by typing ‘y’.
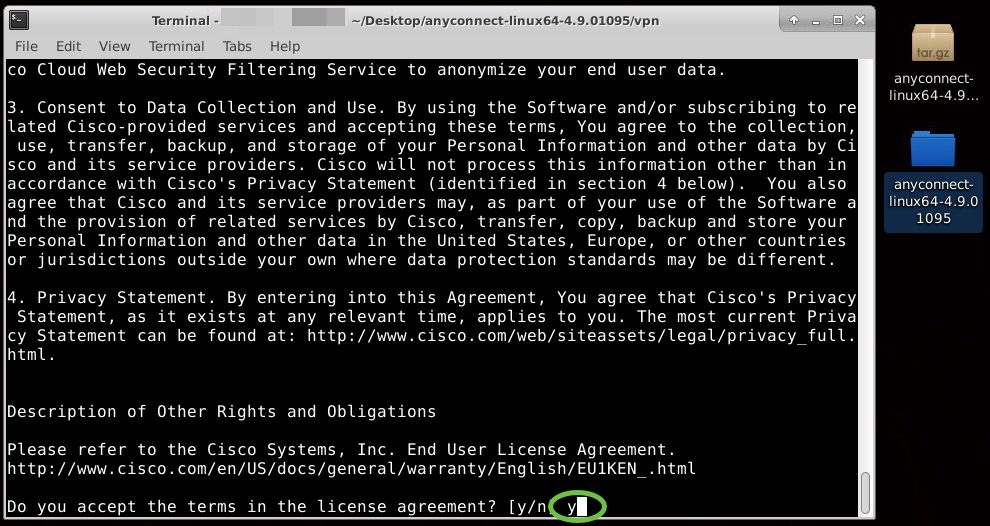
The AnyConnect installation should complete, and the Terminal window can be closed.
Using AnyConnect Secure Mobility Client v4.9.x
Step 1
To access the Anyconnect app, open the Terminal by pressing Ctrl+Alt+T on your keyboard. Use the command, ‘/opt/cisco/anyconnect/bin/vpnui’.
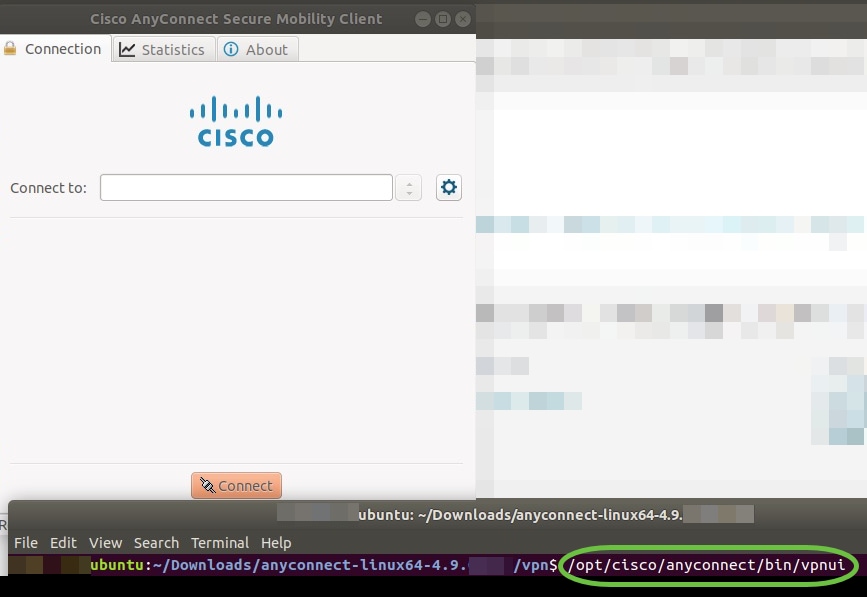
If you encounter any errors through the Terminal, you can access the app from the applications menu as shown below.
To access the applications menu using the User Interface (UI), click on the start icon (appears as nine dots on the lower left corner). Choose the Anyconnect app.
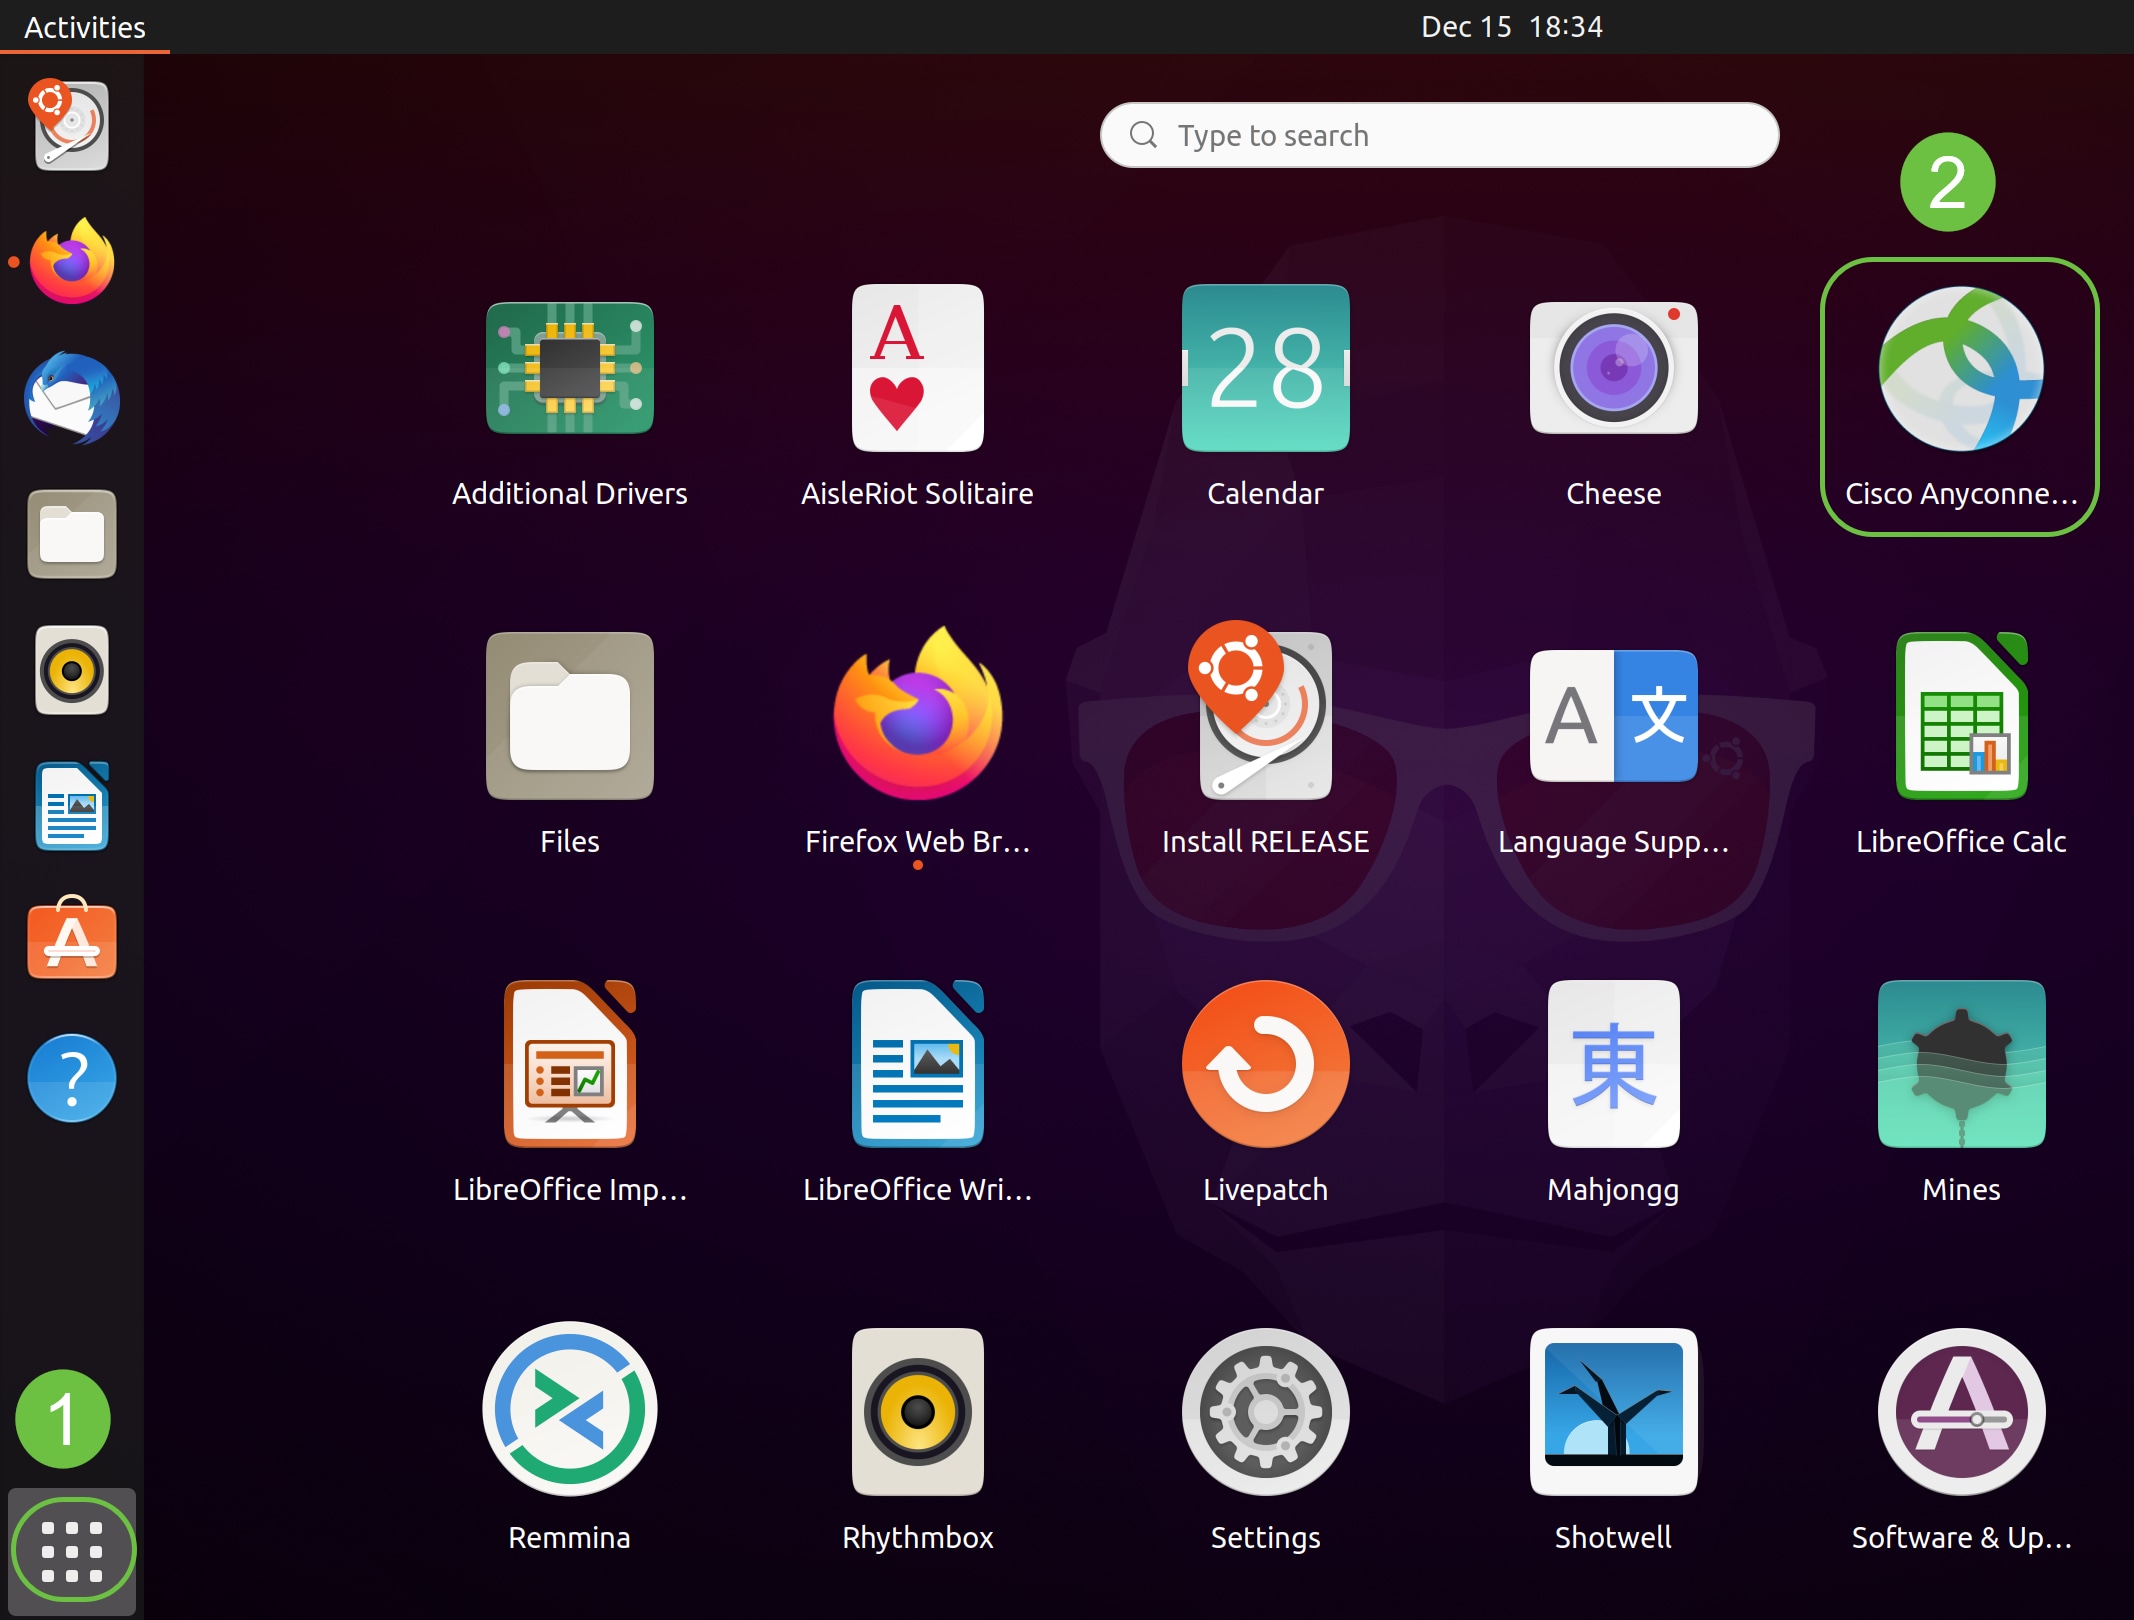
Alternatively, press Super+A (Super key is the windows icon key) on your keyboard to bring up the search bar. Start typing ‘Anyconnect’ and the app will appear.
Step 2
Click on the Anyconnect app.

Step 3
Enter the IP Address or Hostname of your desired server followed by the port number.
For RV340 family, the default port number is 8443.
Step 4
Some connections may not be secure using a trusted SSL certificate. By default, AnyConnect Client will block connection attempts to these servers.
Uncheck Block connections to untrusted servers to connect to these servers.
Uninstalling AnyConnect Secure Mobility Client v4.9.x
Step 1
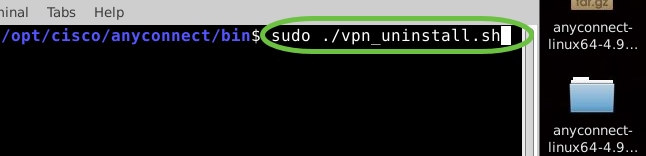
Using Terminal, navigate to the folder that contains the uninstall shell script using the ‘cd’ command.
In a default installation, these files will be located in /opt/cisco/anyconnect/bin/.
Step 2
To run the Anyconnect uninstall script, enter ‘sudo ./vpn_uninstall.sh’
This will begin the uninstall process using superuser permissions. For more information on the ‘sudo’ command, click here.
Step 3
At the prompt, enter the sudo password and the client software will complete uninstallation.

Conclusion
There you have it! You have now successfully learned the steps to install, use, and uninstall the Cisco AnyConnect Secure Mobility Client v4.9.x on Ubuntu Desktop.
For community discussions on Site-to-Site VPN, go to the Cisco Small Business Support Community page and do a search for Site-to-Site VPN.
We want the best for our customers, so if you have any comments or suggestions regarding this topic, please send us an email to the Cisco Content Team.
AnyConnect App
The Anyconnect App can be downloaded from the Google Play store or the Apple store.