How to install DEB packages on Linux Mint?
The packages on Linux are compressed file that contains, in turn, a set of files such as sources or binaries and a set of instructions that indicate what to do with these.
Generally, packages contain instructions by which you can install applications using a package manager for the Linux distribution.
So generally, a package consists of:
- A Header that contains the instructions for the installation process and configuration of the contained files. Here are also the dependencies that the system has to meet in order for it to work.
- Data which are the binary files or sources that will execute an action in the system. Here, for example, you will find the binaries of the applications.
Many packages are dependent on each other. That is to say, they need each other to operate correctly. In addition to this, it is also possible that several packages share other packages as dependencies.
Installing a DEB package in Linux Mint
DEB is the standard Linux Mint package. And for this, you can do it using the terminal or the graphical interface. Keep in mind that it is always faster to do it using the terminal.
Using the terminal to install a DEB package
To install a DEB package using the terminal, we have two essential commands. The first one is dpkg and the second one is apt .
The dpkg command unpacks a package. Or in short, install it. In addition to that, dpkg also removes already installed packages.
To install a package with the dpkg command, you have to run the command together with the -i install option.
sudo dpkg -i [package-name].debThis will prepare the system for installation. You can also use relative and absolute paths. Remember that your user has to belong to the sudo group.
Another interesting command to perform DEB package installation in Linux Mint is apt .
APT is the Linux Mint package manager that will help to install and manage packages easily. Although APT is regularly used to install packages from the official repositories, you can also use it to install downloaded DEB packages.
To do this, we just need to use the install sub command and specify the file name. For example,
sudo apt install ./[package-name].debThis is how quick and easy it is to install DEB packages using the terminal.
Installing DEB packages using the Linux Mint graphical interface
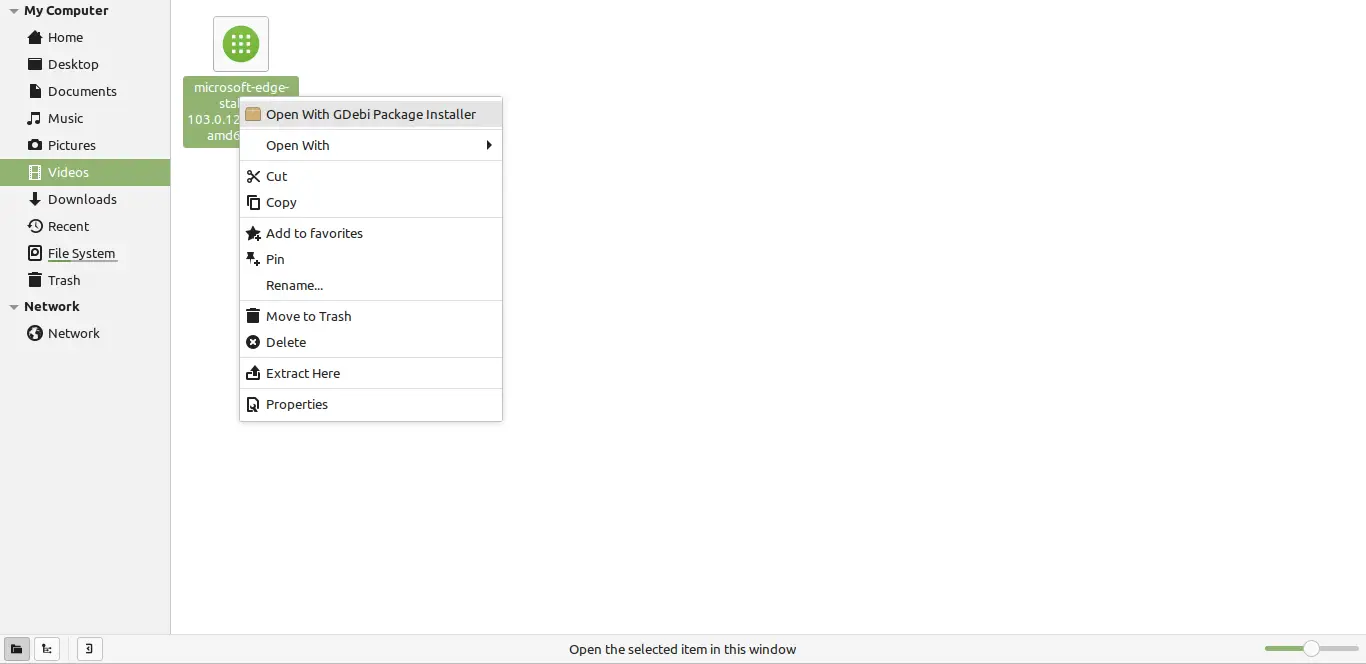
As I said at the beginning, Linux Mint is a distribution that makes everything easy for the user. So, to install a DEB package, just double-click on it or right-click on it and select Open with GDebi Package Installer.
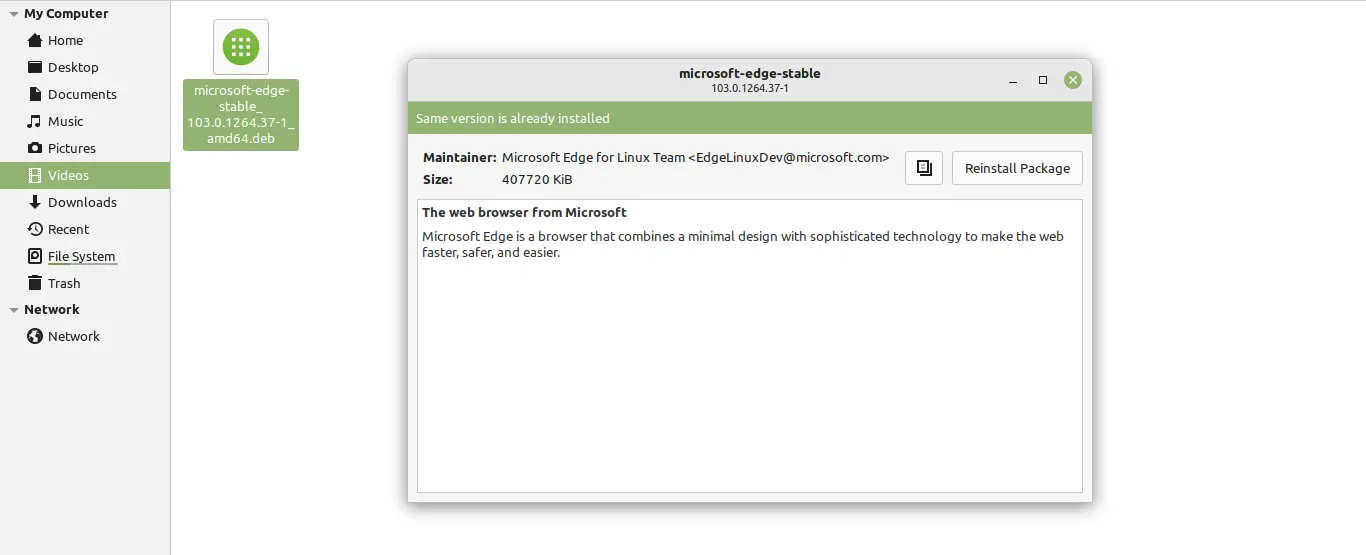
You will see a screen with the information provided by the package header and an installation button. Entering the password will start the process.
As you may have noticed in this post, you have several options for installing DEB packages in Linux Mint. Some users may feel better using the terminal because it is faster, or using the graphical interface if you wish.
The final recommendation is that you don’t install just any package, and make sure of its provenance.
Установка deb пакета linux mint
There are several ways of installing softwares in linux and they are described in many tutorials. this tutorial will cover most of the processes of installing softwares in a linux system.
Online installation:
#1. Through software manager(linux mint)/software center(ubuntu):
first open the terminal and run this command to get the latest version of the software:
sudo apt-get update
1. open software manager/center. it’s in the menu.
2. search your desired software in the search box
3. if it’s in the list then it will appear before you . if it’s not in the list follow the instructions in the ppa installation section of this tutorial.
4. now double click on the desired software entry and then click «install«.
5. it will be installed on your system as per your network connection speed.
#2. Through synaptic package manager:
if it is absent in your linux distribution then you will have to install it through software manager/center first.
to me it’s the best way to install softwares in linux.
1. open synaptic package manager . click reload to get the latest version of the softwares.
2. search your desired software/s in the search box.
3. right click each software you want to install and mark them for installing. it will mark additional dependencies on it’s own.
if your softwares not in the list follow the instructions in the ppa installation section of this tutorial.
4. after marking for installing, click apply
6. it will download and install the marked softwares.
if you have a list of softwares then save the file with the list, with .list extension (this file should contain the exact package name one at every line with an extra string «install» included after each package name preceding by an space/tab). then go to file->read markings and then brows to the file and open it. synaptic will mark the softwares in the list automatically.
if you know the exact name of the software then you can install it through terminal by simply entering the command:
sudo apt-get update (to get the latest version)
sudo apt-get install software-package-name
if it says «unable to locate package. » then follow the instructions in the ppa installation section of this tutorial.
if your software’s not in the software list then it may come from private package archives (PPA’s).
these are private development of softwares so use it at your own risk.
1. search google for the ppa address for your software. (like ppa for package-name)
2. then add it to the repository by entering this command in terminal:
sudo add-apt-repository ppa. whatever_it_is
3. then run this command (must)
sudo apt-get update
4. now your desired software is in the list. so you can follow one of the above processes (#1,#2,#3)
Offline installation:
say, you downloaded your desired softwares from some website. in this case if you don’t trust the origin of the software then don’t install it or install it at your own risk.
Your downloaded softwares may come as a .zip, tar.gz, tar.bz2, .deb, .rpm, .tgz, tar.xz or any other types of archives.
if you are in linux mint or in ubuntu or in a debian based OS try to download .deb packages because it’s easier to install in debian based OS.
#5. installing .deb packages:
cd path_to_the_directory_that_contains_the_.deb_file
sudo dpkg -i filename.deb
through gdebi package manager:
if gdebi is not installed then you have to install it through one of the processes #1,#2,#3 (requires internet connection)
1. then double click on the .deb file or open the file with gdebi package manager and click install.
2. it will be istalled soon.
#6. installing .rpm packages:
rpm has to be installed in the system, otherwise follow one of the processes #1,#2,#3 to install rpm (requires internet connection)
cd path_to_the_directory_that_contains_the_.rpm_file
sudo rpm -i filename.rpm
#7. installing from archives(.zip tar.gz. etc):
these archives generally conatains the source of the package. each of them generally has a different approach to install. I will be discussing a common method which will supposedly work for all of them.
As these archives contains the source, your system needs the required programming languages to compile and build the source. so the general requirement packages stated above may not be sufficient for you. in that case you have to install the required packages through one of the processes #1,#2,#3 (requires internet connection). you can know about the dependencies about your software in a readme file included in the archives.
1. open the archives with archive manager by double clicking it, then extract it.
cd path-to-the-extracted-folder
3. inside the extracted folder look carefully.
a. if you find a file named configure then :
sudo make install
if the first code fails to execute then run this code before above codes:
chmod +x configure
b. if you find a file named install.sh then
chmod +x install.sh
./install.sh or sudo ./install.sh (if it needs root permission)
or you can double click it and select run in terminal or simply run
N.B : sometimes there is a file, something like your_software_name.sh is found instead of install.sh. for this case you have to replace install.sh with the correct name in the previous codes.
c. if you find a file named install then
chmod +x install
./install or sudo ./install (if it needs root permission)
or you can double click it and select run in terminal or simply run
d. if you find a file named make (if there is no configure file) then
sudo make install
e. If you still can’t find the required files
then it may be in a special folder (generally in a folder named ‘bin’). move to this folder with cd command with appropriate path and then look again and follow the same process.
some packages are archived as pre installed packages i.e you don’t have to install them , you just need to extract them in a secure place and theres an executable file (name is generally same as the software name) in the extracted folder or in child folders like bin,build etc. you have to find it and make it executable.
Example: eclipse, adt bundle (android developing tool)
chmod +x filename_with_exact_path
or double clicking it and selecting run in terminal or run, whatever supports your software.
some softwares come with a .sh file to install it
chmod +x filename.sh
./filename.sh or sudo ./filename.sh (if it needs root permission)
or double click it and select run in terminal or run, whatever supports your software.
some softwares come with a .run file to install it
chmod +x filename.run
./filename.run or sudo ./filename.run (if it needs root permission)
or double click it and select run in terminal or run, whatever supports your software.
Additional info about offline installation:
Often, softwares generally have a lot of dependencies. You need to download all of them, which sometimes can be very difficult and tiring. for this you can follow the instructions here which will save your time and effort.
for adding an entry in the menu for your newly installed software you can see my other tutorial:
W: The first three online methods are the safest way to install a software. For other methods you have to take risks of potential damage of your system or software dependencies.
N.B: A well formatted copy of this tutorial can be found here. (This link may change)

