- Установка дистрибутива kali linux
- System Requirements
- Installation Prerequisites
- Preparing for the Installation
- Kali Linux Installation Procedure
- Boot
- Language
- Network
- User Accounts
- Clock
- Disk
- Encrypted LVM
- Proxy Information
- Metapackages
- Boot Information
- Reboot
- Post Installation
- Руководство по установке Kali Linux
- Системные Требования
- Создание загрузочного USB с помощью команды dd
- Установка Kali Linux Distribution
Установка дистрибутива kali linux
Installing Kali Linux (single boot) on your computer is an easy process. This guide will cover the basic install (which can be done on bare metal or guest VM), with the option of encrypting the partition. At times, you may have sensitive data you would prefer to encrypt using Full Disk Encryption (FDE). During the setup process you can initiate an LVM encrypted install on either Hard Disk or USB drives.
First, you’ll need compatible computer hardware. Kali Linux is supported on amd64 (x86_64/64-bit) and i386 (x86/32-bit) platforms. Where possible, we would recommend using the amd64 images. The hardware requirements are minimal as listed in the section below, although better hardware will naturally provide better performance. You should be able to use Kali Linux on newer hardware with UEFI and older systems with BIOS.
Our i386 images, by default use a PAE kernel, so you can run them on systems with over 4 GB of RAM.
In our example, we will be installing Kali Linux in a fresh guest VM, without any existing operating systems pre-installed. We will explain other possible scenarios throughout the guide.
System Requirements
The installation requirements for Kali Linux will vary depending on what you would like to install and your setup. For system requirements:
- On the low end, you can set up Kali Linux as a basic Secure Shell (SSH) server with no desktop, using as little as 128 MB of RAM (512 MB recommended) and 2 GB of disk space.
- On the higher end, if you opt to install the default Xfce4 desktop and the kali-linux-default metapackage, you should really aim for at least 2 GB of RAM and 20 GB of disk space.
- When using resource-intensive applications, such as Burp Suite, they recommend at least 8 GB of RAM(and even more if it is a large web application!) or using simultaneous programs at the same time.
Installation Prerequisites
This guide will make also the following assumptions when installing Kali Linux:
- Using the amd64 installer image.
- CD/DVD drive / USB boot support.
- Single disk to install to.
- Connected to a network (with DHCP & DNS enabled) which has outbound Internet access.
We will be wiping any existing data on the hard disk, so please backup any important information on the device to an external media.
Preparing for the Installation
- Download Kali Linux(We recommend the image marked Installer).
- Burn The Kali Linux ISO to DVD or image Kali Linux Live to USB drive. (If you cannot, check out the Kali Linux Network Install).
- Backup any important information on the device to an external media.
- Ensure that your computer is set to boot from CD/DVD/USB in your BIOS/UEFI.
- In the UEFI settings, ensure that Secure Boot is disabled. The Kali Linux kernel is not signed and will not be recognized by Secure Boot.
Kali Linux Installation Procedure
Boot
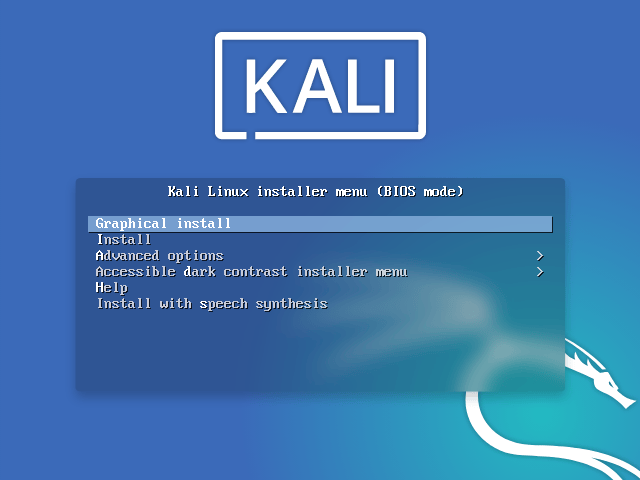
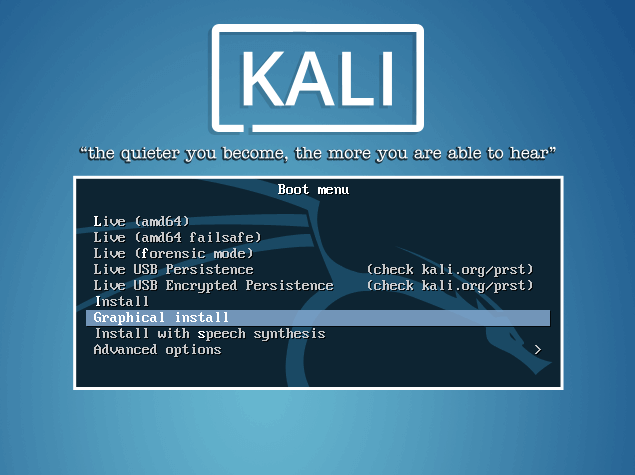
- To start your installation, boot with your chosen installation medium. You should be greeted with the Kali Linux Boot screen. Choose either Graphical install or Install (Text-Mode). In this example, we chose the Graphical install.

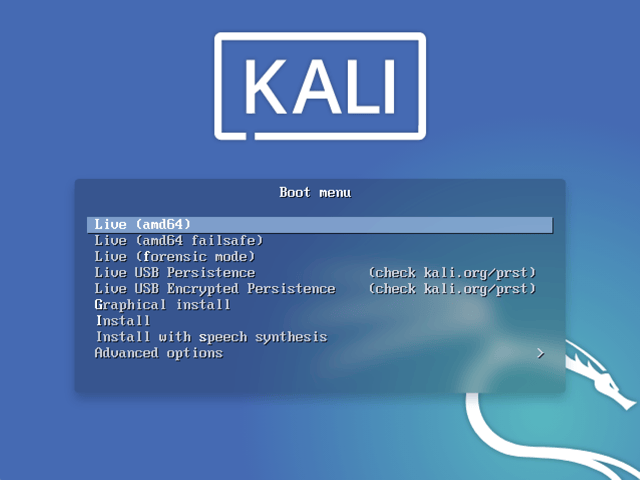
If you’re using the live image instead, you will see another mode, Live, which is also the default boot option.
Language
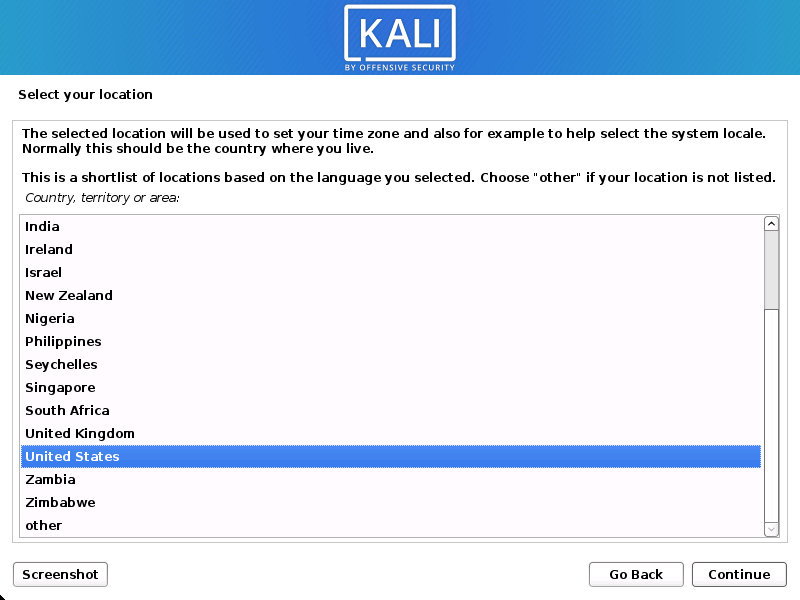
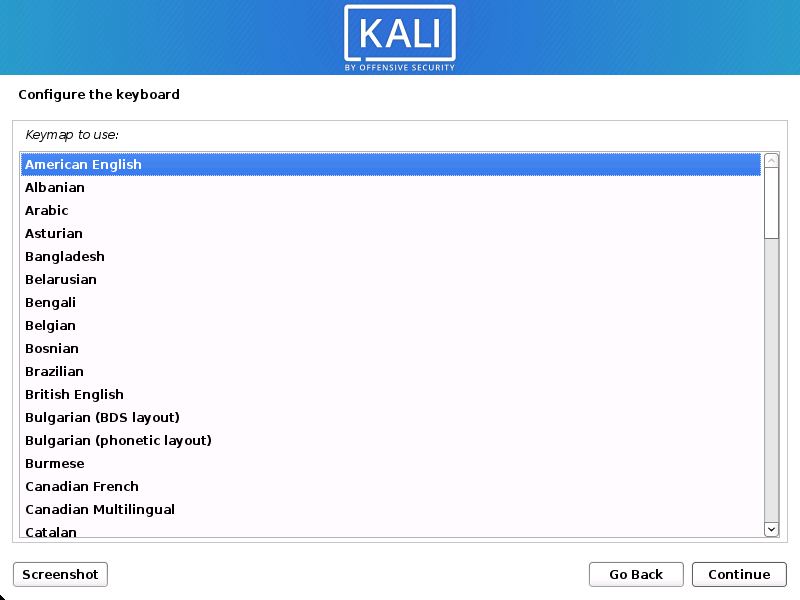
- Select your preferred language. This will be used for both the setup process and once you are using Kali Linux.
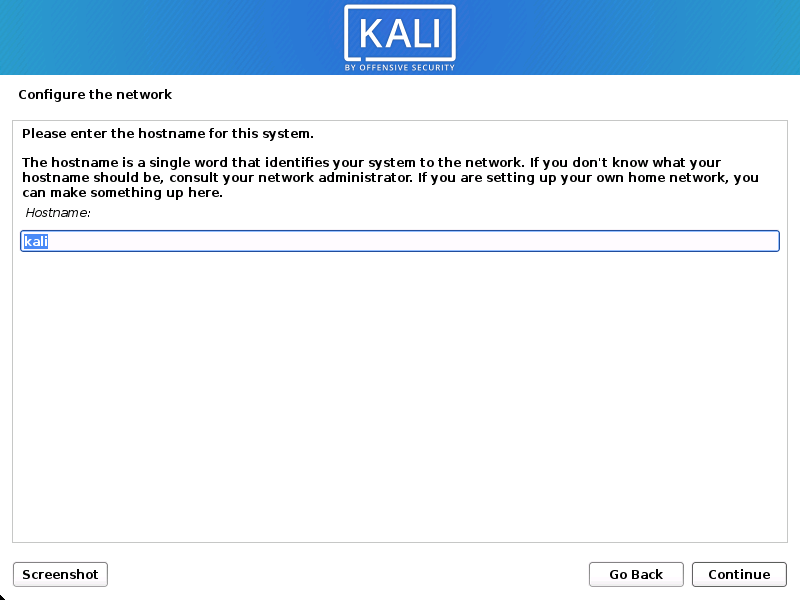
Network
- The setup will now probe your network interfaces, looks for a DHCP service, and then prompt you to enter a hostname for your system. In the example below, we’ve entered kali as our hostname.
If there is no network access with DHCP service detected, you may need to manually configure the network information or do not configure the network at this time.
- If there isn’t a DHCP service running on the network, it will ask you to manually enter the network information after probing for network interfaces, or you can skip.
- If Kali Linux doesn’t detect your NIC, you either need to include the drivers for it when prompted, or generate a custom Kali Linux ISO with them pre-included.
- If the setup detects multiple NICs, it may prompt you which one to use for the install.
- If the chosen NIC is 802.11 based, you will be asked for your wireless network information before being prompted for a hostname.
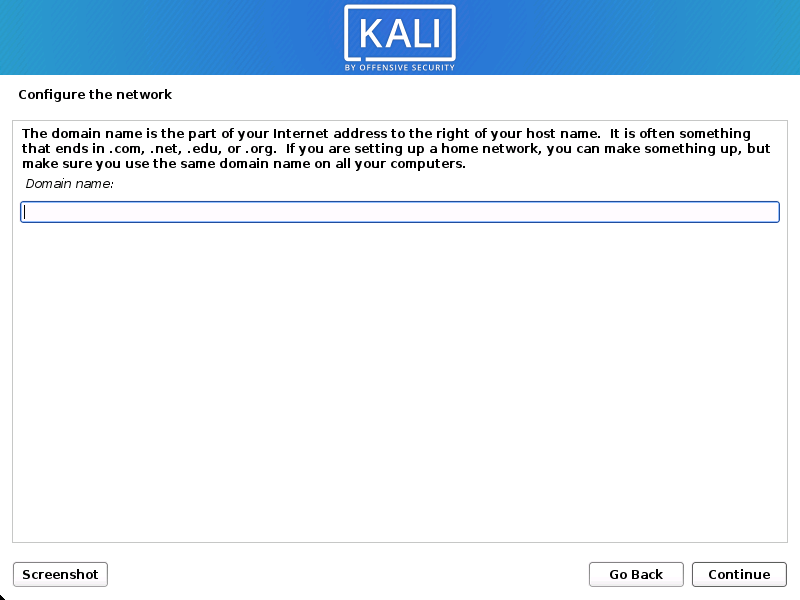
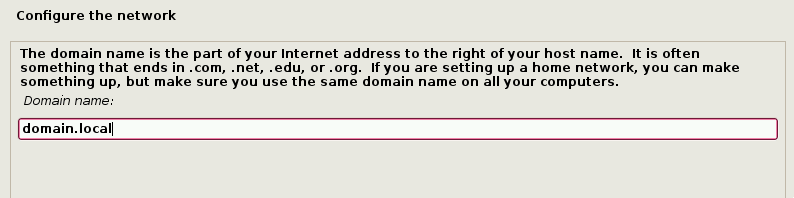
- You may optionally provide a default domain name for this system to use (values may be pulled in from DHCP or if there is an existing operating systems pre-existing).
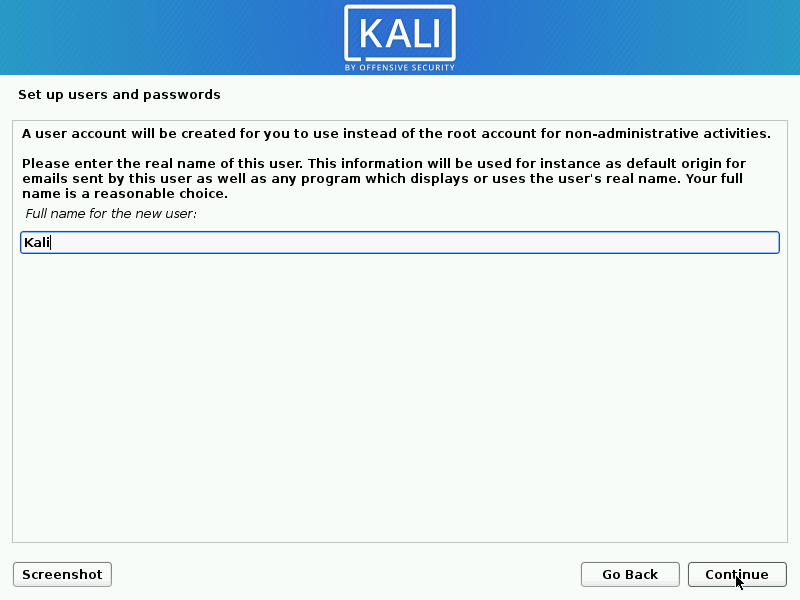
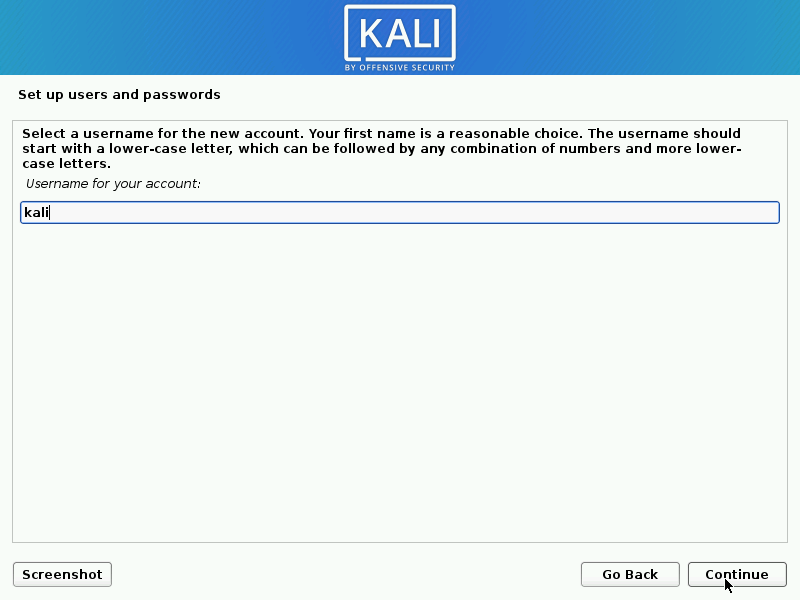
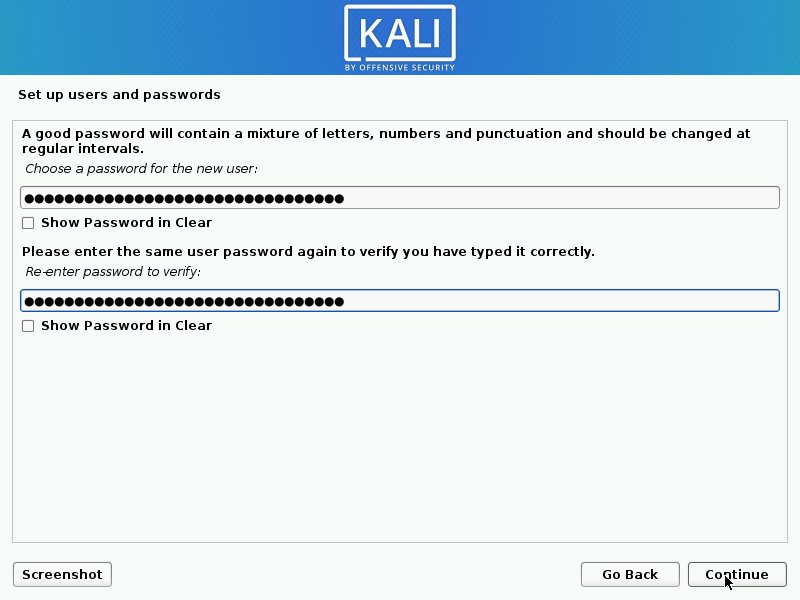
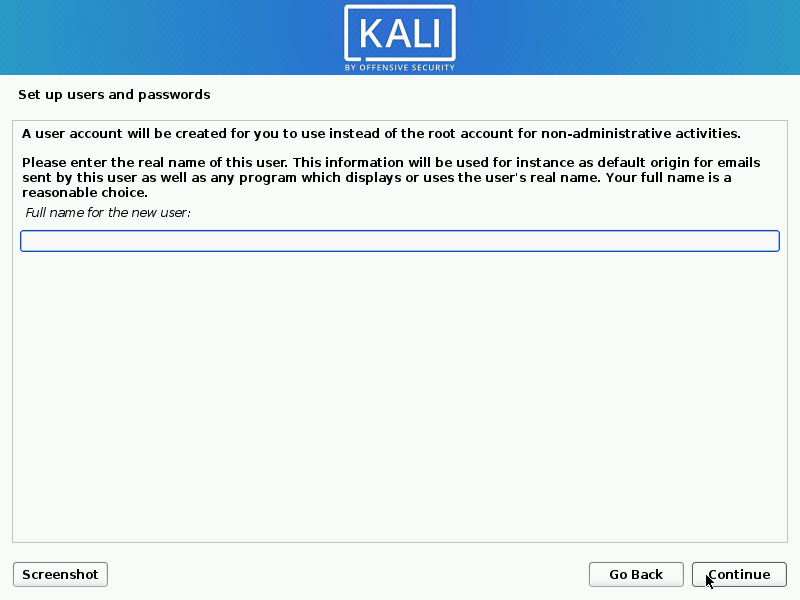
User Accounts
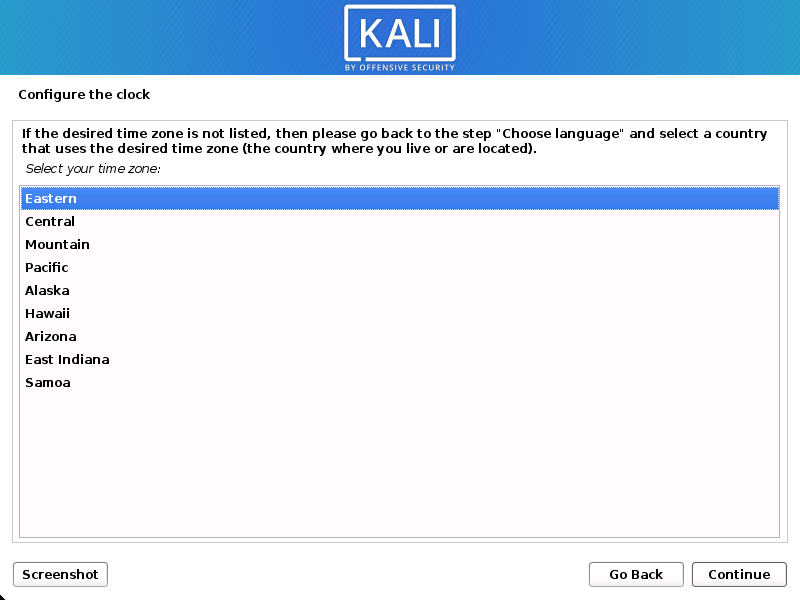
Clock
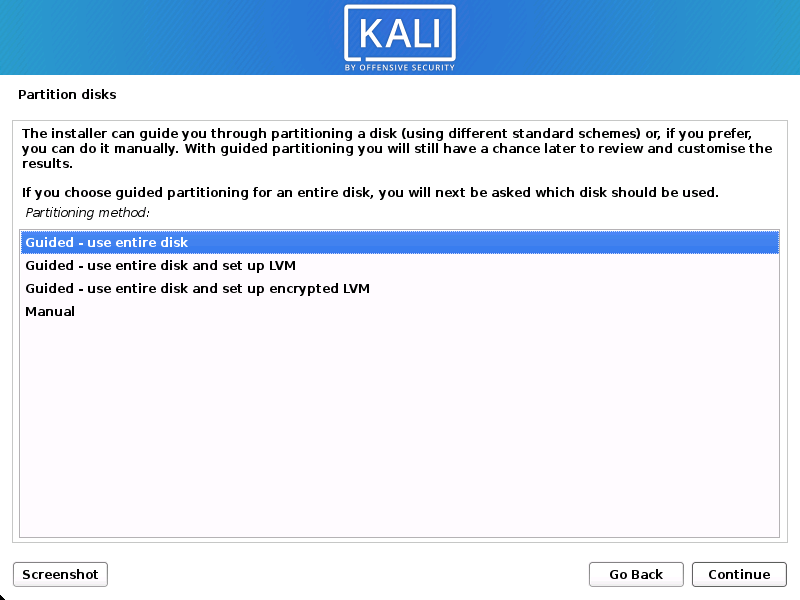
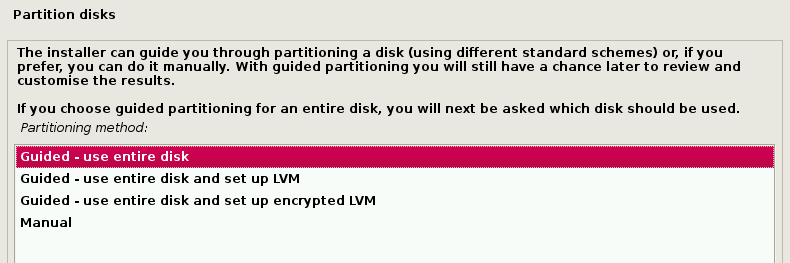
Disk
In our guide, we are using a clean disk, so we have four options to pick from. We will select Guided — the entire disk, as this is the single boot installation for Kali Linux, so we do not want any other operating systems installed, so we are happy to wipe the disk.
If there is an pre-existing data on the disk, you will have have an extra option (Guided — use the largest continuous free space) than the example below. This would instruct the setup not to alter any existing data, which is perfect for dual-booting into another operating system. As this is not the case in this example, it is not visible.
Experienced users can use the “Manual” partitioning method for more granular configuration options, which is covered more in our BTRFS guide.
If you want to encrypt Kali Linux, you can enable Full Disk Encryption (FDE), by selecting Guided — used entire disk and setup encrypted LVM. When selected, later on in the setup (not in this guide) prompt you to enter a password (twice). You will have to enter this password every time you start up Kali Linux.
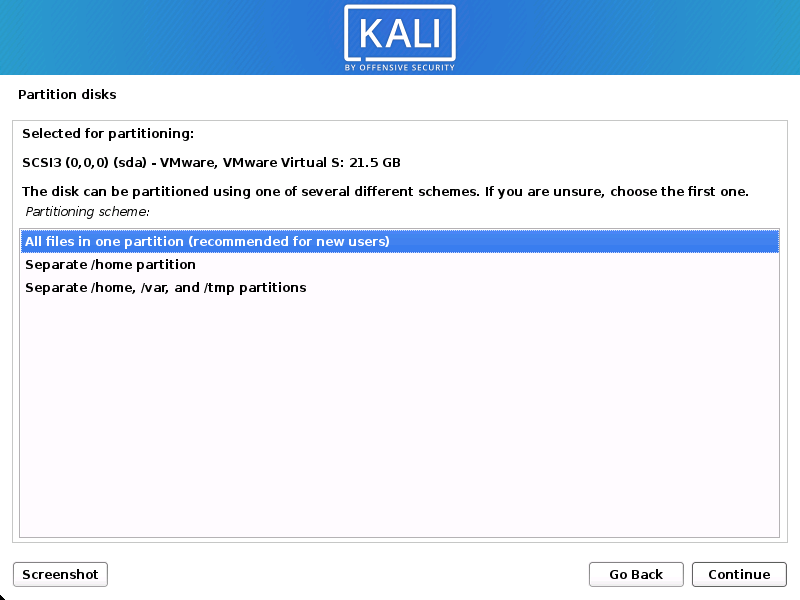
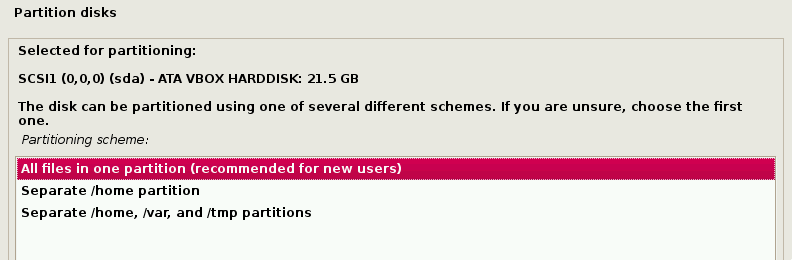
- Depending on your needs, you can choose to keep all your files in a single partition — the default — or to have separate partitions for one or more of the top-level directories.
If you’re not sure which you want, you want “All files in one partition”.
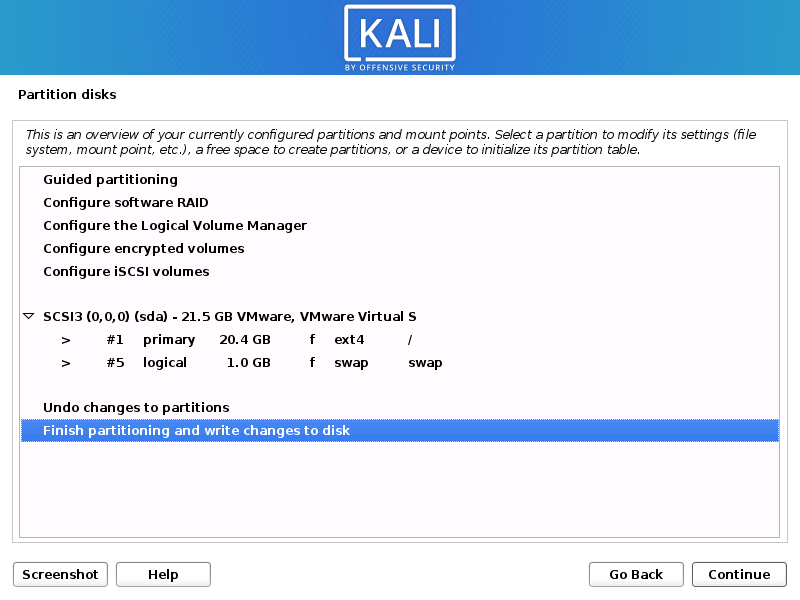
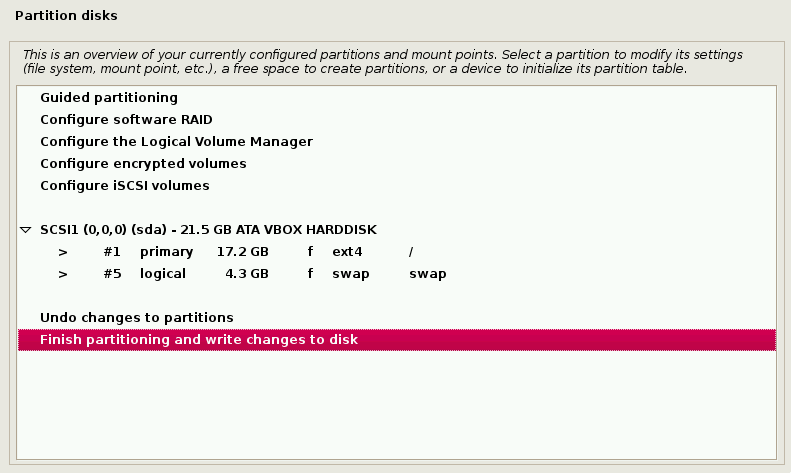
- Next, you’ll have one last chance to review your disk configuration before the installer makes irreversible changes. After you click Continue, the installer will go to work and you’ll have an almost finished installation.
Encrypted LVM
If enabled in the previous step, Kali Linux will now start to perform a secure wipe of the hard disk, before asking you for a LVM password.
Please be sure a strong password is used, or else you will be prompted with a weak passphrase warning.
This wipe may take “a while” (hours) depending on the size and speed of the drive.
If you wish to risk it, you can skip it.Proxy Information
- Kali Linux uses a central repository to distribute applications. You’ll need to enter any appropriate proxy information as needed.
Metapackages
If network access was not setup, you will want to continue with setup when prompt.
If you are using the Live image, you will not have the following stage.
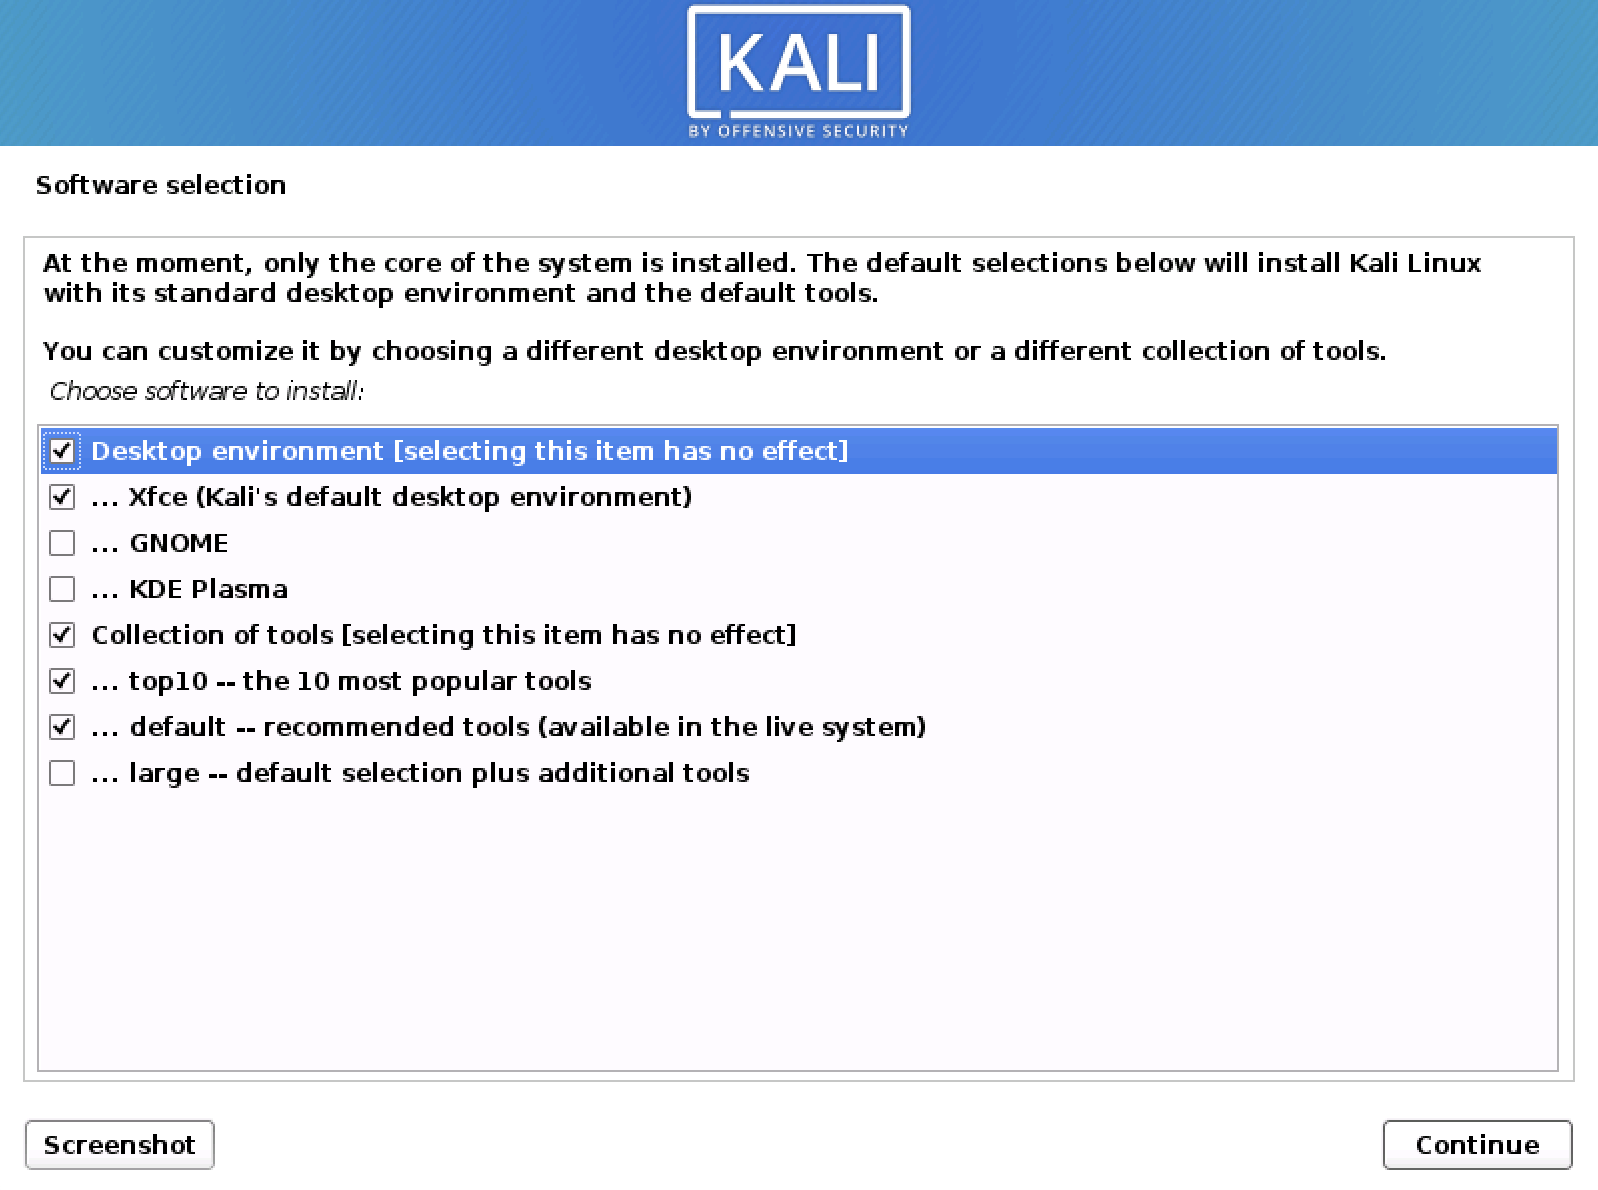
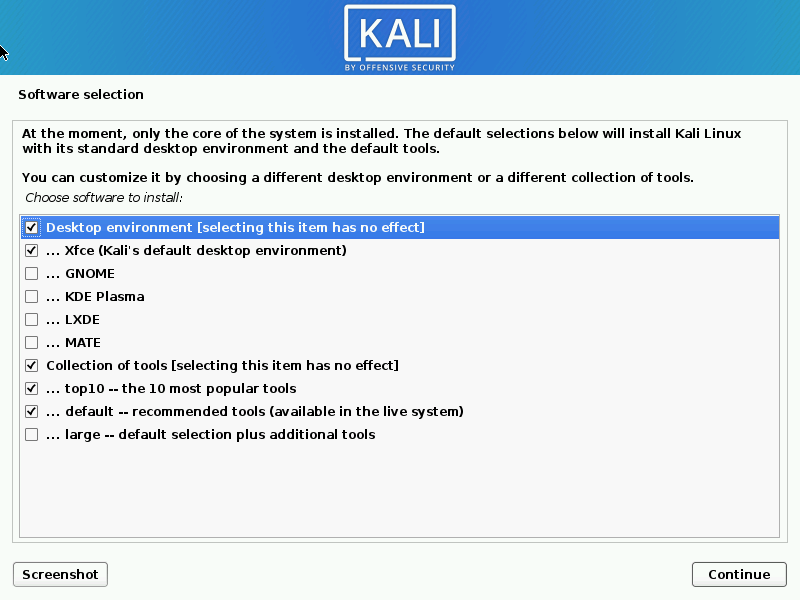
- Next you can select which metapackages you would like to install. The default selections will install a standard Kali Linux system and you don’t really have to change anything here.
Please refer to this guide if you prefer to change the default selections.
Boot Information
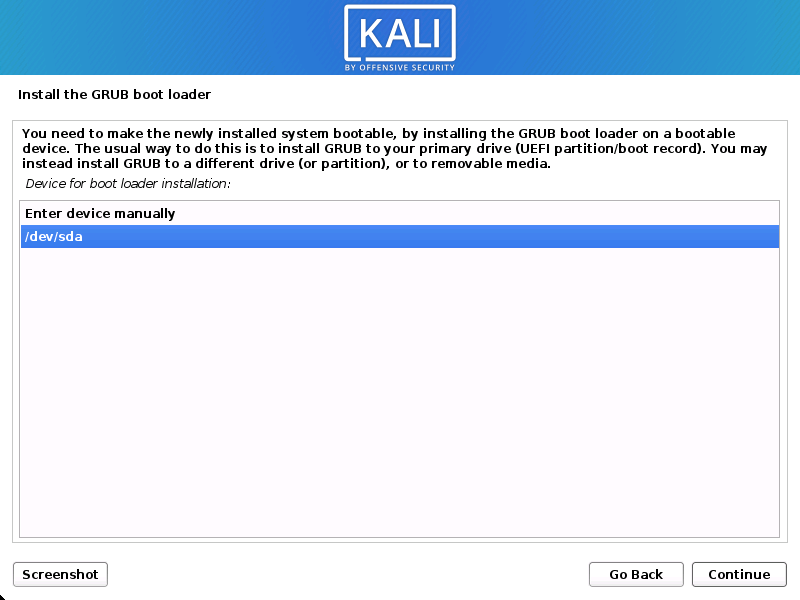
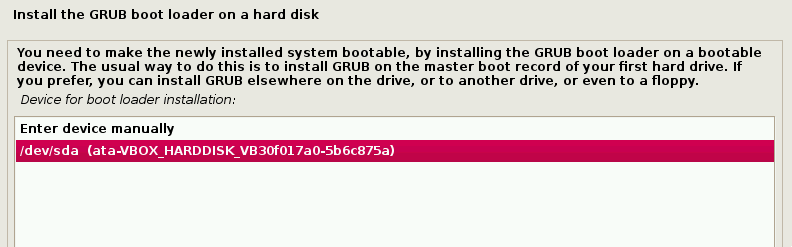
- Select the hard drive to install the GRUB bootloader in (it does not by default select any drive).
Reboot
Post Installation
Now that you’ve completed installing Kali Linux, it’s time to customize your system.
The General Use section has more information and you can also find tips on how to get the most out of Kali Linux in our User Forums.
Updated on: 2023-Mar-13
Author: gamb1tРуководство по установке Kali Linux

Kali Linux, возможно, является одним из лучших дистрибутивов Linux, доступных для тестирования безопасности. Хотя многие инструменты в Kali можно установить в большинстве дистрибутивов Linux, команда разработчиков Offensive Security, занимающаяся разработкой Kali, потратила бесчисленные часы на совершенствование готового к загрузке дистрибутива безопасности.
Kali Linux — это дистрибутив безопасности на основе Debian. Дистрибутив поставляется с предустановленными сотнями известных инструментов безопасности и заслужил себе имя.
В этой статье мы рассказываем, как установить Kali Linux и стать крутым хакером (в рамках закона, конечно же). Мы будем использовать последнюю на данный момент версию Kali Linux — 2020.2
Системные Требования
Кали имеет некоторые минимальные рекомендуемые спецификации для оборудования. В зависимости от предполагаемого использования может потребоваться больше. В этом руководстве предполагается, что вы захотите установить Kali в качестве единственной операционной системы на компьютере.
- Не менее 20 ГБ дискового пространства; Настоятельно рекомендуется иметь больше.
- Не менее 2 ГБ ОЗУ; больше рекомендуется особенно для графических сред.
- Поддержка загрузки с USB или CD/DVD
- ISO доступен на странице загрузки Kali Linux.
Создание загрузочного USB с помощью команды dd
В этом руководстве предполагается, что USB-накопитель доступен для использования в качестве установочного носителя. Обратите внимание, что USB-накопитель должен быть как можно ближе к 4/8 ГБ.
Обязательно сделайте резервную копию всех данных, прежде чем продолжить — все данные будут удалены. Этот загрузочный USB-диск Kali Linux будет создан с другого компьютера с Linux.
Первым шагом нужно получить Kali Linux ISO образ. В этом руководстве будет использоваться новейшая версия Kali с настольной средой Enlightenment Linux.
Чтобы получить эту версию, введите следующую команду wget в терминал.
$ cd ~/Downloads $ wget -c https://cdimage.kali.org/kali-2020.2/kali-linux-2020.2-installer-amd64.iso
Две приведенные выше команды загрузят ISO-образ Kali Linux в папку Downloads текущего пользователя.
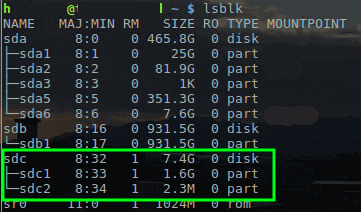
Следующим этапом является запись ISO на USB-накопитель для загрузки установщика. Для этого мы можем использовать инструмент dd в Linux. Сначала нам нужно найти имя диска с помощью команды lsblk .
Когда имя USB-накопителя станет определено как /dev/sdc , образ Kali можно записать на накопитель с помощью инструмента dd .
$ sudo dd if=~/Downloads/kali-linux-2020.2-installer-amd64.iso of=/dev/sdc
Важное замечание: Приведенная выше команда требует привилегий root, поэтому для запуска команды используйте sudo или login в качестве пользователя root. Также эта команда УДАЛИТ ВСЕ на USB-накопителе. Обязательно сделайте резервную копию необходимых данных.
После того, как ISO скопирован на USB-накопитель, переходим к установке Kali Linux.
Установка Kali Linux Distribution
1. Сначала подключите USB-накопитель к соответствующему компьютеру, на котором должен быть установлен Kali, и перейдите к загрузке через USB-накопитель. После успешной загрузки с USB-накопителя пользователю будет показан следующий экран, и он должен перейти к опциям Install (Установка) или Graphical Install (Графическая установка).
В этом руководстве будет использоваться метод Graphical Install.
2. На следующей паре экранов пользователю будет предложено выбрать информацию о локали, такую как язык, страна и раскладка клавиатуры.
После ознакомления с информацией о локали установщик запросит имя хоста и домен (hostname и domain) для этой установки. Предоставьте соответствующую информацию для среды и продолжите ее установку.
3. После настройки имени хоста и имени домена вам необходимо создать новую учетную запись пользователя, чтобы использовать ее вместо учетной записи root для неадминистративной деятельности.
4. После установки пароля установщик запросит данные о часовом поясе, а затем сделает паузу на разбиении диска.
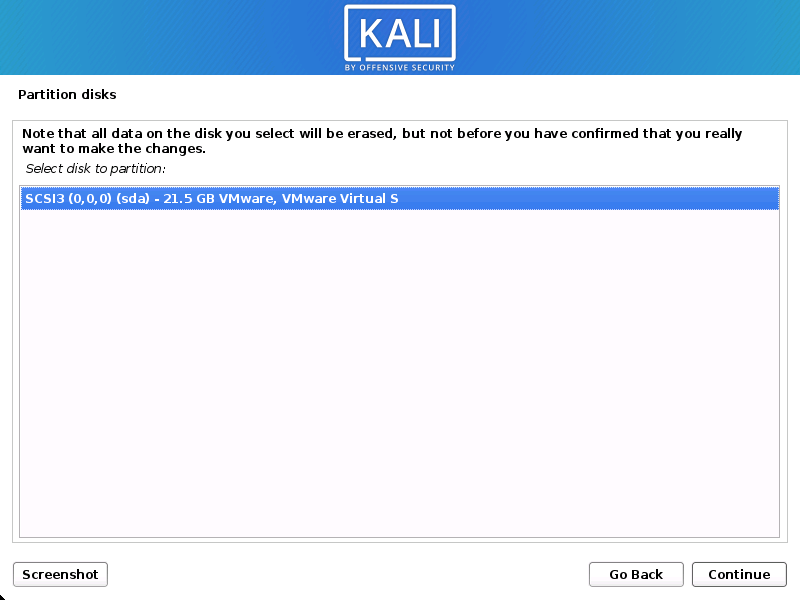
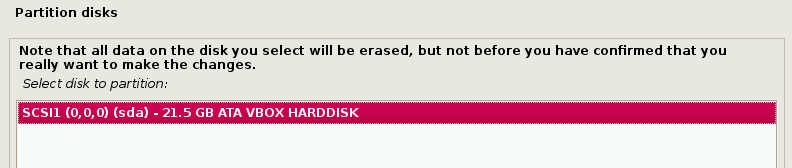
Если Kali будет единственной операционной системой на компьютере, самый простой вариант — Guided – Use Entire Disk использовать (Управляемый — использовать весь диск), а затем выбрать устройство хранения, которое вы хотите установить Kali.
5. Следующий вопрос предложит пользователю определить раздел на устройстве хранения. Большинство установок могут просто поместить все данные в один раздел.
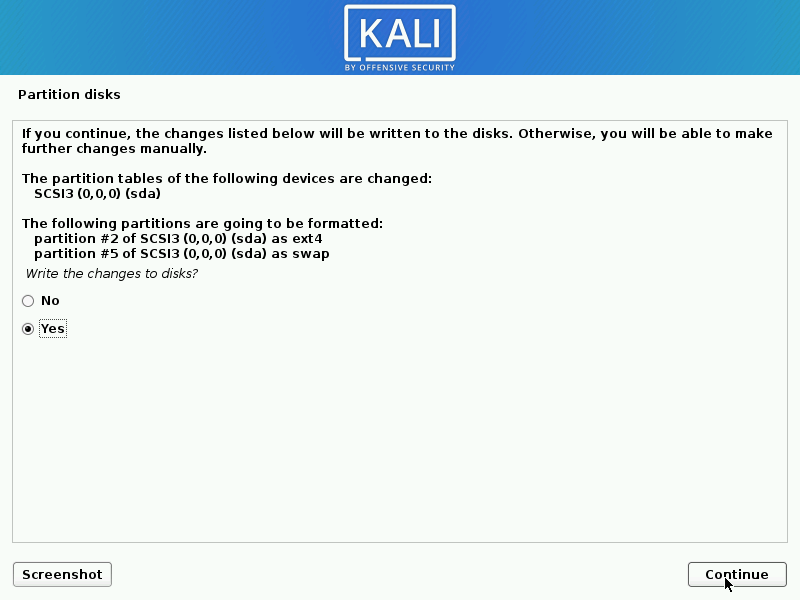
6. На последнем шаге нас просят подтвердить все изменения, которые необходимо внести на компьютере. Имейте в виду, что далее будет удалены данные на диске.
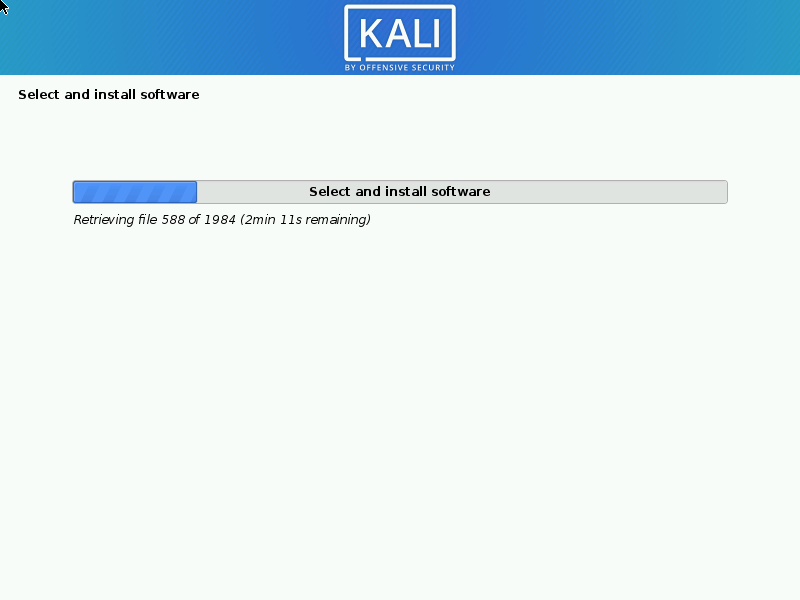
7. После подтверждения изменений раздела программа установки запустит процесс установки файлов. По завершении система предложит вам выбрать программное обеспечение, которое установит стандартную среду рабочего стола с необходимыми инструментами.
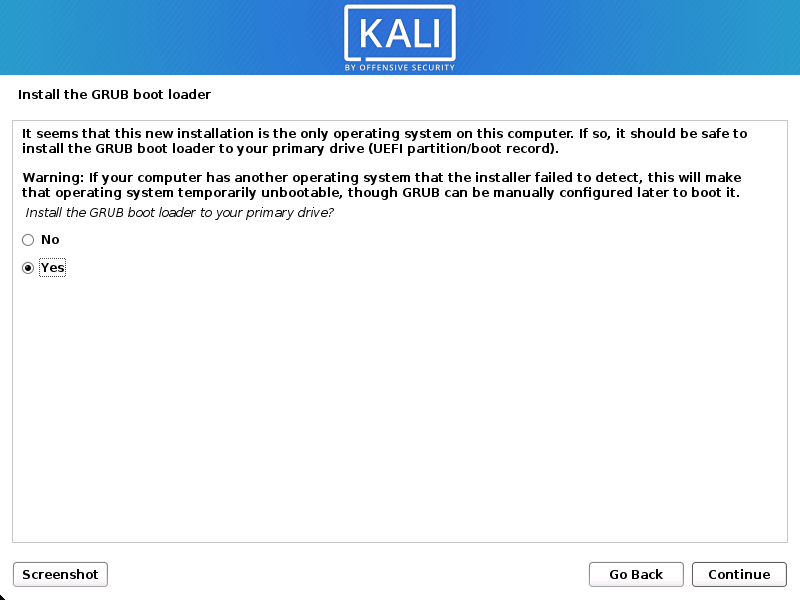
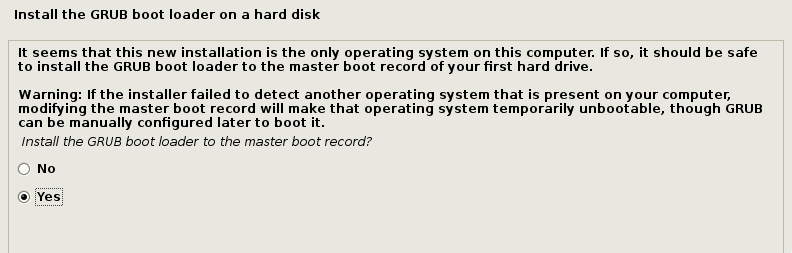
8. После завершения установки программного обеспечения система попросит установить grub. Опять же, в этом руководстве предполагается, что Kali будет единственной операционной системой на этом компьютере.
Выбор «Да» на этом экране позволит пользователю выбрать устройство для записи необходимой информации о загрузчике на жесткий диск для загрузки Kali.
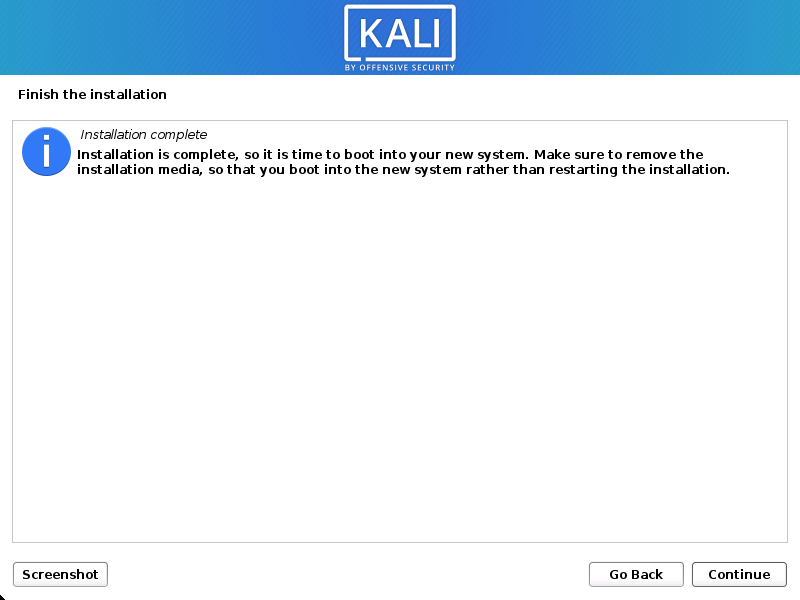
9. После того, как установщик завершит установку GRUB на диск, он предупредит пользователя о перезагрузке компьютера для загрузки Kali.
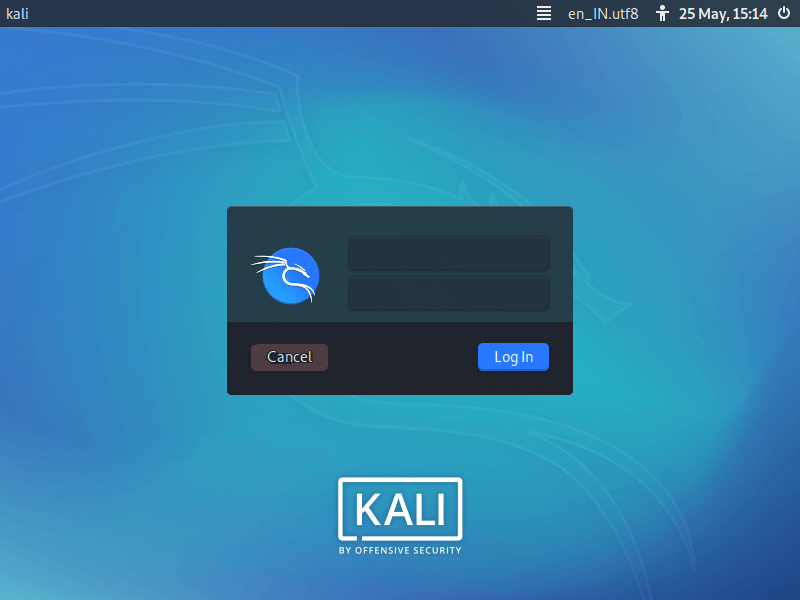
10. Так как это руководство установило среду рабочего стола XFCE, оно, скорее всего, загрузится в нее по умолчанию.
После загрузки войдите в систему как пользователь с паролем, созданным ранее в процессе установки.
На этом этапе Kali Linux успешно установлена и готова к использованию!