- How To Install IntelliJ IDEA on Linux Mint 21
- What are the features of IntelliJ IDEA?
- IntelliJ IDEA installation Prerequisites
- Install Java on Linux Mint 21
- Install IntelliJ IDEA on Linux Mint 21
- Install IntelliJ IDEA Plugins
- How to Install IntelliJ IDEA on Ubuntu and Other Linux Distributions
- Install IntelliJ IDEA on Ubuntu and other Linux distributions
- Method 1: Install IntelliJ IDEA from the Software Center [Recommended for Ubuntu Users]
- Method 2: Install IntelliJ IDEA in Linux using Snap packages [for all Linux distributions]
- Method 3: Install IntelliJ IDEA using Flatpak [for all Linux distributions]
- Method 4: Install IntelliJ using PPA (valid for Ubuntu-based Linux distros)
- What else?
- How to Install IntelliJ on Linux Mint 21
- Install IntelliJ on Linux Mint 21
- Conclusion
- About the author
- Syeda Wardah Batool
How To Install IntelliJ IDEA on Linux Mint 21
IntelliJ IDEA is a powerful Java development environment created by JetBrains and made available in two editions; the Ultimate Edition and the Community Edition. In this guide, we are going to look at how to install IntelliJ IDEA community edition on Linux Mint 21.
What are the features of IntelliJ IDEA?
- Supports major automation tools which include Gradle, Maven and Ant
- Supports version control systems such as SVN and Git
- Has built in terminal, inline debugger, code completion and database tools.
- Supports connecting to docker as well as application servers such as Tomcat.
IntelliJ IDEA installation Prerequisites
To be able to install IntelliJ IDEA on Linx Mint 21, ensure to have the following already in place:
- Java installed – Oracle JDK or OpenJDK
- Working Linux Mint Desktop machine
- A user with sudo privileges
- Internet connectivity for downloading and installing IntelliJ IDEA on Linux Mint 20
Install Java on Linux Mint 21
Update your system and install Java using the following commands.
sudo apt update sudo apt install -y default-jdk default-jreConfirm if Java has been installed properly by checking installed version


Visit JetBrains official website. Go to tools > IntelliJ IDEA > Download. You will be taken to a page where you choose Linux and click Download under Community Edition.
Install IntelliJ IDEA on Linux Mint 21
Once downloaded, change to the directory of your download to extract the file and begin installation. For me the archive file is in Downloads.
cd Downloads wget https://download-cdn.jetbrains.com/idea/ideaIC-2022.2.1.tar.gz tar xvf ideaIC-2022.2.1.tar.gzThe file will be extracted as shown.

Once fully extracted it will add another directory that contains Intellij IDEA installation file. Move this directory to /opt directory and go ahead to launch IntelliJ IDEA.
sudo mv idea-IC-222.3739.54 /opt/idea /opt/idea/bin/idea.sh
Since this is a new installation, we are going to go with do not import settings which is selected by default. Click Ok
Agree to privacy policy and click continue


In the next dialogue box choose your preferred UI theme and click Next: Desktop Entry
Agree to creating a desktop entry and also click the box for For all users if multiple users are going to be using the system. Click Next: Launcher Script

If you wish to open IntelliJ IDEA projects from the command line, check Create a script for opening files and projects from the command linecheckbox and click on Next: Default plugins


At this pint you can customize your IntelliJ environment, choosing the tools you would like to use.
Install IntelliJ IDEA Plugins

The next page shows featured plugins which you can choose to install. Click on Install button under the plugin that you choose to install. Once installation is complete, click on start using IntelliJ IDEA
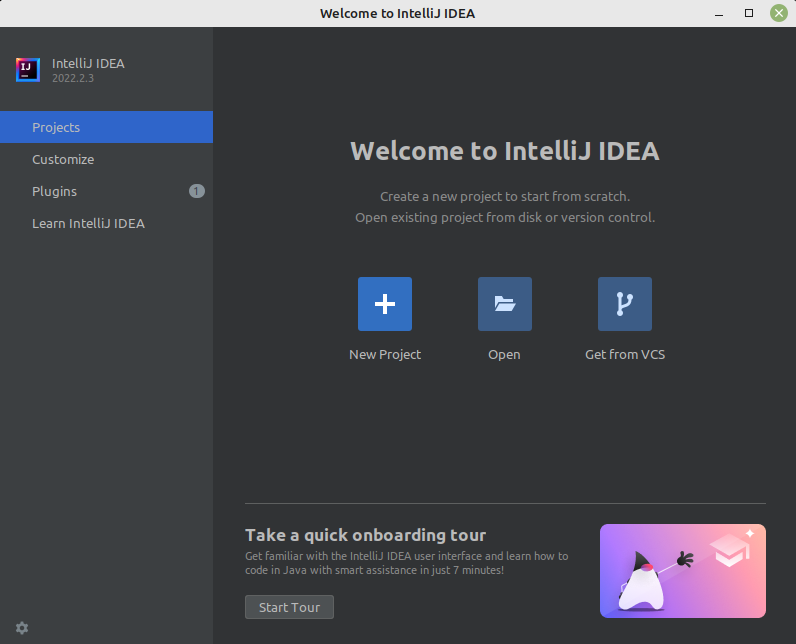
At this point, IntelliJ is ready to use. Click on Create New Project


Enjoy your Java coding!
This has been a step-by-step guide on how to install IntelliJ IDEA on Linux Mint 21. Below are more interesting guides for your developments.
How to Install IntelliJ IDEA on Ubuntu and Other Linux Distributions
This tutorial shows you various ways for installing IntelliJ IDEA on Ubuntu, Linux Mint, elementary OS, Linux Lite and other Linux distributions.
- IntelliJ IDEA Community Edition (Free)
- IntelliJ IDEA Ultimate Edition (Paid version with extra features)
- IntelliJ IDEA Educational (Ultimate Edition but free for students and faculty members)
I am not going to dive into the features of IntelliJ IDEA or which edition is better. You can read about the difference between the Community and the Ultimate Edition here.
I presume that since you have come to read this post, you are already aware of the advantages of using IntelliJ IDEA. In an earlier post, I showed you how to install PyCharm on Ubuntu. In this post, let me show you how to install IntelliJ IDEA on Ubuntu and other Linux distributions.
Install IntelliJ IDEA on Ubuntu and other Linux distributions

Before we go on installing IntelliJ on Ubuntu, please make sure that you have Java on your system. Read this post to see how to install Java on Ubuntu.
Once you have ensured that, let’s go on with IntelliJ installation. There are several ways of installing IntelliJ IDEA on Ubuntu and other Linux distributions.
- Install it from the Software Center [Recommended]
- Install it using Snap (valid for most Linux distributions)
- Install it using Flatpak (valid for most Linux distributions)
- Install it using unofficial PPA in Ubuntu-based distributions
Method 1: Install IntelliJ IDEA from the Software Center [Recommended for Ubuntu Users]
The good news is that all variants of IntelliJ IDEA are available in the Software Center. You have to search IntelliJ IDEA and it will show the possible results.

You have to select the preferred version and then click on the install button.

This would be the simplest method for Ubuntu users.
Method 2: Install IntelliJ IDEA in Linux using Snap packages [for all Linux distributions]
The apps in the Software Center are basically the Snap packages. Snap packages are supported by all major Linux distributions and you can easily install several applications through Snap.
First, make sure that you have Snap support on your Linux distribution. After that, you can use the following commands to install various IntelliJ versions.
sudo snap install intellij-idea-ultimate --classicFor the community version:
sudo snap install intellij-idea-community --classicFor the educational version:
sudo snap install intellij-idea-educational --classicMethod 3: Install IntelliJ IDEA using Flatpak [for all Linux distributions]
Like Snap, Flatpak is also a universal packaging system and is supported by a number of major Linux distributions.
Again, you should make sure that you have Flatpak installed on your system. And then, you should go and download the flatpakref installer files from the Flathub website.

Clicking on install will download the flatpakref files. You can then switch to your Download folder where the flatpakref files has been saved and use the following command to install it:
flatpak install com.jetbrains.IntelliJ-IDEA-Community.flatpakrefThe above described command is for the Community edition. You can use a similar approach for the Ultimate edition as well.

Method 4: Install IntelliJ using PPA (valid for Ubuntu-based Linux distros)
There is an unofficial PPA available that you can use to easily install IntelliJ in Linux Mint, elementary OS and other Ubuntu-based Linux distributions, including Ubuntu of course.
This PPA is developed and maintained by Marcel Kapfer and is available for Ubuntu 18.04, 16.04, 18.10, 19.04 and 16.04. So basically, it covers all the active Ubuntu versions and Linux distros based on them.
Open a terminal and use the commands below:
sudo add-apt-repository ppa:mmk2410/intellij-idea-communitysudo apt updatesudo apt install intellij-idea-communityOnly the Community version is available via this PPA, unfortunately. The PPA will download the IDE, so again installation time will depend on your internet connection.
To remove IntelliJ installed from the above PPA, use the command below:
sudo apt remove intellij-idea-community sudo add-apt-repository --remove ppa:mmk2410/intellij-idea-communityWhat else?
If you are old school, you can take the hard road and install ItelliJ IDEA from its source code. It’s limited to Community edition, though. You can browse the source code on its GitHub repository.
You can browse and download the source code on its GitHub repository.
The main part of installing an IDE comes into configuration but I am more of a C++ guy than Java so I leave that part to you 🙂
I hope this post helped you to install IntelliJ on Ubuntu and other Linux distributions. If you have questions, suggestions or a word of thanks, feel free to drop a comment below.
How to Install IntelliJ on Linux Mint 21
![]()
IntelliJ is a cross-platform and capable Integrated Development Environment designed to enhance developer productivity. It was developed by JetBrains and written in Java language to build software in different programming languages.
It comes up with many features like code completion, code debugging, and refactoring and gives suggestions to resolve issues if found. It integrates with many built-in tools, plugins, and databases such as MYSQL, Oracle, Microsoft SQL Server, and many others.
The IntelliJ idea has three different Editions; Community Edition, Ultimate Edition, and Edu Edition.
The Community Edition is open-source and free-of-cost edition used for the development of Android and JVM.
In the Ultimate Edition, users will get a free trial of 30 days after they pay for it. This Edition comes along with all the features of Community Edition including more supported features like servers, database integrations, profiling tools, and more languages.
The Edu Edition is also a free edition with many built-in tutorials for teachers and also offers them to make their own tutorials with the help of its features.
Install IntelliJ on Linux Mint 21
Getting started with the installation of IntelliJ on the Linux Mint 21 system, a few steps should be followed carefully:
Step 1: Refresh the system repository with the help of the mentioned command:
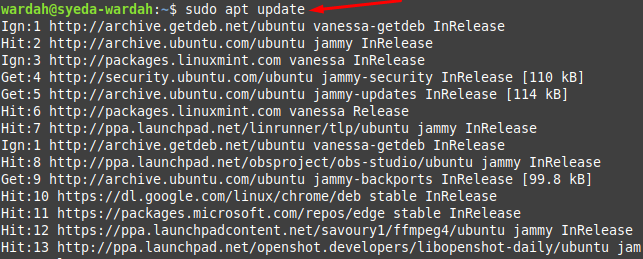
Step 2: Install JRE and JDK from the following command as they are prerequisite of IntelliJ tool:

Step 3: Check the Java version through the following command to ensure its successful installation on Linux Mint system:

Step 4: Visit the IntelliJ official site and download the Community Edition using the “Download” option since it’s a free and open-source environment:

Once you clicked on the “Download” option, you have to wait some time until the downloading is finished on your system.

Step 5: In the next step, change the current working directory and navigate it to the Downloads directory:

Step 6: Now, downloaded the IntelliJ file using the following command:
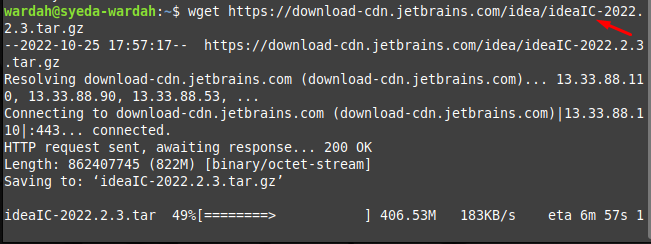
Step 7: Use the following command to extract the tar.jz file:
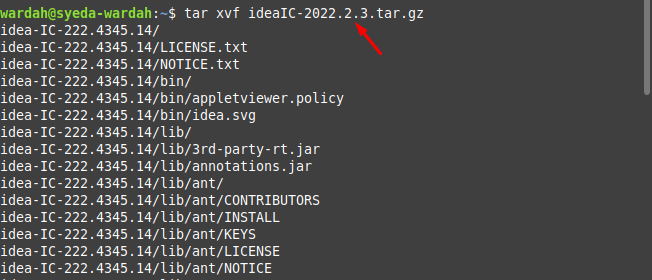
Move the extracted files to the opt/idea directory using the mv command:

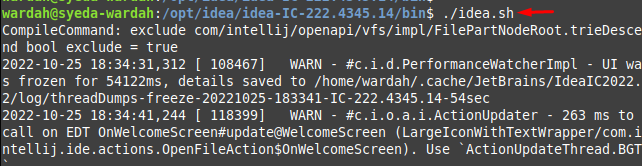
Visit the directory using the following command:

Then execute the following command to let IntelIJ run on Linux Mint 21 system:
Mark check to agree terms and conditions and hit Continue button:

Conclusion
IntelliJ is a cross-platform IDE that allows developers to create projects in different languages. It has several supportive features like version control systems (Git, SVN, and many others), databases (SQLite, MYSQL, MongoDB), plugins, and built-in tools. The above-mentioned guidelines present a detailed guide on how we can install IntelliJ on Linux Mint 21 system. It’s a step-by-step guide that needs to be followed carefully otherwise you will lose track.
About the author
Syeda Wardah Batool
I am a Software Engineer Graduate and Self Motivated Linux writer. I also love to read latest Linux books. Moreover, in my free time, i love to read books on Personal development.