- Установка kali linux загрузочная флешка
- What You’ll Need
- Kali Linux Live USB Install Procedure
- Creating a Bootable Kali USB Drive on Linux (DD)
- Creating a Bootable Kali USB Drive on Linux (DD with status)
- Creating a Bootable Kali USB Drive on Linux (Etcher)
- Яблочный Kali Linux
- Этап 1. Подготовка
- Этап 2. Настройка компонентов
- Подпункт 2.1 Подготовка USB накопителя (флешки)
- Подпункт 2.2 Создание образа диска
- Этап 3. Нарезка яблочного пирога
- Подпункт 3.1 Отрезаем пирог терминалом
- Подпункт 3.2 Отрезаем пирог с помощью дисковой утилиты или при установки Kali Linux
- Этап 4. Прививаем дракона к яблони
- Подпункт 4.1
- Подраздел 4.2
Установка kali linux загрузочная флешка
Our favourite way, and the fastest method, for getting up and running with Kali Linux is to run it “live” from a USB drive. This method has several advantages:
- It’s non-destructive — it makes no changes to the host system’s hard drive or installed OS, and to go back to normal operations, you simply remove the “Kali Live” USB drive and restart the system.
- It’s portable — you can carry Kali Linux in your pocket and have it running in minutes on an available system
- It’s customizable — you can roll your own custom Kali Linux ISO image and put it onto a USB drive using the same procedures
- It’s potentially persistent — with a bit of extra effort, you can configure your Kali Linux “live” USB drive to have persistent storage, so the data you collect is saved across reboots
In order to do this, we first need to create a bootable USB drive which has been set up from an ISO image of Kali Linux.
What You’ll Need
- A verified copy of the appropriate ISO image of the latest Kali build image for the system you’ll be running it on: see the details on downloading official Kali Linux images.
- If you’re running under Linux, you can use the dd command, which is pre-installed, or use Etcher.
- A USB thumb drive, 4GB or larger. (Systems with a direct SD card slot can use an SD card with similar capacity. The procedure is identical.)
Kali Linux Live USB Install Procedure
The specifics of this procedure will vary depending on whether you’re doing it on a Windows, Linux, or macOS/OS X system.
Creating a Bootable Kali USB Drive on Linux (DD)
Creating a bootable Kali Linux USB drive in a Linux environment is easy. Once you’ve downloaded and verified your Kali ISO file, you can use the dd command to copy it over to your USB drive using the following procedure. Note that you’ll need to be running as root, or to execute the dd command with sudo. The following example assumes a Linux Mint 17.1 desktop — depending on the distro you’re using, a few specifics may vary slightly, but the general idea should be very similar. If you would prefer to use Etcher, then follow the same directions as a Windows user. Note that the USB drive will have a path similar to /dev/sdb.
WARNING: Although the process of imaging Kali Linux onto a USB drive is very easy, you can just as easily overwrite a disk drive you didn’t intend to with dd if you do not understand what you are doing, or if you specify an incorrect output path. Double-check what you’re doing before you do it, it’ll be too late afterwards.
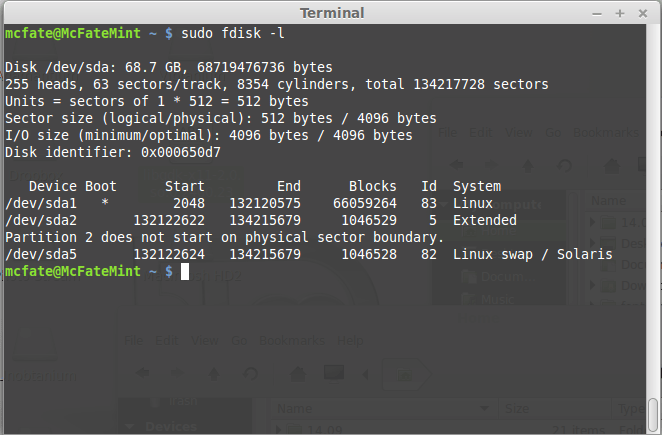
- First, you’ll need to identify the device path to use to write the image to your USB drive. Without the USB drive inserted into a port, execute the command sudo fdisk -l at a command prompt in a terminal window (if you don’t use elevated privileges with fdisk, you won’t get any output). You’ll get output that will look something (not exactly) like this, showing a single drive — “/dev/sda” — containing three partitions (/dev/sda1, /dev/sda2, and /dev/sda5):
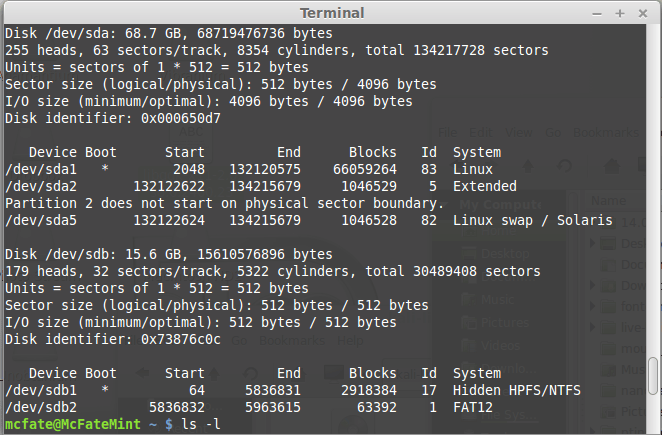
2. Now, plug your USB drive into an available USB port on your system, and run the same command, “sudo fdisk -l” a second time. Now, the output will look something (again, not exactly) like this, showing an additional device which wasn’t there previously, in this example “/dev/sdb”, a 16GB USB drive:
3. Proceed to (carefully!) image the Kali ISO file on the USB device. The example command below assumes that the ISO image you’re writing is named “kali-linux-2023.2-live-amd64.iso” and is in your current working directory. The blocksize parameter can be increased, and while it may speed up the operation of the dd command, it can occasionally produce unbootable USB drives, depending on your system and a lot of different factors. The recommended value, “bs=4M”, is conservative and reliable. Additionally, the parameter “conv=fsync” makes sure that the data is physically written to the USB drives before the commands returns:
[email protected]:~$ dd if=kali-linux-2023.2-live-amd64.iso of=/dev/sdb conv=fsync bs=4M Imaging the USB drive can take a good amount of time, over ten minutes or more is not unusual, as the sample output below shows. Be patient!
The dd command provides no feedback until it’s completed, but if your drive has an access indicator, you’ll probably see it flickering from time to time. The time to dd the image across will depend on the speed of the system used, USB drive itself, and USB port it’s inserted into. Once dd has finished imaging the drive, it will output something that looks like this:
Creating a Bootable Kali USB Drive on Linux (DD with status)
Alternatively there are a few other options available for imaging.
The first option is dd with a status indicator. This is only available on newer systems however. To do this, we simply add the status flag:
[email protected]:~$ dd if=kali-linux-2023.2-live-amd64.iso of=/dev/sdb conv=fsync bs=4M status=progress Another option is to use pv . We can also use the size flag here to get an approximate timer. Change the size depending on the image being used:
[email protected]:~$ dd if=kali-linux-2023.2-live-amd64.iso | pv -s 2.8G | dd of=/dev/sdb conv=fsync bs=4M Creating a Bootable Kali USB Drive on Linux (Etcher)
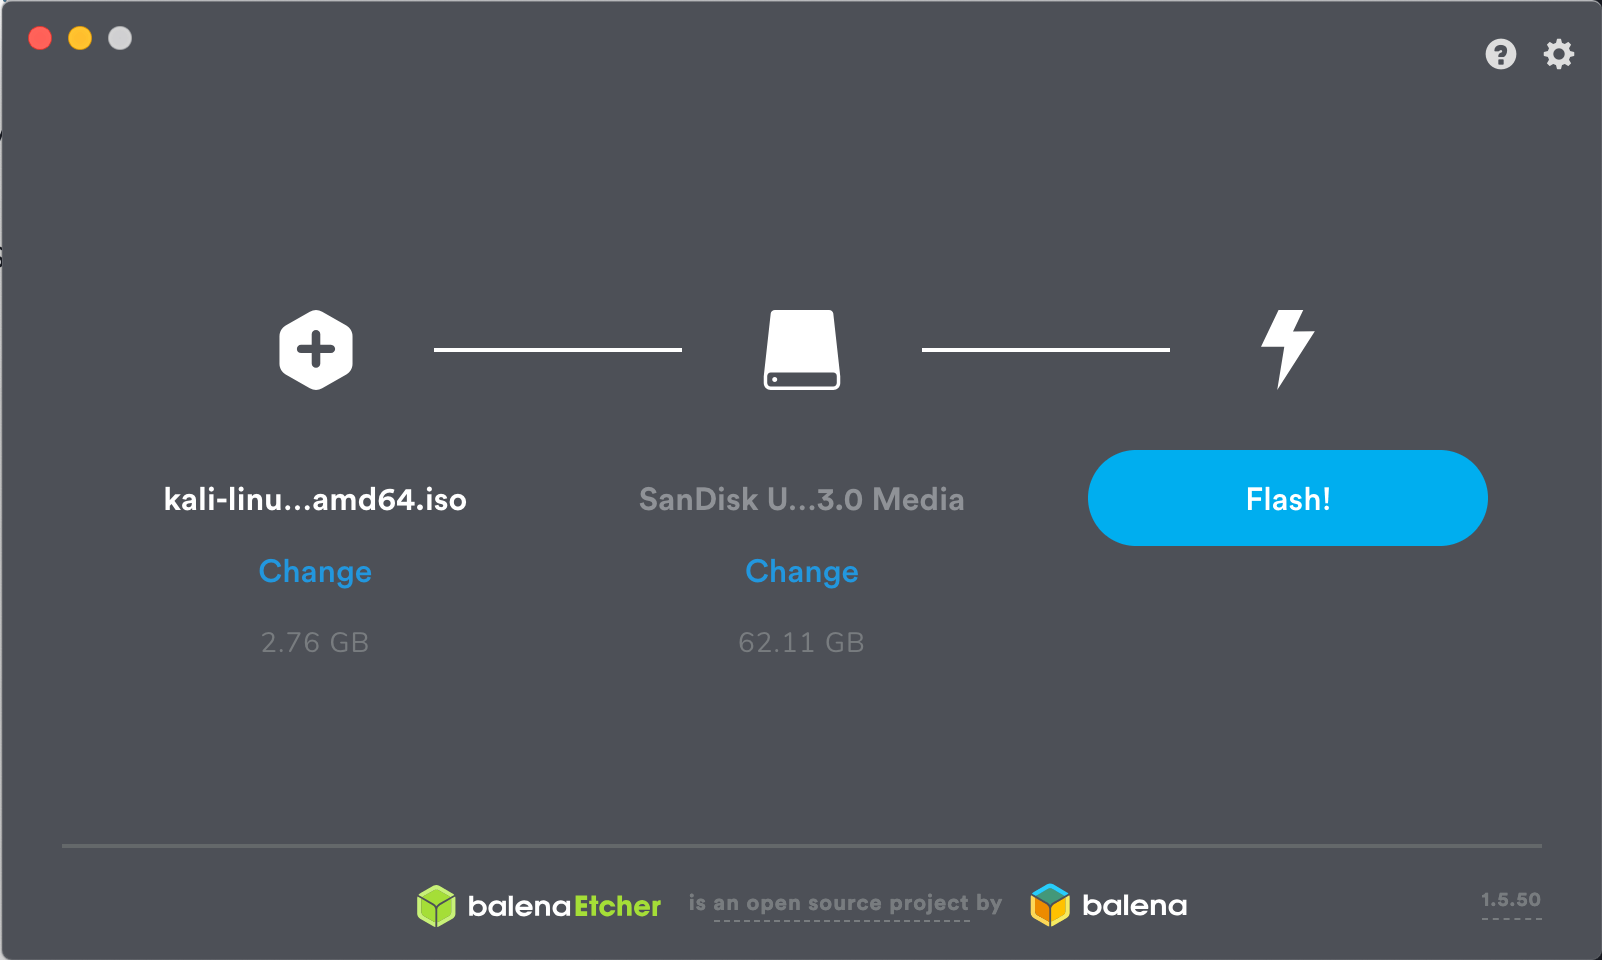
- Download and run Etcher.
- Choose the Kali Linux ISO file to be imaged with “select image” and verify that the USB drive to be overwritten is the correct one. Click the “Flash!” button once ready.
3. Once Etcher alerts you that the image has been flashed, you can safely remove the USB drive.
You can now boot into a Kali Live / Installer environment using the USB device.
Updated on: 2023-May-30
Author: g0tmi1k
Яблочный Kali Linux
Данная статья является моей первой статьей, ориентирована на новичков-любителей, кто любит текстовые инструкции, не судите строго.
Приветствую всех! В данной статье я хотел поделиться с Вами своим опытом по установке операционной системы Kali Linux на MacBook с процессором Intel в качестве второй ОС. В использовании UNIX-подобных операционных систем я новичок, для обучения основам и исходя из специфики рабочих задач я выбрал пару подходящих для себя дистрибутивов, один из которых Kali Linux. Однако в моем арсенале имеется техника только производства Apple, один экземпляр из моего яблочного стафа — это старенький MacBook 12, именно он и станет жертвой для операции, по приданию дракону яблочного вкуса.

Этап 1. Подготовка
Вначале важно подготовить все необходимое оборудование и благоприятную обстановку для работы. Нам потребуется:
- MacBook, iMac, MacMini (исключительно на процессорах Intel)
- USB накопитель (флешка) больше или равно >= 4 Gb
- Внешняя клавиатура и мышь (исключительно проводные)*
- Подключение к сети интернет по Ethernet или Wi Fi
- Источник питания для ПК (ноутбука)
- Свободное время около 2-х часов
Этап 2. Настройка компонентов
Подпункт 2.1 Подготовка USB накопителя (флешки)
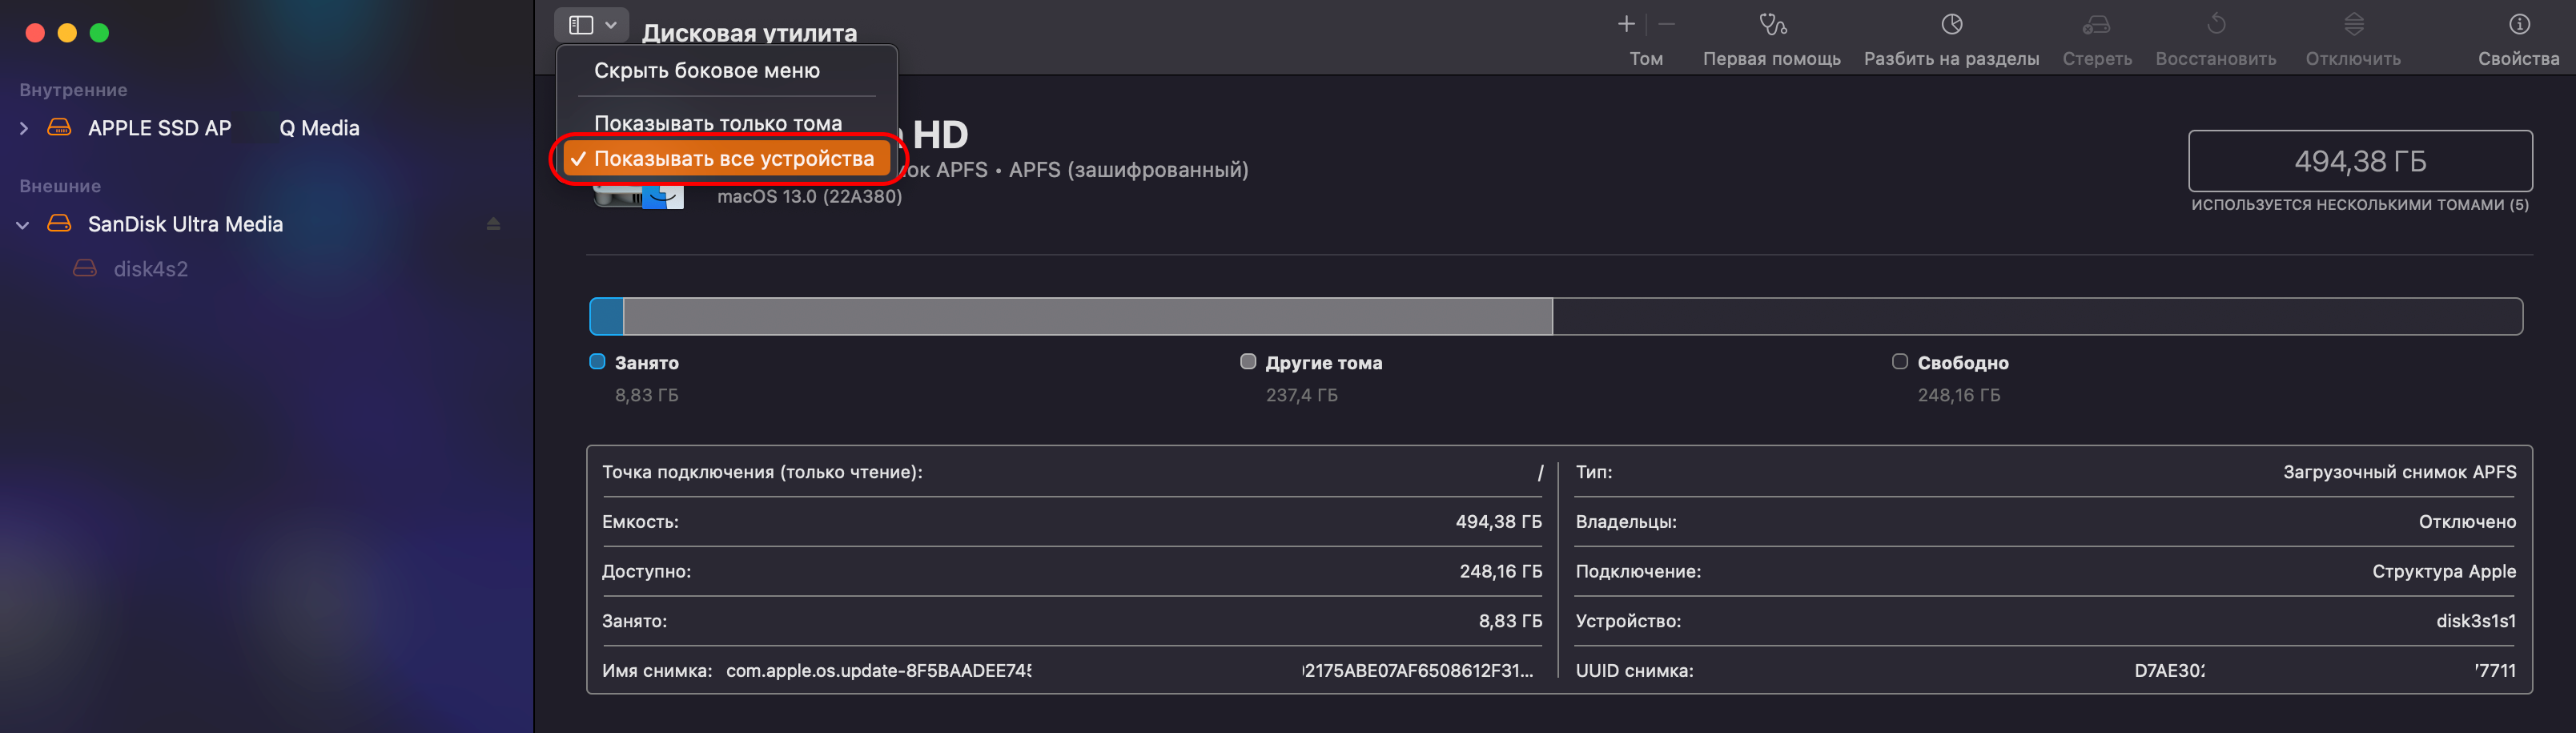
Вначале заряжаем MacBook на 100% или подключаем к источнику питания, после чего подключаем к нему наш USB накопитель и открываем дисковую утилиту. В дисковой утилите выбираем пункт ПОКАЗАТЬ ВСЕ УСТРОЙСТВА.
Выбираем из списка внешних устройств наш USB накопитель и нажимаем кнопку сверху СТЕРЕТЬ, после чего в открывшемся уведомлении устанавливаем параметры: ИМЯ (по желанию), ФОРМАТ и СХЕМА как указано на рис. № 3 и подтверждаем, после чего можно либо свернуть либо закрыть дисковую утилиту.

Подпункт 2.2 Создание образа диска
После форматирования (стирания всех данных) USB накопителя (флешки) создаем образ диска. Для этого сначала открываем официальный сайт Kali Linux и скачиваем нужный образ. Тут два варианта под нашу архитектуру процессора X86_64 (amd64) и оба рабочие для нашего случая (INSTALLER IMAGES или LIVE BOOT), разработчики Kali рекомендуют второй вариант. Однако я выберу первый вариант, так как образ этого установщика является автономным и более производительным нежели LIVE BOOT, кроме того я буду делить диск на разделы из сеанса Mac OS.

Теперь пока скачивается наш файл Kali, заходим на сайт Balena Etcher (ПО для записи образов диска, аналог Rufus), скачиваем и устанавливаем данное ПО. После скачивания образа Kali Linux запускаем Balena Etcher и записываем образ Kali на наш USB накопитель (флешку) как показано на рис. № 5.

Этап 3. Нарезка яблочного пирога
Подпункт 3.1 Отрезаем пирог терминалом
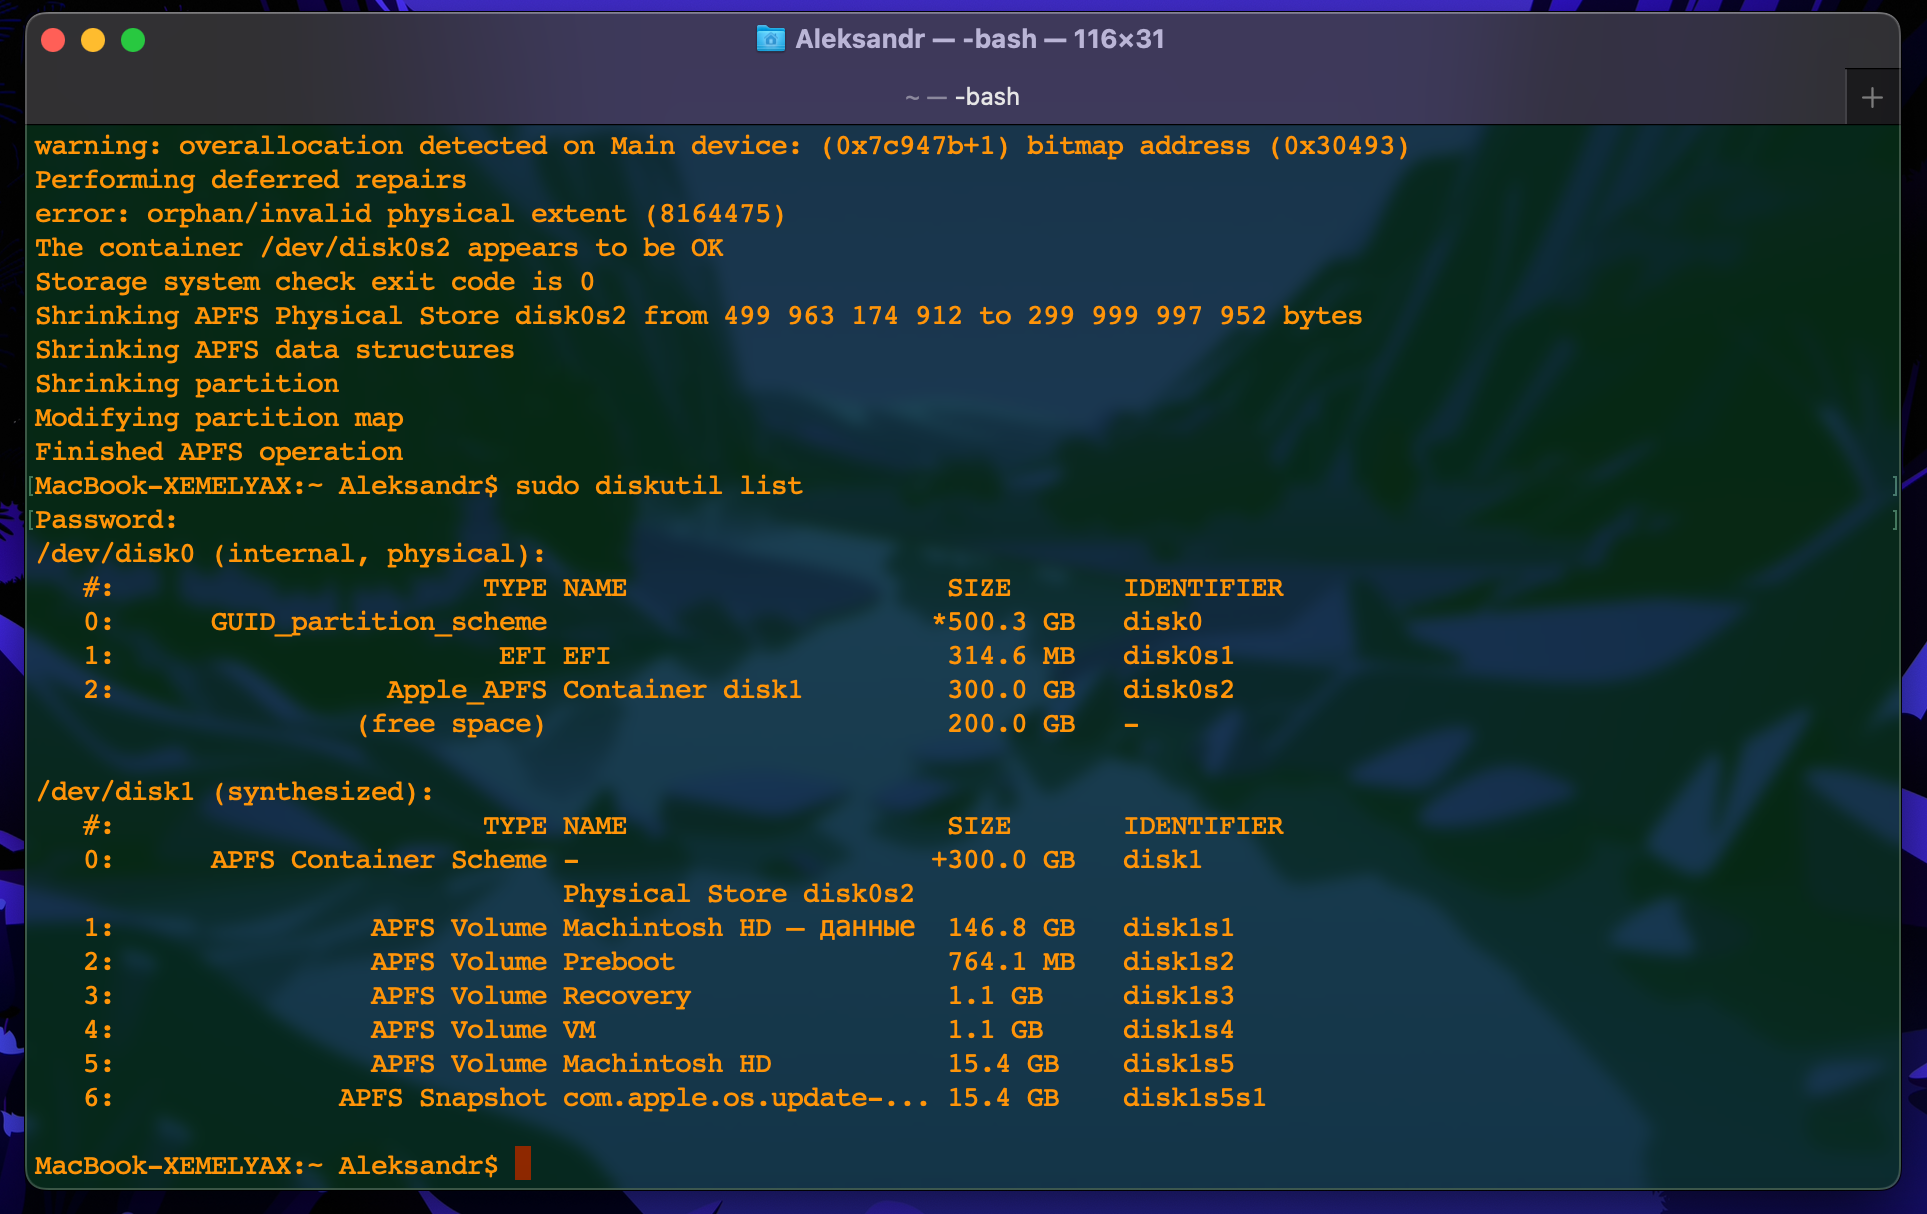
Перед тем как начать процесс установки Kali Linux на наш MacBook, подготовим наш жесткий диск. Открываем терминал и вводим команду для просмотра разделов на нашем жестком диске:

Затем выделяем под Kali Linux место не менее 40 Gb, я выделил 200 Gb (лучше не жалеть места, особенно если будешь часто работать на Kali). Введем команду которой скажем нашему яблоку сколько оставим ему, а остальное заберем соответственно. (Не перепутайте у всех разделы могут называться по разному также размеры каждый устанавливает под себя)
sudo diskutil apfs resizeContainer disk0s2 300g
После окончания процесса нарезки необходимо проверить изменения введя вновь команду
Как мы можем заметить, на диске появилось свободное пространство в размере 200 Gb под нашу Kali
Подпункт 3.2 Отрезаем пирог с помощью дисковой утилиты или при установки Kali Linux
Способы разметки диска с помощью дисковой утилиты в сеансе Mac OS я не использовал как и не использовал способы разметки диска с помощью GParted во время загрузки с USB накопителя в сеансе Kali Live (LIVE BOOT). Хотя эти способы также хороши и могут быть Вами использованы для рассматриваемой установки.
Этап 4. Прививаем дракона к яблони
Подпункт 4.1
Выключаем (перезагружаем) Mac машину (в нашем случае MacBook) и зажимаем кнопку option (alt) и держим до тех пор пока не прозвучит звук включения и не появится логотип Apple. На экране появиться Ваш жесткий диск Apple и загрузочный том EFI (USB накопитель), который и нужно выбрать. Выбираем и загружаемся с него.

Выбираем Graphical install и начинаем процедуру установки согласно инструкции Kali Linux, там пошаговая инструкция в которой нет ничего сложного, однако трекпад и клавиатура на ноутбуках могут не работать, поэтому советую подключить внешние клавиатуру и мышь, кроме того при установки вам надо выбрать вариант подключения к сети, тут на выбор можете выбрать Ethernet, если есть адаптер, вход у ноутбука или же выбрать Wi Fi, я выбрал вафлю.

Подраздел 4.2
Во время установки дойдя до момента разделения диска выбираем Управляемый — использовать наибольшее свободное пространство, это очень ВАЖНО, после чего разметку раздела можно сделать по умолчанию для новичков (рекомендую), однако можно создать 3 раздела для наиболее оптимальной работы системы, как именно разметить диск я забыл сделать скрин экрана поэтому предлагаю смотреть таблицу ниже рис. № 11