- Kali http server setup
- How to install Apache, NGINX, or Python 3 on Kali Linux
- Configure Python 3 web server in Kali Linux step by step instructions
- Configure Apache web server in Kali Linux step by step instructions
- Configure NGINX web server in Kali Linux step by step instructions
- Closing Thoughts
- Related Linux Tutorials:
- linux #software #kali_Linux
- Install LAMP Stack on System KALI Linux Version 2022.2
- Authorize for setup
- Disallow web access to directories that don’t need it
- Как установить LAMP на Кали Линукс
- Установить LAMP на Кали Линукс
- LAMP на Кали Линукс: проверяем работоспособность
Kali http server setup
There are multiple ways to set up an HTTP web server in Kali Linux. Apache, NGINX, and Python are a few of the ways this can be accomplished.
Since you are looking to set up a web server on Kali, it might be safe to assume that you are trying to spoof some other website, or dupe users with some sort of phishing ploy. In that case, all three web server types have their pros and cons, with Python being the quickest one to get up and running.
Whatever the purpose of your web server may be, nefarious or not, you will learn how to install and configure a simple HTTP server using either Apache, NGINX, or Python in this tutorial. Follow through our step by step instructions below to see how it’s done.
In this tutorial you will learn:
- How to install Python 3 on Kali Linux
- How to install Apache and NGINX on Kali Linux
- How to host a web server using Python 3
- How to host a web server using Apache and NGINX

| Category | Requirements, Conventions or Software Version Used |
|---|---|
| System | Kali Linux |
| Software | Python 3, Apache, NGINX |
| Other | Privileged access to your Linux system as root or via the sudo command. |
| Conventions | # – requires given linux commands to be executed with root privileges either directly as a root user or by use of sudo command $ – requires given linux commands to be executed as a regular non-privileged user |
How to install Apache, NGINX, or Python 3 on Kali Linux
The only prerequisite to follow this guide is that you have either Apache, NGINX, or Python 3 installed on your system, depending on which type of web server you want to host. Use the instructions below to install one of the software packages on your Linux system.
You can use the appropriate command below to install Python 3, Apache, or NGINX with your system’s package manager.
To install Python 3 Kali Linux:
To install Apache on Kali Linux:
To install NGINX on Kali Linux:
Configure Python 3 web server in Kali Linux step by step instructions
- To start a web server using Python 3, use the following command. With this syntax, our web server will be running on IP address 127.0.0.1 and port 9000 . You can change this to anything you want, or omit the options entirely to have Python be hosted on the default IP and port.
$ python3 -m http.server --bind 127.0.0.1 9000
$ echo Python 3 on Kali Linux > ~/index.html
Configure Apache web server in Kali Linux step by step instructions
- Once Apache installed, you can use systemd’s systemctl commands to control the service.Enable or disable Apache from starting at system boot:
$ sudo systemctl enable apache2 OR $ sudo systemctl disable apache2
$ sudo systemctl start apache2 OR $ sudo systemctl stop apache2
$ echo Apache on Kali Linux > index.html $ sudo mv index.html /var/www/html
Configure NGINX web server in Kali Linux step by step instructions
- After NGINX is installed, you can use systemd’s systemctl commands to control the service.Enable or disable NGINX from starting at system boot:
$ sudo systemctl enable nginx OR $ sudo systemctl disable nginx
$ sudo systemctl start nginx OR $ sudo systemctl stop nginx
$ echo NGINX on Kali Linux > index.html $ sudo mv index.html /var/www/html
Closing Thoughts
In this tutorial, we saw how to host an HTTP web server using Python 3, Apache, and NGINX on a Kali Linux system. This set of instructions will work for whatever purpose you have, especially to setup a fake website to try and trick users to login to. Python web servers are not as robust as full stack web servers like Apache or NGINX but, they are good for simple purposes and getting a web server up quickly.
Related Linux Tutorials:
linux #software #kali_Linux
Install LAMP Stack on System KALI Linux Version 2022.2
- Linux operating system.
- Apache HTTP server.
- MySQL relational database management system.
- PHP programming language.
- PhpMyAdmin
** Please Focus Step by step **
- Update System.
sudo apt update && sudo apt full upgrade -y - install php , mysql server ,apache2
sudo apt -y install wget php php-cgi php-mysqli php-pear php-mbstring libapache2-mod-php php-common php-phpseclib php-mysql - install phpMyAdmin last version
wget https://www.phpmyadmin.net/downloads/phpMyAdmin-latest-all-languages.tar.gz
tar xvf phpMyAdmin-5.0.4-all-languages.tar.gz
** now add commands configuration files **
- sudo mv phpMyAdmin-*/ /usr/share/phpmyadmin
- sudo mkdir -p /var/lib/phpmyadmin/tmp
- sudo chown -R www-data:www-data /var/lib/phpmyadmin
- sudo mkdir /etc/phpmyadmin/
- sudo cp /usr/share/phpmyadmin/config.sample.inc.php /usr/share/phpmyadmin/config.inc.php
- sudo nano /usr/share/phpmyadmin/config.inc.php
- $cfg[‘blowfish_secret’] = ‘H2TxcGXxflSd8JwrXVlh6KW4s2rER63i’;
- $cfg[‘TempDir’] = ‘/var/lib/phpmyadmin/tmp’;
- sudo nano /etc/apache2/conf-enabled/phpmyadmin.conf
- add commands in file
Alias /phpmyadmin /usr/share/phpmyadmin
Options SymLinksIfOwnerMatch
DirectoryIndex index.php
AddType application/x-httpd-php .php
php_value include_path .
php_admin_value upload_tmp_dir /var/lib/phpmyadmin/tmp
php_admin_value open_basedir /usr/share/phpmyadmin/:/etc/phpmyadmin/:/var/lib/phpmyadmin/:/usr/share/php/php-gettext/:/usr/share/php/php-php-gettext/:/usr/share/javascript/:/usr/share/php/tcpdf/:/usr/share/doc/phpmyadmin/:/usr/share/php/phpseclib/
php_admin_value mbstring.func_overload 0
Authorize for setup
AuthType Basic
AuthName «phpMyAdmin Setup»
AuthUserFile /etc/phpmyadmin/htpasswd.setup
Disallow web access to directories that don’t need it
- sudo systemctl restart apache2
- systemctl status apache2
- sudo mysql -u root
- systemctl restart mysql
- CREATE USER ‘admin’@’%’ IDENTIFIED BY ‘admin4321’;
- GRANT ALL PRIVILEGES ON . TO ‘admin’@’%’ WITH GRANT OPTION;
- CREATE DATABASE database_name ;
- EXIT;
- now login in PhpMyAdmin :
http://localhost/phpmyadmin/index.php
Как установить LAMP на Кали Линукс
Установить LAMP на Кали Линукс или подготовка к установке локального сайта.
Приветствую всех на страницах блога Компьютер76, и сейчас разберём установку Linux Apache MySQL Php (LAMP) на ОС Кали Линукс 2016.2. Так или иначе в сборке Кали достаточно инструментов для тестирования на проникновение, прекрасно работающих против неудачно настроенных веб-приложений, просмотренных администраторами дыр в безопасности удалённых хостов, использующих специальные веб-движки. Включая давно разработанный и обновляемый инструмент против популярнейшего WordPress, на котором «бегает» и блог, страницу которого вы сейчас читаете.
Ну и грех для тестера было бы не «пощупать» на прочность пару блогов с явно присутствующими уязвимостями, предварительно подготовившись к ним в уединённой обстановке. А перед тем, как вы установите на свою Кали локальный уязвимый сайт, придётся подготовить под него почву.
СРАЗУ . Вариантов для этого много. Так, можно было бы с лёгкостью установить целый пакет LAMP с автоматическими настройками, при всём том запуская его в приятном и доступном интерфейсе с рисунками и кнопочками. Да, я говорю о XAMPP. Я рассмотрю и его установку, причём настройки для XAMPP и отсюда конфликтовать не будут. Однако нас, современных пользователей Кали, уже подстерегает одно жирное НО: если на борту Кали 32-битной версии, при установке программ с графическим интерфейсом вас будет ждать разочарование — современных версий существует всё меньше. С XAMPP та же история. Так что владельцам Кали 32 bit придётся рассчитывать на встроенные средства.
Установить LAMP на Кали Линукс
Вся прелесть Кали (и тем более начиная с Кали версий 2016.*) состоит в том, что для LAMP здесь уже почти всё есть. Нам остаётся только проверить настройки и убедиться в работоспособности, подготовив почту для будущего локального сайта.
Как всегда, начинаем с проверки обновлений (это правило каждого сеанса):
apt-get update && apt-get upgrade
Apache и PHP у вас уже установлены. Проверьте версии:

Сервер MySQL в Кали тоже установлен со всеми необходимыми пакетами. Если нет, то команда:
apt-get install mysql-server
вас выручит. Давайте запустим сервер mysql. Сначала службу:
В поле Enter password: просто нажмите клавишу ввода (пароль пока пуст):
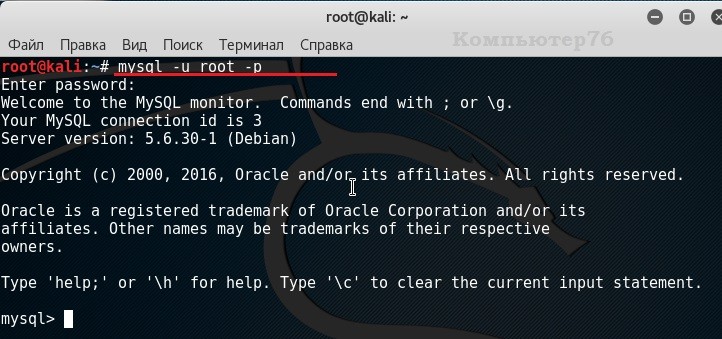
и в поле команд введите status:

Чтобы выйти, наберите quit или exit.
LAMP на Кали Линукс: проверяем работоспособность
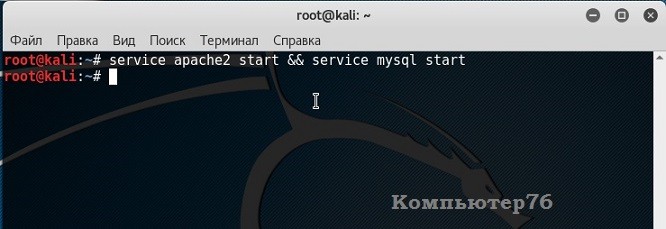
Запускаем обе службы совместной командой:
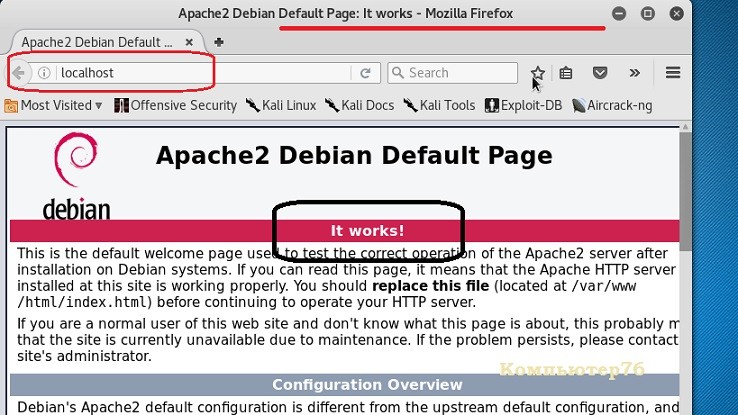
Откроем браузер и проверим состояние Apache2. Наберите в адресной строке localhost. Вы должны увидеть окно настроек:
Тестируем PHP. Свернём браузер и прямо из терминала отправимся в директорию (да, теперь тут появилась и папка html):
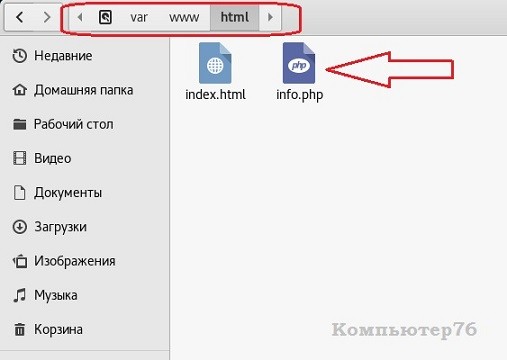
Теперь в этой папочке нам нужно создать файл с традиционным наименованием info.php
Или, если вам так неудобно работать, можете открыть любой текстовый редактор, например :
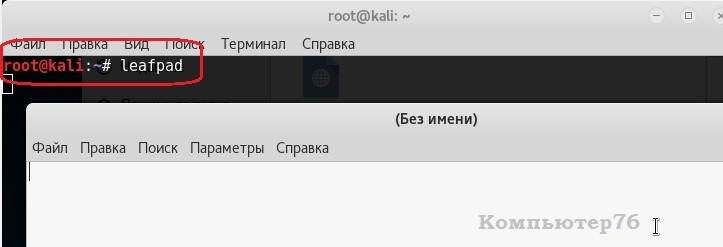
и через меню Файл сохранить его с именем info.php, вручную отправить его в директорию по пути /var/www/html. Но в любом случае в поле этого файла должен быть вот такой код:
Копируйте внимательно: любой пропущенный или лишний символ будет отображать пустую или чистую страницу файла информации PHP.
Итак, файл в папке html появился нужный файл с известным вам содержимым:
А теперь снова разверните на Рабочий стол окно браузера и дополните адресную строку, добавив путь к только что созданному файлу. Вот так:
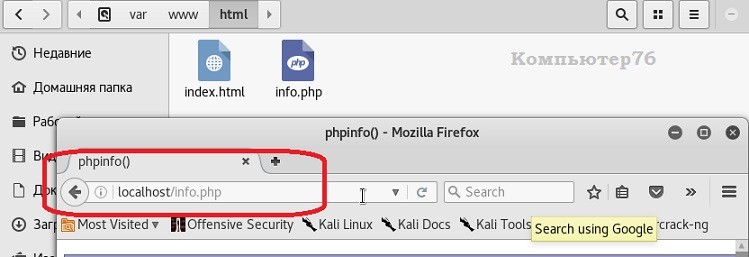
Цель всех этих настроек — вот эта страница:

Посмотрели? Я её сразу удалил из соображений безопасности:
На вопрос о подтверждении удаления я ответил утвердительно. Всё, Кали готова к приёму сайта, на котором мы и будем тренироваться.