- Linux Mint Forums
- Installing Linux Mint/Ubuntu desktop edition with full-disk encryption and LVM
- Install Linux Mint 21.1 with custom LVM on LUKS
- Let’s go!
- My setup
- 1. During the install: Installation type
- 2. After the install: Continue Testing
- 3. Switch to root
- 4. View layout
- 5. Resize root
- 6. Create home
- Option 1
- Option 2
- 7. Format home
- 8. Move home
- 9. Fstab
- 10. Finish
Linux Mint Forums
The following describes the installation of Linux Mint 13, 14 or 16 using LVM (logical volume manager) for / and /home. Linux Mint 16 has LVM capability in the installer, but unfortunately with some limitations. If you are familiar with LVM, you can skip directly to the how-to:
For those who want to use UEFI boot (EFI), have a look here: http://forums.linuxmint.com/viewtopic.p . 20#p608123.
The how-to was inspired by this how-to http://forums.linuxmint.com/viewtopic.php?f=197&t=71159 and uses some of it’s steps.
The following how-to should work on most PCs or laptops without issues. It should also work with different Linux Mint releases and desktops — Gnome, KDE, or whatever. I’ve done this installation at least 10-15 times, including some modified installation procedure for UEFI. UEFI can be a pain in the neck, so unless you really need it, choose the MBR method below.
If you need encryption as well, check the above mentioned how-to or use the new Linux Mint 16 that comes with an encryption option.
You can skip the introduction and follow the installation part below if you are familiar with LVM!
Why use LVM?
LVM stands for Logical Volume Manager. LVM virtualizes your hard disk drives. Ever ran out of hard disk space? If you did you probably know what that means: Installing a new (usually larger) drive and copying your stuff to the new drive, or creating new partitions to hold the data. In most cases people want to keep their data organized into folders. If the disk is full your folder can’t store any more files. Unless you have some spare space on your disk and can resize the partitions, you’re forced to add a new drive and copy your folder to that drive. And what if that folder or drive fills up?
Well, you could put your data on RAID using several disks. But eventually these will fill up and then you need to add additional storage. Of course you can expand your RAID and add a new disk, but that procedure may be challenging. If you need to backup all your data, you may need lots of disk space to do that. My old PC holds somewhere around 5-6TB of data on 5 hard disks, plus external storage for backup of the critical data.
What does LVM do?
LVM virtualizes disks. First you create a PV or Physical Volume. This is the hard drive or partition layer. Then you create a VG or Volume Group which is the logical layer for one or multiple drives or partitions. Then you create the LV or Logical Volume, which is the equivalent of a partition. The beautiful thing about LVM is that you can expand VGs and LVs over several drives or partitions. Sounds difficult? It isn’t. Let’s see an example:
Disk 1 has 3 partitions: /dev/sda1 for /boot, /dev/sda2 for swap, and /dev/sda3 formatted to LVM to hold / and /home. Let’s say the disk has 60GB (like a small modern SSD). If your /home folder/partition runs out of disk space, you just add another disk, create a PV (physical volume), add it to the same VG (volume group) as the one that contains the /home partition, and expand the LV (logical volume) to include that disk. Let’s say the new disk has a size of 2TB. Now you have a LV mounted as /home with a size of 2TB plus the space you reserved on your original LV. Once that fills up, you add another disk, for example a 3TB disk. Now you have the original disk space you reserved for /home on /dev/sda3 plus the 2TB drive plus the 3TB drive, so somewhere around 5TB+ of disk space on a single logical volume (like a single partition). Not enough, just add disks.
You can even stripe disks (LVs) to get similar performance improvements to RAID. And you can use RAID in combination with LVs.
The beautiful thing about LVM is that you don’t need to worry about disk size or type. Hard drive technology and size develops very quickly. My old PC from 5 years ago had 2 250GB drives. Today it holds 5-6TB of data, unfortunately without LVM. I’ll move the drives the to the new PC, copy the data onto the new LVM formatted disks, and format these «old» drives to LVM. At the end I will have 10TB on 6 drives. My PC can hold 8 internal drives. If the old drives are too small, I’ll copy their data onto external media and copy the data back onto larger LVM drives.
By the way, this does not only pertain to data drives. If your / partition runs out of space, just add a partition on the same or other drive to the LV, or increase the LV to include some empty space of the drive or other drives. Remember, your drive space is virtual and you add as much storage space as your disks or computer allow.
Last not least LVM is the preferred storage option for Xen. With Xen it provides increased read/write speed compared to normal ext4 or other formats.
With LVM you want to assign a reasonable but conservative size to each LV. Why? Because if you leave spare room you can always increase a volume that fills up. For reference, a typical LM13/LM14 installation will use somewhere around 6GB on the / volume (given that you created a separate /home volume).
Partitioning
I suggest 15GB for / unless your are tight on disk space. /boot should be somewhere around 512MB to 1GB, depending on how many kernels you like to install. The size of /home depends on your data structure and needs — it can be anything between ~10GB to several Terabyte.
Increasing the size of logical volumes
Increasing the size of a logical volume is quite easy. Here are the steps involved:
a) Add a physical volume (disk or partition) to the volume group. This is only necessary if your VG runs out of disk space.
b) Extend the logical volume using the «lvextend» command.
will increase lv1 in volume group vg1 by 50GB. Note the +.
c) Resize the file system using resize2fs (for ext2, ext3, and ext4 file systems).
Installing Linux Mint/Ubuntu desktop edition with full-disk encryption and LVM
For some reason (complexity perhaps) it is not possible to configure full-disk encryption and LVM from the graphical installer in the desktop edition. It is possible to select full-disk encryption but this only creates one filesystem (root).
I want to use LVM to allow me to have more than one filesystem without having to enter more than one password during boot-up. It is not impossible to install Ubuntu desktop (or Linux Mint as in this guide) with encryption and LVM but it does require a little more work.
Before starting the installation, we need to prepare the harddisk. Start up GParted (as this is the easiest to work with, if you feel adventurous it can be done in parted or fdisk as well).
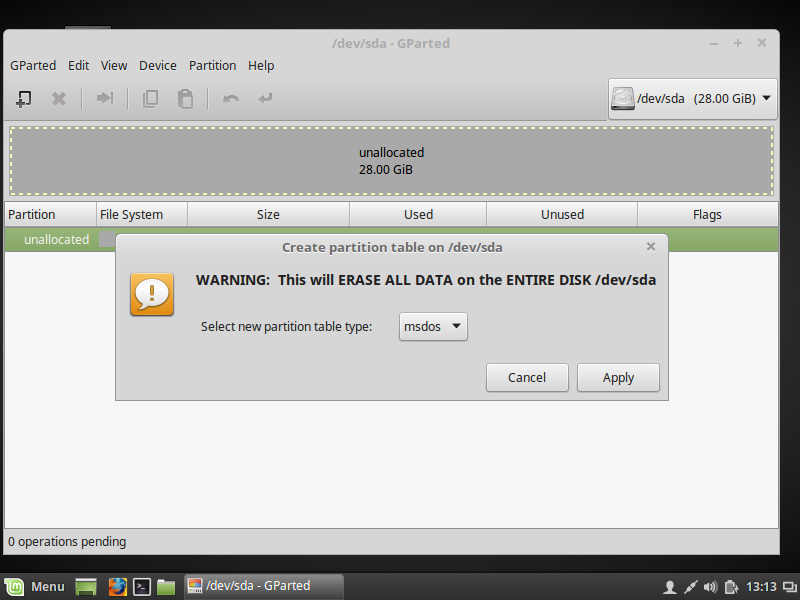
Start by creating a new partition table if needed (if you want to start over or the disk is empty)
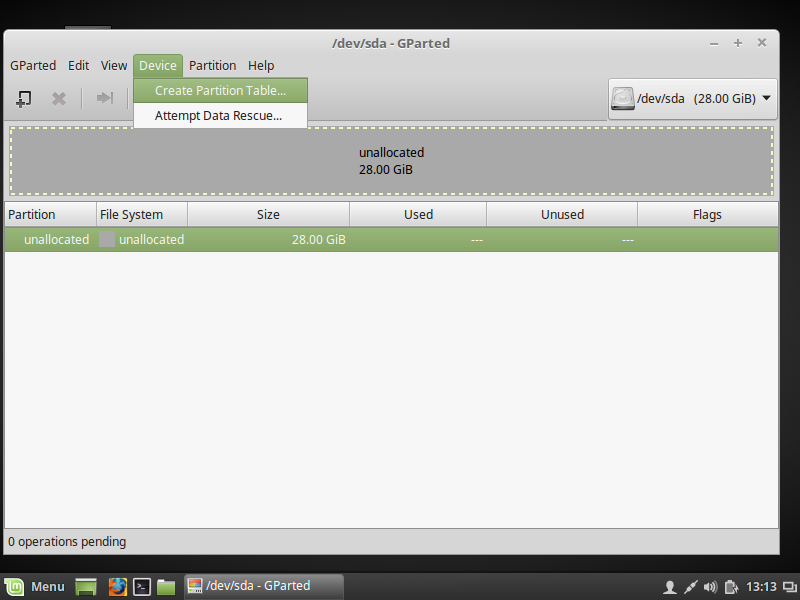
Of course this will destory any data already on the disk, you may want to resize any existing partitions (Windows for instance) instead.
Next, create three new partitions
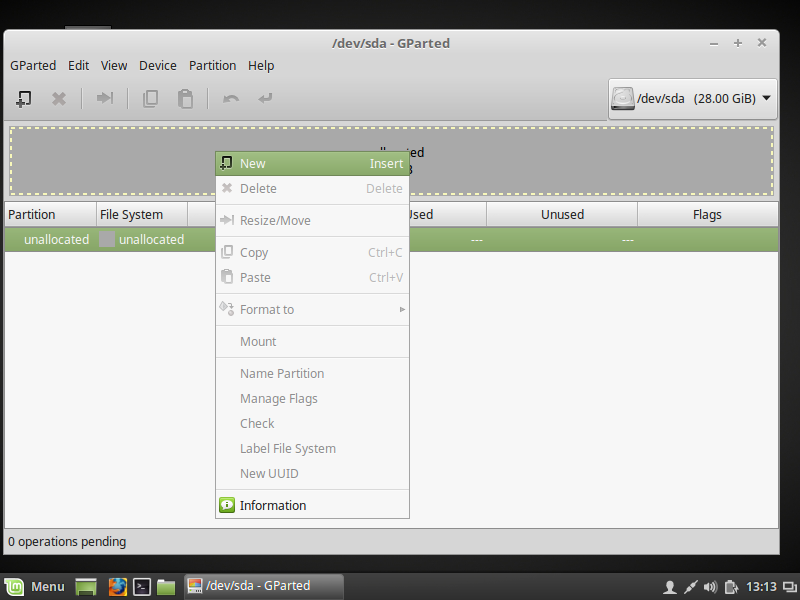
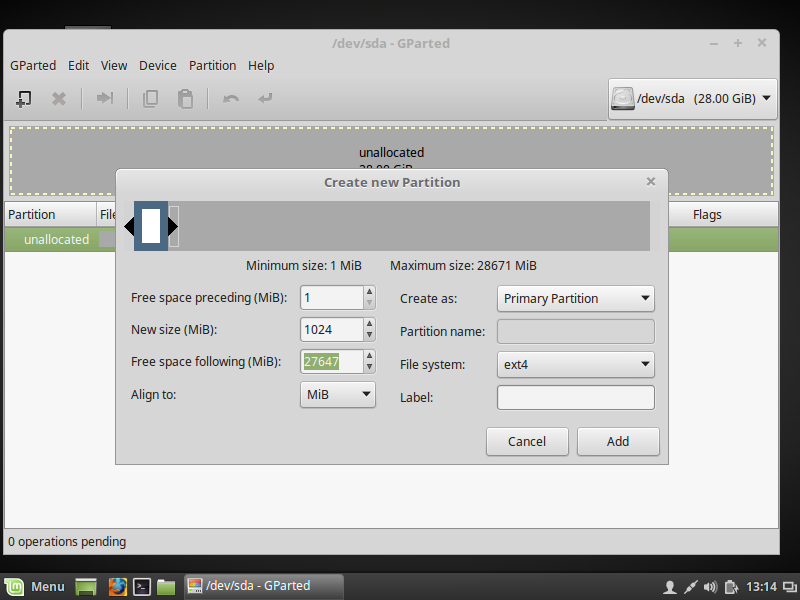
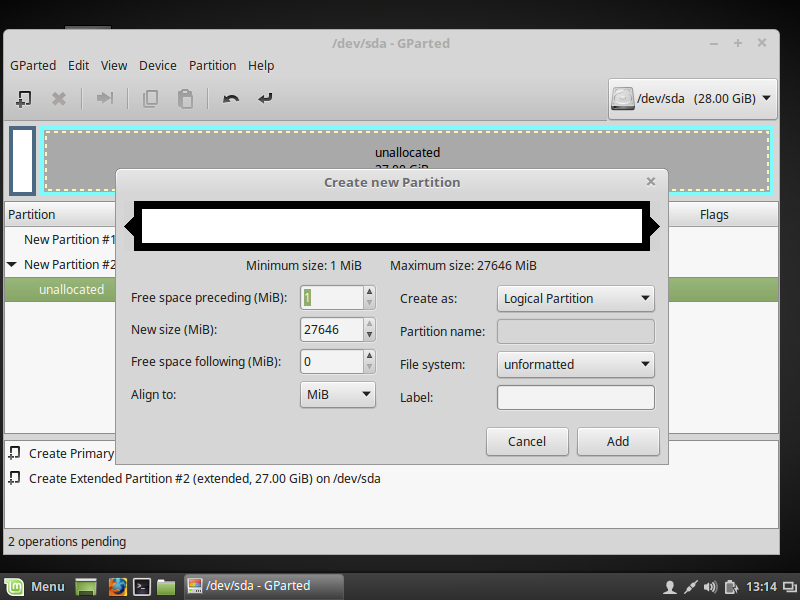
Second, create an extended partition
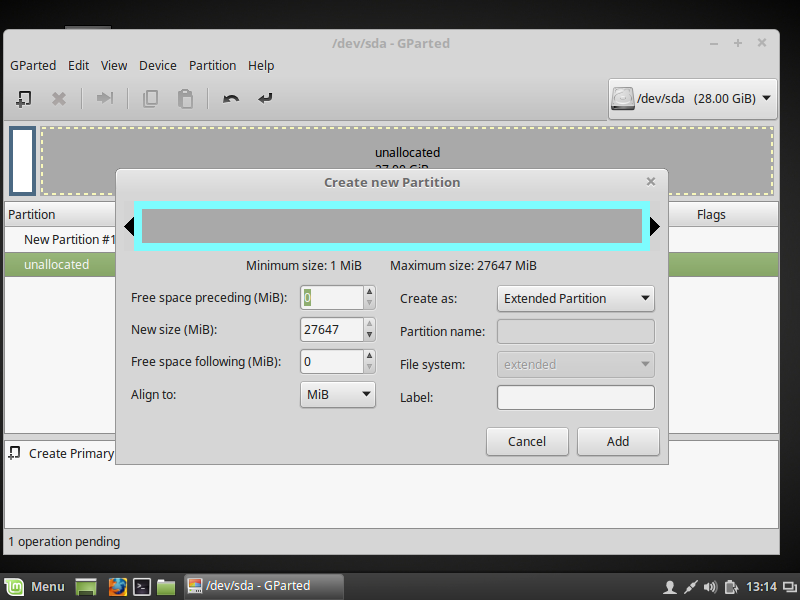
Lastly, the partition which will hold the encrypted data
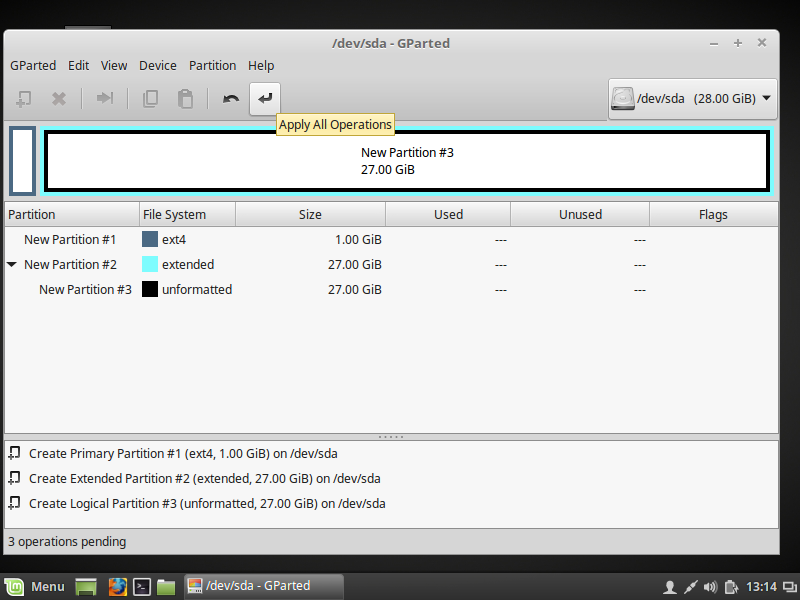
Now, apply the configuration
Now exit GParted and then start a terminal and sudo su —
First, create the encrypted partition (you need to double check the device names). Needless to say, you need to pick a good password.
# cryptsetup luksFormat /dev/sda5 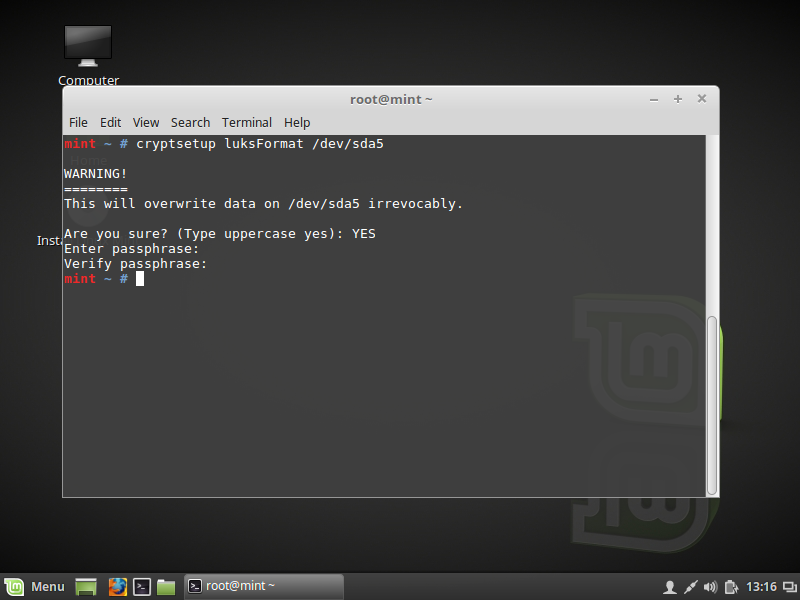
Open (activate) the encrypted container/partition
# cryptsetup open --type luks /dev/sda5 sda5_crypt 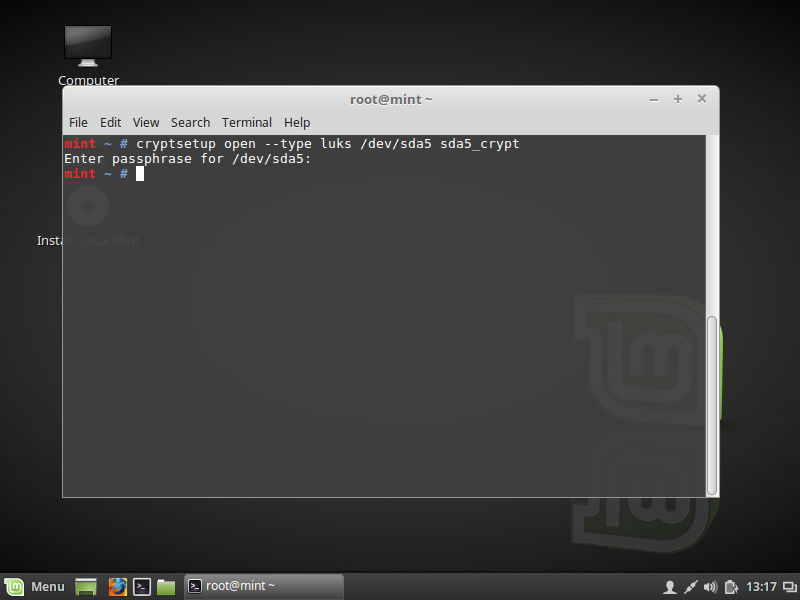
Create the volume group on the container
# vgcreate systemvg /dev/mapper/sda5_crypt 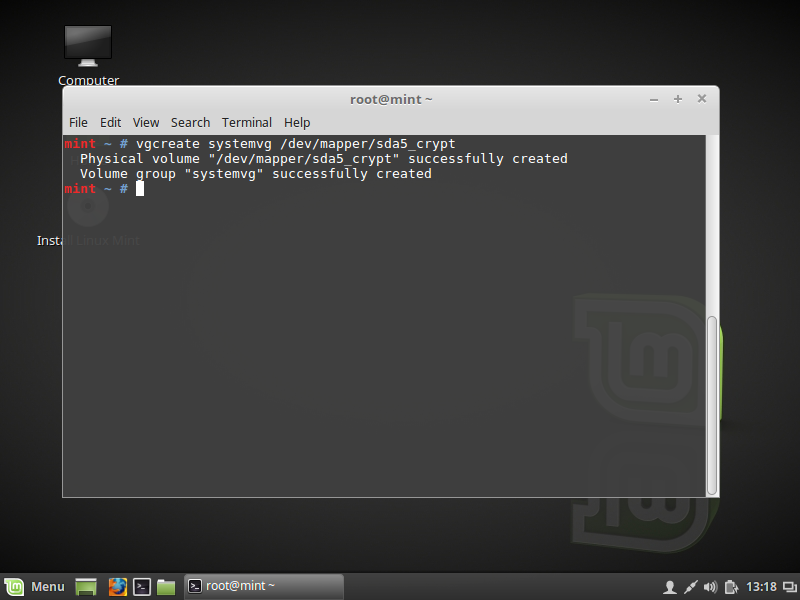
Final step in the terminal is to create the logical volumes — I’ve opted for three: /, /home and swap (having a separate /home makes reinstalling easier).
# lvcreate -n rootlv -L20G systemvg # lvcreate -n swaplv -L8G systemvg # lvcreate -n homelv -l100%FREE systemvg 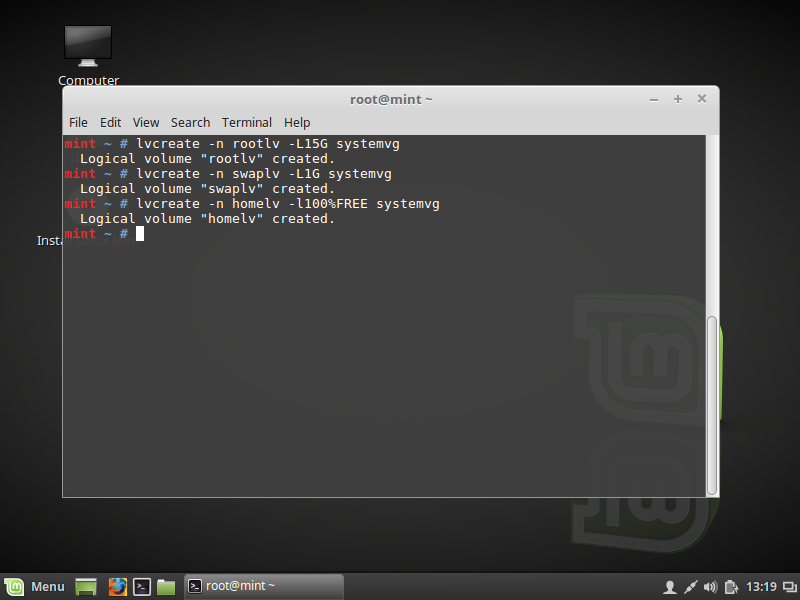
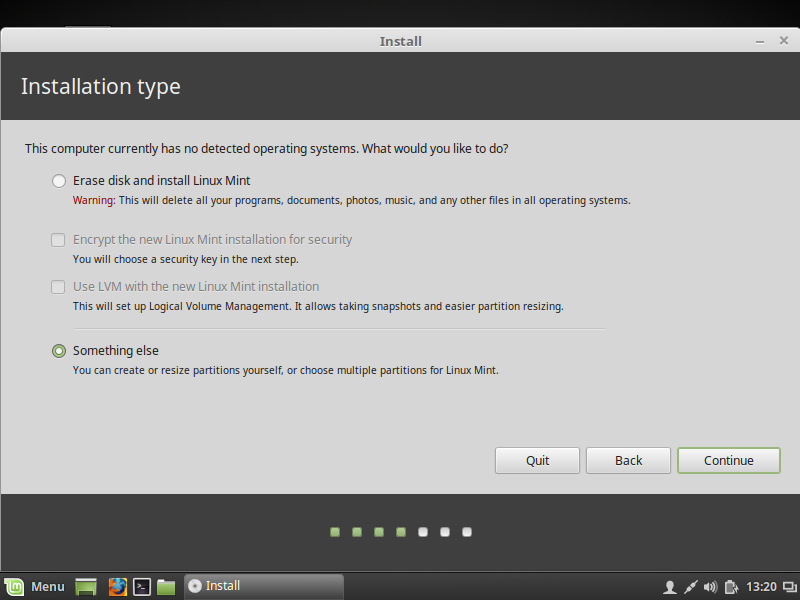
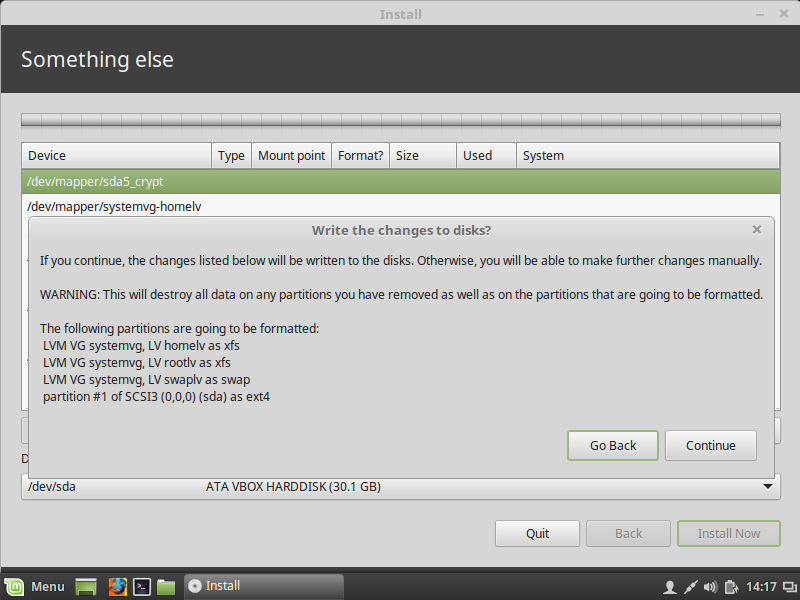
Next, start up the Installer and answer the questions until you get to the screen where to decide the way to install Ubuntu/Mint. Select Something else
Now, select the filesystems to create, they should be configured like so:
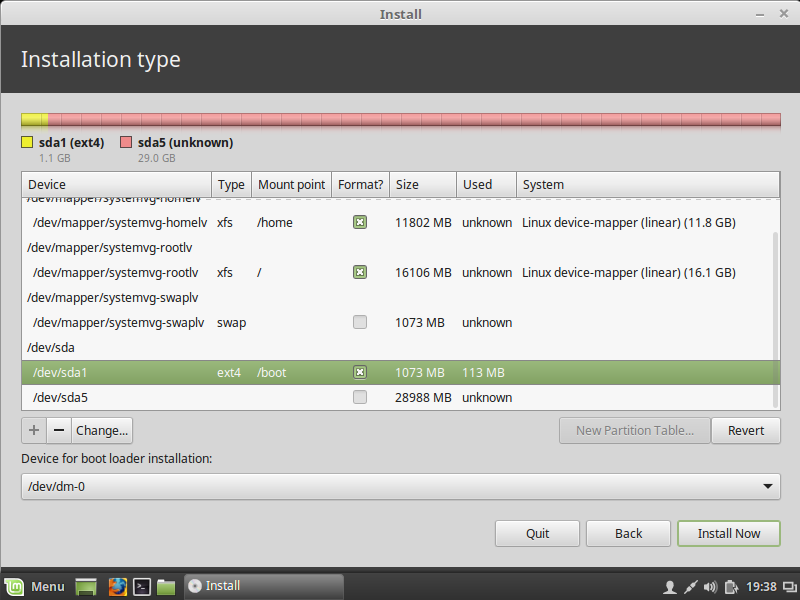
It is also important to select the correct device for bootloader installation. It should NOT be installed to /dev/dm-0
And continue to installation.
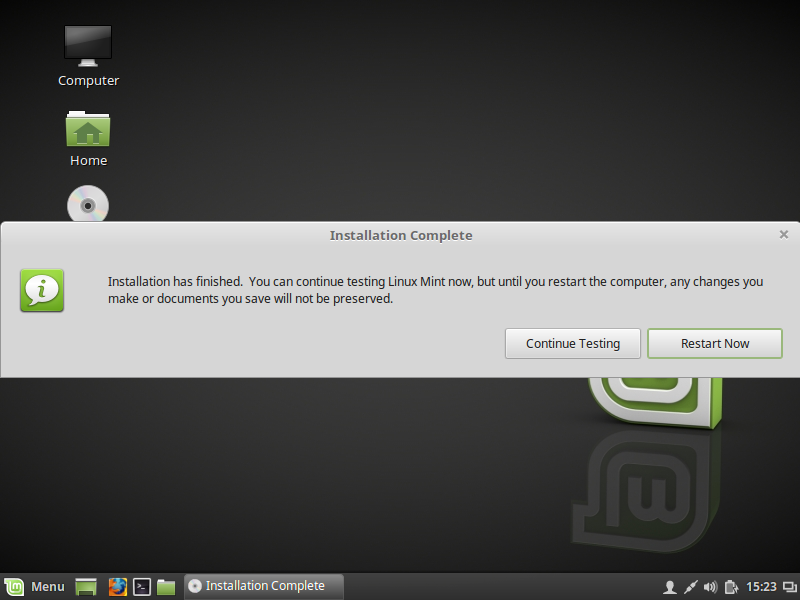
When the installation is done, do not reboot.
Go back to the terminal and setup a chroot with your new installation
# mount /dev/systemvg/rootlv /target # mount /dev/sda1 /target/boot # mount -o bind /proc /target/proc # mount -o bind /dev /target/dev # mount -o bind /sys /target/sys # chroot /target Last steps are to let your installation know you are using an encrypted root partition and re-generate the ramdisk used for booting
# echo "sda5_crypt /dev/sda5 none luks" >> /etc/crypttab # update-initramfs -k all -c 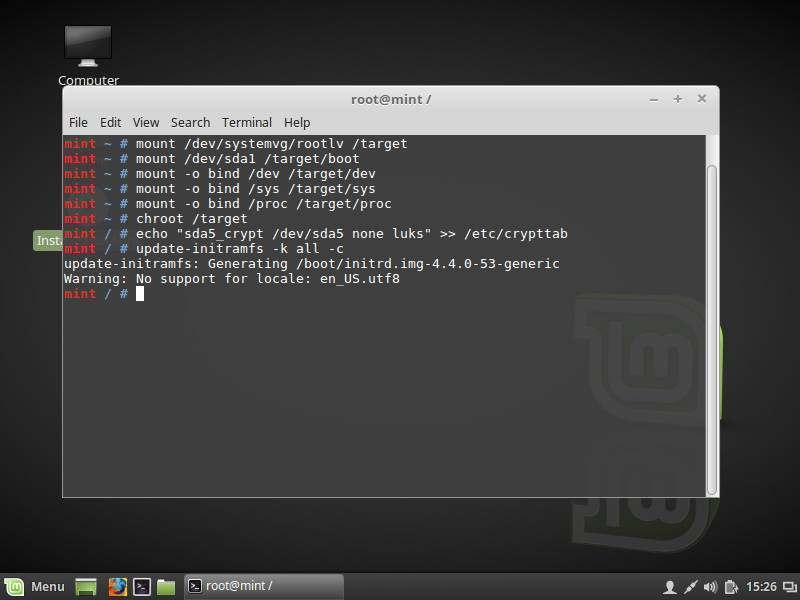
The line in crypttab may also use UUID (to prevent problems if your device names change)
# blkid /dev/sda5 # echo "cryptodisk UUID=63a28f07-6f16-4b00-93a1-1c95614efafb none luks" >> /etc/crypttab 63a28f07-6f16-4b00-93a1-1c95614efafb is the UUID of the disk.
Now exit the chroot (press CTRL-D or type exit ) and then reboot.
Install Linux Mint 21.1 with custom LVM on LUKS
I like to create storage space to hold the contents of my home directory that is separate from the space that contains the root filesystem. This makes it easier if I decide to re-install Linux in the future while preserving user data.
Using a combination of Linux Unified Key Setup (LUKS) and Logical Volume Manager (LVM), I encrypt the storage space and create “virtual partitions” (Logical Volumes or LVs) for separate root and home file systems. Installing LVM on top of the encrypted partition allows the creation of multiple LVs protected by a single passphrase, and the ability to create and resize LVs as needed.
Let’s go!
During an install of Linux Mint 21.1 «Vera» Cinnamon Edition — if you select the option to automatically erase and partition the disk using LUKS and LVM — the installer creates a single encrypted partition with two LVs: a swap LV, and a root LV that uses all remaining disk storage. There is no option to add a home LV to the automatic schema.
My setup
Linux Mint is installed as the sole OS on the device. I use Mint’s installer to erase, partition, and encrypt the storage space, and configure LVM.
After the installer finishes — but before rebooting — I shrink the root LV to free up storage, then create a new home LV.
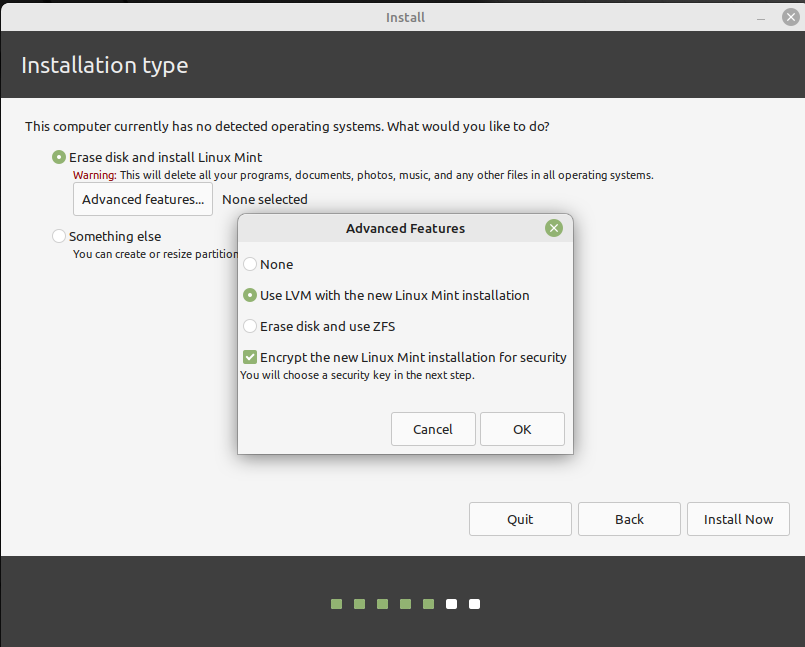
1. During the install: Installation type
Choose Erase disk and install Linux Mint , click on Advanced features. , and opt to use LVM and encryption.
A password to secure the storage is entered and confirmed.
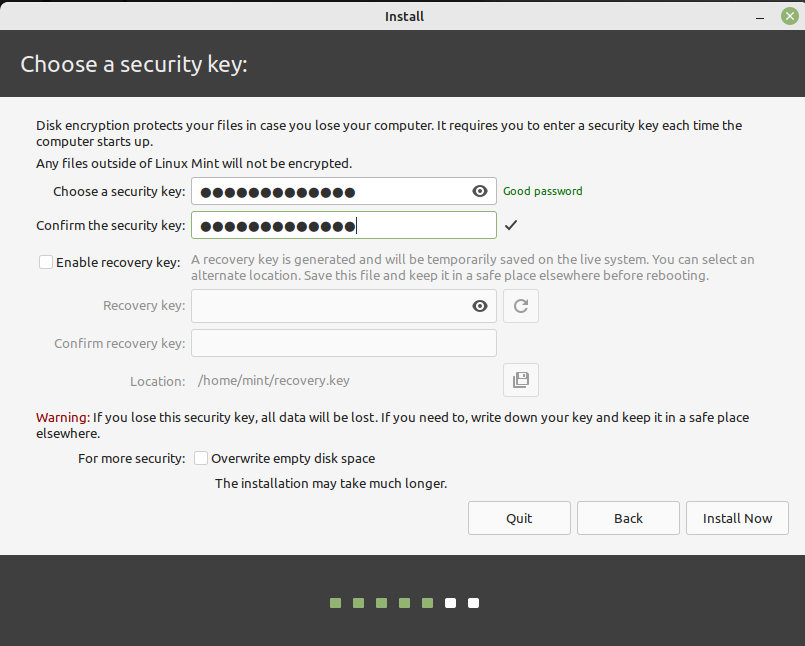
Proceed with the rest of the install as per usual.
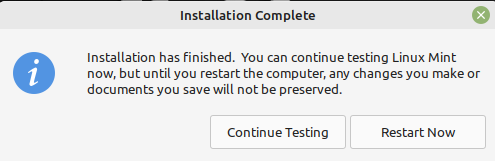
2. After the install: Continue Testing
When the Mint installer finishes, select Continue Testing .
3. Switch to root
Open a terminal. Switch to root using sudo -i .
Run mount | grep /dev/mapper/vgmint and ensure nothing is returned (LVs need to be unmounted).
4. View layout
Run lsblk -f and view the partition layout generated by the Mint installer.
Example: In my install, the partition used for encryption is sda3 and the encrypted LUKS device is sda3_crypt .
List physical volumes (PV) with the command vgs . There is a single PV labelled vgmint .
List the LVs with lvs . There are two: root LV, and swap_1 LV.
Note: Only LVs with ext2, ext3, ext4, ReiserFS, and XFS file systems are supported for resizing.
5. Resize root
Shrink the root LV to free up space for a new home LV.
Set the desired size of root (example: 40G ) and resize its file system all at once .
lvresize -L 40G --resizefs vgmint/root 6. Create home
Option 1
Use fixed amount of storage (example: 300G ) .
lvcreate -L 300G vgmint -n home Option 2
Or use percentage of free capacity (example: 80% ) .
lvcreate -l +80%FREE vgmint -n home 7. Format home
The new LV will appear as /dev/vgmint/home .
Format the LV with an appropriate file system (example: ext4 ) .
8. Move home
mkdir /mnt/,home> mount /dev/vgmint/root /mnt/root/ mount /dev/vgmint/home /mnt/home/ Move the contents of /home from the root LV to the new home LV .
9. Fstab
Create an entry for home in /mnt/root/etc/fstab .
echo "/dev/mapper/vgmint-home /home ext4 defaults 0 2" >> /mnt/root/etc/fstab 10. Finish
umount /mnt/root umount /mnt/home Deactivate swap and volume group .
swapoff -a lvchange -an vgmint Remove the encrypted device mapping (example: sda3_crypt ) .
cryptsetup close sda3_crypt © 2023 Daniel Wayne Armstrong • Created with ♥ in Canada • Website content licensed under CC BY-SA 4.0
Non est ad astra mollis e terris via