- Install Ubuntu Server
- 2. Requirements
- 3. Boot from install media
- 4. Choose your language
- 5. Choose the correct keyboard layout
- 6. Choose your install
- 7. Networking
- 8. Configure storage
- 9. Select a device
- 10. Confirm partitions
- 11. Confirm changes
- 12. Set up a Profile
- 13. Install software
- 14. Installation complete
- 15. What next?
- Finding help
- Установка Linux Ubuntu Server – пошаговое описание
- Ubuntu Server
- Где скачать Linux Ubuntu Server?
- Как установить Linux Ubuntu Server?
- Шаг 1
- Шаг 2
- Шаг 3
- Шаг 4
- Шаг 5
- Шаг 6
- Шаг 7
- Шаг 8
- Шаг 9
- Шаг 10
- Шаг 11
- Шаг 12
- Шаг 13
- Шаг 14
- Шаг 15
Install Ubuntu Server
Ubuntu Server is a variant of the standard Ubuntu you already know, tailored for networks and services. It’s just as capable of running a simple file server as it is operating within a 50,000 node cloud.
Unlike the installation of Ubuntu Desktop, Ubuntu Server does not include a graphical installation program. Instead, it uses a text menu-based process. If you’d rather install the desktop version, take a look at our Install Ubuntu desktop tutorial.
This guide will provide an overview of the installation from either a DVD or a USB flash drive.
For a more detailed guide on Ubuntu Server’s capabilities and its configuration, take a look at our the Community Ubuntu Server documentation.
2. Requirements
You’ll need to consider the following before starting the installation:
- Ensure you have at least 2GB of free storage space.
- Have access to either a DVD or a USB flash drive containing the version of Ubuntu Server you want to install.
- If you’re going to install Ubuntu Server alongside data you wish to keep, ensure you have a recent backup.
See the server guide pages for more specific details on hardware requirements. We also have several tutorials that explain how to create an Ubuntu DVD or USB flash drive.
3. Boot from install media
To trigger the installation process, perform the following:
- Put the Ubuntu DVD into your DVD drive (or insert the USB stick or other install media).
- Restart your computer.
After a few moments, you should see messages like those shown below on the screen…

Most computers will automatically boot from USB or DVD, though in some cases this is disabled to improve boot times. If you don’t see the boot message and the “Welcome” screen which should appear after it, you will need to set your computer to boot from the install media.
There should be an on-screen message when the computer starts telling you what key to press for settings or a boot menu. Depending on the manufacturer, this could be Escape , F2 , F10 or F12 . Simply restart your computer and hold down this key until the boot menu appears, then select the drive with the Ubuntu install media.
4. Choose your language
After the boot messages appear, a ‘Language’ menu will be displayed.

As the message suggests, use the Up , Down and Enter keys to navigate through the menu and select the language you wish to use.
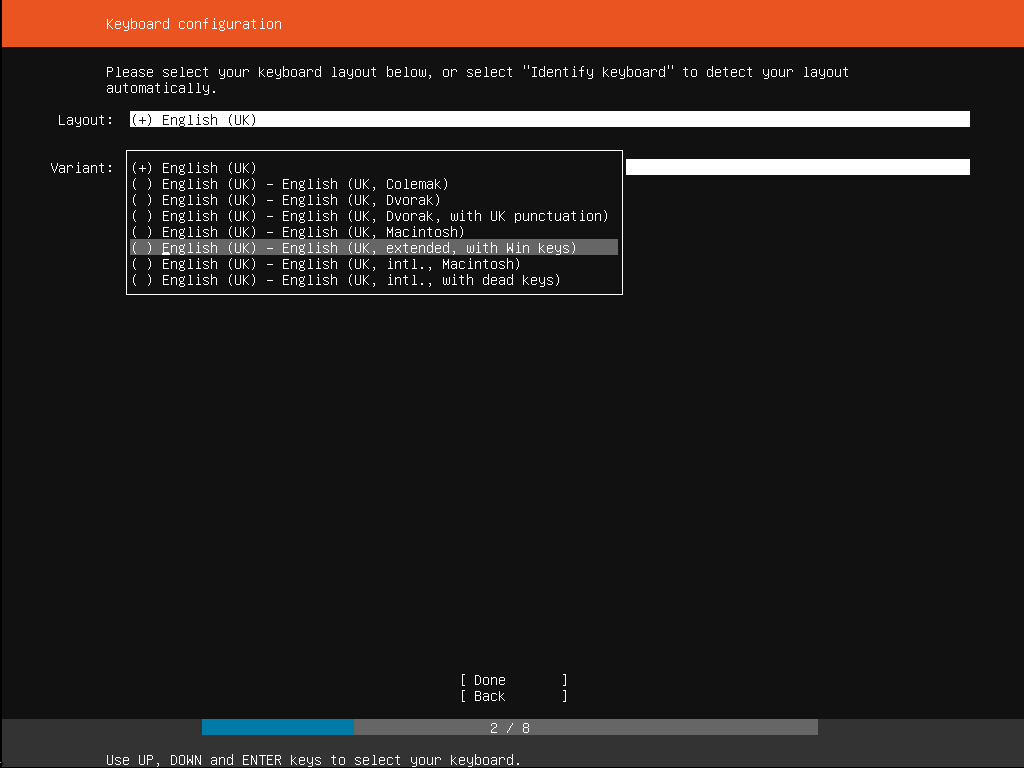
5. Choose the correct keyboard layout
Before you need to type anything in, the installer will next display a menu asking you to select your keyboard layout and, if applicable, the variant.

If you don’t know which particular variant you want, just go with the default — when Ubuntu Server has been installed you can test and change your preferences more easily if necessary.
6. Choose your install
Now we are ready to select what you want to install. There are three options in the menu:
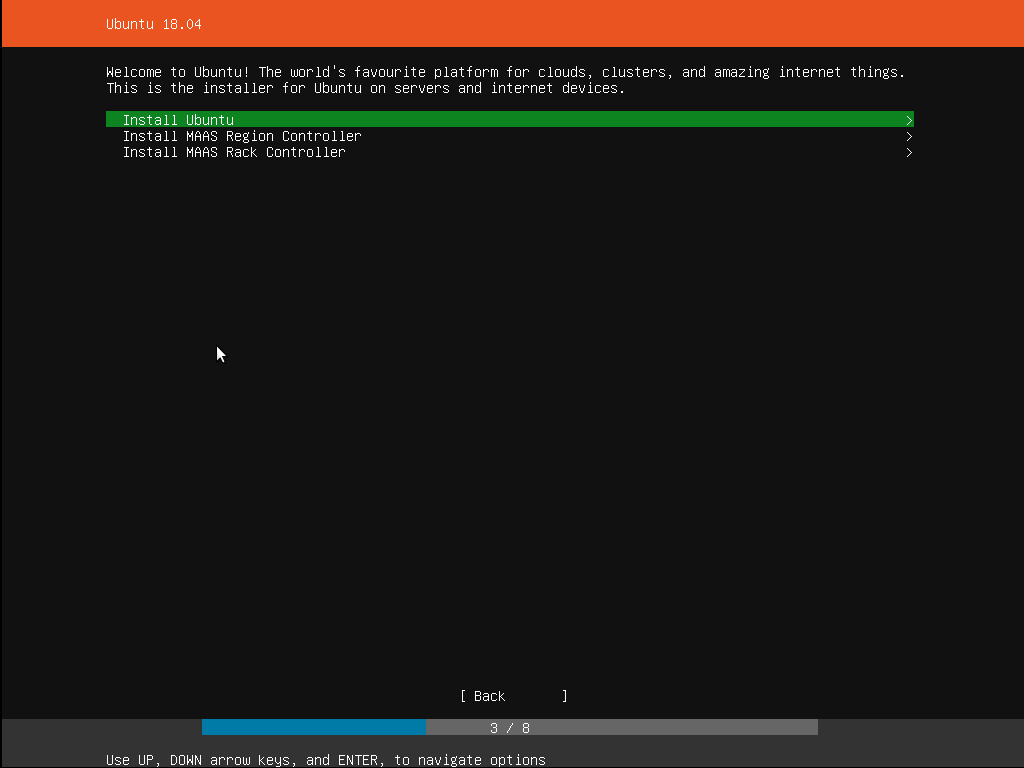
The bottom two options are used for installing specific components of a Metal As A Service (MAAS) install. If you are installing MAAS, you should check out the MAAS documentation for more information on this! The rest of this tutorial assumes you select the first option, Install Ubuntu .
7. Networking
The installer will automatically detect and try to configure any network connections via DHCP.

This is usually automatic and you will not have to enter anything on this screen, it is for information only.
If no network is found, the installer can continue anyway, it just won’t be able to check for updates. You can always configure networking after installation.
8. Configure storage
The next step is to configure storage. The recommended install is to have an entire disk or partition set aside for running Ubuntu.

If you need to set up a more complicated system, the manual option will allow you to select and reorganise partitions on any connected drives.
Note that Ubuntu no longer requires a separate partition for swap space, nor will the automated install create one.
9. Select a device
This menu will allow you to select a disk from the ones detected on the system.

To help identification, the drives will be listed using their system ID. Use the arrow keys and enter to select the disk you wish to use.
10. Confirm partitions
With the target drive selected, the installer will calculate what partitions to create and present this information…
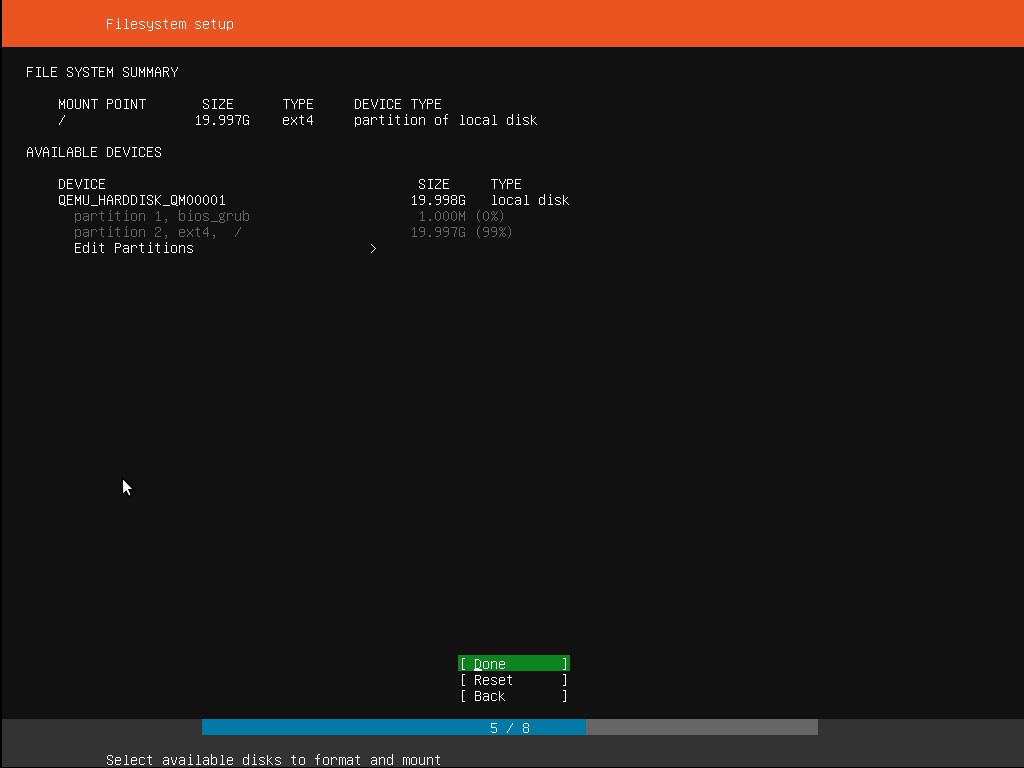
If this isn’t what you expected to see (e.g., you have selected the wrong drive), you should use the arrow keys and enter to select Back from the options at the bottom of the screen. This will take you back to the previous menu where you can select a different drive.
It is also possible to manually change the partitions here, by selecting Edit Partitions . Obviously you should only select this if you are familiar with how partitions work.
When you are happy with the disk layout displayed, select Done to continue.
11. Confirm changes
Before the installer makes any destructive changes, it will show this final confirmation step. Double check that everything looks good here and you aren’t about to reformat the wrong device!

There is no “Undo” for this step, once you confirm the changes, the indicated devices will be overwritten and any contents may be lost
12. Set up a Profile
The software is now being installed on the disk, but there is some more information the installer needs. Ubuntu Server needs to have at least one known user for the system, and a hostname. The user also needs a password.

There is also a field for importing SSH keys, either from Launchpad, Ubuntu One or Github. You simply need to enter the username and the installer will fetch the relevant keys and install them on the system ready for use (e.g. secure SSH login to the server).
13. Install software
Once you have finished entering the required information, the screen will now show the progress of the installer. Ubuntu Server now installs a concise set of useful software required for servers. This cuts down on the install and setup time dramatically. Of course, after the install is finished, you can install any additional software you may need.

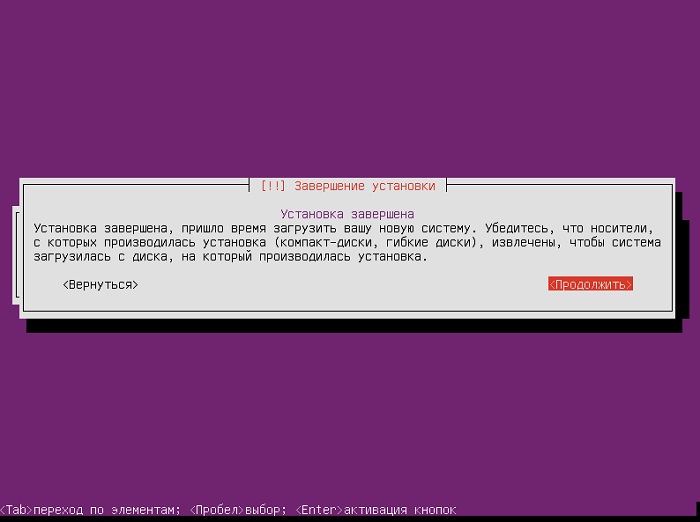
14. Installation complete
When the install is complete, you will see a message like this on the screen.

Remember to remove the install media, and then press enter to reboot and start the server. Welcome to Ubuntu!
15. What next?
With Ubuntu Server installed, you can now carry on and build that file-server or multi-node cluster we mentioned!
If you are new to Ubuntu Server, we’d recommend reading the Server Guide.
You can also check out the latest on Ubuntu Server, and what others are using it for on the Ubuntu Server pages.
Finding help
The Ubuntu community, for both desktop and server, is one of the friendliest and most well populated you can find. That means if you get stuck, someone has probably already seen and solved the same problem.
Try asking for help in one of the following places:
Alternatively, if you need commercial support for your server deployments, take a look at Ubuntu Advantage.
Установка Linux Ubuntu Server – пошаговое описание
Всем привет! Материал сегодня будет посвящен рассмотрению процесса установки серверной операционной системы Linux Ubuntu Server, а также Вы узнаете особенности данной системы и где ее можно скачать.
Ubuntu Server
Linux Ubuntu Server – это бесплатная серверная операционная система на базе ядра Linux. Ubuntu Server можно использовать в качестве платформы для Web-серверов, серверов баз данных, DNS-серверов, файловых серверов и других типов серверов. Ubuntu очень популярный дистрибутив Linux, в том числе и серверный вариант, который активно используется организациями разных размеров, за счет того что главной особенностью Ubuntu Server, да и всех серверных операционных систем на базе Linux, является надежность, производительность и безопасность.
Начинающим администраторам хотелось бы сказать, что Ubuntu Server не имеет графической оболочки, управление системой осуществляется в командной строке.
Где скачать Linux Ubuntu Server?
Скачать Ubuntu Server можно со страницы загрузки официального сайта вот она — https://www.ubuntu.com/download/server.
После того как Вы перешли на страницу выбираете версию Ubuntu Server и нажимаете на кнопку «Download». Рекомендовано скачивать версию с долгосрочной поддержкой (LTS).
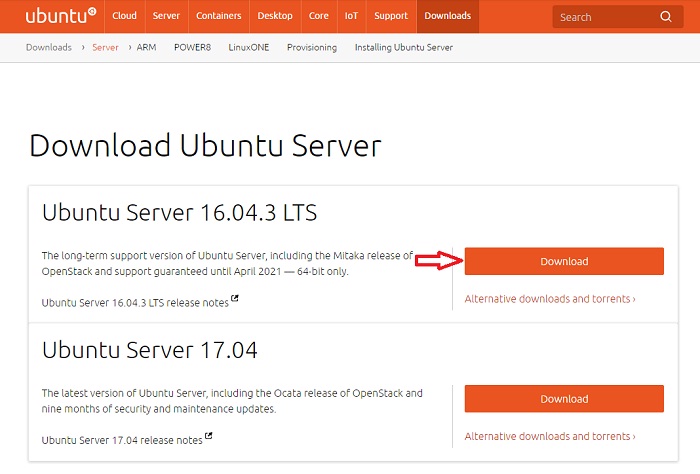
В итоге у меня загрузился файл (образ диска) ubuntu-16.04.3-server-amd64.iso размером примерно 825 мегабайт.
Как установить Linux Ubuntu Server?
Первое, что нам необходимо сделать, это записать образ на диск (или загрузочную флешку) и загрузиться с него.
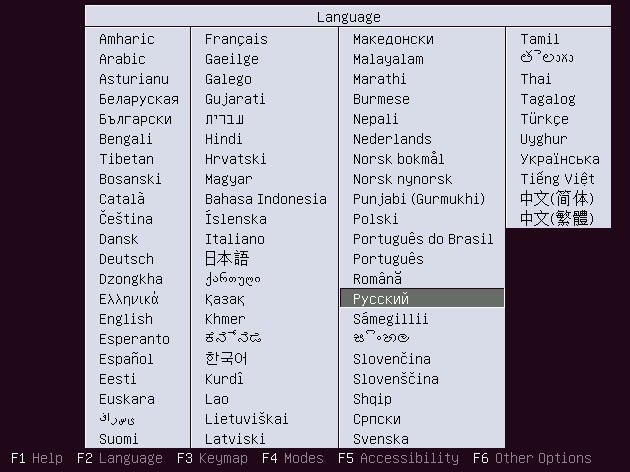
Шаг 1
После того как диск загрузится, выбираем язык.
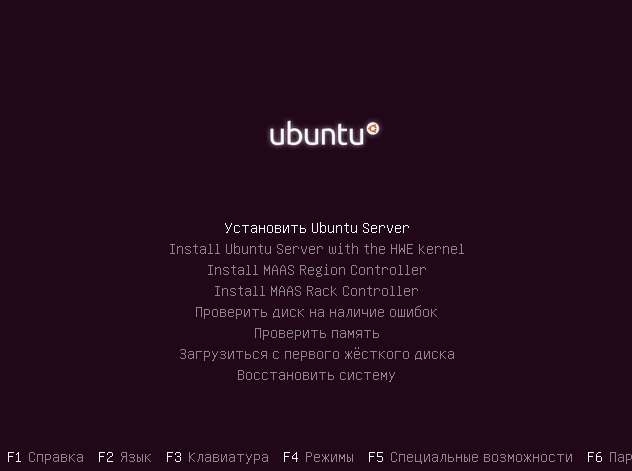
Шаг 2
Далее выбираем пункт «Установить Ubuntu Server».
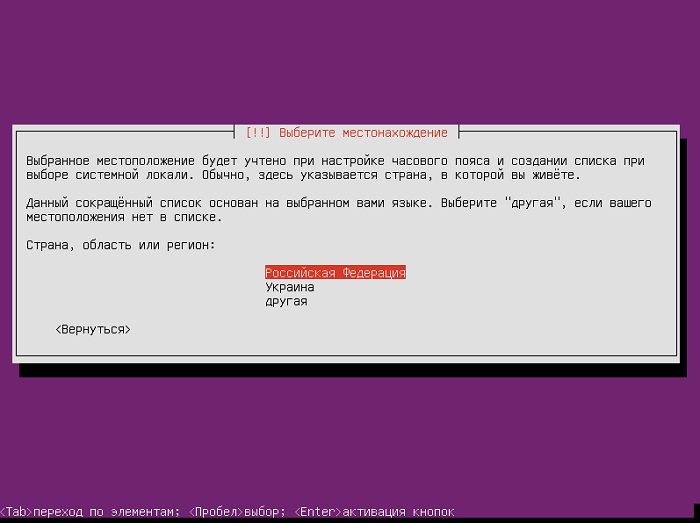
Шаг 3
Затем выбираем местоположение и жмем Enter.
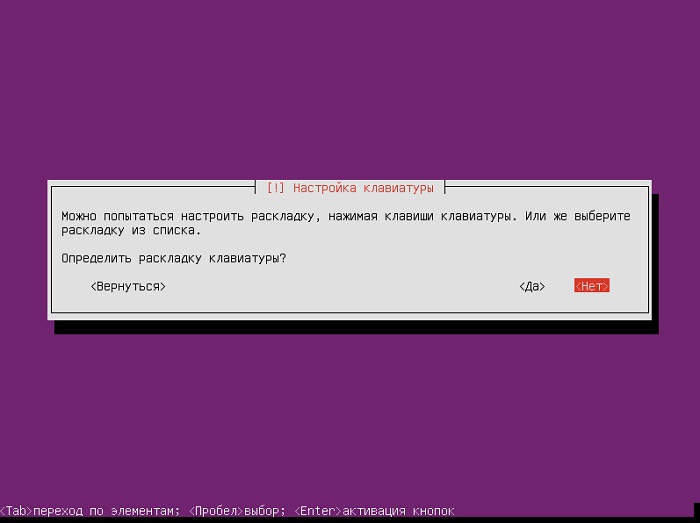
Шаг 4
Потом нам предлагают автоматически настроить раскладку клавиатуры, но ее также можно настроить и вручную, для этого отвечаем «Нет».
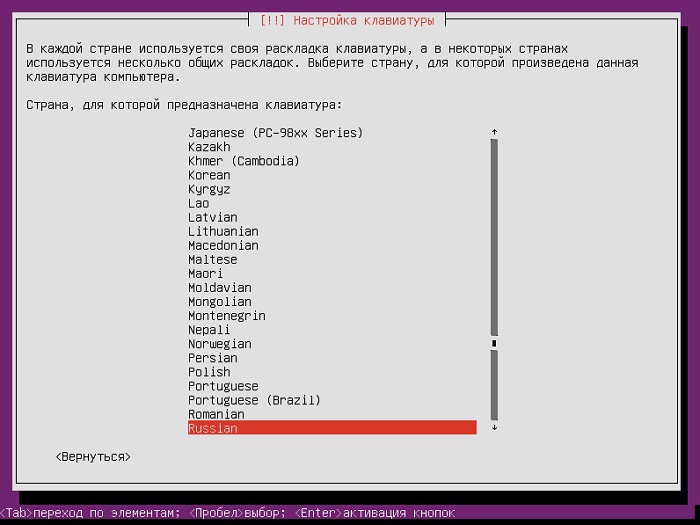
Сначала указываем страну, для которой предназначена клавиатура.
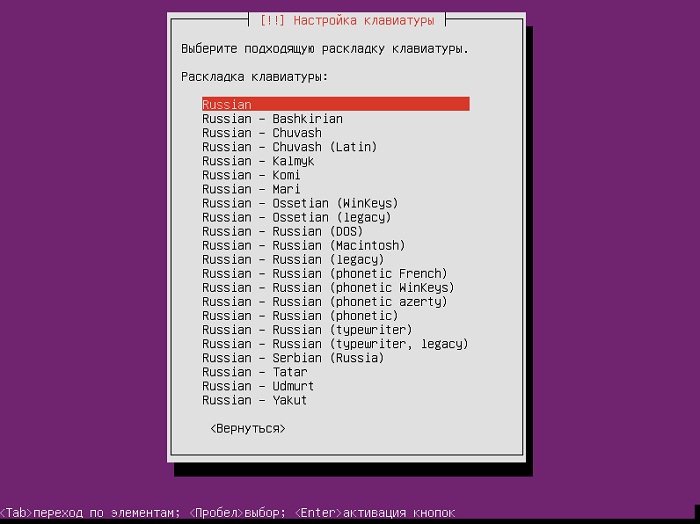
Потом указываем раскладку клавиатуры.
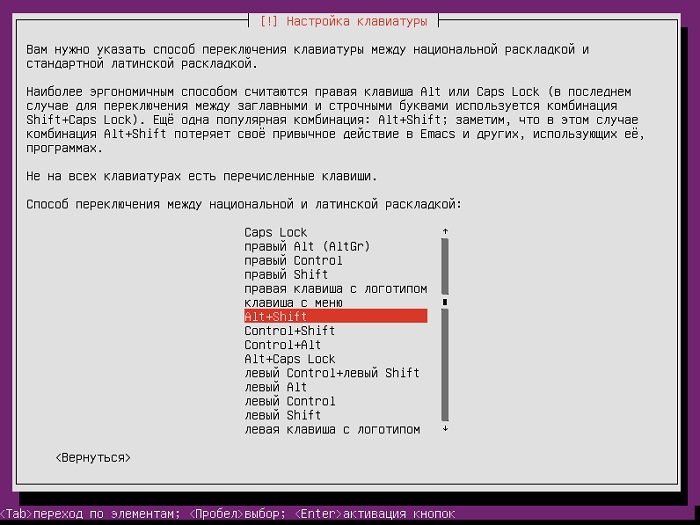
А затем способ переключения раскладки клавиатуры.
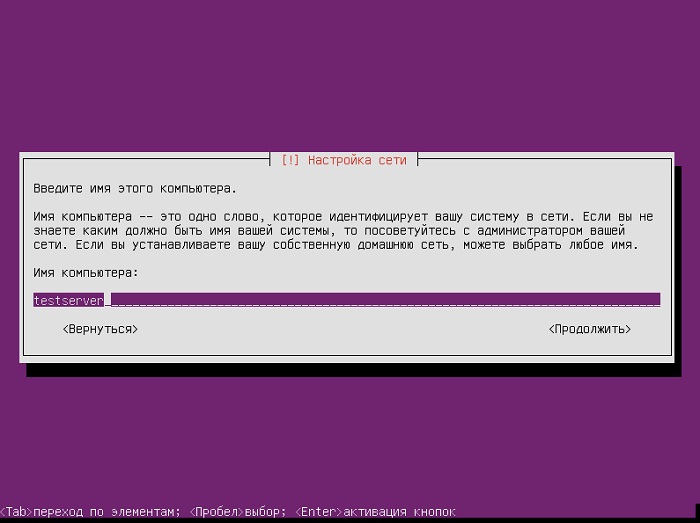
Шаг 5
На следующем шаге нам необходимо ввести имя компьютера.
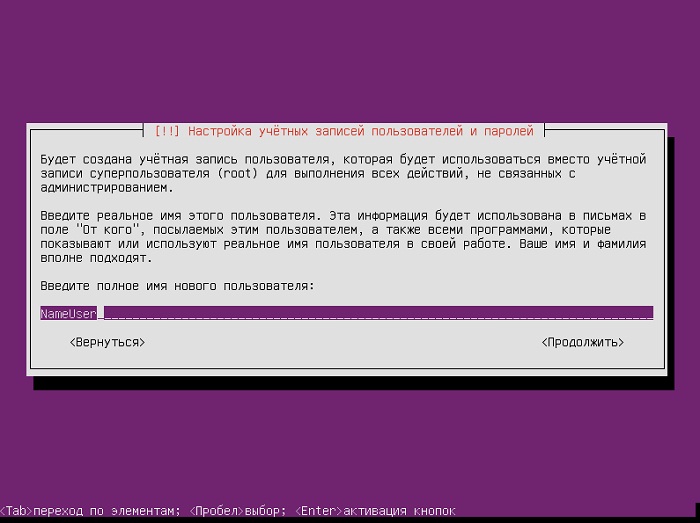
Шаг 6
Потом вводим имя пользователя.
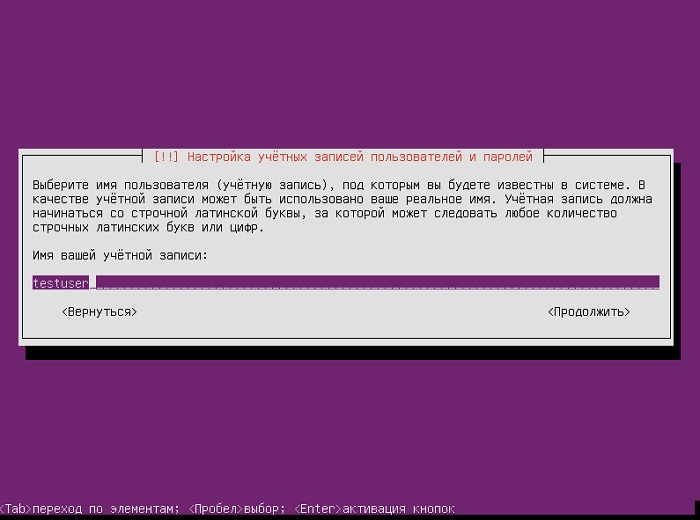
Шаг 7
Далее вводим имя учетной записи, т.е. логин.
Шаг 8
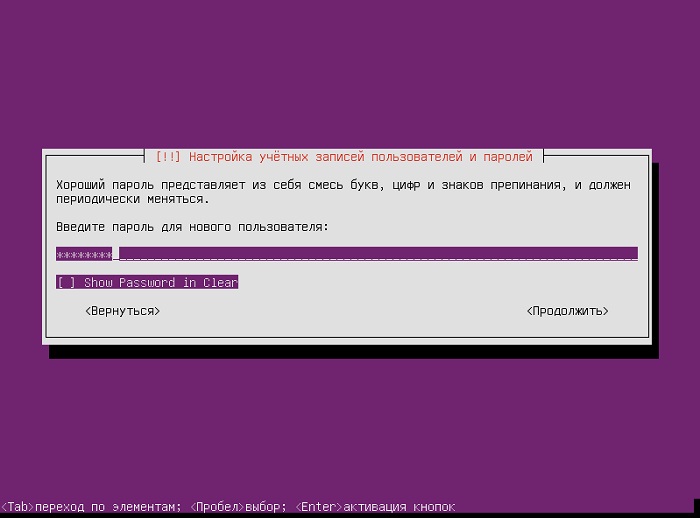
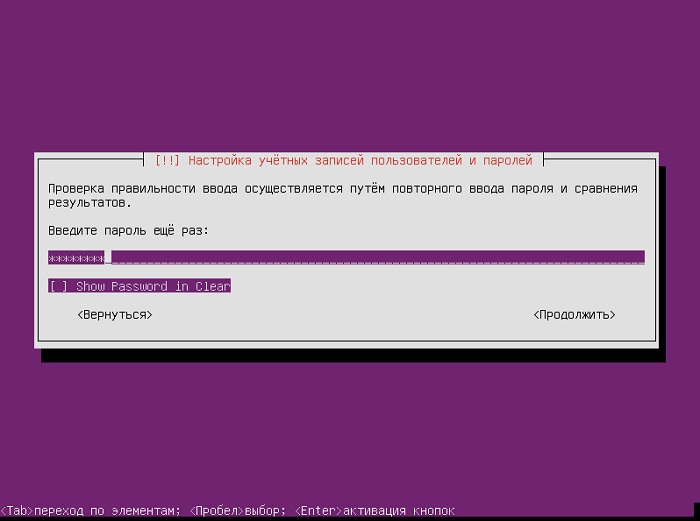
И, конечно же, указываем пароль для этой учетной записи.
Шаг 9
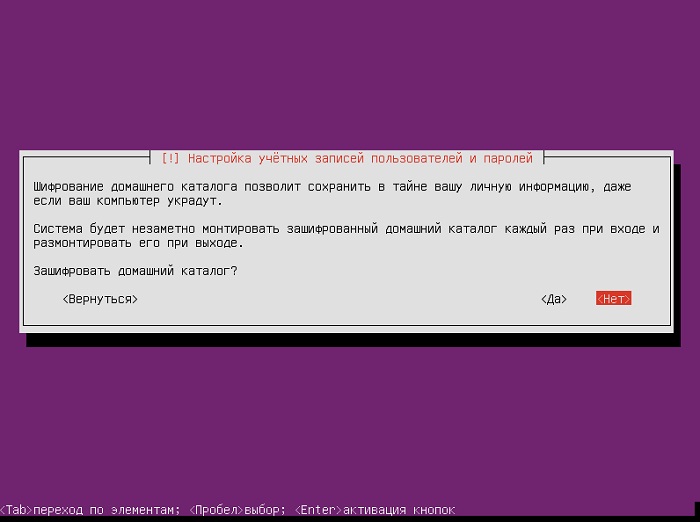
Если Вы хотите, чтобы домашний каталог шифровался, отвечаете на данном шаге «Да», если не хотите, то соответственно «Нет».
Шаг 10
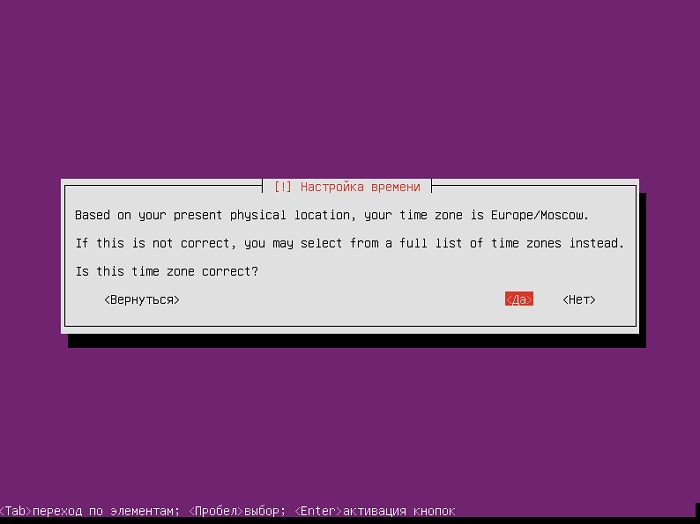
Затем программа установки попытается автоматически определить часовой пояс, если она сделает это правильно, то соглашаетесь, т.е. отвечаете «Да».
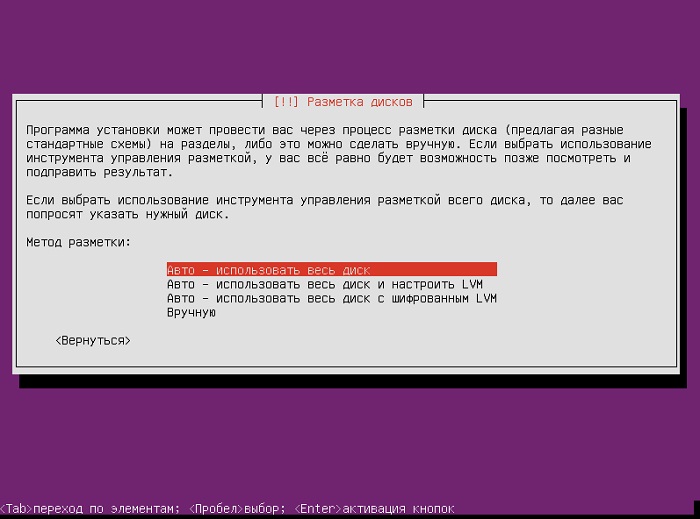
Шаг 11
Теперь нам необходимо разметить диск, так как у меня это тестовая установка и жесткий диск небольшого размера я выбираю первый пункт «Авто – использовать весь диск». Разметку диска можно также осуществить и вручную, для этого Вам необходимо выбрать пункт «Вручную» (более подробно о ручной разметке диска мы с Вами разговаривали в материале «Разметка жесткого диска в Linux Ubuntu во время установки»).
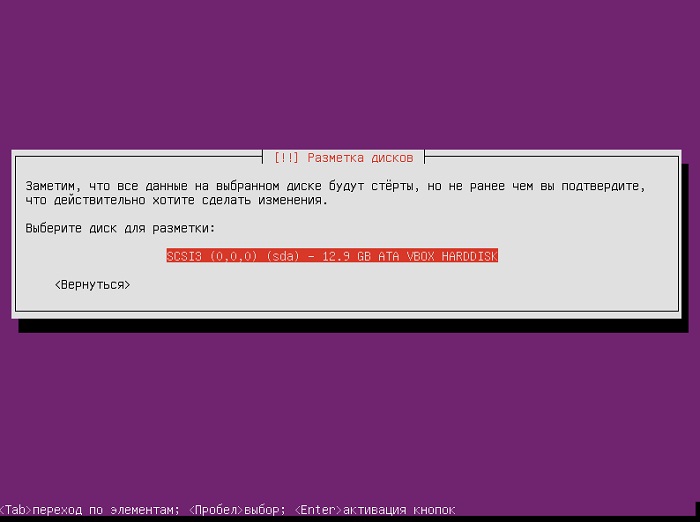
Выбираем жесткий диск для разметки.
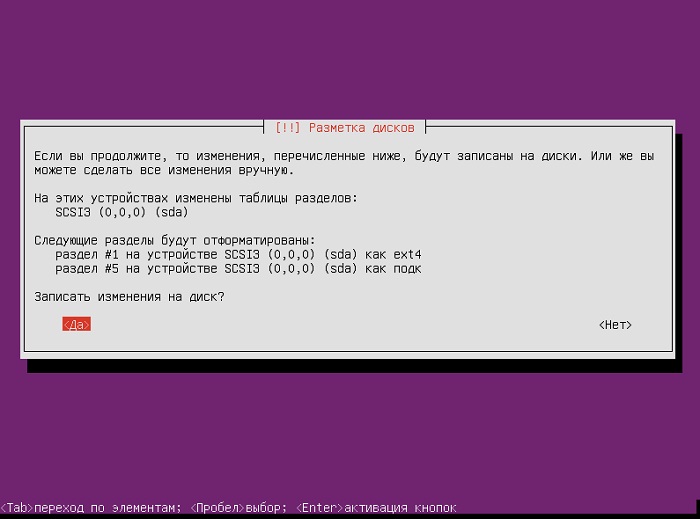
Программа установки автоматически разметит диск и предложит Вам сохранить все изменения, отвечаем «Да».
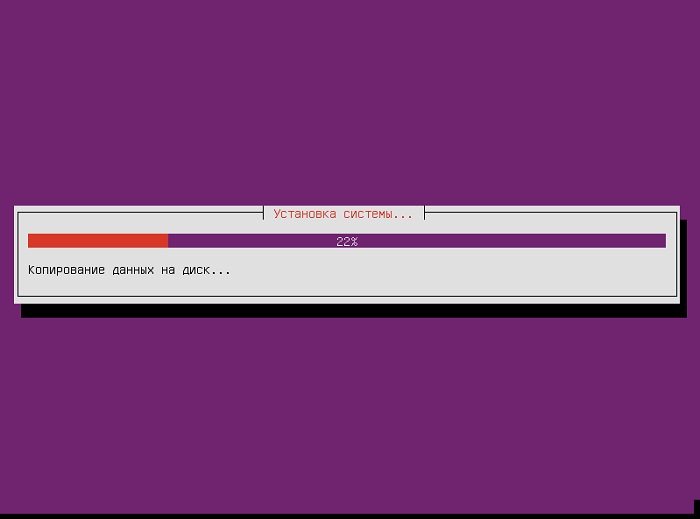
В итоге начнется установка системы.
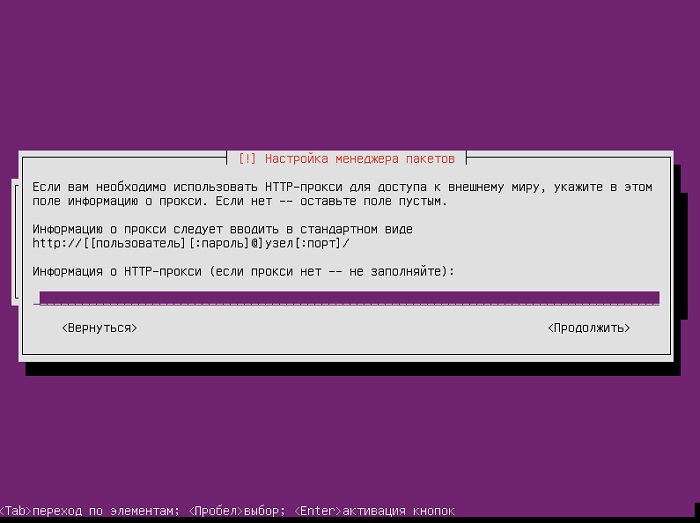
Шаг 12
Если для доступа к внешнему миру Вы используете прокси сервер, то соответствующую информацию Вы можете указать на данном шаге, если нет, то оставляете поле пустым.
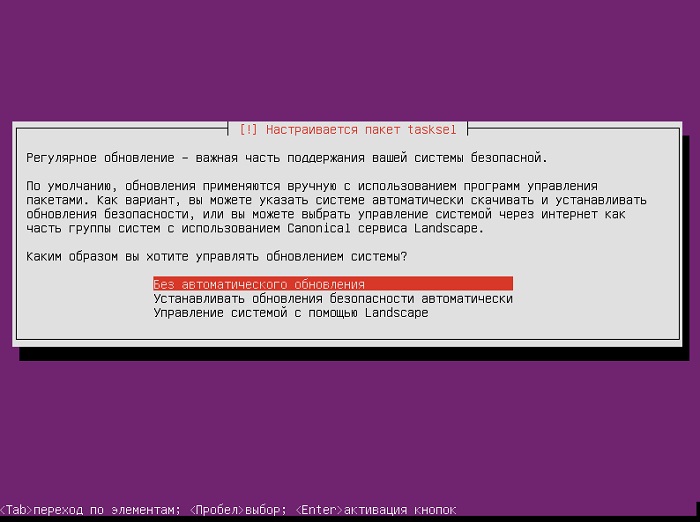
Шаг 13
Теперь нам необходимо настроить способ обновления системы, я указываю «Без автоматического обновления», но также можно указать настройку, при которой обновления безопасности будут устанавливаться автоматически.
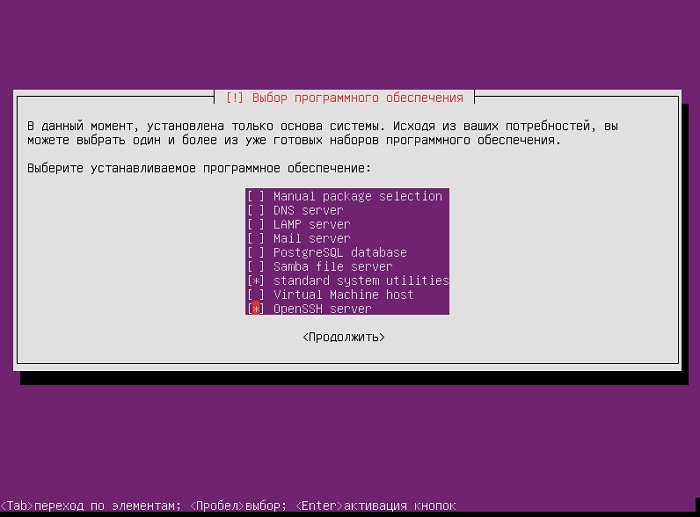
Шаг 14
Сейчас мы можем выбрать программное обеспечение, которое мы точно будем использовать на данном сервере, и оно будет установлено прямо сейчас (дополнительное ПО мы можем установить и после установки системы). Я выбираю стандартные системные утилиты и сервер OpenSSH.
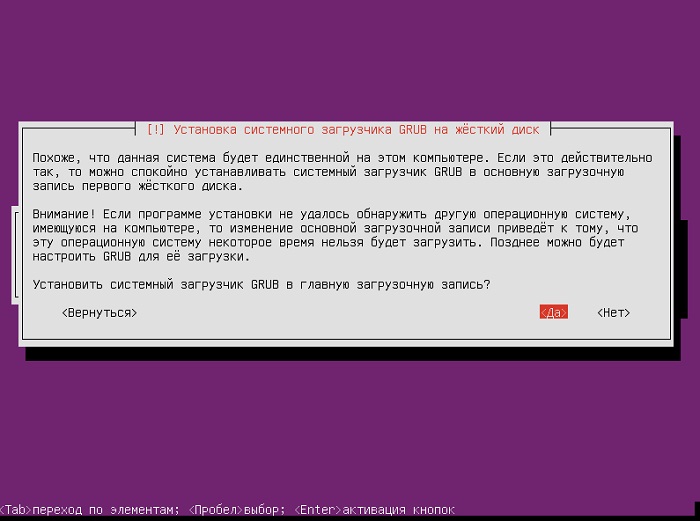
Шаг 15
Если на данном компьютере Ubuntu Server будет единственной системой, то системный загрузчик GRUB устанавливаем в главную загрузочную запись, т.е. отвечаем «Да».
Установка завершена, выбираем «Продолжить», в результате система перезагрузится.
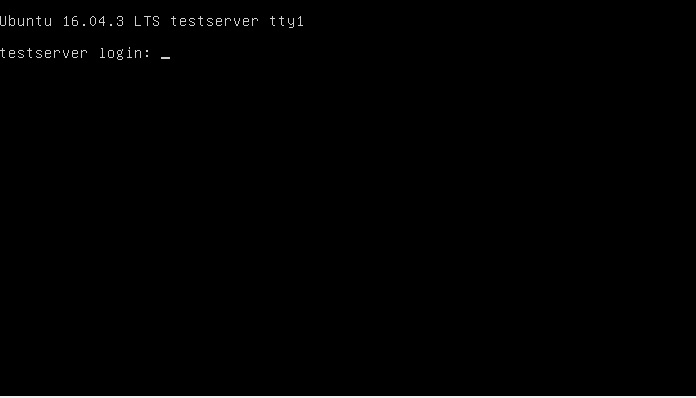
Для входа используем учетную запись, которую мы создали во время установки системы.
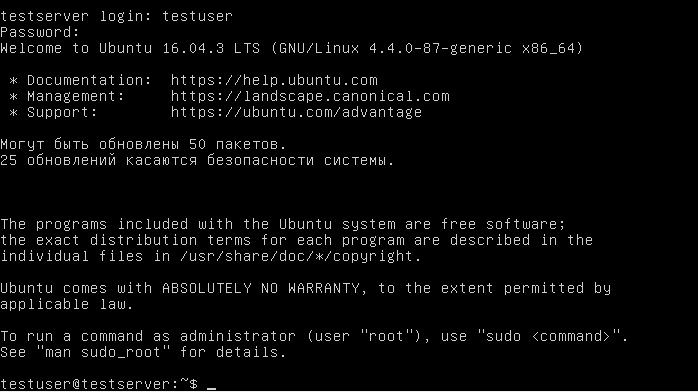
Вот и все, Ubuntu Server мы установили, надеюсь, материал был Вам полезен, пока!