- OpenVPN 3 Client for Linux
- Installation as Connector for CloudConnexa
- Installation for Debian and Ubuntu
- Important
- Installation for Fedora, Red Hat Enterprise Linux, CentOS, or Scientific Linux
- Note
- Using .ovpn Profile
- Mandatory Commands
- Important
- Note
- Important
- Note
- Простая настройка OpenVPN Linux
- Настройка OpenVPN сервера в Linux
- Настройка клиента OpenVPN
- Выводы
OpenVPN 3 Client for Linux
The OpenVPN 3 Linux project is a new client built on top of the OpenVPN 3 Core Library, which is also used in the various OpenVPN Connect clients and OpenVPN for Android (need to be enabled via the settings page in the app).
This client is built around a completely different architecture in regard to usage. It builds heavily on D-Bus and allows unprivileged Users to start and manage their own WPC tunnels out-of-the-box. System Administrators wanting more control can also control and restrict this access both by hardening the default OpenVPN 3 D-Bus policy or facilitating features in OpenVPN 3 Linux.
Even though the project name carries “Linux”, it doesn’t mean it is restricted to Linux only. Any platform which has D-Bus available should be capable of running this client in theory. But since D-Bus is most commonly used in Linux environments, this will naturally be the primary focus for the project.
The release notes are stored in git tags in the project git repository. They can also be viewed here: https://github.com/OpenVPN/openvpn3-linux/releases (expand the tag to see the full text).
Installation as Connector for CloudConnexa
Installation of CloudConnexa 3 client as a Connector for CloudConnexa Host or Network has been simplified and documented here.
Installation for Debian and Ubuntu
Follow these steps in order to install OpenVPN 3 Client on Linux for Debian and Ubuntu:
- Open the Terminal by pressing ctrl + alt + T .
- Type the following command into the Terminal: sudo wget https://swupdate.openvpn.net/repos/openvpn-repo-pkg-key.pub . This will install the OpenVPN repository key used by the OpenVPN 3 Linux packages.
- Type the following command into the Terminal: curl -fsSL https://swupdate.openvpn.net/repos/openvpn-repo-pkg-key.pub | gpg —dearmor | sudo tee /etc/apt/trusted.gpg.d/openvpn-repo-pkg-keyring.gpg . This will install the OpenVPN repository key used by the OpenVPN 3 Linux packages.
- Type the following command into the Terminal: DISTRO=$(lsb_release -c | awk ») . This will detect the OS distribution and will be automatically used in the next command.
Important
It is recommended to be cautious of the distribution and release you are running. Distribution and version should preferably be retrieved using the hostnamectl command, where the user needs to link the Operating System field with the supported distros table.
Distribution
Release name ($DISTRO)
Installation for Fedora, Red Hat Enterprise Linux, CentOS, or Scientific Linux
Packages for these distributions are provided via a Fedora Copr repository. Supported versions:
Distribution
Release versions
Red Hat Enterprise Linux / CentOS
In order to install the OpenVPN 3 Client for Fedora , Red Hat Enterprise Linux , CentOS , or Scientific Linux , follow the steps below:
- Open Terminal by typing terminal into the search bar.
- If you are running Red Hat Enterprise Linux or its clones, you need to install the Fedora EPEL repository first. Here is the list of commands for each version: (The original article on Fedora EPEL can be found here). RHEL/CentOS 6 : sudo yum install https://dl.fedoraproject.org/pub/epel/epel-release-latest-6.noarch.rpm RHEL/CentOS 7 : sudo yum install https://dl.fedoraproject.org/pub/epel/epel-release-latest-7.noarch.rpm On RHEL 7 it is recommended to also enable the optional, extras , and HA repositories since EPEL packages may depend on packages from these repositories: sudo subscription-manager repos —enable «rhel-*-optional-rpms» —enable «rhel-*-extras-rpms» —enable «rhel-ha-for-rhel-*-server-rpms RHEL/CentOS 8 : sudo yum install https://dl.fedoraproject.org/pub/epel/epel-release-latest-8.noarch.rpm On RHEL 8 it is required to also enable the codeready-builder-for-rhel-8-$-rpms repository since EPEL packages may depend on packages from it: sudo ARCH=$( /bin/arch ) followed by sudo subscription-manager repos —enable «codeready-builder-for-rhel-8-$-rpms On CentOS 8 it is recommended to also enable the PowerTools repository since EPEL packages may depend on packages from it: sudo dnf config-manager —set-enabled PowerTools
- You need to install the yum copr module first by running the following command: sudo yum install yum-plugin-copr .
Note
Using .ovpn Profile
Please note that by this point you should have downloaded a .ovpn Profile to your machine.
Mandatory Commands
- In order to start a one-shot configuration Profile, type the following command into the Terminal: openvpn3 session-start —config $ .
Important
A » one-shot configuration Profile » means that the configuration file is parsed, loaded, and deleted from the configuration manager as soon as the WPC session has been started. No configuration file is available for re-use after this approach. This is achieved by giving the configuration file to the openvpn3 session-start command directly.
Note
Using this approach, an imported configuration file can be used several times, and access to the configuration file itself is not needed to start WPC tunnels. By default, configuration profiles imported are only available to the User who imported the configuration file. But OpenVPN 3 Linux also provides an Access Control List feature via openvpn3 config-acl to grant access to specific or all Users on the system.
Important
This loads the configuration Profile and stores it in memory-only . That means, if the system is rebooted, the configuration Profile is not preserved. If the –persistent argument is added to the command line above, the configuration Profile will be saved to disk in a directory only accessible by the CloudConnexa User. Whenever the Configuration Manager is started, configuration files imported with –persistent will be automatically loaded as well.
Note
When a configuration Profile is available via openvpn3 configs-list , it can easily be started via openvpn3 session-start using the configuration Profile name (typically the filename used during the import)
Простая настройка OpenVPN Linux
OpenVPN часто используется для создания виртуальных безопасных сетей между компьютерами, которые находятся на очень большом расстоянии, но при этом между ними нужно получить шифрованное безопасное соединение, которое невозможно перехватить и прослушать.
Другое применение для OpenVPN — это обход блокировок различных интернет ресурсов. Существуют различные серверы OpenVPN серверы в интернете, но будет намного надежнее если развернуть OpenVPN на своем сервере. Мы рассматривали процесс в статье установка OpenVPN на Ubuntu, но для новичков это достаточно сложно. В этой инструкции мы рассмотрим как выполняется настройка OpenVPN linux с помощью скрипта openvpn-install, который упрощает процесс установки и настройки в несколько раз. С его помощью вы получите работающий сервер в течение нескольких минут.
Настройка OpenVPN сервера в Linux
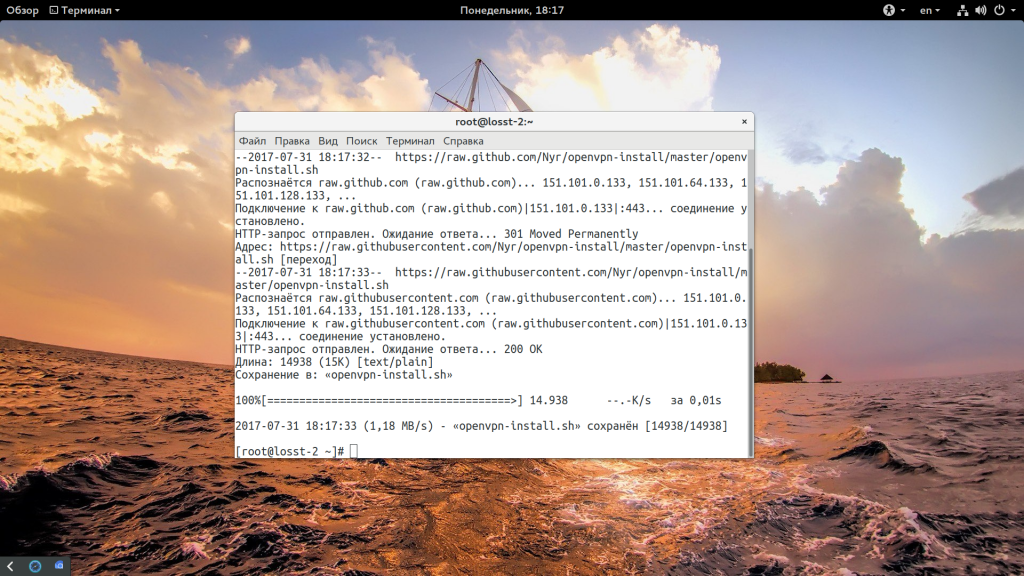
В этой статье, в качестве системы для примера мы будем использовать операционную систему CentOS, но операции не будут отличаться в других дистрибутивах. Сначала скачайте сам скрипт:
wget https://git.io/vpn -O openvpn-install.sh
Затем запустите скрипт от имени суперпользователя с помощью такой команды:
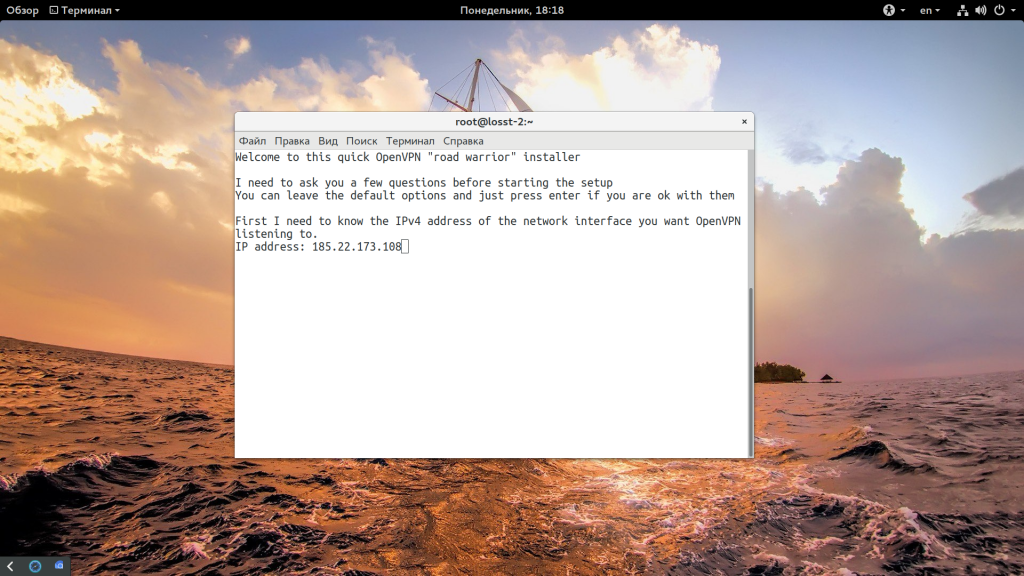
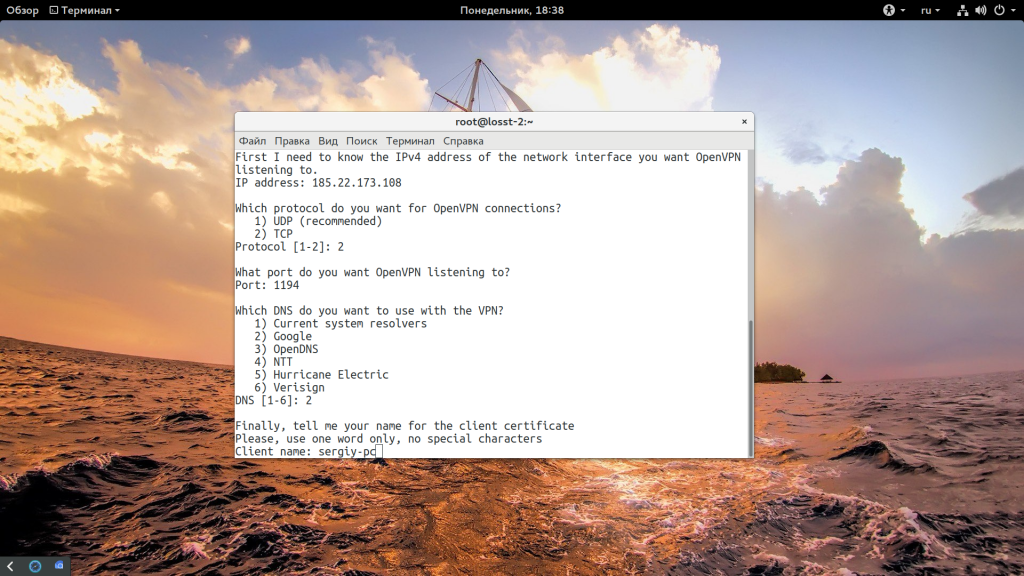
Дальше скрипт задаст несколько вопросов по настройкам OpenVPN. Сначала нужно указать точный ip адрес VPS, на котором будет запущен OpenVPN, именно на этом адресе программа будет слушать соединения:

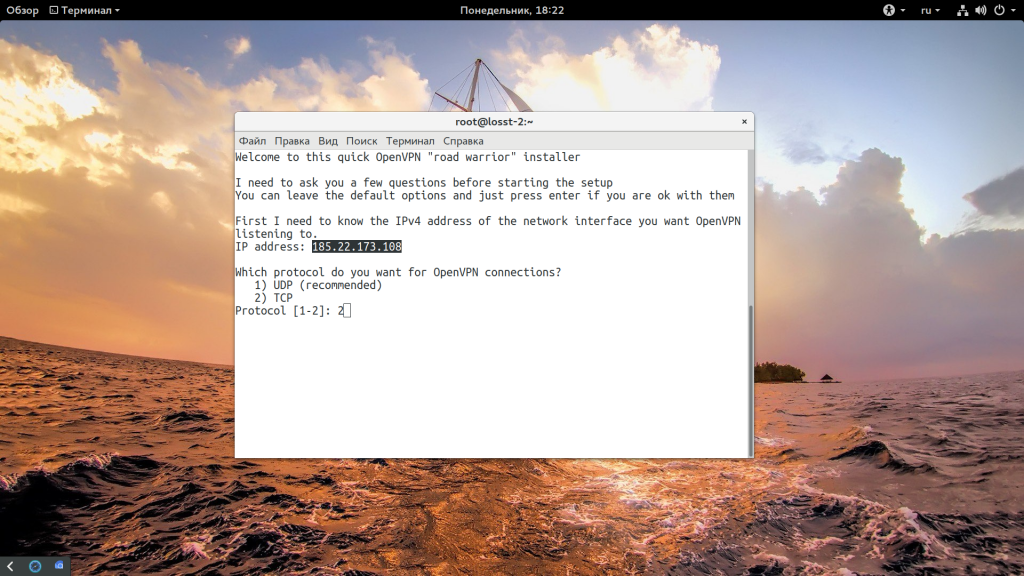
Затем выберите протокол, который вы хотите использовать. Например, если я хочу использовать TCP то нужно выбрать 2:
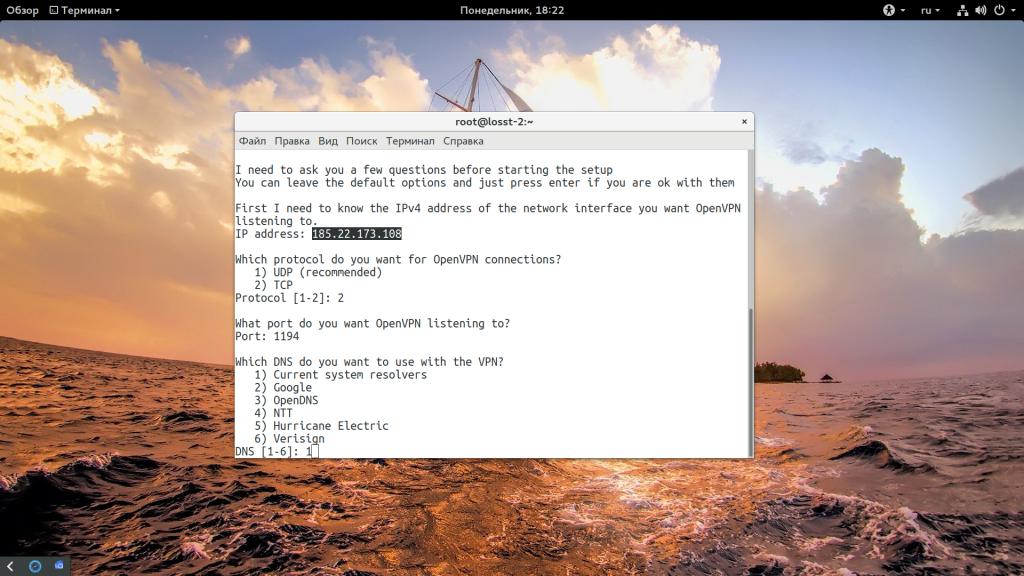
Затем введите номер порта, на котором будет слушать программа, можно оставить значение по умолчанию:

Выберите сервера DNS, которые нужно использовать, мне, например, нравятся сервера от Google:
Введите имя клиента, для которого будут подписаны сертификаты на доступ:
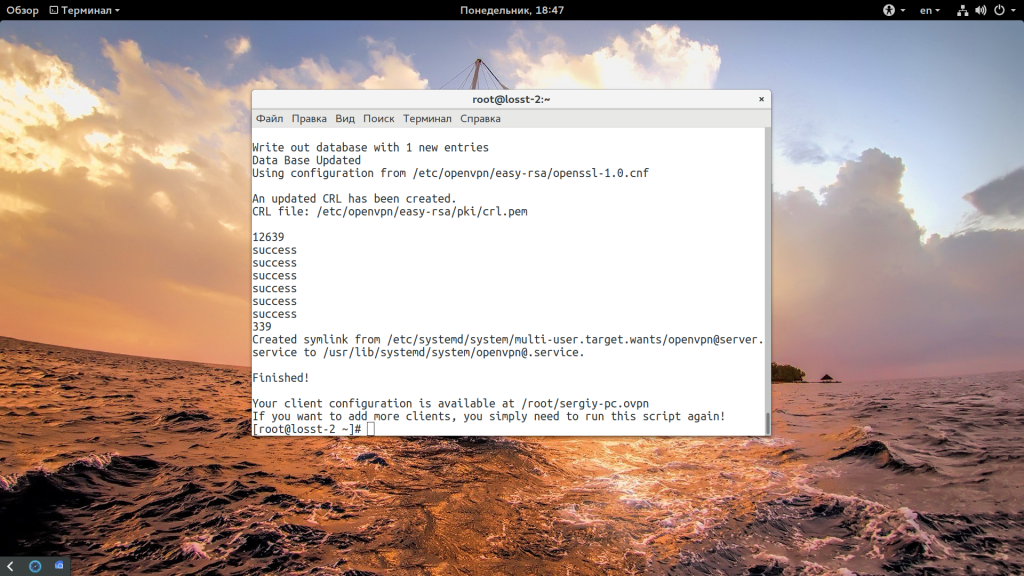
Дальше нажмите Enter, и подтвердите установку OpenVPN. Программа сама установит нужные пакеты в вашем дистрибутиве, а затем подпишет все необходимые сертификаты, запустит сервер openvpn и даже добавит его в автозагрузку systemd:
Последний шаг, это утилита спросит есть ли у вашего сервера дополнительный внешний ip адрес. Это может быть полезно, если вы используете NAT, и для доступа к серверу применяете какой-либо туннель. В других случаях этот пункт можно пропустить, для VPS точно пропускаем.
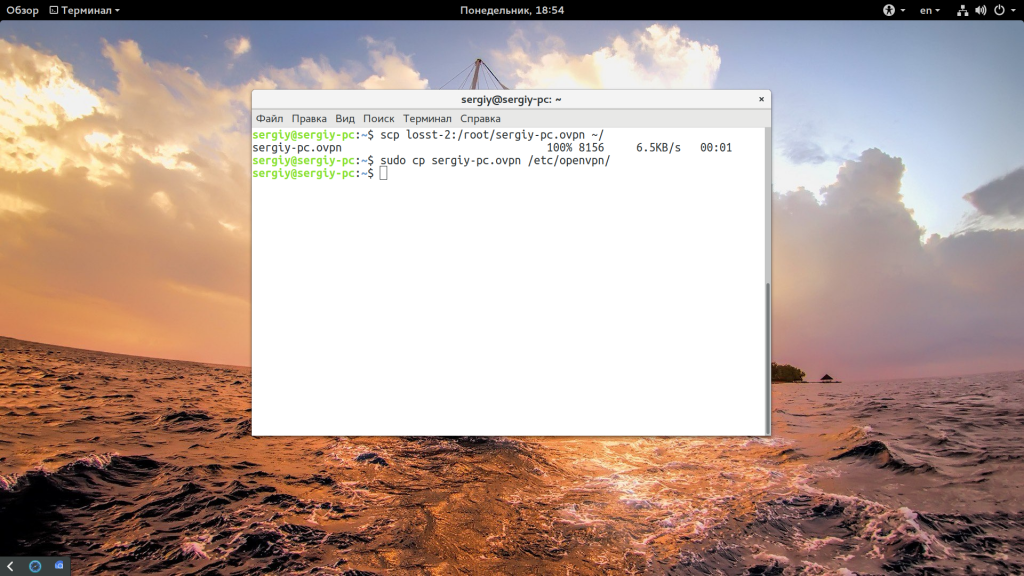
Теперь установка и настройка OpenVPN сервера Linux завершена. Конфигурационный файл для клиента сохранен по адресу /root/sergiy-pc.ovpn, может иметь и другое имя, в зависимости от того, какое имя вы дали клиенту. Самое интересное, что для того чтобы добавить новых клиентов, вам просто достаточно запустить скрипт еще раз. Осталось только скопировать полученный файл клиенту, для этого можно на клиентском компьютере выполнить scp:
scp root@адрес_сервера:/root/sergiy-pc.ovpn /etc/openvpn/
Настройка клиента OpenVPN
Вы можете настроить OpenVPN на клиентской машине как захотите, например, с помощью NetworkManager. Но мы рассмотрим ручной вариант. Сначала установите саму программу. Установка OpenVPN Linux Ubuntu выполняется командой:
Теперь для подключения к нашему серверу используем полученный файл:
openvpn —config /etc/openvpn/client.ovpn
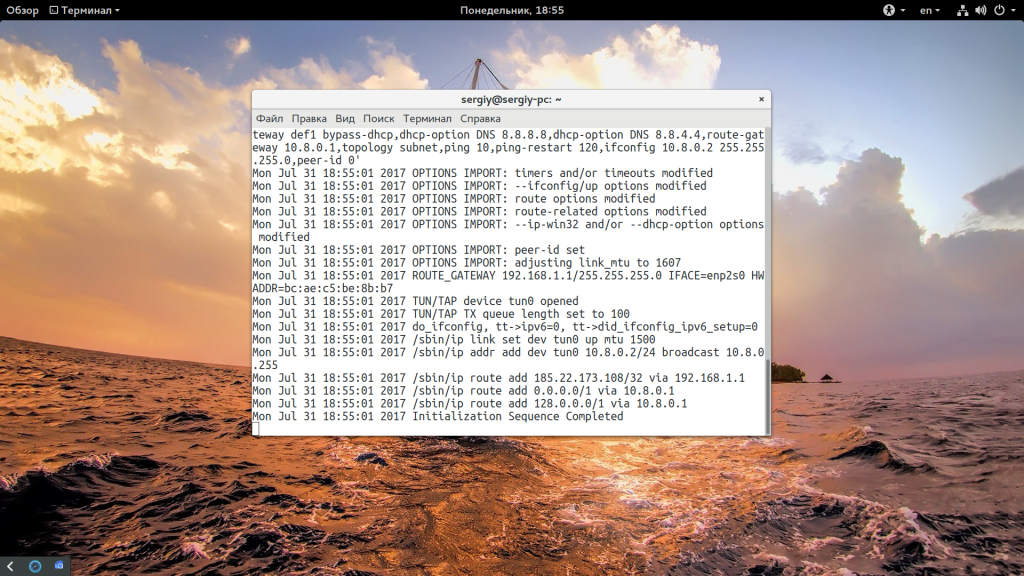
Вы можете использовать команду ip addr чтобы проверить ip адрес интерфейса OpenVPN — tun0:
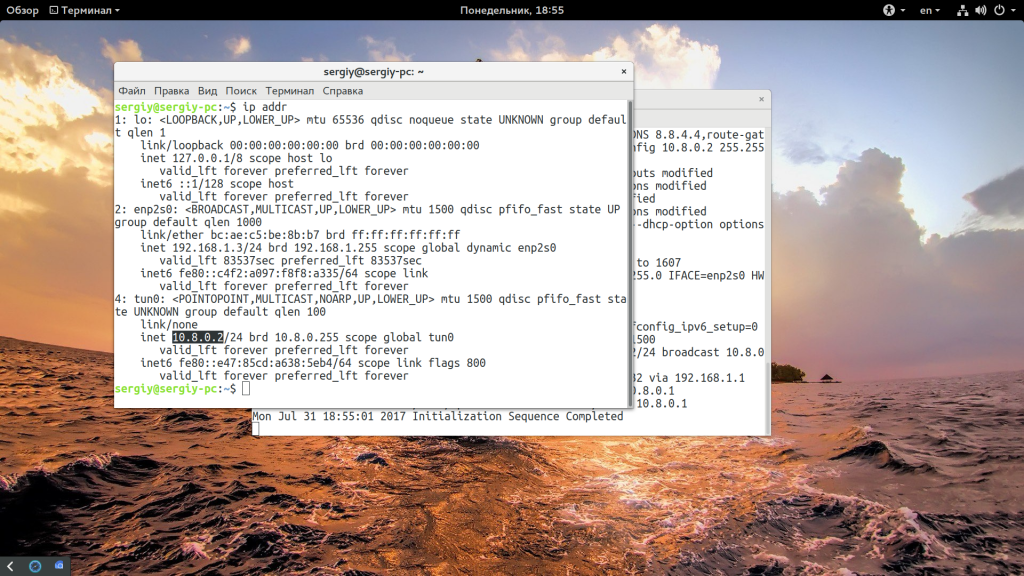
Как видите, OpenVPN автоматически выдал IP вашему компьютеру, теперь можете проверить подключение к этому серверу с помощью ping:
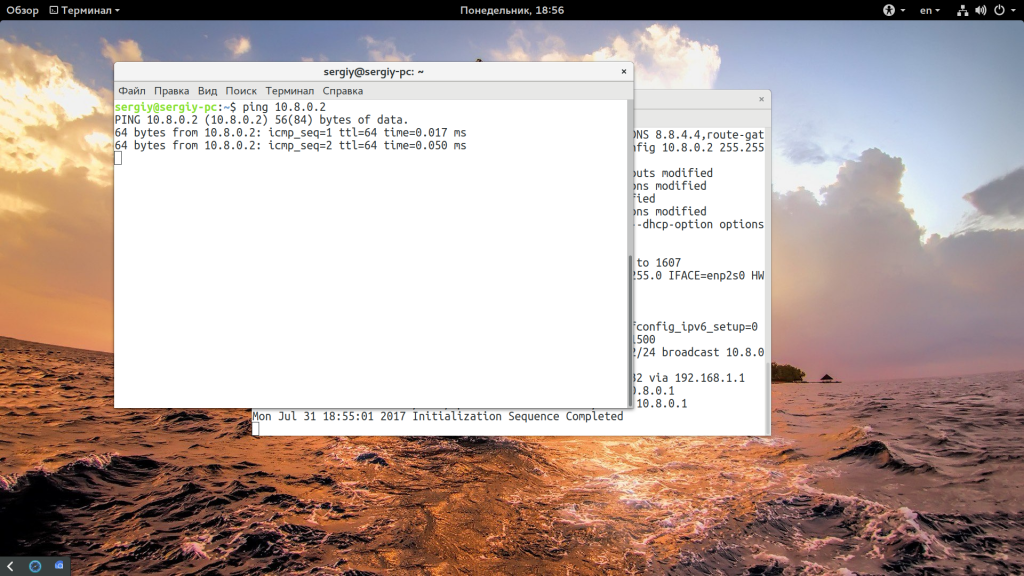
Вот и все, ваша сеть готова к работе.
Выводы
Пять минут и настройка OpenVPN Linux завершена, а не подключение следующего клиента уйдет еще меньше. Этот метод не специфичен для RPM систем и может использоваться также в DEB системах, таких как Ubuntu или Debian. Если у вас остались вопросы, спрашивайте в комментариях!

Обнаружили ошибку в тексте? Сообщите мне об этом. Выделите текст с ошибкой и нажмите Ctrl+Enter.