- How to run an Ubuntu Desktop virtual machine using VirtualBox 7
- What you’ll learn
- What you’ll need
- Download an Ubuntu Image
- Download and install VirtualBox
- 2. Create a new virtual machine
- Create a user profile
- Define the Virtual Machine’s resources
- 3. Install your image
- 4. Explore Virtual Box
- 5. Tell us your thoughts!
- How will you use this tutorial?
- How to Install VirtualBox on Ubuntu
- Option 1: Install VirtualBox from Ubuntu Repositories
- Option 2: Installing VirtualBox from Oracle’s Repositories
- Install Supporting software
- Install GPG keys
- Add VirtualBox Repository to Ubuntu
- Install Latest Version of VirtualBox
- Install VirtualBox Extension Pack
- Using VirtualBox
How to run an Ubuntu Desktop virtual machine using VirtualBox 7
In this tutorial, we’ll walk you through one of the easiest ways to try out Ubuntu Desktop on a virtual machine. VirtualBox is a general purpose virtualiser that is available across Linux, Mac OS and Windows. It’s a great way to experience Ubuntu regardless of your current operating system.
VirtualBox 7 and above includes a new feature called Unattended Guest OS Install which significantly streamlines the setup experience for common operating systems like Ubuntu, making it easier than ever to get started.
Note: This tutorial will also work for other distributions, so try it out with some of the Ubuntu flavours as well!
What you’ll learn
- How to install and configure VirtualBox
- How to import an Ubuntu image
- How to run a virtual instance of Ubuntu Desktop
- Further configuration options
What you’ll need
Download an Ubuntu Image
You can download an Ubuntu image here. Make sure to save it to a memorable location on your PC! For this tutorial, we will use the latest Ubuntu 22.10 release.

Download and install VirtualBox
You can download VirtualBox from the downloads page here. This page includes instructions on how to install VirtualBox for your specific OS so we won’t repeat those here.
Once you have completed the installation, go ahead and run VirtualBox.
2. Create a new virtual machine
Click New to create a new virtual machine. Fill in the appropriate details:
- Name: If you include the word Ubuntu in your name the Type and Version will auto-update.
- Machine Folder: This is where your virtual machines will be stored so you can resume working on them whenever you like.
- ISO Image: Here you need to add a link to the ISO you downloaded from the Ubuntu website.
We want to install Ubuntu unattendedly so we can leave the checkbox to skip unchecked.
Create a user profile
To enable the automatic install we need to prepopulate our username and password here in addition to our machine name so that it can be configured automatically during first boot.
The default credentials are:
It is important to change these values since the defaults will create a user without sudo access.
Ensure your Hostname has no spaces to proceed!
It is also recommended to check the Guest Additions box to install the default Guest Additions ISO that is downloaded as part of VirtualBox. Guest additions enables a number of quality of life features such as changing resolution and dynamic screen resizing so it is highly recommended!
Note: If you choose not to use unattended install then this step will be skipped and you will go straight to the following screen. Once your machine has been created you will be able to create a username and password by proceeding through the standard Ubuntu Desktop installation flow on first boot.
Define the Virtual Machine’s resources
In the next section we can specifiy how much of our host machine’s memory and processors the virtual machine can use. For good performance it’s recommended to provide your VM with around 8GB of RAM (althought 4GB will still be usable) and 4 CPUs. Try to remain in the green areas of each slider to prevent issues with your machine running both the VM and the host OS.
Then we need to specify the size of the hard disc for the virtual machine. For Ubuntu we recommend around 25 GB as a minimum. By default the hard disk will scale dynamically as more memory is required up to the defined limit. If you want to pre-allocate the full amount, check the ‘Pre-allocate Full Size’ check box. This will improve performance but may take up unnecessary space.
Click Next to continue and view a summary of your machine setting.
After this click Finish to initialize the machine!
3. Install your image
Click Start to launch the virtual machine.
You will see a message saying ‘Powering VM up …’ and your desktop window will appear.
On first boot the unattended installation will kick in so do not interact with the prompt to ‘Try and Install Ubuntu’ and let it progress automatically to the splash screen and into the installer.
Note: If you chose not to use unattended install then you will need to progress through the Ubuntu install manually. Check out our Ubuntu Desktop installation tutorial for more details.
You will notice at this stage that the resolution of the window is fixed at 800×600. This is because the Guest Additions features are not installed until after the Ubuntu installation has completed.
Once the installation completes, the machine will automatically reboot to complete the installation.
Finally you will be greeted with the Ubuntu log-in screen where you can enter your username and password defined during the initial setup (don’t forget that the default password is ‘changeme’ if you left everything as the default).
4. Explore Virtual Box
Enjoy your shiny new Ubuntu Desktop!
As always we recommend opening a terminal and running sudo apt update && sudo apt upgrade -y and then sudo snap refresh to get everything updated to the latest versions.
Once you’ve finished your session you can close your machine by clicking the X in the top right of the window and choosing whether to keep your machine frozen in its current state or shut it down completely.
As you can probably tell, there are tonnes of further configuration options available in VirtualBox and we’ve only scratched the surface.
VirtualBox allows you to create and configure multiple virtual machines, so don’t be afraid to create new instances of Ubuntu to try out different system and storage configurations to fine tune your performance.
Why not try following the tutorial above with one of the Ubuntu flavours!

5. Tell us your thoughts!
Thank you for following this tutorial, we’d love to hear how you got on.
Give us feedback in the Ubuntu Discourse if you have any issues.
To help us improve our tutorials, we’d love to hear more about you:
How will you use this tutorial?
How to Install VirtualBox on Ubuntu
VirtualBox is a powerful free tool by Oracle for running a virtual operating system on your computer. In this tutorial learn how to install VirtualBox on Ubuntu and other Debian-based Linux distributions.
Option 1: Install VirtualBox from Ubuntu Repositories
The easiest way to install VirtualBox is by using the official Ubuntu repositories.
1. Open a terminal, and enter the following to update the repository:
2. Download and install VirtualBox by running:
sudo apt-get install virtualbox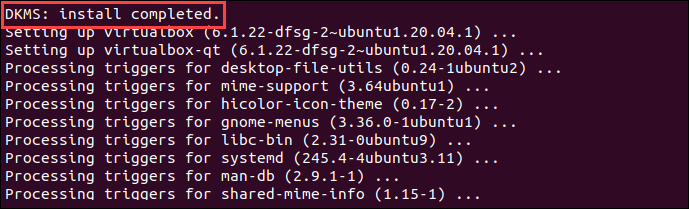
3. Next, install the VirtualBox Extension Pack:
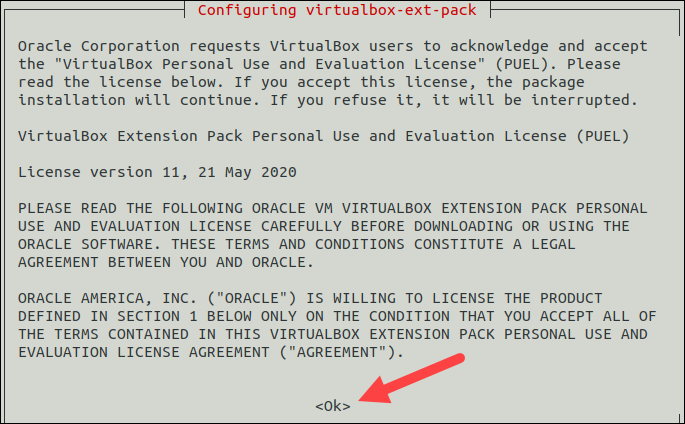
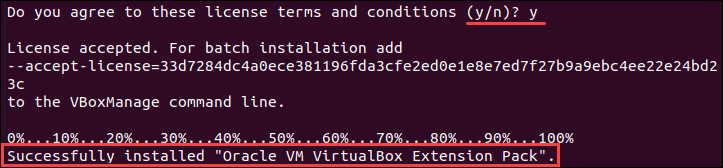
sudo apt-get install virtualbox—ext–packRead the VirtualBox Extension Pack Personal Use and Evaluation License and select to confirm you understand.
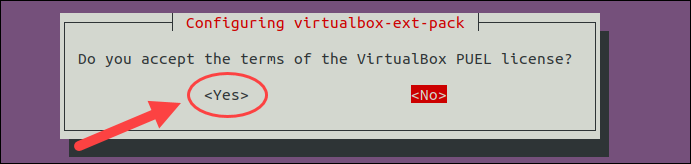
Accept the terms of the VirtualBox PUEL license by selecting and hitting Enter.
Finally, the output displays you have successfully installed «Oracle VM VirtualBox Extension Pack».

The Extension Pack enhances VirtualBox by adding USB 2.0 and 3.0 support, remote desktop, and encryption.
Option 2: Installing VirtualBox from Oracle’s Repositories
Often the default repositories do not have the latest versions of the software. They may work for test environments, but some users need the latest security or functionality patches. This process is more in-depth but installs the most recent version of VirtualBox on Ubuntu.
Install Supporting software
The software-properties-common package is required to run Virtualbox on Ubuntu. It allows you to add new software repositories.
Enter the following into a terminal window:
sudo apt-get install software–properties–commonInstall GPG keys
GPG keys allow you to verify and communicate with the VirtualBox repository.
To download and install GPG keys, use the commands:
wget -q https://www.virtualbox.org/download/oracle_vbox_2016.asc -O- | sudo apt-key add -wget -q https://www.virtualbox.org/download/oracle_vbox.asc -O- | sudo apt-key add –
Note: Refer to our guide How to Delete GPG Keys to learn how to delete GPG keys using different methods.
Add VirtualBox Repository to Ubuntu
To add the VirtualBox repository, enter the command :
echo "deb [arch=amd64] http://virtualbox.org/virtualbox/debian $(lsb_release -cs) contrib" | sudo tee /etc/apt/sources.list.d/virtualbox.listInstall Latest Version of VirtualBox
1. Start by updating the package lists:

2. To Install VirtualBox 6.1 on Ubuntu, use the command:
sudo apt-get install virtualbox–6.1At the time of writing this article, the latest VirtualBox version is 6.1.26. It was designed for 64-bit operating systems. If you’re running a 32-bit OS, you can use VirtualBox 5.2 instead.
To install VirtualBox 5.2, enter the following:
sudo apt-get install virtualbox–5.2Install VirtualBox Extension Pack
The VirtualBox Extension Pack enhances the functionality of your virtual machines. It adds additional tools like USB 2.0 and 3.0, Remote Desktop, and encryption.
wget https://download.virtualbox.org/virtualbox/6.1.26/Oracle_VM_VirtualBox_Extension_Pack-6.1.26.vbox-extpack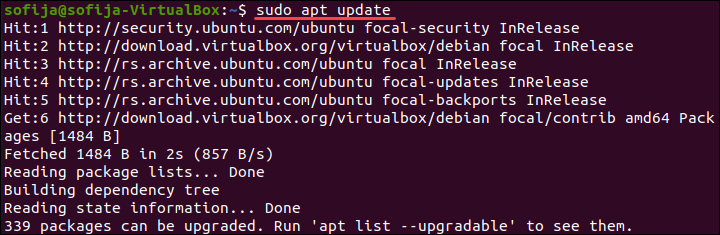
2. Import the Extension Pack:
sudo VBoxManage extpack install Oracle_VM_VirtualBox_Extension_Pack-6.1.26.vbox-extpackConfirm the installation, then allow the process to complete.
Note: The Extension Pack corresponds to the version of VirtualBox. If you’re working with VirtualBox 5.2, please see the Version 5.2 downloads page for the Extension Pack.
Using VirtualBox
1. Launch the VirtualBox interface by entering the following:
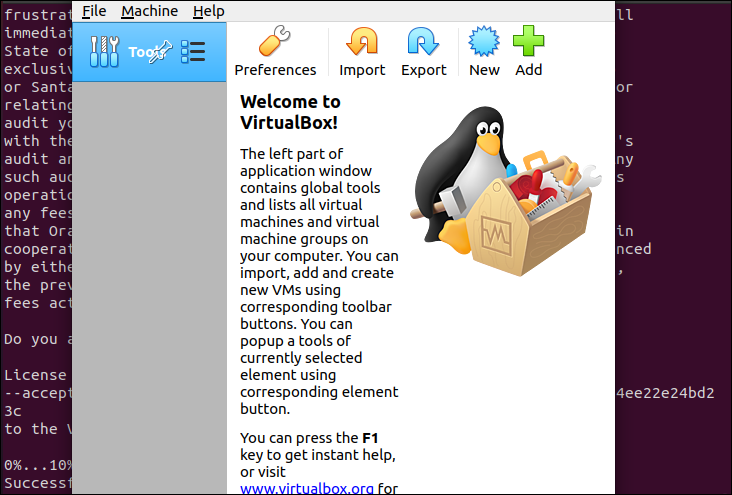
2. After VirtualBox launches, a graphic interface will load. Use the Add or New button to create a new virtual machine. A dialog will open. Select the operating system and version you’d like to create, then click Next.
3. The dialog will offer you several options for the virtual machine. This is where you allocate memory, hard drive, and other resources to the virtual machine. Use default options if you are unsure about customizing this,
4. Once you finish, a new virtual machine is available in the left column. Select it, and click the green arrow Start button. A new window will open and boot up the virtual machine.
Note: If you need to run a virtual machine from a command line, you can install Vagrant to manage virtual machines from the terminal.
In this tutorial, we covered two methods of installing VirtualBox on Ubuntu. You should now have a working VirtualBox application on your system. For additional information on VirtualBox, visit the VirtualBox Wiki.
And for more tutorials on VirtualBox, be sure to read our guides on How To Install Kali Linux On VirtualBox, and How To Install Rocky Linux On VirtualBox.