- Установка wireshark linux debian
- 2.6.1. Installing from RPMs under Red Hat and alike
- 2.6.2. Installing from debs under Debian, Ubuntu and other Debian derivatives
- 2.6.3. Installing from portage under Gentoo Linux
- 2.6.4. Installing from packages under FreeBSD
- Как установить сетевой анализатор Wireshark в Debian
- Предварительные условия
- Обновление списка пакетов
- Установка Wireshark в Debian
- Тестирование Wireshark
- Заключение
- Похожие записи:
- How to Install Wireshark on Debian 11
- Installing Wireshark on Debian 11
- Getting started with Wireshark
- The Wireshark GUI
- Capturing Packets with Wireshark
- Conclusion
- About the author
- David Adams
Установка wireshark linux debian
In general installing the binary under your version of UNIX will be specific to the installation methods used with your version of UNIX. For example, under AIX, you would use smit to install the Wireshark binary package, while under Tru64 UNIX (formerly Digital UNIX) you would use setld .
2.6.1. Installing from RPMs under Red Hat and alike
Building RPMs from Wireshark’s source code results in several packages (most distributions follow the same system):
- The wireshark package contains the core Wireshark libraries and command-line tools.
- The wireshark or wireshark-qt package contains the Qt-based GUI.
Many distributions use yum or a similar package management tool to make installation of software (including its dependencies) easier. If your distribution uses yum , use the following command to install Wireshark together with the Qt GUI:
yum install wireshark wireshark-qt
If you’ve built your own RPMs from the Wireshark sources you can install them by running, for example:
rpm -ivh wireshark-2.0.0-1.x86_64.rpm wireshark-qt-2.0.0-1.x86_64.rpm
If the above command fails because of missing dependencies, install the dependencies first, and then retry the step above.
2.6.2. Installing from debs under Debian, Ubuntu and other Debian derivatives
If you can just install from the repository then use
Apt should take care of all of the dependency issues for you.
By installing Wireshark packages non-root, users won’t gain rights automatically to capture packets. To allow non-root users to capture packets follow the procedure described in https://gitlab.com/wireshark/wireshark/-/blob/master/packaging/debian/README.Debian (/usr/share/doc/wireshark-common/README.Debian.gz)
2.6.3. Installing from portage under Gentoo Linux
Use the following command to install Wireshark under Gentoo Linux with all of the extra features:
USE="c-ares ipv6 snmp ssl kerberos threads selinux" emerge wireshark
2.6.4. Installing from packages under FreeBSD
Use the following command to install Wireshark under FreeBSD:
pkg_add should take care of all of the dependency issues for you.
Как установить сетевой анализатор Wireshark в Debian
Wireshark — это самый передовой и широко используемый в мире анализатор сетевых протоколов. Он позволяет увидеть, что происходит в вашей сети на микроскопическом уровне, и является стандартом де-факто (а часто и де-юре) для многих коммерческих и некоммерческих предприятий, государственных учреждений и учебных заведений. Разработка Wireshark процветает благодаря добровольному вкладу сетевых экспертов по всему миру и является продолжением проекта, начатого Джеральдом Комбсом в 1998 году.
Установить Wireshark в Debian очень просто — в этом руководстве мы покажем вам, как это сделать. Мы также объясним некоторые основы использования Wireshark, чтобы вы могли сразу же приступить к работе.
Предварительные условия
Для того чтобы следовать нашему руководству по установке Wireshark в Debian, вам потребуется:
- Подключение к интернету (для загрузки и установки пакетов)
- Учётная запись с привилегиями sudo для установки и удаления пакетов. Вы можете настроить её, следуя инструкциям здесь.
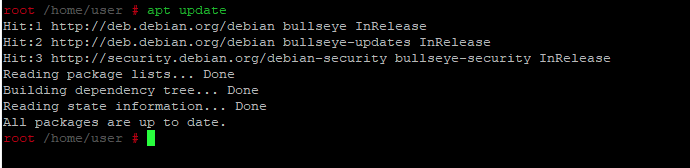
Обновление списка пакетов
Wireshark зависит от ряда библиотек с открытым исходным кодом. Нам нужно убедиться, что они обновлены, прежде чем мы установим саму программу. Debian 10 поддерживает все свои пакеты в актуальном состоянии посредством регулярных обновлений, поэтому сначала мы запустим обновление.
Установка Wireshark в Debian
Теперь, когда мы получили актуальную информацию, мы можем перейти к загрузке и установке Wireshark.
Wireshark распространяется в виде пакета .deb файлов. Это означает, что нет необходимости скачивать что-либо вручную. Вместо этого мы можем просто установить его через apt, как и любую другую программу в Debian.
sudo apt install wireshark -y 
Во время установки вам будет предложено разрешить не-суперпользователям получать данные с ваших сетевых интерфейсов. Выберите Да, чтобы продолжить.

Тестирование Wireshark
Теперь, когда мы установили Wireshark, давайте проведем быстрый тест-драйв.
Прежде всего, запустите программу, набрав sudo wireshark. Это откроет Wireshark в собственном окне.
Вы также можете открыть Wireshark из системы меню среды рабочего стола.

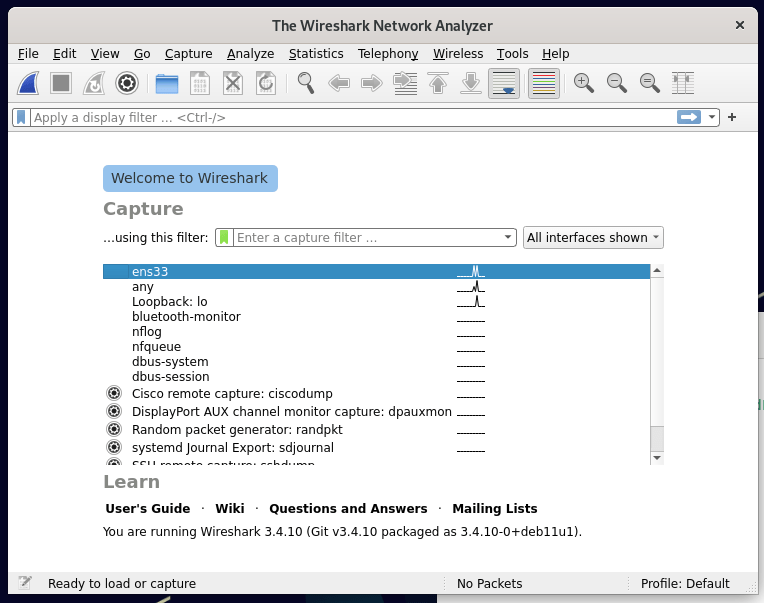
Wireshark имеет графический интерфейс пользователя (GUI) для захвата пакетов, как показано ниже. Вам будет представлен список доступных сетевых интерфейсов, которые понимает Wireshark. Если вы хотите отслеживать интерфейс, через который ваш веб-браузер получает подключение к Интернету (например, wlan0), выберите этот интерфейс и нажмите кнопку Start.
Однако вы также можете использовать его из терминала, набрав команду tshark, а затем команду для захвата некоторого трафика. Tshark — это программа командной строки для мониторинга сетевого трафика. Вместе с TShark она входит в состав пакета Wireshark. Как и ее аналог с графическим интерфейсом, она может захватывать пакеты, а затем показывать их описание в окне терминала или сохранять в файл в двоичном формате.
Вы можете установить tshark, введя следующую команду в окне терминала:
sudo apt install tshark -y 
Выполните команду tshark -help ниже, чтобы увидеть различные опции, которые предлагает tshark. Выполните команду tshark -D ниже, чтобы проверить, что ваши сетевые интерфейсы распознаются tshark.
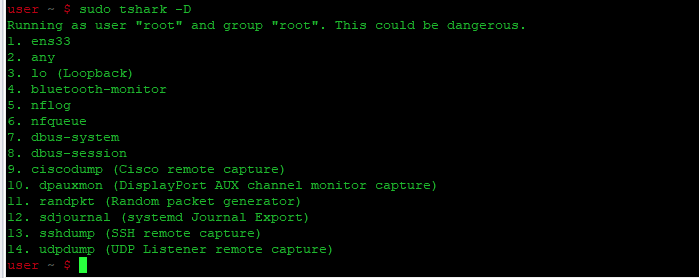
Вы получите список ваших сетевых интерфейсов, как показано ниже. Обратите внимание, что некоторые сетевые интерфейсы могут находиться в состоянии «отключено». Не все сетевые интерфейсы активны по умолчанию. Вам придется найти активные интерфейсы. В данном примере это интерфейсы ens3 и lo.
Вы можете узнать, какой интерфейс активен, набрав ifconfig в терминале.

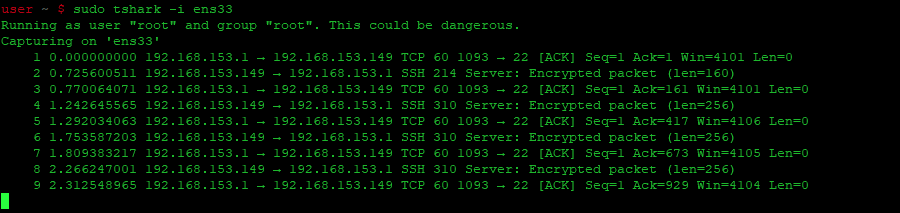
Определив нужный интерфейс захвата, выполните команду tshark -i [интерфейс], чтобы начать захват пакетов. Где — это имя нужного интерфейса захвата.
После завершения захвата данных нажмите Ctrl-C в окне терминала. Это остановит процесс захвата и закроет tshark. Вы увидите захваченные данные, отображенные в окне терминала ниже.

Заключение
В этом руководстве мы показали вам, как установить Wireshark на Debian. Мы также продемонстрировали использование Tshark — инструмента командной строки, который можно использовать вместе с Wireshark, как и его эквивалент с графическим интерфейсом. На этом этапе у вас должна быть установлена рабочая версия Wireshark.
Похожие записи:
How to Install Wireshark on Debian 11
![]()
This tutorial explains how to install Wireshark on Debian 11, and how to get started with this packet analyzer useful for many purposes including network problems troubleshooting, sniffing and more.
Installing Wireshark on Debian 11
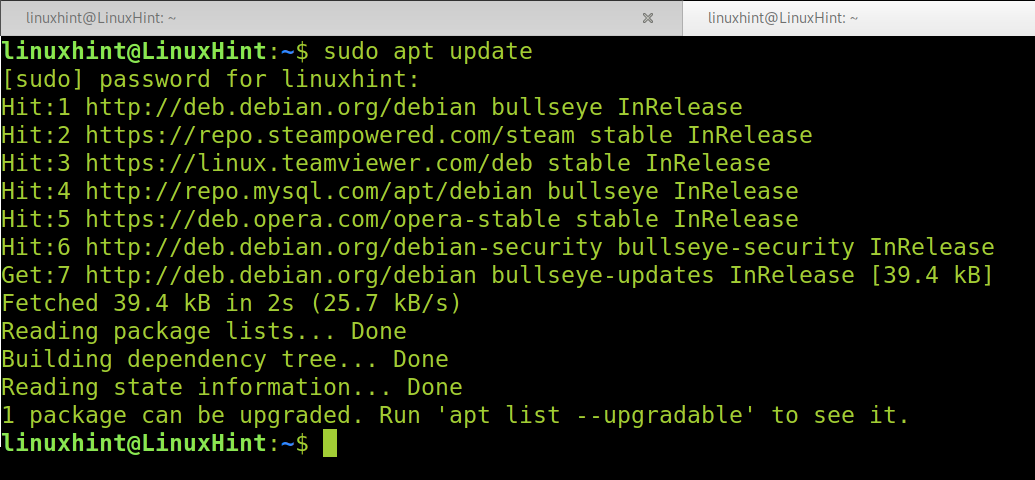
To Install Wireshark on Debian 11, run the following command to update your packet versions information.
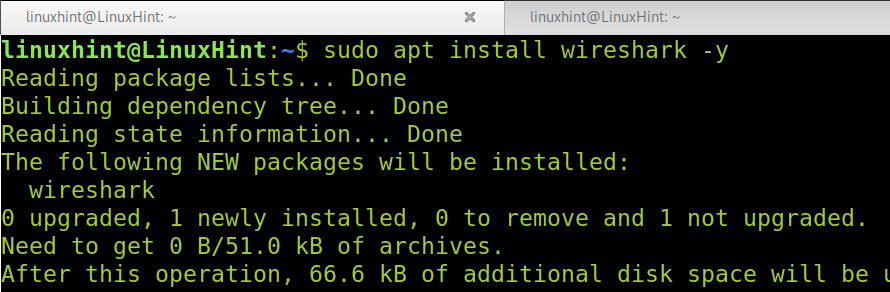
Then, install Wireshark using the apt command as shown below.
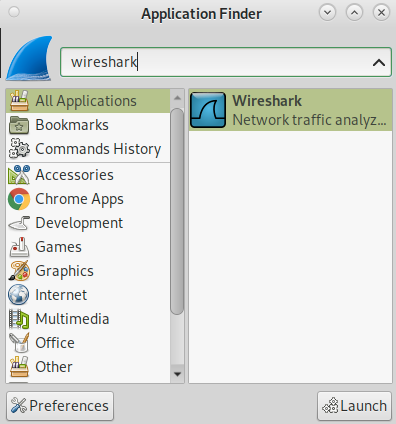
As you can see in the screenshot below, you can find Wireshark from your applications menu or Applications Finder. To get started with Wireshark, select it and press the Launch button.
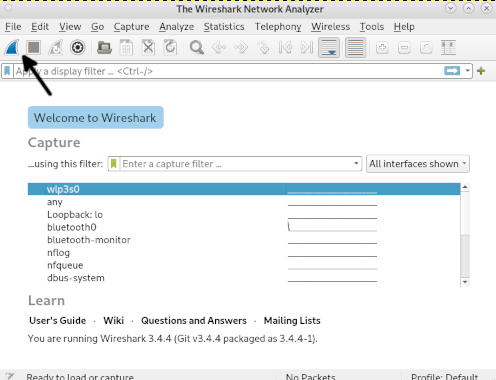
The welcome screen will show up. Select your network device to capture packets and press the shark fin icon shown in the screenshot below to start capturing network traffic.
Getting started with Wireshark
You can launch Wireshark from the graphical interface as explained in the previous steps, from the Application Finder or applications menu.
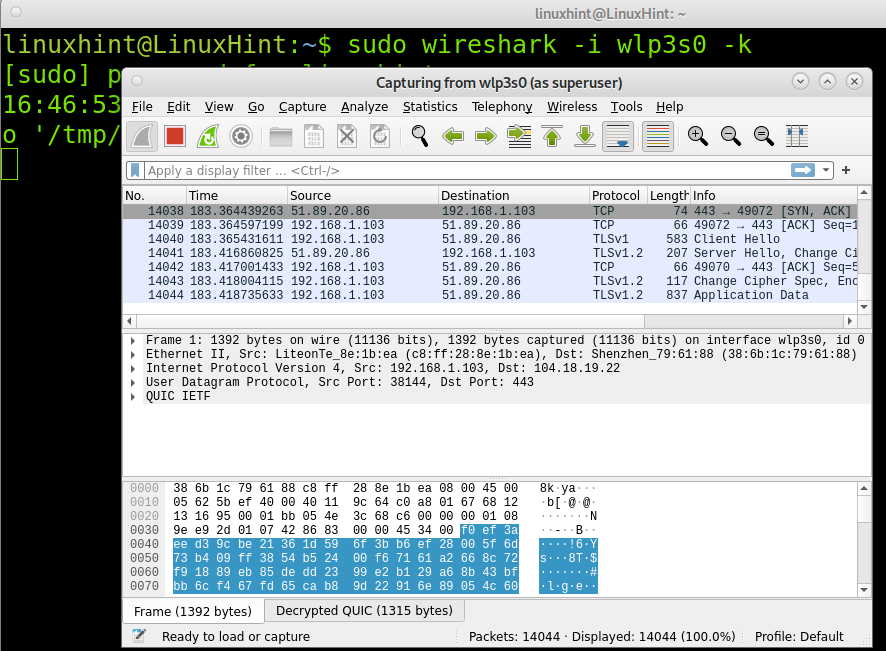
If you already know the network interface, you’ll use to monitor the network, you can launch Wireshark by running the following command, where must be replaced by the network device you are using. The screenshot below depicts Wireshark execution using the network interface named wlp3s0.
Note: You can find additional launching options at
The Wireshark GUI
To begin understanding Wireshark, let’s divide the screen into 6 sections: Menu, toolbar, packet list pane, packet details pane and packet bytes pane. The following screenshot shows the location of each section.
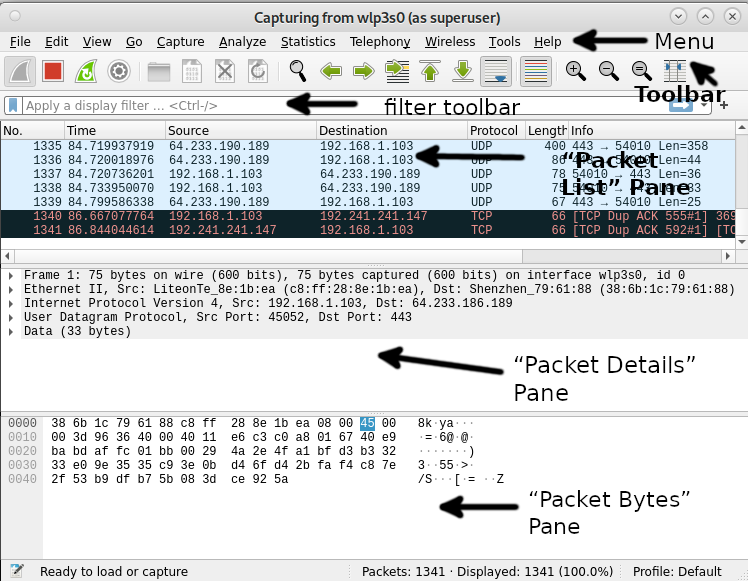
Where each section contains the following:
Menu: The menu section includes items to manage capture files, save, export and print partial or all captures. On the Edit tab this section contains options to find packets, manage configuration profiles and some preferences. The View tab allows to manage display options such as specific packet colorization, fonts, additional windows, and more. The Go tab allows you to inspect specific packets. The Capture tab allows to start and to stop capturing files, as well as editing filters. From the Analyze tab you can enable or disable protocol dissection, manipulate display filters, among additional options. The statistics tab allows to show statistics and summaries of captures. The telephony tabs allow you to display telephony statistics. The Wireless tab shows bluetooth and IEEE 802.11 statistics. The tools tab contains available tools for Wireshark. Finally the Help menu contains manual and help pages.
Toolbar: The main toolbar contains buttons to start, restart and stop capturing packets. From this toolbar you can save, reload and close capture files. From this menu you also can access additional capture options or find specific packets. You can pass to the next packet, or go back to the previous one. This toolbar includes display options to colorize packets, zoom in or zoom out, etc.
Filter Toolbar: This toolbar is useful to specify the type of packets you want to capture, or to specify the type of packets you want to drop. For example, to capture all packets whose source is the port 80, you can type “tcp src port 80”. To drop all arp packets you can type “not arp”
Packet List: The Packet List section displays packets in the capture file. The available columns show the number of packets in the file, the packet’s timestamp, the source and destination addresses, the protocol and packet length. The Info column shows additional information. If you select a packet in this section, more details on the specific packet will be shown in the “Packet Details” and “Packet Bytes” panes.
Packet Details: The Packets Details pane shows additional information on protocols, including response time, TCP analysis, checksum and IP geolocation. This pane also will show if there are links or a relationship between different packets.
Packet Bytes: This pane displays hex dump of packets, including data offset, sixteen ASCII bytes, sixteen hexadecimal bytes.
Capturing Packets with Wireshark
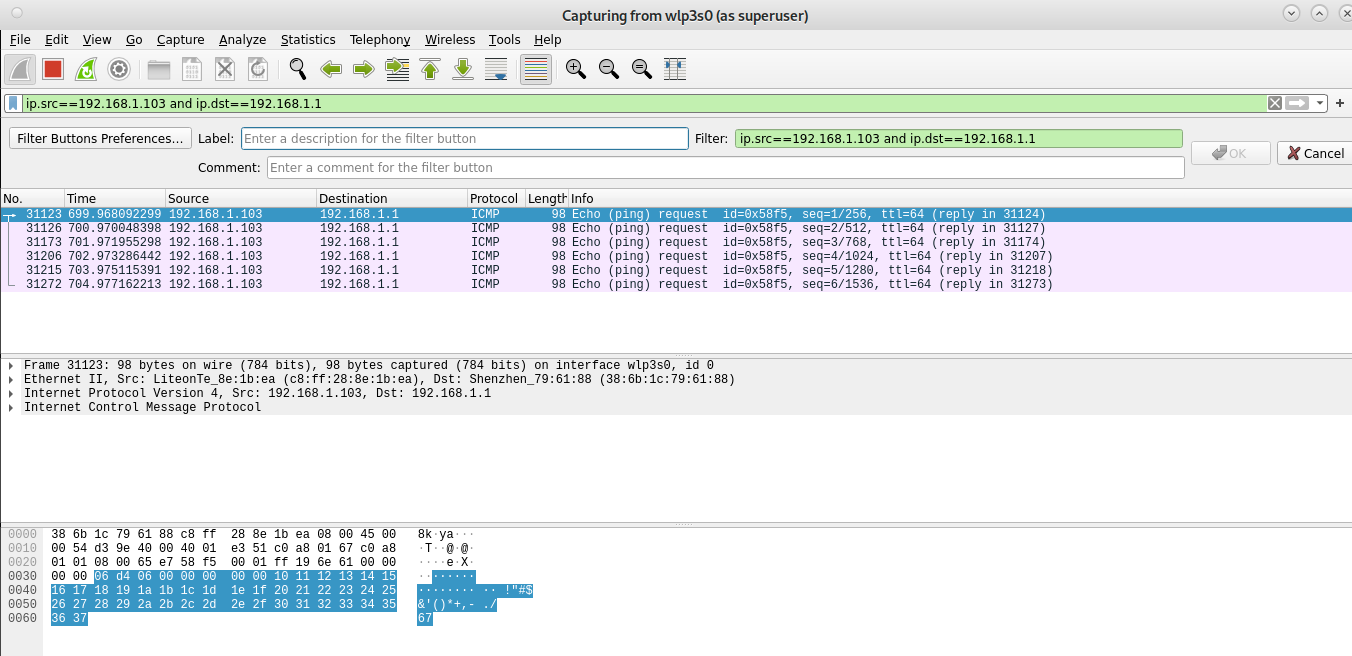
The first example shows how to capture packets belonging to a communication between two specific devices. As you can see in the screenshot below, the filter toolbar contains the filter “ip.src==192.168.1.103 and ip.dst==192.168.1.1” which instructs Wireshark to capture files whose source is the IP address 192.168.1.103 and whose destination is the IP 192.168.1.1.
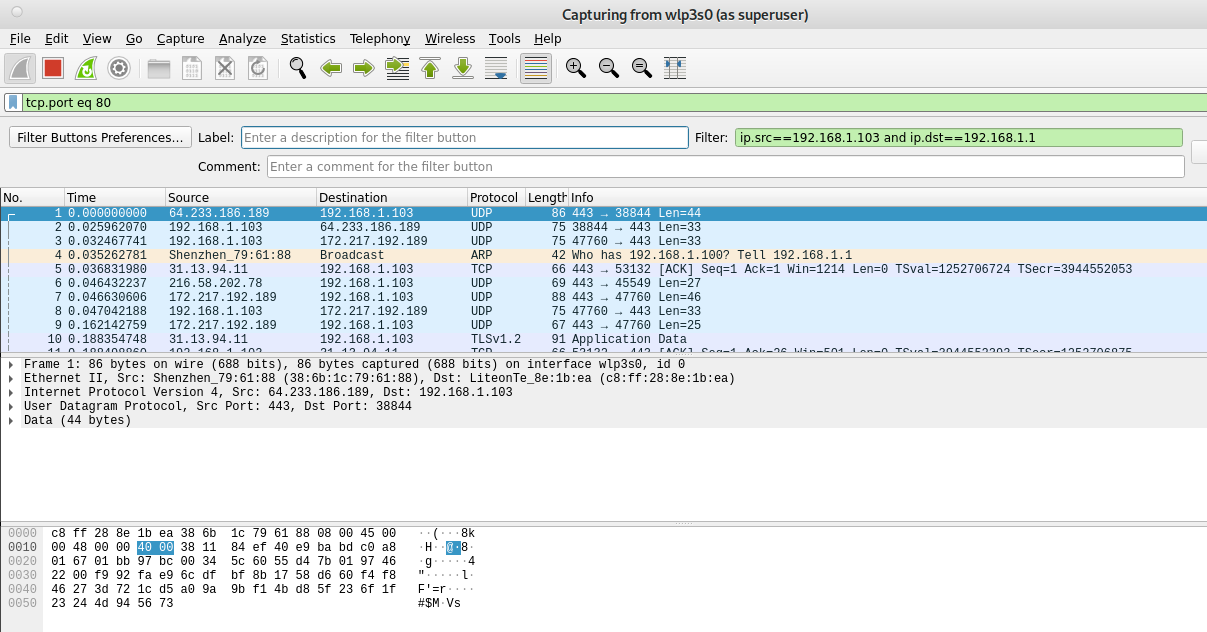
The second example shows the filter “tcp.port eq 80”, which instructs Wireshark to show traffic to port 80, of course you can specify any other port.
Once you finish capturing packets, you need to press the Stop capturing icon shown in the following screenshot.

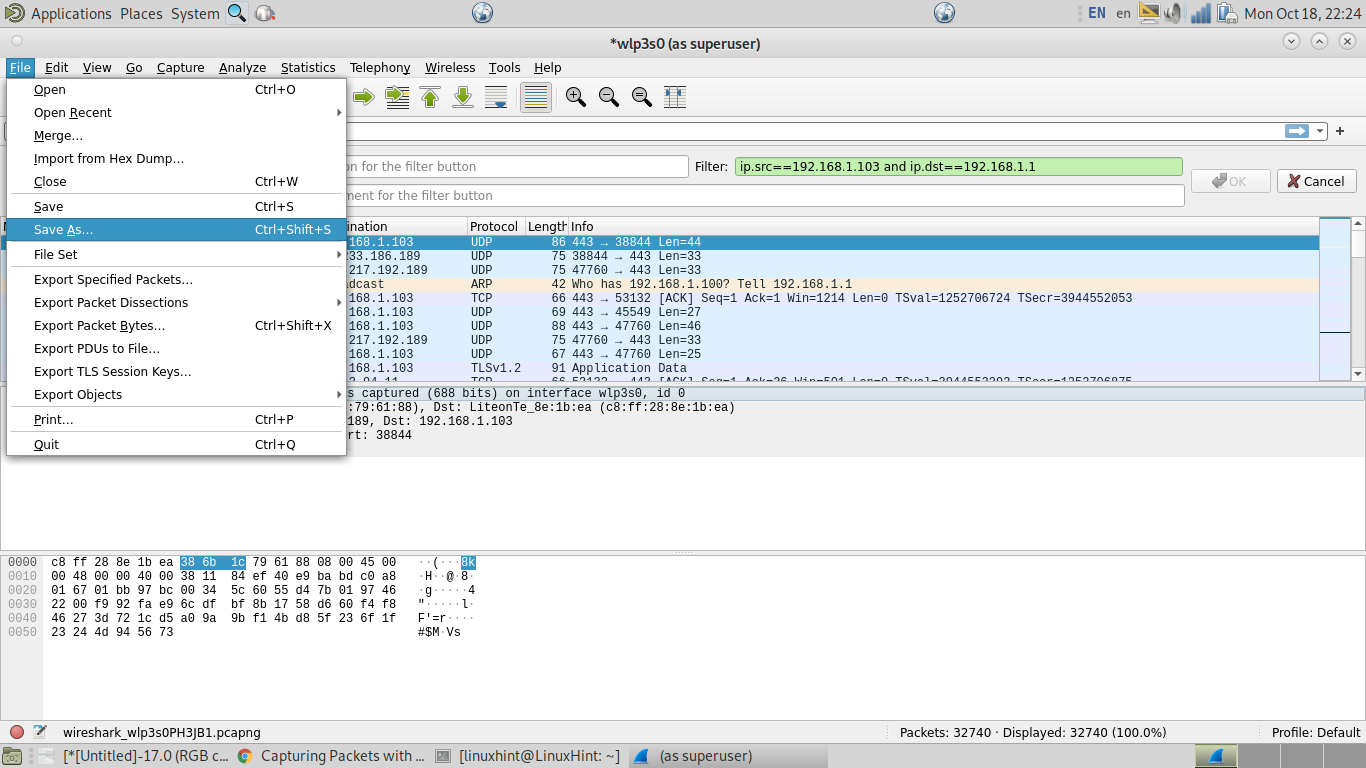
Then, once you stop capturing packets, you can save your captured file by pressing File>Save or File>Save as, as shown in the following image.
That’s all to start learning how to use Wireshark for now.
Conclusion
As you can see, installing Wireshark on Debian 11 is pretty easy and can be done using the apt command, with just a single command. Any Linux level user can install it, while it is mandatory for system administrators to know this or similar tools for network analysis. Wireshark is a very flexible tool which allows users to easily capture and analyze packets. In real scenarios Wireshark was useful to detect anomalies in network traffic. Wireshark can be also used to sniff traffic, both hackers and system administrators looking for bad traffic, need to know how to implement this tool.
Thank you for reading this tutorial showing how to install and get started with Wireshark on Debian 11. I hope this was useful to you. Keep following Linux Hint for additional Linux tips and tutorials.
About the author
David Adams
David Adams is a System Admin and writer that is focused on open source technologies, security software, and computer systems.