- Install Vagrant
- How to Install Vagrant on Ubuntu 22.04
- How to Install Vagrant on Ubuntu 22.04 – Linux Hint
- Step 1: Update Ubuntu Packages
- Step 2: Install VirtualBox
- Step 3: Install Vagrant
- Using Vagrant on Ubuntu 22.04
- Removing Vagrant from Ubuntu 22.04
- Conclusion
- About the author
- Awais Khan
- How to Create Virtual Machine with Vagrant and VirtualBox
- What is Vagrant Box?
- Setting Up Vagrant Project Environment
- Install a Virtual Machine with Vagrant and VirtualBox
- Configures Guest Machines According to Vagrantfile
Install Vagrant
To get started with Vagrant, download the appropriate installer or package for your platform from our Vagrant downloads page. Install the package with the standard procedures for your operating system.
The installer automatically adds vagrant to your system path so that it is available in terminals. If it is not found, log out and back into your system; this is a common issue for Windows.
Rubygem installation is unsupported Vagrant 1.0.x has the option to be installed as a RubyGem. However, this installation method is no longer supported. If you have an old version of Vagrant installed via Rubygems, remove it prior to installing newer versions of Vagrant.
First development environment
If you are new to Vagrant, the next step to set up a development environment is to install a box.
How to use multiple hypervisors
Hypervisors often do not allow you to bring up virtual machines if you have more than one hypervisor in use.
Below are a couple of examples to allow you to use Vagrant and VirtualBox if another hypervisor is present.
If you encounter the following error message, it is because another hypervisor, like KVM, is in use.
There was an error while executing `VBoxManage`, a CLI used by Vagrant for controlling VirtualBox. The command and stderr is shown below. Command: ["startvm", , "--type", "headless"] Stderr: VBoxManage: error: VT-x is being used by another hypervisor (VERR_VMX_IN_VMX_ROOT_MODE). VBoxManage: error: VirtualBox can't operate in VMX root mode. Please disable the KVM kernel extension, recompile your kernel and reboot (VERR_VMX_IN_VMX_ROOT_MODE) VBoxManage: error: Details: code NS_ERROR_FAILURE (0x80004005), component ConsoleWrap, interface IConsole You must add the additional hypervisors to the deny list in order for VirtualBox to run correctly.
First, find out the name of the hypervisor.
$ lsmod | grep kvm kvm_intel 204800 6 kvm 593920 1 kvm_intel irqbypass 16384 1 kvm Use the blacklist command to add the hypervisor to your denylist.
$ echo 'blacklist kvm-intel' >> /etc/modprobe.d/blacklist.conf Restart your machine and try the vagrant command again.
Windows, VirtualBox, and Hyper-V
If you encounter an issue with Windows, you will get a blue screen if you attempt to bring up a VirtualBox VM with Hyper-V enabled.
If you wish to use VirtualBox on Windows, you must ensure that Hyper-V is not enabled on Windows. You can turn off the feature with the following Powershell command for Windows 10.
Disable-WindowsOptionalFeature -Online -FeatureName Microsoft-Hyper-V-All For Windows 11, you can use an elevated Powershell.
bcdedit /set hypervisorlaunchtype off You can also disable Hyper-V in the Windows system settings.
- Right click on the Windows button and select ‘Apps and Features’.
- Select Turn Windows Features on or off.
- Unselect Hyper-V and click OK.
You might have to reboot your machine for the changes to take effect. More information about Hyper-V can be read here.
How to Install Vagrant on Ubuntu 22.04
![]()
Vagrant is an open-source command-line utility that enables Linux users to create and manage virtual machines using the virtualization hypervisors like VirtualBox, VMware and others. Before installing Vagrant on any system, you must ensure the installation of a virtualization hypervisor first as this allows you to work in a different environment without shutting down your system.
This article, guides you in installing Vagrant on Ubuntu 22.04 using the VirtualBox as a virtualization hypervisor.
How to Install Vagrant on Ubuntu 22.04 – Linux Hint
The installation of Vagrant on Ubuntu 22.04 isn’t tough as this can be easily done through following steps:
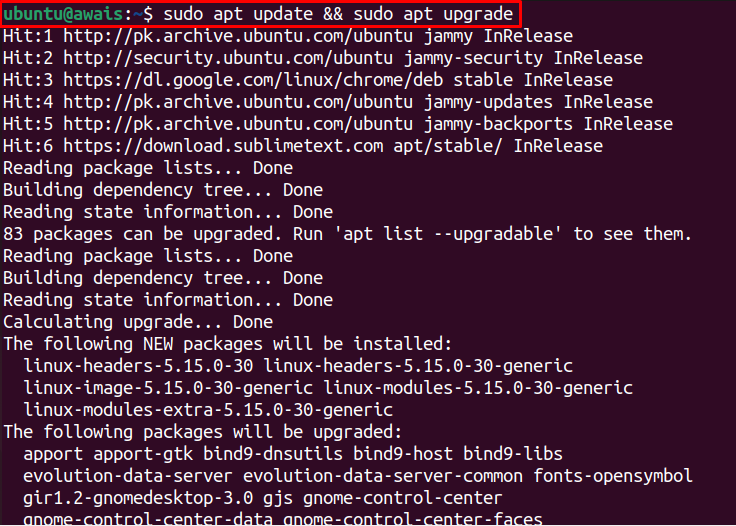
Step 1: Update Ubuntu Packages
First, update your packages on Ubuntu system using the following command:
Step 2: Install VirtualBox
Next, install VirtualBox on your system using the following command:
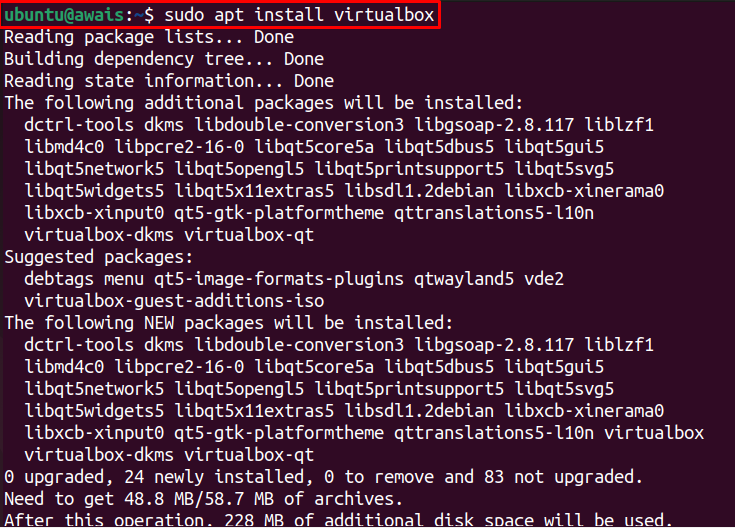
Wait for a few minutes until the VirtualBox installation completes. If you experience any error running VirtualBox on Ubuntu, you can get help from our published article.
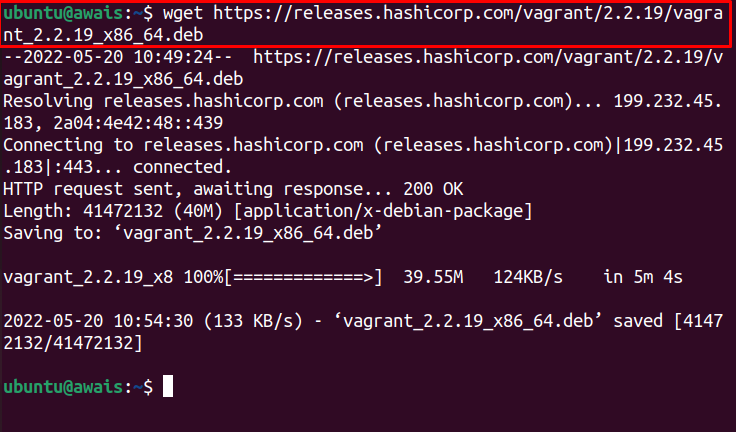
Step 3: Install Vagrant
After the installation of VirtualBox, download the Vagrant deb package from the following command:
Now, install the deb package from the apt installer using the following command:
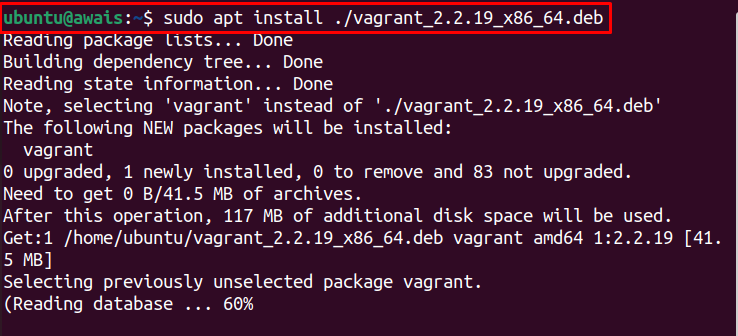
To check Vagrant version on Ubuntu, issue the following command:

The above output confirms that Vagrant is successfully installed on Ubuntu 22.04.
Using Vagrant on Ubuntu 22.04
After successfully installing Vagrant on Ubuntu, it’s now time to know how you can use it on your system. Follow the below step-by-step guidelines:
Step 1: First, make a project directory with the name of your choice.

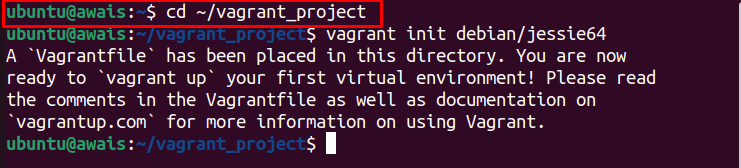
Step 2: Then navigate to created directory through following command:

Step 3: Visit the website and choose your VagrantBox (built-in virtual environment image of operating system).
In our case, we picked “debian/jessie64” and run the following command::
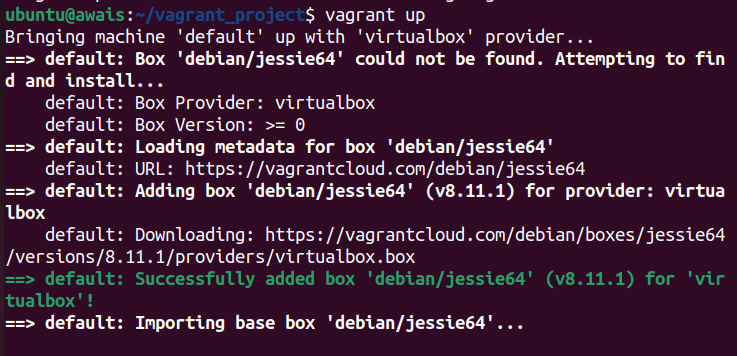
Step 4: Now, use the following command to create and configure the virtual machine:
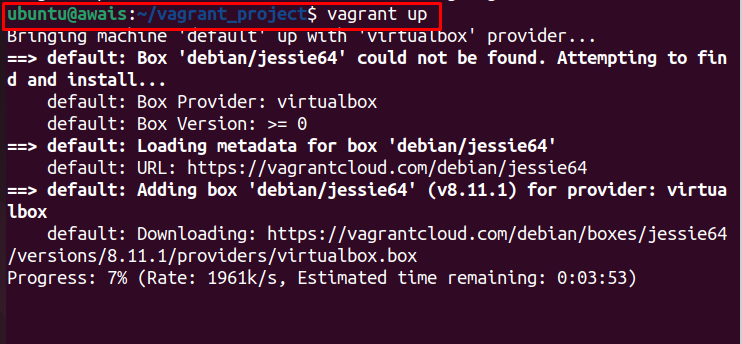
The above command will add the selected “debian/jessie64” to your VirtualBox environment.
To view it, open the VirtualBox on your system.
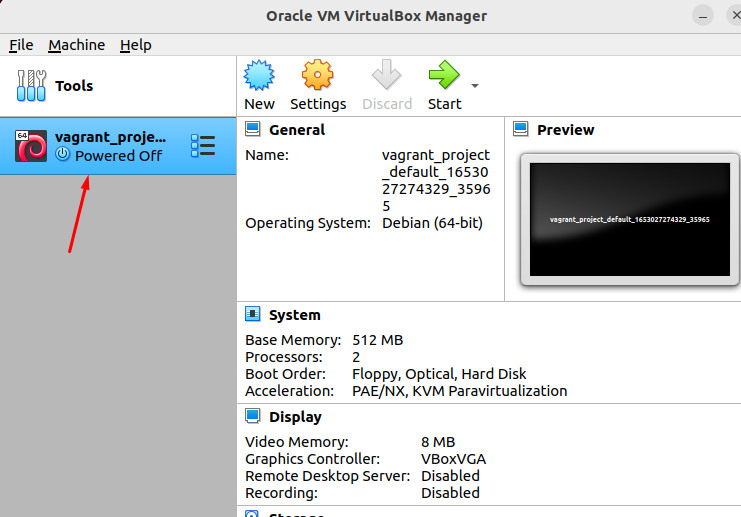
Note: You must have a virtualization provider software on your machine as we have VirtualBox.
In case, if you need guidance on how to install OS on VirtualBox, you can visit our published article.
In this way, you can add any OS environment on VirtualBox through Vagrant on Ubuntu 22.04.
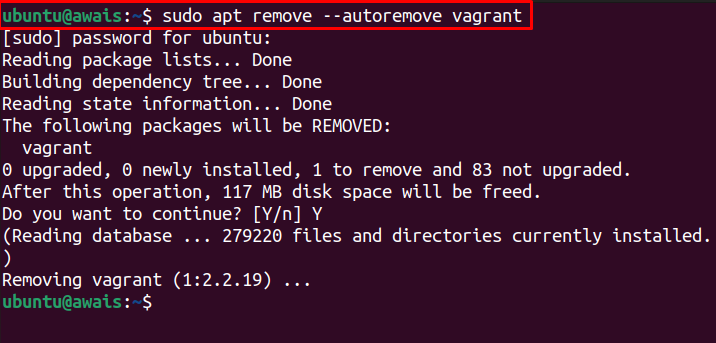
Removing Vagrant from Ubuntu 22.04
To remove Vagrant from Ubuntu 22.04, issue the following command to completely remove it from your system:
Conclusion
Vagrant is an excellent command-line utility that provides users the opportunity to add different operating systems on the VirtualBox or other virtualization hypervisors. From the above guidelines, you can install and use Vagrant on Ubuntu 22.04 by first installing a virtual environment like VirtualBox and then using the command utility to add any OS in the virtual environment.
About the author
Awais Khan
I’m an Engineer and an academic researcher by profession. My interest for Raspberry Pi, embedded systems and blogging has brought me here to share my knowledge with others.
How to Create Virtual Machine with Vagrant and VirtualBox
In the previous article, we have seen how to set up vagrant in your Linux distribution. In this article, you will learn how to create a Vagrant project to install a vagrant box, configure a guest machine, and understand core aspects of vagrant and important configurations and commands.
What is Vagrant Box?
The vagrant box is a package format for the vagrant environment. When you download or package a virtual machine to be used in vagrant it will be in box format. When I say boxes throughout this series I am just referring to a virtual machine.
There are two ways you can get the boxes. You can create your own custom box and share it among others and use an identical environment or download the boxes from the vagrant site.
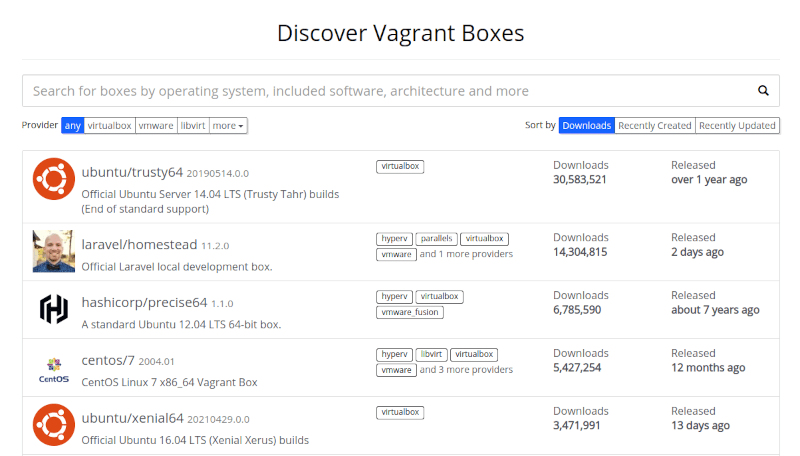
There are boxes hosted on the vagrant site which is already packaged and ready to use. On the site, you can search for different box flavors (CentOS, Ubuntu, Arch, etc..) and you also have the option to choose a Provider (here we using VirtualBox as provider).
Setting Up Vagrant Project Environment
Let’s start creating a project and download a vagrant box. Open the terminal and create a project directory by running the following command. You can create this directory in any location you want in your file system.
Now move into the newly created directory and run the vagrant init command, which will create a vagrant configuration file in your project directory.

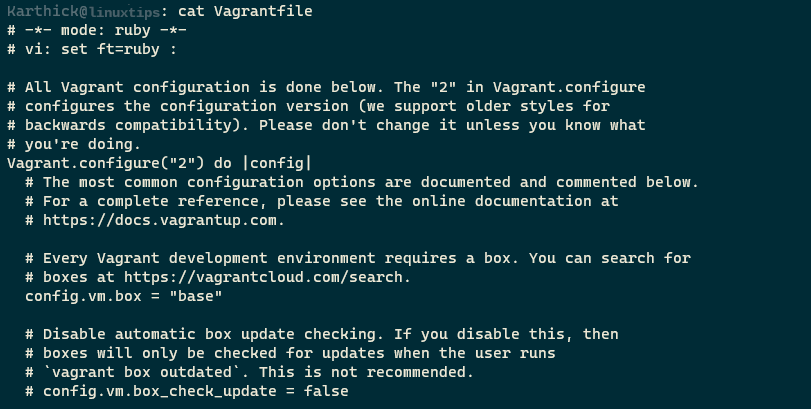
Now open the vagrant file, which is a template file created by the vagrant when you run the vagrant init command. This file is where we are going to store all our box-related configuration information.
Install a Virtual Machine with Vagrant and VirtualBox
At the moment all you need to care about is modifying a single parameter “config.vm.box”. This parameter will take care of downloading the box from the vagrant site. I am going to download the Ubuntu20.04 box. In the vagrant, site search for “Ubuntu20” and set the Provider to Virtualbox as shown in the below image.
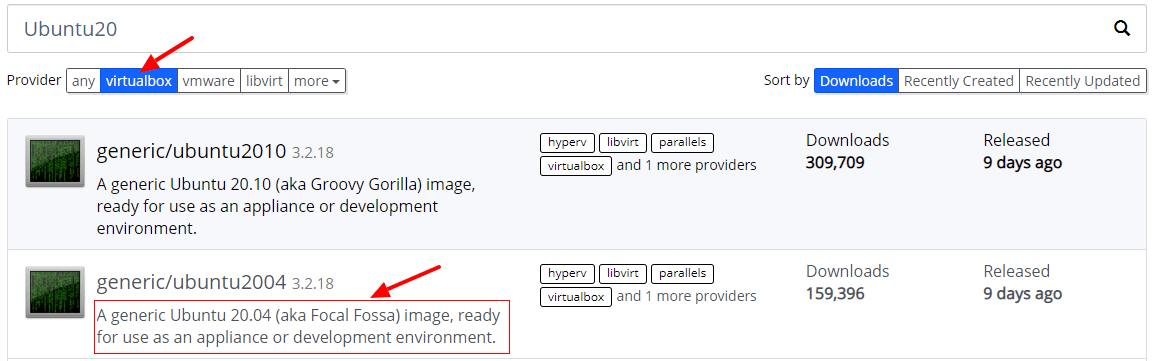
Click the box from the site and you can get the box name to configure in the vagrant file.
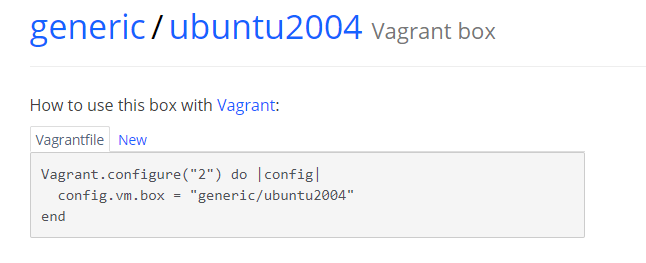
Now pass the box name as the argument with the vagrant init command which will automatically set the box name in the Vagrant file.
$ vagrant init generic/ubuntu2004 ==> Create a vagrant config file $ vagrant init -m generic/ubuntu2004 ==> Create a vagrant config file without helper and comments $ vagrant init -f generic/ubuntu2004 ==> Override existing vagrant file
Now you have configured the mandatory parameter to download a box. Now run the “vagrant up command”, which will read the Vagrant configuration file to download and provision the box.
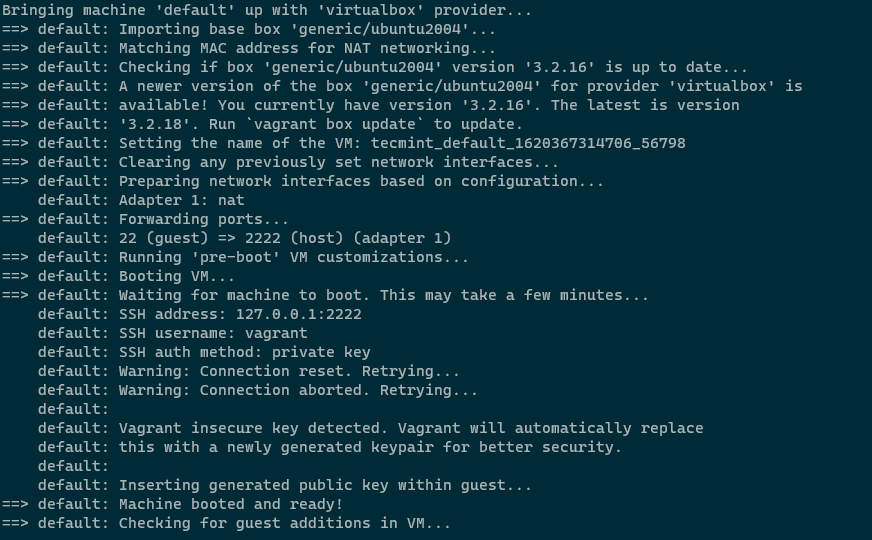
If everything goes well you will see the output as shown in the below image. It is important to understand these outputs to get to know about your virtual machine configurations.
Configures Guest Machines According to Vagrantfile
Let’s break down the output from the vagrant up command.
1. The first line is going to be your Provider name, Virtualbox is the default provider and it is pointing to that.
Bringing machine 'default' up with 'virtualbox' provider.
2. All your boxes and vagrant-related files will be stored under the .vagrant.d directory under your home folder. Vagrant will see if the named box (generic/ubuntu2004) is already available under this directory to import the box if not it will connect with the vagrant site and will download the box. In this case, I already have ubuntu2004 downloaded from the vagrant site so it is just importing the box.
3. When your box boots up it will check for updates. To turn this off you can set the following parameter in your Vagrantfile.
config.vm.box_check_update = false

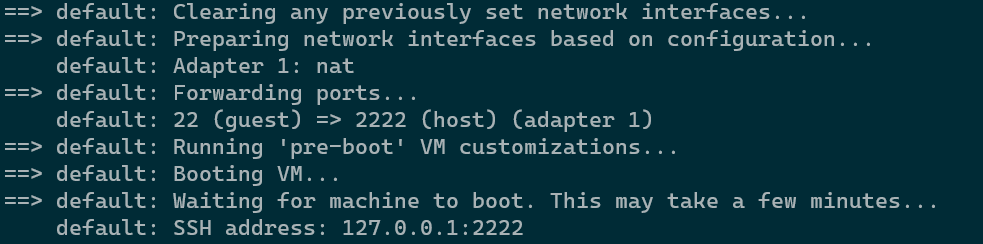
4. By default your virtual machine network mode will be set to NAT and port forwarding will be enabled for you to SSH from the Host machine. This is configurable and we have options to select different networking modes.
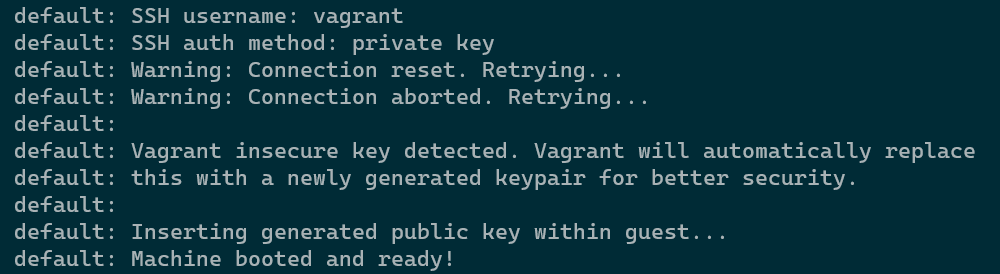
5. Each box has only two users available. One is the root and the second is the vagrant user. The default username and password are vagrant.
Password-based authentication is turned off by default and a public-private key pair is automatically generated and is copied to your virtual machine during boot up and is used to connect to your box.
Username = vagrant Password = vagrant
You can run the following command to check the ssh configuration for the box. From the below image you can password authentication is turned off and the user is set to vagrant and port forwarding is set to 2222.
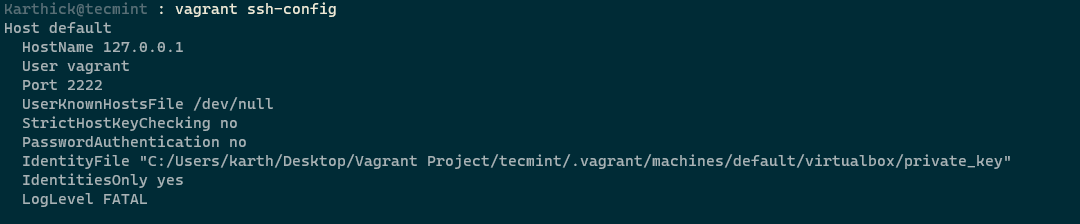
6. Some boxes will try to mount a shared folder to your VM. You need guest additions installed in your VM for the shared folder to work. Your current directory (project directory) from the local machine will be mounted with /vagrant in the remote machine.
From all the above steps you might now have an idea what vagrant is doing. All these steps will be taken care of by us when we are manually setting up a VM in virtualbox. Here vagrant is taking care of all these steps in an automated way.
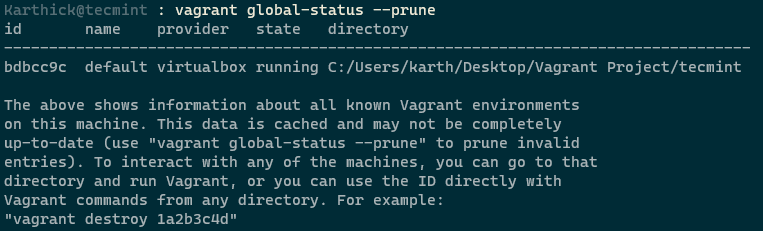
Now you might have a single or multiple VM running and to check the status run the following command. You can get the name, provider, state, id, and directory information of all the vagrant boxes in your machine using:
$ vagrant global-status --prune
Now that you may have a fair amount of understanding of what vagrant does. In the next article, we will see important vagrant commands and how to connect with a box and work on it.