- How to install VirtualBox guest additions on Debian 11
- What are Guest Additions?
- How to install VirtualBox additions on Debian 11 automatically
- “Unable to insert the Virtual Optical Disk into the machine Debian 11” Error
- Mount the Guest Addition ISO image Manually
- Conclusion
- Quickly Install VirtualBox Guest Additions on Debian 12 VM
- Table of Contents
- Quickly Install VirtualBox Guest Additions on Debian 12 VM
- Install Required Packages
- Install/Inset VirtualBox Guest Additions ISO on Debian 12
- Install Guest Additions ISO from System Repos
- Install/Insert Guest Additions ISO file from VM Menu
- Install VirtualBox Guest Additions on Debian 12 VM
- Как установить VirtualBox Guest Additions на Debian 11 | Debian 10
- Установка гостевых дополнений в гостевой системе Debian
- Вывод
How to install VirtualBox guest additions on Debian 11
VirtualBox is open-source software that allows the user to operate different operating systems on a single machine, either at the same time or one by one. It saves not only a lot of time but also saves the cost of buying different machines to operate different operating systems.
Debian 11 is also known as Debian bullseye. When it is installed on the VirtualBox with the help of ISO, some of its functionalities are restricted like one cannot access its full screen and similarly, one cannot share files between the host and guest.
What are Guest Additions?
The VirtualBox guest additions are the set of drivers and tools which improve the handling of the operating system for better performance. The guest additions include features like:
- Allows the fullscreen mode
- It synchronizes the time between the host and guest operating system
- It also improves video performance
- Allows smooth integration of mouse pointer
- Allows the automated logins
- Generic additional tools which help to control and manage the guest operating system
This write-up will guide you in detail how to install the VirtualBox Additions on Debian 11.
How to install VirtualBox additions on Debian 11 automatically
There is a file named, “VBoxGuestAdditions.iso” in the host operating system when the virtual machine is installed. To enable the VirtualBox guest additions, we have to just mount that file from the host operating system to Debian 11 using the VirtualBox GUI manager. We can complete this process by following the simple procedure explained.
Step 1: Update the package repository of Debian 11
Open the VirtualBox GUI manager and start Debian 11, once Debian 11 is started open the terminal and run the following command to update the repository of Debian 11,

Step 2: Install prerequisite packages
Next, we need to install the build-essential package, DKMS, and Linux-headers packages.
- Build-essential package is needed to build Debian 11 packages and it also contains the informational list of all packages which are supposed to be important in building Debian 11.
- The DKMS (Dynamic Kernel Module System) will enable the installation of further packages of kernel modules.
- Lastly, the Linux-headers package behaves like an interface between the kernel components.
These packages can be installed by executing the command:
$ sudo apt install build-essential dkms linux-headers-$(uname -r)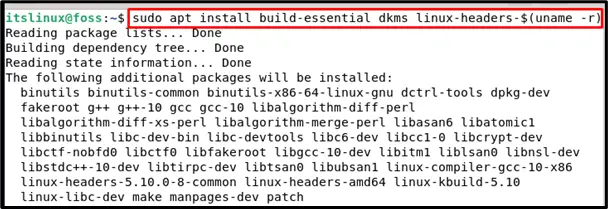
It will inform you about the space required for the installation of these packages and ask your permission to continue with this so press “y” to allow the installations:

It will take a few moments to download and install the prerequisite packages:
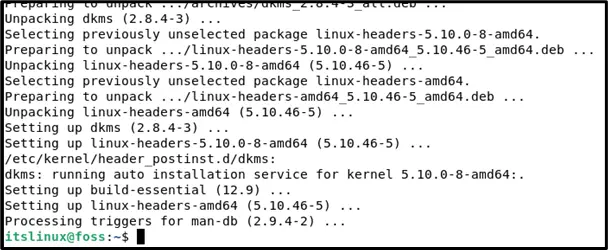
Once the prerequisite packages are successfully installed, the next step is to insert the guest Addition CD image.
Step 3: Insert Guest Addition CD Image
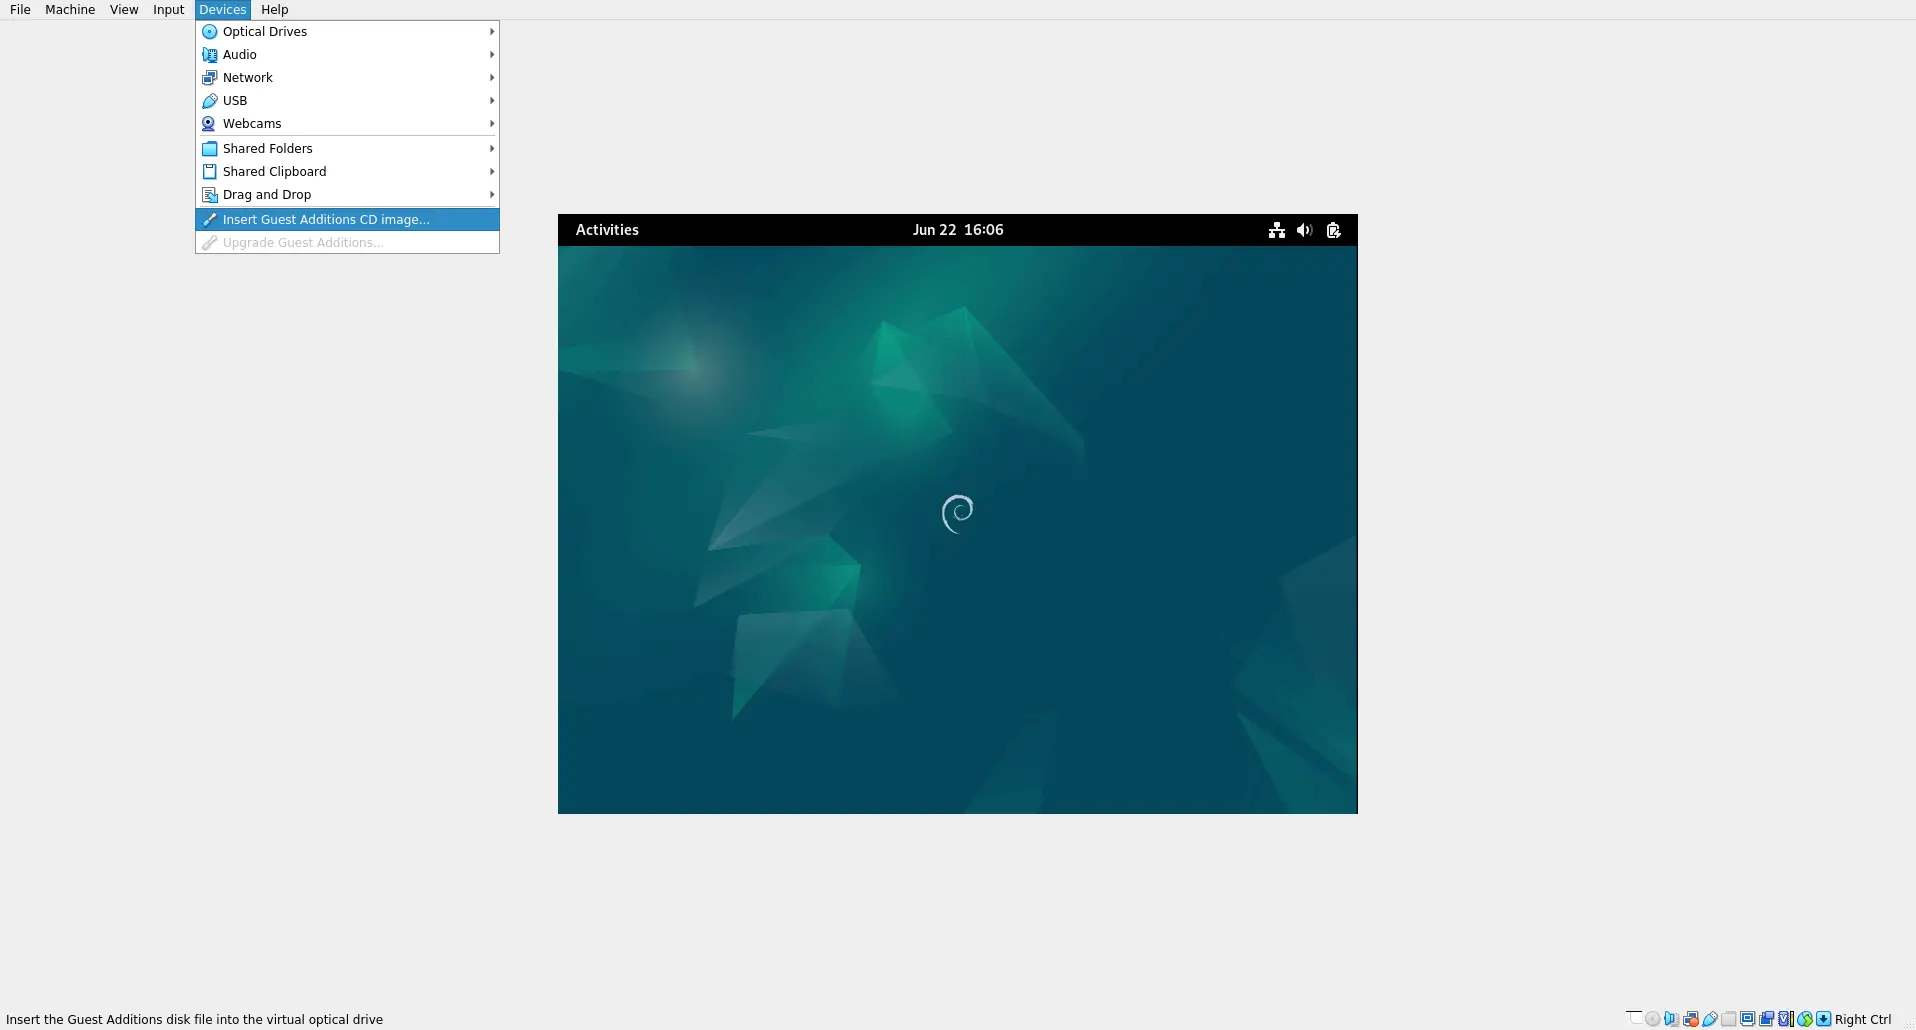
To insert the Guest Addition CD Image, click on the “Devices” in the menu bar present at the top of the GUI of the virtual manager and choose “Insert Guest Additions CD image… ” as shown in the screenshot attached below:
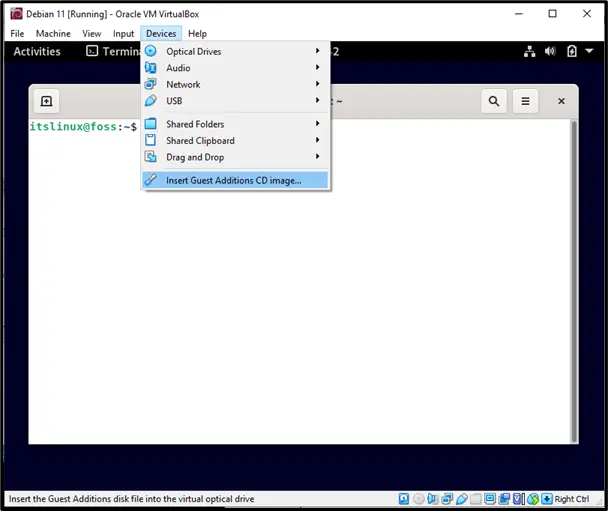
After this step the VirtualBox guest additions CD Image will mount automatically, the guest additions will start to install, and be completed in a while. Just restart the system and enjoy the installed guest additions.
“Unable to insert the Virtual Optical Disk into the machine Debian 11” Error
However, if an error occurs like “Could not mount the media/drive ‘C:\Program Files\Oracle\VirtualBox\VBoxGuestAdditions.iso’”, it means that the Guest Addition Image is not mounted automatically.
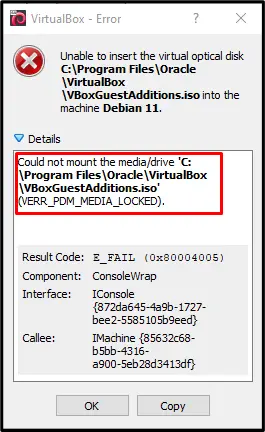
Then we will have to mount the Guest Addition ISO image manually.
Mount the Guest Addition ISO image Manually
For mounting the Guest Addition ISO image manually, simply follow the procedure provided below.
Step 1: make a “cdrom” directory in the “/mnt” directory
For making a directory with the name of “cdrom” in the “/mnt/” directory, use the command:

Step 2: Mount the Optical Disk from “/dev/” to “/mnt/” directory
For mounting the ISO image of VirtualBox guest addition from “/dev/cdrom” to “/mnt/cdrom” directory, execute the command:
$ sudo mount /dev/cdrom /mnt/cdrom
Step 3: Go to the /mnt/cdrom directory
Now open the directory of the mounted file using the “cd” command:

Step 4: Execute the “VBoxLinuxAdditions.run” Script
To install the VirtualBox guest additions on Debian 11, execute the “VBoxLinuxAdditions.run” script file using the “sh” command:
$ sudo sh ./VBoxLinuxAdditions.run --nox11
The script will take a few seconds to run and on successful execution, the output will show the progress of building packages.
Step 5: Reboot the system
Once it is completed, restart the Debian 11 Operating system using the “shutdown -r now” command:

Step 6: Verify the installation of VirtualBox Guest Additions
Once Debian 11 is rebooted, go to the “View” in the menu bar and click on “Full-screen Mode”:
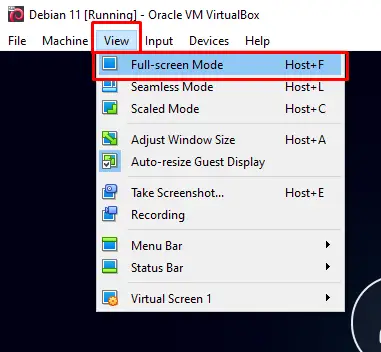
Now you can enjoy the fullscreen of Debian 11 along with other helpful features which means it has been are installed successfully.
Another method to verify the installation is by “lsmod” command:

The output displays the details of the installed vboxguest package.
Conclusion
VirtualBox guest addition installs the tools which enhance the functionality of Debian 11, it has a lot of features discussed in this write-up. This write-up describes the simple procedure of installing the VirtualBox guest additions on Debian 11 by mounting the ISO image of guest addition automatically as well as manually. If an error is occurred in mounting the ISO automatically, then will proceed towards the manual procedure of mounting ISO. Hope this write-up will resolve all the queries regarding the installation of VirtualBox guest additions on Debian 11.
TUTORIALS ON LINUX, PROGRAMMING & TECHNOLOGY
Quickly Install VirtualBox Guest Additions on Debian 12 VM

This tutorial servers a guide to quickly install VirtualBox Guest Additions on Debian 12. VirtualBox Guest Additions are designed to be installed inside a virtual machine after the guest operating system has been installed. They consist of device drivers and system applications that optimize the guest operating system for better performance and usability.
Table of Contents
Quickly Install VirtualBox Guest Additions on Debian 12 VM
If you are installing Debian 12 on VirtualBox, then VirtualBox 7 support unattended guest installation which also includes an option to install VirtualBox guest additions automatically;
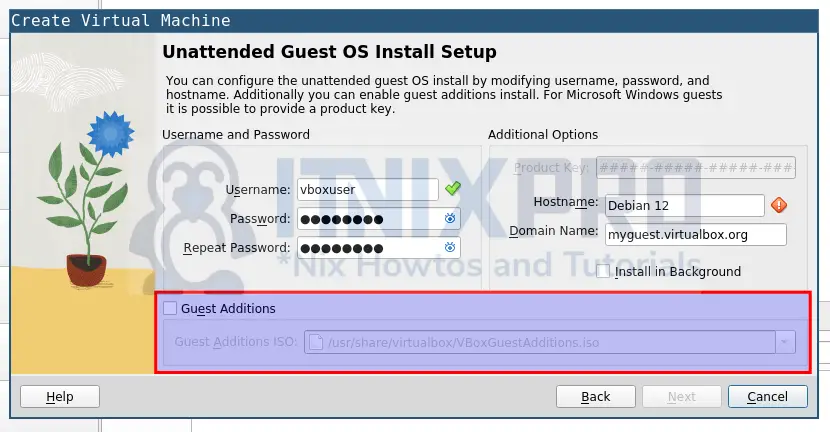
Anyways, if you missed that, then this guide will help you.
Install Required Packages
To begin, run the command below to install required packages;
apt install dkms build-essential linux-headers-$(uname -r) -yOnce the installation completes, reboot the system;
Ensure the installed linux headers and system kernel release version matches;
Check kernel release version;
sudo dpkg -l | grep linux-headersii linux-headers-6.1.0-9-amd64 6.1.27-1 amd64 Header files for Linux 6.1.0-9-amd64 ii linux-headers-6.1.0-9-common 6.1.27-1 all Common header files for Linux 6.1.0-9 ii linux-headers-amd64 6.1.27-1 amd64 Header files for Linux amd64 configuration (meta-package)
ii means installed.
Install/Inset VirtualBox Guest Additions ISO on Debian 12
So, you can install VirtualBox guest additions;
- by inserting guest additions ISO file from VirtualBox VM menu or
- by installing guest additions ISO from the system repositories.
Install Guest Additions ISO from System Repos
The quickest way to insert the guest additions ISO file is to install from the default Debian 12 repositories.
The packages usually provided the guest additions ISO for the currently installed version of VirtualBox on your host.
To confirm the same, run the command below on the host to check the currently installed version of VirtualBox;
Then, on the Debian 12 virtual machine, check the available version of Guest Additions iso;
apt-cache policy virtualbox-guest-additions-isoAs of this writing, this packaege is not available on Debian 12 repos.
virtualbox-guest-additions-iso: Installed: (none) Candidate: (none) Version table:
If it is available, then you can install Guest Additions ISO by running the command below;
apt install virtualbox-guest-additions-iso -yInstall/Insert Guest Additions ISO file from VM Menu
From the VM menu, click Devices > Insert Guest Additions CD Image…
Before you insert, ensure you have an empty IDE controller under storage settings.
Install VirtualBox Guest Additions on Debian 12 VM
Once the insertion of Guest Additions ISO file is done, proceed to install VirtualBox Guest Additions on Debian 12 VM.
Mount the ISO file (for the ISO installed from APT repos);
mount -o loop /usr/share/virtualbox/VBoxGuestAdditions.iso /mntFor the ISO inserted from the VM menu, mount it as follows;
/mount -o loop /dev/cdrom /mntInstall VirtualBox Guest Additions on Debian 12 VM;
Sample installation output;
Verifying archive integrity. 100% MD5 checksums are OK. All good. Uncompressing VirtualBox 7.0.8 Guest Additions for Linux 100% VirtualBox Guest Additions installer Copying additional installer modules . Installing additional modules . VirtualBox Guest Additions: Starting. VirtualBox Guest Additions: Setting up modules VirtualBox Guest Additions: Building the VirtualBox Guest Additions kernel modules. This may take a while. VirtualBox Guest Additions: To build modules for other installed kernels, run VirtualBox Guest Additions: /sbin/rcvboxadd quicksetupVirtualBox Guest Additions: or VirtualBox Guest Additions: /sbin/rcvboxadd quicksetup all VirtualBox Guest Additions: Building the modules for kernel 6.1.0-9-amd64. update-initramfs: Generating /boot/initrd.img-6.1.0-9-amd64 VirtualBox Guest Additions: Running kernel modules will not be replaced until the system is restarted or 'rcvboxadd reload' triggered VirtualBox Guest Additions: reloading kernel modules and services VirtualBox Guest Additions: kernel modules and services 7.0.8 r156879 reloaded VirtualBox Guest Additions: NOTE: you may still consider to re-login if some user session specific services (Shared Clipboard, Drag and Drop, Seamless or Guest Screen Resize) were not restarted automatically
Pay attention to the last message;
NOTE: you may still consider to re-login if some user session specific services (Shared Clipboard, Drag and Drop, Seamless or Guest Screen Resize) were not restarted automatically
Either way, let’s reboot the system;
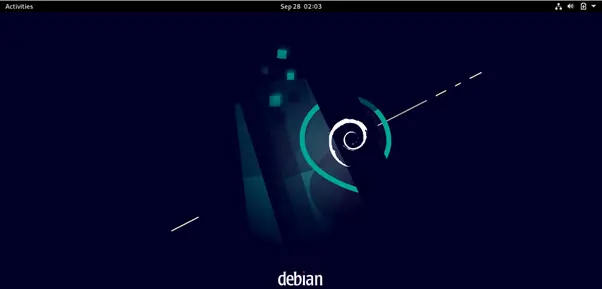
Upon login, the screen should at least auto-resize.
If it don’t auto-resize automatically, you need toggle Auto-resize Guest Display Off and On by navigating to the VM menu, click View > Auto-resize Guest Display.
And that is it on how to Quickly install VirtualBox Guest Additions on Debian 12 VM.
Как установить VirtualBox Guest Additions на Debian 11 | Debian 10

VirtualBox Guest Additions — это набор драйверов и приложений для повышения производительности гостевой операционной системы на VirtualBox. Он предоставляет такие функции, как общий буфер обмена, Drag & Drop, поддержку 3D-ускорения и многое другое.
В этом уроке мы узнаем , как установить VirtualBox Guest Additions на Debian 11 гостей.
Установка гостевых дополнений в гостевой системе Debian
Гостевые дополнения VirtualBox поставляются в виде ISO-файла образа с именем VBoxGuestAdditions.iso. Этот файл поставляется вместе с VirtualBox и поддерживается почти всеми гостями. В основном это два шага: прикрепление ISO-образа к дисководу оптических компакт-дисков и подключение к гостевой ОС для установки.
1. Сначала запустите гостевую виртуальную машину Debian в VM VirtualBox Manager. Войдите в Debian с помощью пользователя sudo и обновите гостевую операционную систему Debian.
2. Установите необходимые пакеты для сборки модулей:
$ sudo apt install build-essential dkms linux-headers-$(uname -r)3. На виртуальной машине перейдите в раздел «Устройства» и в раскрывающемся меню выберите « Вставить образ компакт-диска с гостевыми дополнениями ».

Если это сработало, вы можете увидеть, что VBoxguestAdditions.iso был прикреплен в настройках хранилища конкретной гостевой виртуальной машины в VirtualBox Manager.

4. Теперь давайте смонтируем указанный выше .iso с устройства CD-ROM в локальный каталог. Для этого мы создадим новый каталог.
Откройте терминал в гостевой ОС Debian, введите:
$ sudo mkdir -p /mnt/guestadditions $ sudo mount /dev/cdrom /mnt/guestadditions
5. Перейдите в новый каталог и запустите сценарий VBoxLinuxAdditions.run. Запуск этого сценария установит гостевые дополнения.
cd /mnt/guestadditions sudo sh ./VBoxLinuxAdditions.run --nox11
6. Перезагрузите гостевую ОС Debian, чтобы изменения вступили в силу:
7. Чтобы убедиться, что установка прошла успешно, перечислив загруженные модули ядра .
Это означает, что модуль ядра VirtualBox загружен и установка прошла успешно.
Вывод
В этом руководстве мы узнали, как установить гостевые дополнения VirtualBox в Debian 11. Надеюсь, вам понравится улучшенная гостевая ОС с гостевыми дополнениями.