- Установка Viber на Ubuntu 20.04
- Как установить приложение Viber Messenger в Ubuntu 20.04 LTS
- Предварительные требования
- Установите Viber через Deb Package
- Шаг 1: Загрузите Viber
- Шаг 2: Установите Viber
- Установите Viber с помощью Snap Package
- Шаг 1: Установите Snapd
- Шаг 2: Установите Viber snap
- Запустить Viber
- Удалить Viber
- Похожие записи:
- How to Install Viber Messenger App on Ubuntu 20.04 LTS
- Prerequisites
- Install Viber via Deb Package
- Step 1: Download Viber
- Step 2: Install Viber
- Install Viber via Snap Package
- Step 1: Install Snapd
- Step 2: Install Viber snap
- Launch Viber
- Remove Viber
- Search
- About This Site
- Latest Tutorials
- How to Install Viber on Ubuntu 20.04
- Method #1 Install Viber on Ubuntu via Official Deb package
- Method #2 Install Viber on Ubuntu via Official Snap Package
- Launch Viber
- Uninstall Viber from Ubuntu
Установка Viber на Ubuntu 20.04
Всем доброго дня! После установки Ubuntu 20.04 решил поставить себе Viber. И скажу я вам, что придётся немножко постараться, чтобы установить его.
Скачиваем установщик через терминал
wget http://download.cdn.viber.com/cdn/desktop/Linux/viber.deb
Либо скачиваем напрямую с официального сайта
Дальше начинается самое интересное. Установить просто так не получится. Начиная с Ubuntu 18.04 обновился пакет libcurl4, в установщике Viber стоит libcurl3, соответственно программа не установится. Нужно вручную поменять пакет и удалить libssl1.0.0
Для начала нужно распаковать установочный пакет. Набираем в терминале команды
cd Загрузки
dpkg-deb -x viber.deb viber
dpkg-deb —control viber.deb viber/DEBIAN
В файле Control удаляем libssl1.0.0 и меняем libcurl3 на libcurl4 (если у вас не было в списке libcurl3, то просто добавляем libcurl4).
После сохранения собираем пакет и устанавливаем. В терминале вводим команды
dpkg -b viber viber1.deb
sudo dpkg -i viber1.deb
После установки можно удалить временные файлы командой
sudo rm -rf viber viber.deb viber1.deb
Запускаем приложение и с помощью QR-кода проходим авторизацию
Также полезно будет проверить зависимости, возможно нужно что-то доустановить. Вводим команду
sudo apt-get install -f
Установка Viber на Ubuntu 20.04 завершена.
Получить купон 8$ на первый заказ AliExpress можно здесь
Как установить приложение Viber Messenger в Ubuntu 20.04 LTS
Viber — это приложение для обмена мгновенными сообщениями и видеозвонков, которое позволяет отправлять мгновенные сообщения, фотографии, аудио и видеофайлы, совершать бесплатные звонки и делиться своим местоположением с другими пользователями Viber. Он связывает людей, где бы они ни находились. Viber сначала был выпущен для смартфонов, а затем был разработан для пользователей настольных компьютеров, включая Windows, Linux и macOS. Теперь вы можете легко использовать Viber прямо со своего рабочего стола, выполняя другую работу.
В этой статье объясняется, как установить Viber в системе Ubuntu. Есть два следующих способа установить Viber в Ubuntu:
Мы рассмотрим установку Viber обоими методами с использованием приложения командной строки Terminal. Вы можете запустить Терминал с помощью сочетания клавиш Ctrl + Alt + T.
Также обратите внимание, что процедуры установки были протестированы на Ubuntu 20.04 LTS.
Предварительные требования
Установите Viber через Deb Package
Выполните следующий шаг, чтобы установить Viber в вашей системе:
Шаг 1: Загрузите Viber
Установочный файл Viber доступно на официальном сайте Viber. Чтобы загрузить файл deb Viber, перейдите на официальный сайт Viber Downloads page и загрузите Viber для Ubuntu. Вы также можете загрузить файл установщика Viber из командной строки с помощью команды wget.
Выполните следующую команду в Терминале, чтобы загрузить файл установщика Viber .deb.
wget https://download.cdn.viber.com/cdn/desktop/Linux/viber.debШаг 2: Установите Viber
Следующим шагом является установка Viber с помощью команды apt. Выполните следующую команду в Терминале, чтобы установить пакет viber.deb.
sudo apt install ./viber.debПри запросе пароля введите sudo password.
Установите Viber с помощью Snap Package
Выполните следующие шаги, чтобы установить Viber с помощью пакета Snap. Однако, чтобы установить любой пакет snap, в вашей системе должен быть установлен snapd.
Шаг 1: Установите Snapd
Выполните следующую команду в Терминале, чтобы установить snapd в вашей системе:
Шаг 2: Установите Viber snap
Теперь вы можете установить пакет Viber snap. Для этого введите в Терминале следующую команду:
sudo snap install viber-unofficialУстановка Viber начнется и будет завершена; вы получите следующее сообщение.
Запустить Viber
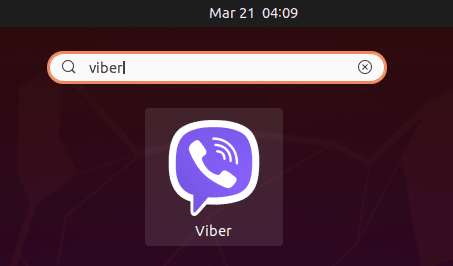
После того, как вы закончили установку Viber одним из описанных выше методов, вы можете найти и запустить его из списка установленных приложений на вкладке «Действия».
Кроме того, вы также можете запустить Viber из командной строки. Если вы установили Viber с помощью файла deb, используйте следующую команду в Терминале для запуска Viber:
Если вы установили Viber с помощью пакета snap, то используйте следующую команду в Терминале для запуска Viber:
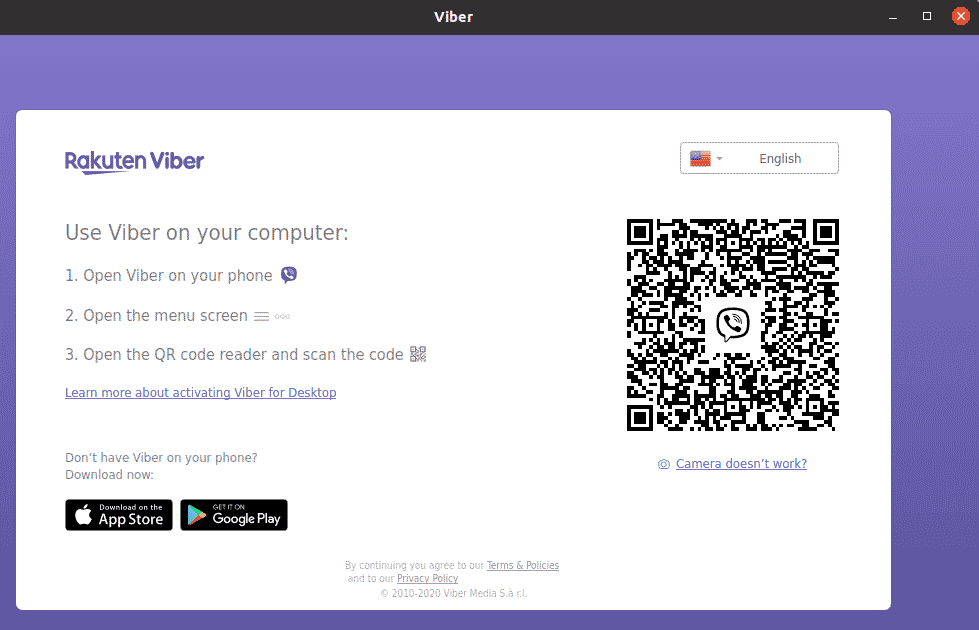
Когда вы запускаете приложение Viber в первый раз, вы увидите следующее представление:
На скриншоте выше вы можете увидеть три инструкции по использованию Viber в вашей системе. Выполните эти шаги в том же порядке, после чего появится мастер настройки.Используя простой и понятный мастер, вы можете легко настроить и использовать Viber в своей системе.
Удалить Viber
В случае, если вам больше не нужно приложение Viber, вы можете удалить его с помощью следующей команды в Терминале:
При запросе подтверждения нажмите y, после чего Viber будет удален из вашей системы. .
Если вы установили Viber с помощью пакета snap, удалите его с помощью следующей команды:
sudo snap remove viber-unofficialВот и все! Теперь вы можете легко установить и использовать Viber на рабочем столе Ubuntu. Как вы видели, установка Viber проста как с помощью deb, так и с помощью пакета snap. Вы можете использовать любой из этих методов в зависимости от ваших предпочтений.
Похожие записи:
How to Install Viber Messenger App on Ubuntu 20.04 LTS
Viber is an instant messaging and video calling app that allows you to send instant messages, photos, audio, video files, make free calls, and share your location with other Viber users. It connects people no matter where they are. Viber was first released for smartphones, then later also developed for desktop users including Windows, Linux, and macOS. Now you can easily use Viber right from your desktop while doing other work.
This article is about explaining how to install Viber on the Ubuntu system. There are the following two ways to install Viber in Ubuntu:
We will cover the installation of Viber via both methods using the command line Terminal application. You can launch the Terminal via Ctrl+Alt+T keyboard shortcut.
Also, note that the installation procedures have been tested on Ubuntu 20.04 LTS.
Prerequisites
Install Viber via Deb Package
Follow the below step in order to install Viber on your system:
Step 1: Download Viber
The installer file of Viber is available at the official Viber website. To download the Viber deb file, go to Viber official website Downloads page and download Viber for Ubuntu. You can also download the Viber installer file from the command line using the wget command.
Issue the following command in Terminal to download Viber .deb installer file.
$ wget https://download.cdn.viber.com/cdn/desktop/Linux/viber.deb
Step 2: Install Viber
The next step is to install the Viber using the apt command. Issue the following command in Terminal in order to install the viber.deb package.
$ sudo apt install ./viber.deb
When asked for a password, type sudo password.
Install Viber via Snap Package
Follow the below steps in order to install Viber via snap package. However, in order to install any snap package, you will need snapd installed on your system.
Step 1: Install Snapd
Issue the following command in Terminal in order to install snapd on your system:
Step 2: Install Viber snap
Now you can install the Viber snap package. Issue the following command in Terminal to do so:
$ sudo snap install viber-unofficial
The installation of Viber will be started and once finished; you will be informed with the following message.
Launch Viber
Once you have finished installing the Viber using either of the above-described methods, you can search and launch it from the installed applications list in the Activities tab.
Alternatively, you can also launch the Viber from the command line. If you have installed Viber using the deb file, then use the following command in the Terminal to launch Viber:
If you have installed Viber using the snap package, then use the following command in the Terminal to launch Viber:
When you will launch Viber application for the first time, you will see the following view:
In the above screenshot, you can see three steps instructions about using Viber on your system. Follow these steps in the same order, after which the setup wizard will appear. Using the simple and self-explanatory wizard, you can easily set up and use Viber on your system.
Remove Viber
In case, you no longer need the Viber application, you can remove it using the following command in the Terminal:
When asked for confirmation, hit y, after which Viber will be removed from your system.
If you have installed Viber via snap package, then use the following command to remove it:
$ sudo snap remove viber-unofficial
That is all there is to it! Now you can easily install and use Viber on your Ubuntu desktop. As you have seen, the installation of Viber is simple both via deb and the snap package. You can use any of these methods based on your preferences.
Search
About This Site
Vitux.com aims to become a Linux compendium with lots of unique and up to date tutorials.
Latest Tutorials
How to Install Viber on Ubuntu 20.04
Viber is one of the popular and cross-platform communication apps that is supported on both iOS and Android. It allows you to make free audio and video calls, send messages along with multimedia attachments to any Viber user. Similar to other communication apps like WhatsApp, Signal, and Skype, Viber also offers end-to-end encryption making sure your communication is not accessible to third parties. Viber also has its desktop version available for Linux, Mac, and Windows.
In this post, we will walk you through the process of installing Viber on the Ubuntu desktop. We will be explaining the installation procedure on Ubuntu 20.04 LTS (Focal Fossa).
Note: You must have sudo privileges in order to install Viber on your system.
Method #1 Install Viber on Ubuntu via Official Deb package
In the following procedure, we will install Viber using the deb package available on its official website.
1. Head over to Viber’s official website Downloads page and download Viber for Linux Ubuntu. The downloaded file will be saved as viber.deb to your Downloads directory.
Alternatively, you can also download the Viber package from the command line. To do so, execute the command below in Terminal.
$ wget https://download.cdn.viber.com/cdn/desktop/Linux/viber.deb
The downloaded file will be saved as viber.deb to in your Home directory.
Once the download is completed, move on to the next step.
2. Now, make sure you are in the same directory where the downloaded file is placed (your Home directory or Downloads directory). Then to install Viber, execute the below command in Terminal:
After running the above command, you will be prompted to enter the sudo password. Enter sudo password, after which the installation of Viber will be started on your system.
If you encounter any error about broken dependencies, execute the below command to fix it:
$ sudo apt --fix-broken install
Method #2 Install Viber on Ubuntu via Official Snap Package
Viber for Ubuntu is also available as a snap package. A snap package can be installed through snapd utility.
To check whether snapd is installed on your system on not, execute the command below in Terminal:
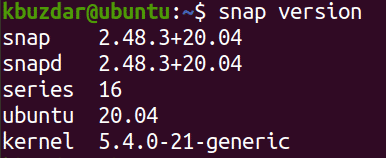
You will see the following output if snapd is installed on your system:
In case it is missing from your system, you can install it as follows:
Now in order to install the Viber snap package on your system, execute the below command in Terminal:
$ sudo snap install viber-unofficial
After running the above command, you will be prompted to enter the sudo password. Enter sudo password, after which the installation of Viber will be started. Once installed, you will see the following output:
Launch Viber
Once Viber is installed, you can launch it from the Activities tab or hit the super key on the keyboard and type viber. From the search results, click on the Viber icon to launch it.
Once Viber is launched, you will see the following view:
Follow the on-screen instructions and connect Viber on your phone with the Viber desktop app.
Uninstall Viber from Ubuntu
In case you no longer need Viber on your system, you can easily remove it using the command below in Terminal:
After running the above command, you will be prompted to enter the sudo password. Enter the sudo password, after which the Viber will be removed from your system.
If you have installed Viber from the snap package, use the below command to remove it:
$ sudo snap remove viber-unofficial
This is how you can install Viber on your Ubuntu system. In this post, we have shown you two different methods through which Viber can be installed on Ubuntu. In the end, we have also shown how to remove Viber from Ubuntu in case you no longer need it.
Karim Buzdar holds a degree in telecommunication engineering and holds several sysadmin certifications including CCNA RS, SCP, and ACE. As an IT engineer and technical author, he writes for various websites.


