- Setting up VirtualBox Guest Additions
- For recent guest OSs
- Ubuntu or similar
- Getting VBoxGuestAdditions.iso
- Making VBoxGuestAdditions.iso visible to the guest
- Executing install script for Guest Additions on older Linux guests
- References
- How to Install & Use VirtualBox Guest Additions on Ubuntu
- Why should you use VirtualBox Guest Additions?
- Installing VirtualBox Guest Additions on Ubuntu guest system
- Troubleshooting tips
- Using VirtualBox Guest Addition features
- Change the Virtual Screen Resolution
- Configure Drag And Drop (any files)
- Configure Shared Clipboard (for copy-pasting)
- Uninstalling VirtualBox Guest Additions
- Wrapping Up
- Install Virtualbox Guest Additions on Ubuntu To Enable 3D Support
- Install Virtualbox Guest Additions on Ubuntu
- Enable 3D Hardware Acceleration
Setting up VirtualBox Guest Additions
Guest Additions are distributed on their own CD image (.iso file) named VBoxGuestAdditions.iso. How you get that file to the guest can depend on the OS of the guest — see below.
After installing Guest Additions, on some, older guests you might need to restart the guest.
For recent guest OSs
In the guest virtual machine, choose Devices -> Install Guest Additions from the menubar of VirtualBox.
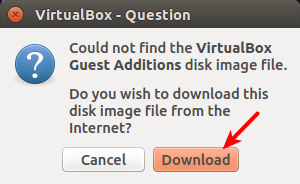
VirtualBox will look for the needed file. Failing to find it, it may give you an opportunity to download the file from the internet.
If all that fails, follow one of the steps below.
Ubuntu or similar
Getting VBoxGuestAdditions.iso
- Download a VirtualBox package from https://www.virtualbox.org/wiki/Downloads (you might have installed this package when you installed VirtualBox). The package should include the VBoxGuestAdditions.iso file.
- Open http://download.virtualbox.org/virtualbox/ and enter the subdirectory for the latest version of VirtualBox. It should contain the corresponding VBoxGuestAdditions_X.Y.Z.iso file.
- Install a package through the usual channels for your distribution. For example, you might use:
sudo apt-get install virtualbox-guest-additions-iso
Some, recent versions of VirtualBox will now be able to find the file on the host when you choose Device -> Install Guest Additions on the VirtualBox running a guest. Continue with instructions for setting up file sharing.
For other, older versions of guest OS’s and VirtualBox, the .iso file is on the host, but the guest needs to see it (and file sharing is not yet enabled.) Follow the next two steps for mounting the .iso file and executing the scripts in the .iso file.
Making VBoxGuestAdditions.iso visible to the guest
Just as you mounted a .iso CD image for your guest OS when installing it on the guest, now mount VBoxGuestAdditions.iso as a CD on the guest. For example, in the VirtualBox window, choose the Storage section under Details, and so forth.
Note that recent versions of VirtualBox have changed the method of mounting .iso files.
Executing install script for Guest Additions on older Linux guests
Make sure you have the image, for example VBoxGuestAdditions.iso or VBOXADDITIONS, mounted as CDROM.
If you are running a Linux guest, open a terminal and type:
in for instance Ubuntu Lucid, the CD image should mount at /media/ so that would be
sudo sh ./VBoxLinuxAdditions.run
If you would like to uninstall the Guest Additions, run:
sudo sh ./VBoxLinuxAdditions.run uninstall
References
VirtualBox/GuestAdditions (последним исправлял пользователь 78-0-208-105 2012-10-20 16:28:08)
The material on this wiki is available under a free license, see Copyright / License for details
You can contribute to this wiki, see Wiki Guide for details
How to Install & Use VirtualBox Guest Additions on Ubuntu
Install VirtualBox Guest Additions in Ubuntu and with this, you’ll be able to copy-paste, drag and drop between the host and guest system. It makes using Ubuntu on virtual machines a lot easier.
The VirtualBox Guest Additions consist of device drivers and system applications that optimize the operating system for better performance and usability. These drivers provide a tighter integration between the guest and host systems. No matter how you are using your Virtual Machine, Guest Additions can be very helpful for you. For example, I test many installations and applications inside a VM and take a lot of screenshots. It comes in very handy to be able to move those screenshots freely between the Host OS and the Guest OS.
The host system is your actual operating system installed on your physical system. The guest system is the virtual machine you have installed inside your host operating system.
Before you see the steps to install VirtualBox Guest Additions in Ubuntu, let’s first talk about its features.
Why should you use VirtualBox Guest Additions?
With VirtualBox Guest Additions enabled, using the virtual machine becomes a lot more comfortable. Don’t believe me? Here are the important features that the Guest Additions offer:
- Mouse pointer integration: You no longer need to press any key to “free” the cursor from the Guest OS.
- Shared clipboard: With the Guest Additions installed, you can copy-paste between the guest and the host operating systems.
- Drag and drop: You can also drag and drop files between the host and the guest OS.
- Shared folders: My favorite feature; this feature allows you to exchange files between the host and the guest. You can tell VirtualBox to treat a certain host directory as a shared folder, and the program will make it available to the guest operating system as a network share, irrespective of whether guest actually has a network.
- Better video support: The custom video drivers that are installed with the Guest Additions provide you with extra high and non-standard video modes, as well as accelerated video performance. It also allows you to resize the virtual machine’s window. The video resolution in the guest will be automatically adjusted, as if you had manually entered an arbitrary resolution in the guest’s Display settings.
- Seamless windows: The individual windows that are displayed on the desktop of the virtual machine can be mapped on the host’s desktop, as if the underlying application was actually running on the host.
- Generic host/guest communication channels: The Guest Additions enable you to control and monitor guest execution. The “guest properties” provide a generic string-based mechanism to exchange data bits between a guest and a host, some of which have special meanings for controlling and monitoring the guest. Applications can be started in the Guest machine from the Host.
- Time synchronization: The Guest Additions will resynchronize the time with that of the Host machine regularly. The parameters of the time synchronization mechanism can be configured.
- Automated logins: Basically credentials passing, it can be a useful feature.
Impressed by the features it provides? Let’s see how you can install VirtualBox Guest Additions on Ubuntu Linux.
Installing VirtualBox Guest Additions on Ubuntu guest system
The scenario here is that you have Ubuntu Linux installed inside VirtualBox. The host system could be any operating system.
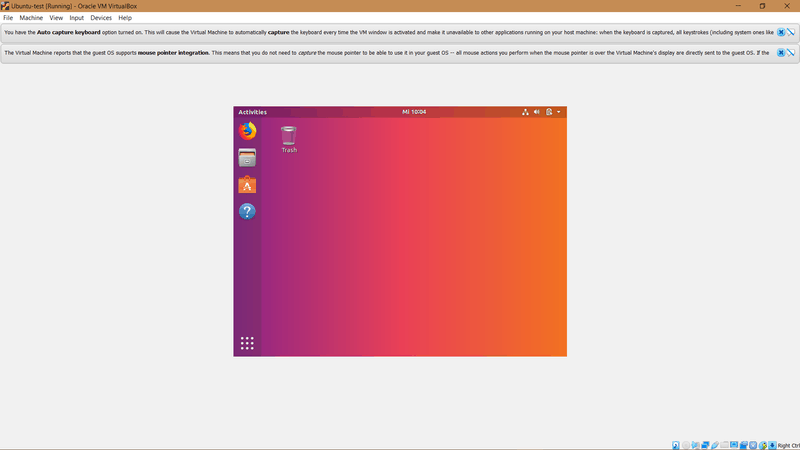
I’ll demonstrate the installation process on a minimal install of a Ubuntu virtual machine. First, run your virtual machine:
To get started, select Device > Insert Guest Additions CD image…:
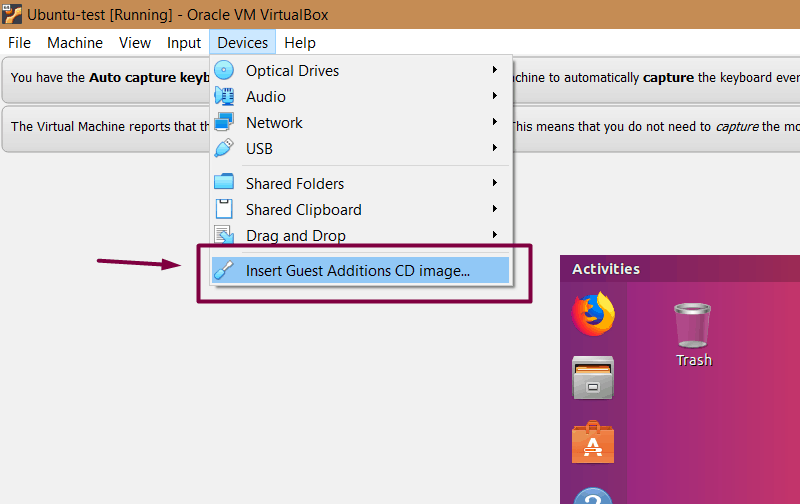
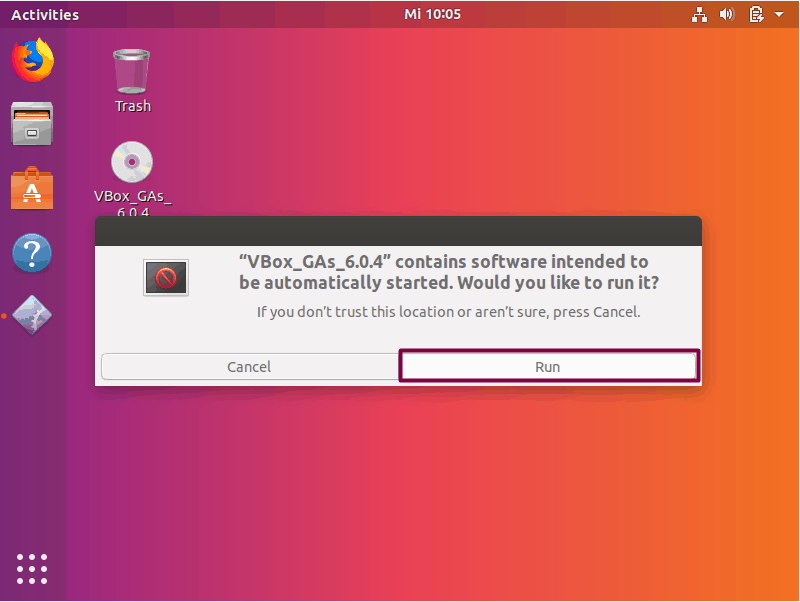
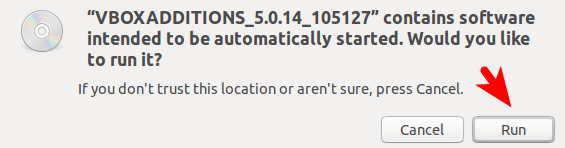
This will provide you with the required installer inside the guest system (i.e. the virtual operating system). It will try auto-running, so just click Run:
This should open up the installation in a terminal window. Follow the on-screen instructions and you’ll have the Guest Additions installed in a few minutes at most.
Troubleshooting tips
If you get an error like this one, it means you are missing some kernel modules which happens in some cases, such as minimal installs:
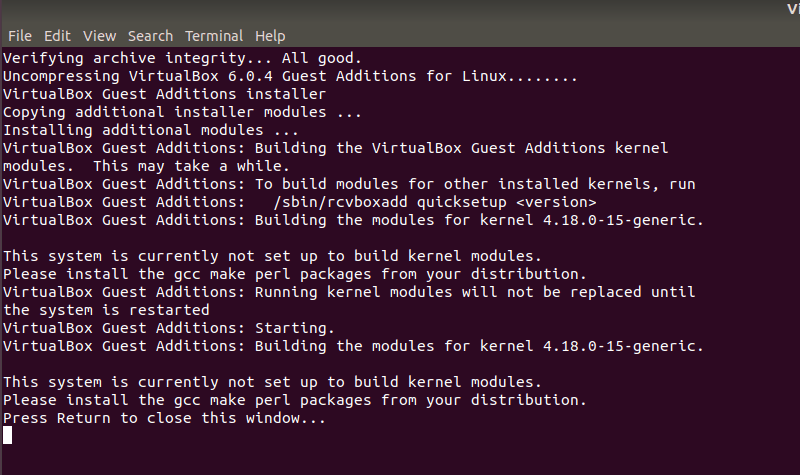
You need to install a few more packages here. Just to clarify, you need to run these commands in the virtual Ubuntu system:
sudo apt install build-essential dkms linux-headers-generic Now run the Guest Addition setup again:
Using VirtualBox Guest Addition features
Here are some screenshots for enabling/using helpful features of VirtualBox Guest Additions in use:
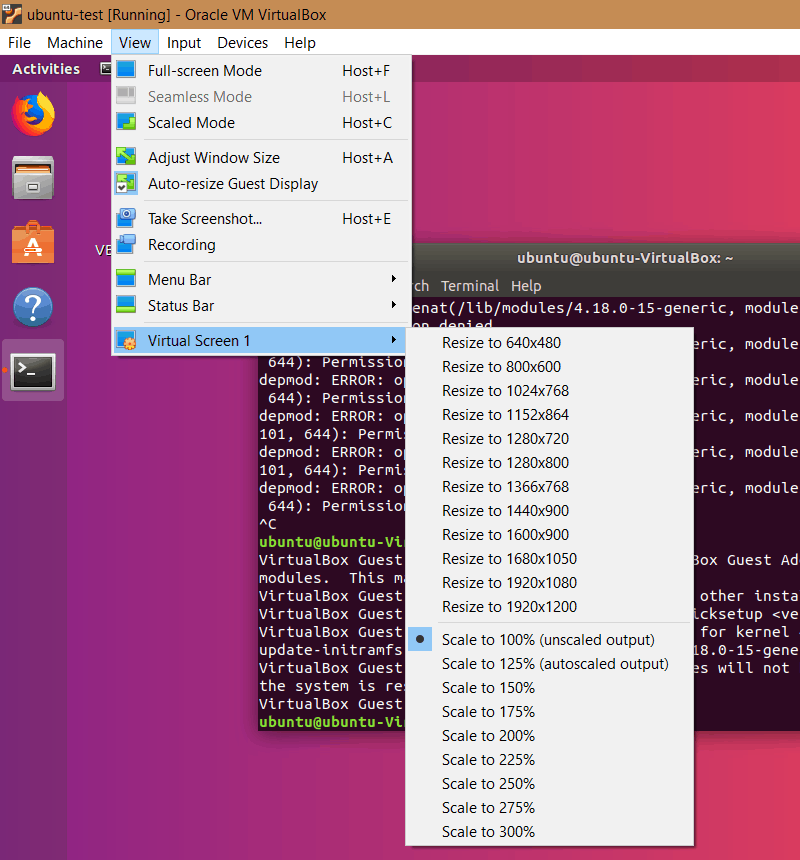
Change the Virtual Screen Resolution
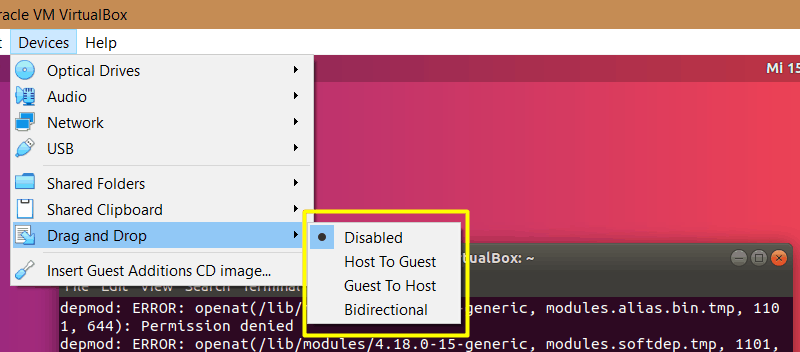
Configure Drag And Drop (any files)
You can enable drag and drop from the top menu -> Devices ->Drag and Drop -> Bidirectional.
With Bidirectional, you can drag and drop from guest to host and from host to guest, both.
Configure Shared Clipboard (for copy-pasting)
Similarly, you can enable shared clipboard from the top menu -> Devices -> Shared Clipboard -> Bidirectional.

Uninstalling VirtualBox Guest Additions
For some reasons, if you don’t want to use it anymore, here’s how you can remove it.
Navigate to the CD image and open it in terminal (Right Click inside the directory > Open in Terminal):

sh ./VBoxLinuxAdditions.run uninstallHowever, in some cases you might have to do some more cleanup. Use the command:
/opt/VBoxGuestAdditions-version/uninstall.shNote: Replace VBoxGuestAdditions-version with the right version (you can hit tab to autocomplete; in my case it is VBoxGuestAdditions-6.0.4).
Wrapping Up
Hopefully by now you have learned how to install and use the VirtualBox Guest Additions in Ubuntu. Let us know if you use these Additions, and what feature you find to be the most helpful!
Install Virtualbox Guest Additions on Ubuntu To Enable 3D Support
In this tutorial I will show you how to install virtualbox guest additions on Ubuntu virtual machine. Guest additions allow your guest OS to be full screen and enable the host and guest to share files and folders with each other. The guest additions will also provide 3D support for Unity desktop thus improving the speed of Ubuntu virtual machine.
Tip: Virtualbox Guest additions are compiled and installed inside a guest OS.
The following instructions are tested on Ubuntu 16.04 and Ubuntu 16.10.
Install Virtualbox Guest Additions on Ubuntu
Log into Ubuntu (Guest OS), open a terminal and update your software with the below command. && means the shell will only execute the next command after previous command is successfully executed.
sudo apt-get update && sudo apt-get upgrade && sudo apt-get dist-upgrade
Install required packages for building kernel modules.
sudo apt-get install build-essential module-assistant dkms
Note: On Ubuntu MATE edition, you need to enable the universe repository, which can be done with the following command, in order to install module-assistant.
sudo add-apt-repository universe sudo apt update
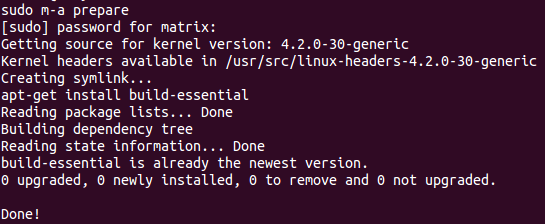
After the above packages are installed, prepare your system to build kernel module.
In the virtual machine window, select Devices > Insert Guest Additions CD image.

You will be asked to download the guest additions iso image. Click Download.
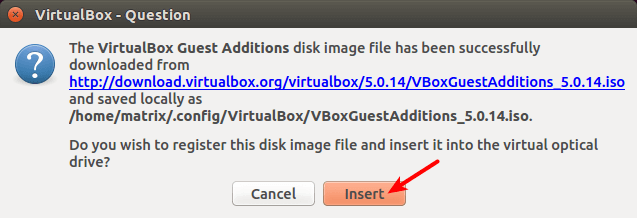
If you host is a Linux distribution, then the guest additions disk image will be downloaded to ~/.config/VirtualBox/ directory. Once the download is complete, click Insert button to insert the CD image into the virtual optical drive.
A pop-up will appear asking you if you would like to run it. Click the Run button.
Then enter your password on ubuntu and it will begin building the virtualbox guest additions kernel modules.
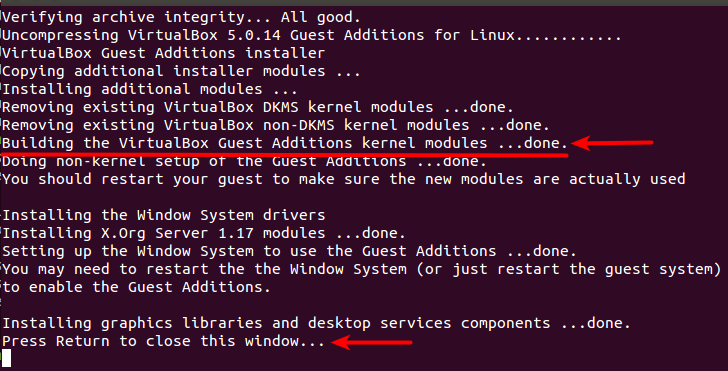
As you can see from the output, it’s also installing window system drivers and graphics libraries and that’s what make 3D acceleration in the guest OS possible. Once it’s done, press Return to close the window.
Reboot your Ubuntu virtual machine.
Now the resizeable display should be working and the resolution of Ubuntu will adjust with the size of virtulbox window. You can press right Ctrl and F keyboard shortcut to enter full-screen mode.
Enable 3D Hardware Acceleration
This step is useful to Ubuntu Unity edition.
Shutdown Ubutnu VM and open your virtualbox settings. Click Display on the left pane. In the Screen tab, allocate 128M video memory to Ubuntu VM and check the box before Enable 3D Acceleration. Save you settings.

Start your Ubuntu VM again. It should be running much faster right now because Unity 3D is supported now. You can run the following command in the terminal to determine whether Unity 3D is supported.
/usr/lib/nux/unity_support_test -p
Look at the last line of the output, if it says
Then Unity 3D is supported.