- How to Run an Ubuntu Linux Virtual Machine on macOS running M1/M2 processor.
- Step #1 Install a Virtualization platform
- Step #2 Get an ARM-supported OS iso
- Step #3 Configuring a Linux VM on M1/M2 mac
- VM config step #1 Getting started with UTM
- VM config step #2 Choose Virtualization option
- VM config step #3Choosing the OS flavour
- VM config step #4 Linux VM Configuration
- VM config step #5 Hardware customization – Memory & CPU
- VM config step #6 Storage size settings
- VM config step #7 Shared Directory
- VM config step #8 Configuration Summary
- VM config step #9 Start the OS installation
- VM config step #10 Running the Ubuntu installer
- Conclusion
- The latest
- How to Install Ubuntu on Your Mac Using VirtualBox
- How to use Linux on your Mac using a virtual machine
- What is virtualization?
- Installing Linux through Parallels
- Installing Linux through VirtualBox
- Adjust the settings
- Which should you choose?
- Questions?
- Get more iMore in your inbox!
How to Run an Ubuntu Linux Virtual Machine on macOS running M1/M2 processor.
This guide will walk through the complete steps for configuring a Linux Ubuntu VM on M1/M2 Mac computers. To be precise, we will cover all the required steps to customize your first Linux VM to run in quickly.
Here are the steps at a high level before you start.
- Install the Virtualization platform, UTM
- Get an ARM-supported OS iso
- Configure a Linux VM on M1/M2 mac
- Getting started with UTM
- Choose Virtualization option
- Choosing the OS flavour
- Linux VM Configuration
- Hardware customization – Memory & CPU
- Storage size settings
- Shared Directory
- Configuration Summary
- Start the OS installation
- Running the Ubuntu installer
Step #1 Install a Virtualization platform
Software Virtualization has two primary components:
- Host Machine, in our case, this is your m1 / m2-based macOS
- Guest Machine, also called Virtual Machine or VM – in our case, is Ubuntu Linux.
The virtualization platform facilitates the guest os, a Virtual environment. Here we use UTM, so you can run a complete sandbox environment inside your Virtual Machine without impacting any other files on your host-machine base OS.
We have chosen UTM for ARM-based macOS since it is an Open source and a free solution. (there are other platforms available, such as Parallels and VMware Fusion).
- Download the free version of UTM virtualization software for your Apple silicon
- Install the UTM app on your macOS.
If you are using the UTM App on mac for the first time, I would recommend you to go to this article first:
Step #2 Get an ARM-supported OS iso
You would require an ARM-supported Linux Operating system to run Linux on M1/M2-based Mac.
Ubuntu and many other OS currently support arm architecture, and we will use Ubuntu in this guide.
Step #3 Configuring a Linux VM on M1/M2 mac
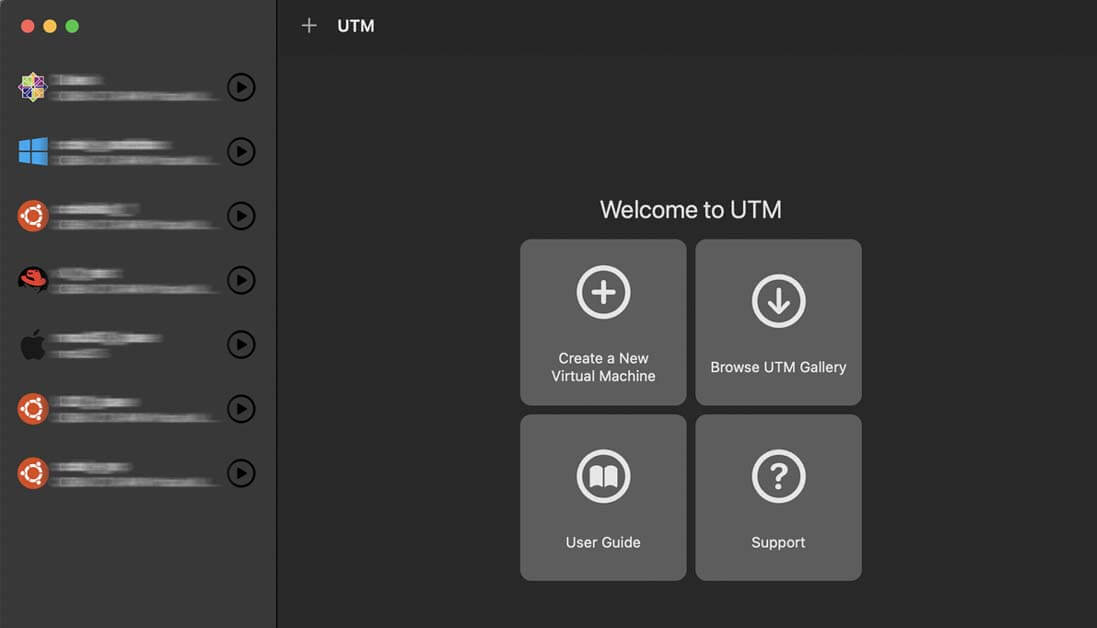
VM config step #1 Getting started with UTM
Firstly, Open your UTM app, and open a new VM creation menu (the plus symbol)
As mentioned before, please refer to this complete guide on UTM if required. Here is a preview of what the UTM Virtual Machine app console looks like:

UTM Virtualization on m1 mac
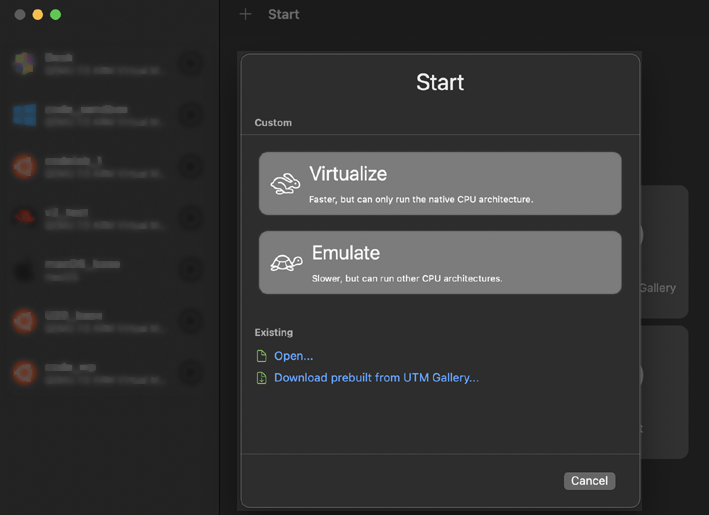
VM config step #2 Choose Virtualization option
New VM customization menu, select the Virtualize option.

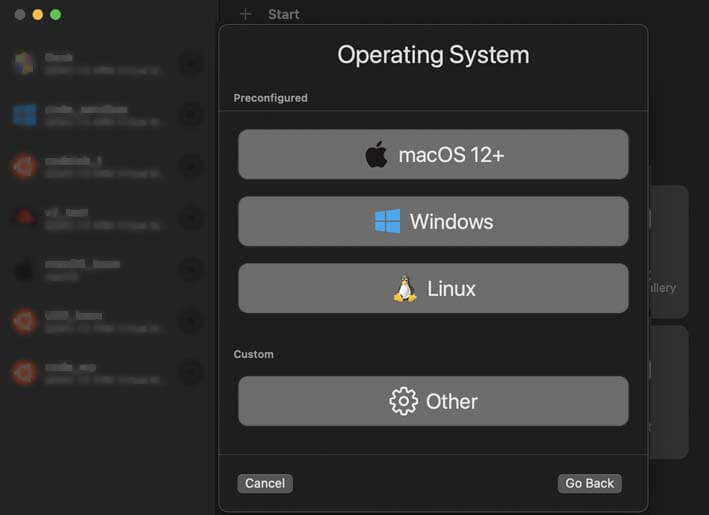
VM config step #3Choosing the OS flavour
Under the Operating System selection, select Linux since we will be using Ubuntu Linux as our guest OS.
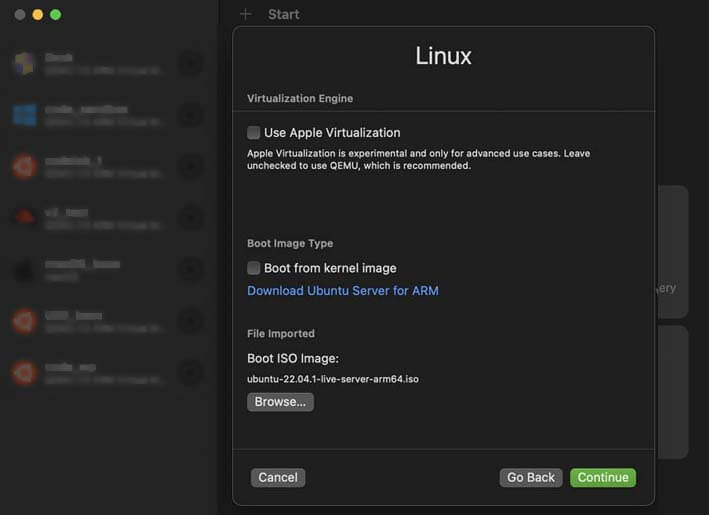
VM config step #4 Linux VM Configuration
From here on, you will get an advanced Linux VM customization menu.
From the first page, map your Ubuntu iso file, as shown below.
You can download the latest version of Ubuntu ARM isos from the official pages, and links are given below.
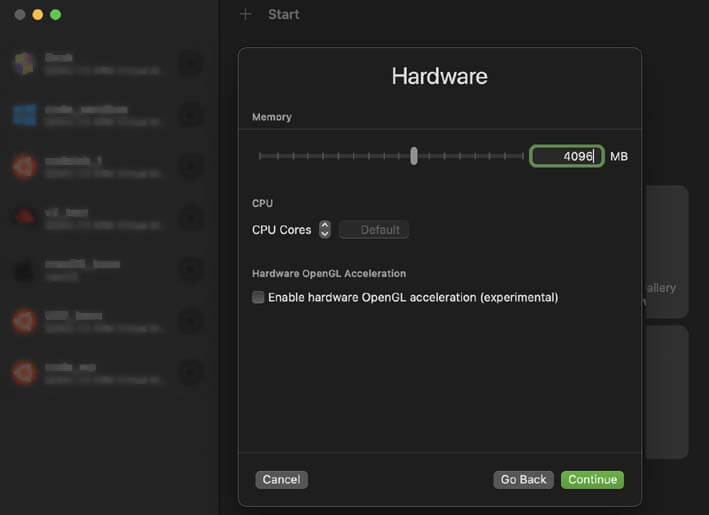
VM config step #5 Hardware customization – Memory & CPU
Memory – Under Hardware, you can set the RAM – Memory. I recommend leaving it at the default value (4096 or 4GB).
CPU Selection – again, do not change this unless you are aware of the performance issue to your host OS if you add more virtual CPUs to the guest.
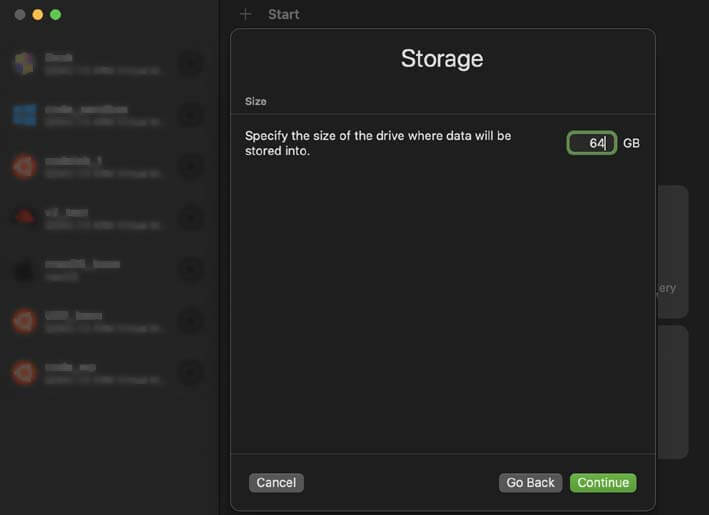
VM config step #6 Storage size settings
I saw the default value is set to 64GB. If this is not suitable for you, you may change it. Please note the space you allocate here will be occupied by your host machine disk.
VM config step #7 Shared Directory
UTM provides a feature to share your MacOS directory with the Linux Guest. I did not use this feature here in this guide for simplicity.
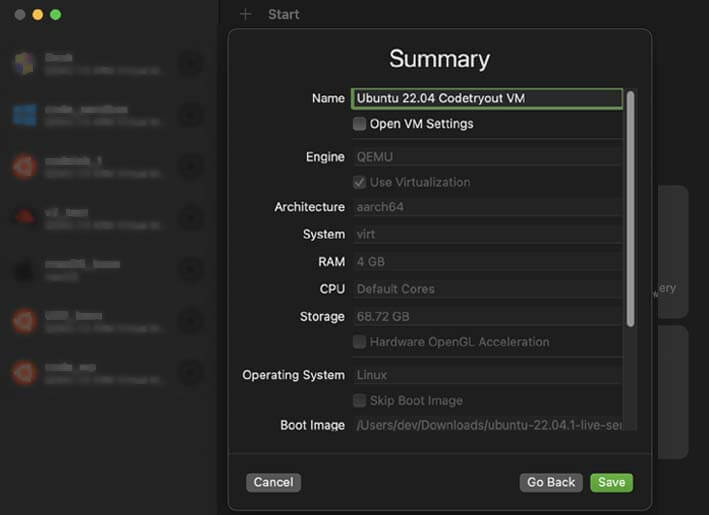
VM config step #8 Configuration Summary
Finally, you will get a summarized view of your advanced VM configurations. You may edit it here, or a few options would be editable even after creating the VM.
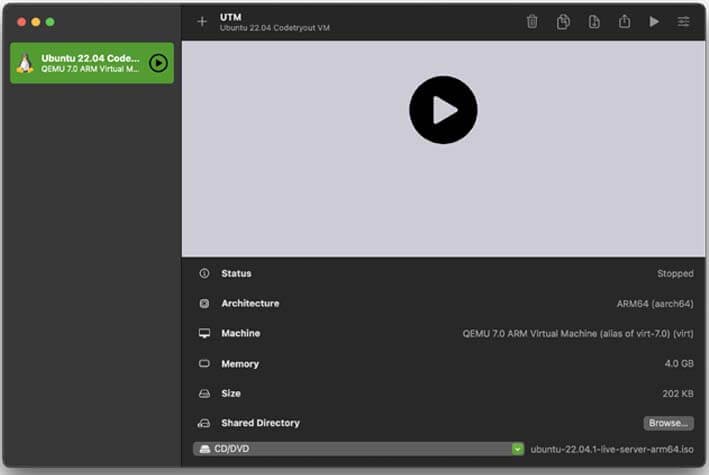
VM config step #9 Start the OS installation
Your Virtual Machine hardware is ready with this step. You may change the settings or start the installation.

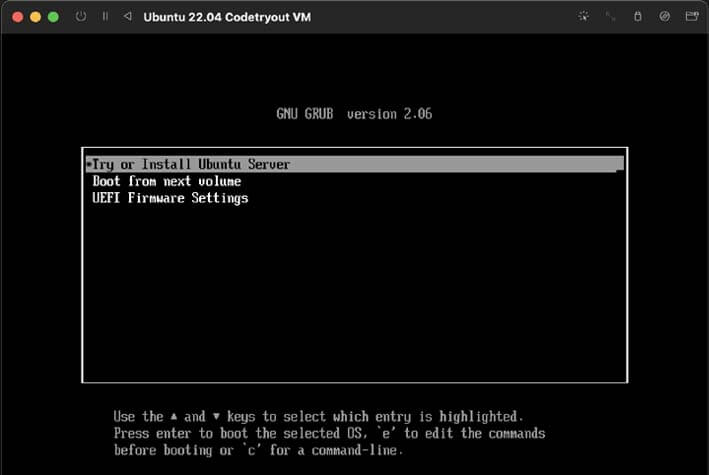
VM config step #10 Running the Ubuntu installer
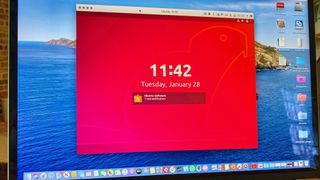
When you are ready to start the OS installation, just click the play button and your OS installation menu will come, just like you are installing an OS on a physical computer.
You can follow the OS installation menu options to complete the Ubuntu installation step. I recommend you choose the default options provided by the install Wizard if you are unsure of your changes.
FAQ: Can I change the VM hardware setting after the OS installation
Yes! When the VM is in the stopped state, you can change most of ( not all ) the VM configurations after the Guest OS iinstallation.
Conclusion
This how-to guide has covered all steps required to run an Ubuntu Virtual Machine on macOS m1/m2 ARM architecture using UTM Virtualization. My experiment used a MacBook Pro M2, with 16GB Memory and 512GB SSD. The Ubuntu VM performance is excellent. Good luck with your new Virtual Machine development environment!
The latest
How to Install Ubuntu on Your Mac Using VirtualBox
This in depth guide will take you every step of the way through installing Ubuntu Linux on your Mac, by way of VirtualBox – a free and outstanding program. Using this method you’ll be able to run Ubuntu and macOS at the same time!
Please note: although this guide was initially authored in 2015, it has been updated (2020) to be current. The following guide uses Ubuntu 18.04.3 LTS “Bionic Beaver”, but the steps and screenshots are nearly identical for most versions of Ubuntu, up to including 20.04.1 LTS.
Using this method to install Ubuntu not only allows you to run it and macOS at the same time, you can really try out Ubuntu – and if you don’t like it – very easily get rid of it. Plus, it will not affect the files in macOS itself at all. None of the data on your Mac is at risk of being deleted or altered. The entire process is actually quite straightforward – and all of the software involved is free – so why not give it a shot 🙂
- Before you get started, there are a few things that should be noted up front.
- Depending on the speed of your Internet connection, it might take a while to download Ubuntu. During the actual installation process, based on the version of Ubuntu you opt to install – you may have to spend some time downloading updates as well.
- The installation time is about 20 minutes, depending on the speed of your Mac, amount of memory etc. You may want to make yourself a cup of coffee or tea before you start.
- Running both Ubuntu and macOS at the same time will “slow down” your Mac. The more memory you have and the faster your CPU and/or hard drive is, the less you’ll notice it.
- First up, head over to the Ubuntu download page and download Ubuntu.
- Now you’ll need to download and install VirtualBox. Visit their download page and click the link OS X hosts (which is the current stable version). Once the download has completed, open the .dmg file and run the installer – the installation is as easy as clicking ‘next’ a bunch of times. When installation is done, launch VirtualBox from your Applications folder.
- When VirtualBox opens, click the New button.


- If you’re using macOS 10.15 (Catalina) or later, you’re going to need to ‘allow’ Virtualbox to receive keystrokes from any application (which is completely safe). Click the Open System Preferences button.
- Click the ‘lock’ icon in the bottom left corner of the screen. After entering your password, place a check in the box next to the Virtualbox item in the list.


- IF VirtualBox crashes right around now, or in the next step or two – check out the 13 minute 45 second mark of this video (link will open in a new tab/window). Hopefully there are no crashes and everything goes smoothly, but there is a known issue with Big Sur that may arise.
- Again, if you’re using macOS 10.15 or later, you’ll be prompted to grant permission for Virtualbox to access a folder. Click OK. You may be prompted to do this several more times – just click OK each time.
- Navigate to the Ubuntu .iso file that you downloaded all the way back in step #1. Select it, and click Open
How to use Linux on your Mac using a virtual machine

With virtualization, you can install and use various operating systems on your Mac, including Windows and Linux. For the latter, we recommend using the latest version of Parallels or open-source VirtualBox. Here’s a look at how to install and use Linux using each option.
What is virtualization?
As I noted in a previous post, software virtualization allows you to simulate a hardware environment and run multiple operating systems on one computer. In doing so, these virtual machines can take advantage of the hardware components on a computer such as RAM and storage in complete isolation to the primary operating system.
For those wanting to install Linux on their Mac through virtualization, we recommend using the latest version of Parallels or open-source VirtualBox. The former offers an easier-to-install solution, but you must pay for it after a 14-day free trial. The latter is open-source and free, but more difficult to install. Regardless, each solution will get the job done.
Installing Linux through Parallels
Using Parallels 15 for Mac, you can install a copy of Linux on your computer following the directions below. These steps assume Parallels has already been installed on your machine.
- Click File on the Parallels toolbar.
- Select New
- Highlight Download Ubuntu Linux under Free Systems.
- Click Continue.
- Choose Download to download a copy of Linux onto your computer.
Once installed, Linux want you to add a new password for the «Parallels» user. You can also choose «Not Listed?» to add a new UNIX user. Regardless, sign into your UNIX account.
- Type in your newly created password in the Parallels Tools box.
- Click OK.
- Restart your virtual machine at the prompt.
You can now use Ubuntu Linux on your Mac using Parallels.
Installing Linux through VirtualBox
To install a virtual copy of Linux on your Mac using the open-source VirtualBox, do the following. These steps assume VirtualBox has already been installed on your machine:
- Click New in VirtualBox.
- Add a name for your virtual copy of Linux.
- Choose Linux as the type of installation.
- Select the version of Linux to use.
- Click Continue
- Choose a Memory Size. Use the suggested minimum or select another number up to your maximum. The more memory you allocate for your virtual operating system, the speedier it will be.
- Select Continue.
- Choose the Create a virtual hard disk now radio dial.
- Click Create.
- Confirm VDI (VirtualBox Disk Image) as your hard drive file type.
- Select Continue.
- Confirm Dynamically allocated for storage.
- Choose file location and size
- Select Create.
The steps above are just the first part of installing Linux on your Mac. You must now download a copy of Linux to work with VirtualBox to finish the process:
- Download Ubuntu Desktop from the Ubuntu website.
- Click Download next to the latest LTS version.
- Confirm to download.
Once downloading this file is complete, go back into VirtualBox.
- Highlight the Linux instance on the left side of the VirtualBox Manager.
- Choose Start.
- Click on the File Icon on the pop-up screen.
- Select Add at the top left.
- Find, then highlight the Ubuntu file you just downloaded.
- Choose Open.
- With the new file highlight, select Choose.
- Select Start.
From there, following the online directions provided by Ubuntu to finish the installation.
Adjust the settings
Depending on your Mac version and age, you may need to adjust the VirtualBox settings for Linux to make the window bigger. To do so, you must first exit the Linux installation. From there:
- Highlight the Linux virtual intallation on the main VirtualBox screen.
- Choose Settings.
- Select Display.
- Change Scale Factor from 100% to 200%.
- Click OK.
- Click Start to start Linux on your Mac.
You can now change the screen size for your Linux installation and begin using the oeprating system on your Mac.
Which should you choose?
Having installed Linux through both Parallels and VirtualBox on my MacBook Pro, I can tell you the process is easier through Parallels. As you can see above, there are much fewer steps to install Linux through Parallels. The result is the same once the operating system gets installed, however.
If you’re already using Parallels on your Mac (to use Windows, for example), you should continue to do so for Linux. The process is simple, and easy-to-follow. However, if you’re looking for a free solution or are new to virtualization, consider VirtualBox. Just go into it know you’ll need to follow a few more steps.
Questions?
Do you have any questions? Let us know in the comments below.
Get more iMore in your inbox!
Our news, reviews, opinions, and easy to follow guides can turn any iPhone owner into an Apple aficionado
By submitting your information you agree to the Terms & Conditions and Privacy Policy and are aged 16 or over.