- How to enable a Virtualbox shared folder for Linux guest systems
- INTRODUCTION
- VIDEO TUTORIAL
- Enable a shared folder in VirtualBox for Arch Linux guest
- Prepare the system
- Add the shared folder
- Enable a shared folder in VirtualBox for Debian guest
- Prepare the system and add a shared folder
- Install the GuestAddition CD Image
- Setting the permissions to the shared folder
- Enable a shared folder in VirtualBox for Linux Mint / Ubuntu guest
- CONCLUSION
- Introduction
- Required: Virtualbox Guest Additions
- Creating a shared folder
- Prepare the folder
- Linux
- Windows
- Troubleshooting
- The name was not valid
- Ubuntu 10.04 host
How to enable a Virtualbox shared folder for Linux guest systems
VirtualBox is a very useful tool to install operating systems inside the main system. However, configuring the Virtualbox to share files between your main system and the system you installed in a VirtualBox is not trivial. So, I will show you how to enable a shared folder in Virtualbox for Debian, Linux Mint/Ubuntu, and Arch Linux as guest systems. I will also show a universal way that should work for any Linux guest distribution.
INTRODUCTION
There are several essential steps you need to follow, to enable a shared folder between the real machine (host) and the virtual machine (guest):
- Install guest additions for your guest system.
- Create a shared folder.
- Change the user permission for the shared folder.
In this tutorial, my host system is Arch Linux, but the host system does not matter in this case because we will do all the setting in the guest systems. So, I will show you the settings for Arch Linux, Linux Mint and Debian as guest systems. If you use some other distributions as a guest, look at the instructions for Debian. It is a universal way to enable a shared folder and it should work for all distributions.
VIDEO TUTORIAL
Enable a shared folder in VirtualBox for Arch Linux guest
Prepare the system
First, make sure your Arch Linux guest system is up to date. Open a terminal and update it:
Next, install kernel headers. I use the Linux kernel LTS, so I have to install the linux-lts-headers package. If you use the standard kernel, install linux-headers .
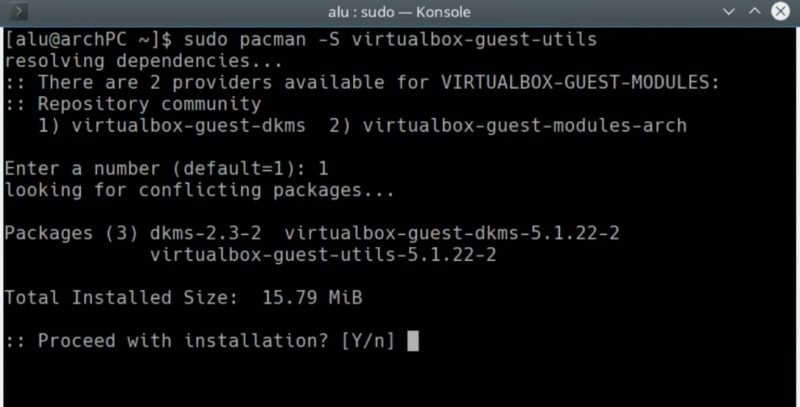
sudo pacman -S linux-lts-headers Then, install the virtualbox-guest-utils package. It will make you choose a package: either virtualbox-guest-modules-arch or virtualbox-guest-dkms . The Arch Linux wiki recommends choosing the virtualbox-guest-modules-arch package if you use the Linux kernel and virtualbox-guest-dkms for others kernels like LTS. Again, I use the linux-lts kernel so I needed to install the virtualbox-guest-dkms package.
sudo pacman -S virtualbox-guest-utils After that, enable the VirtualBox kernel modules:
sudo systemctl enable vboxservice Add the shared folder
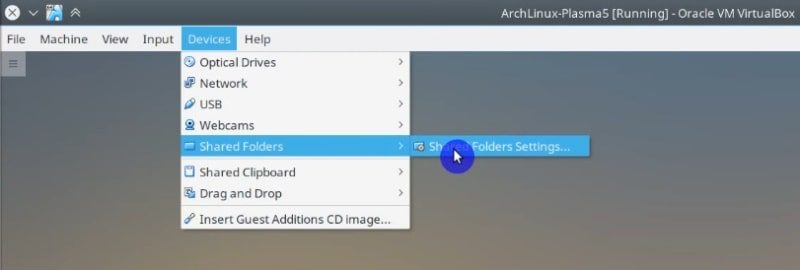
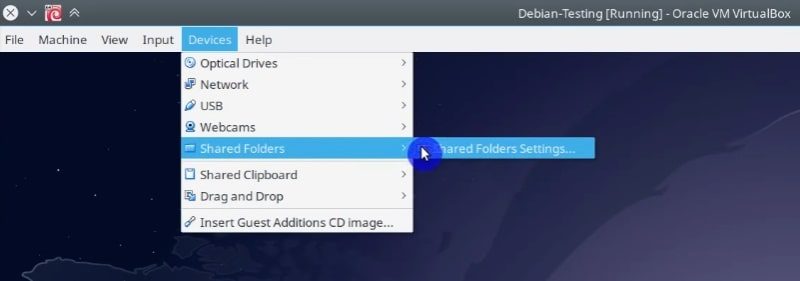
In VirtualBox, go to the Devices menu -> Shared Folders menu -> Shared folders settings.
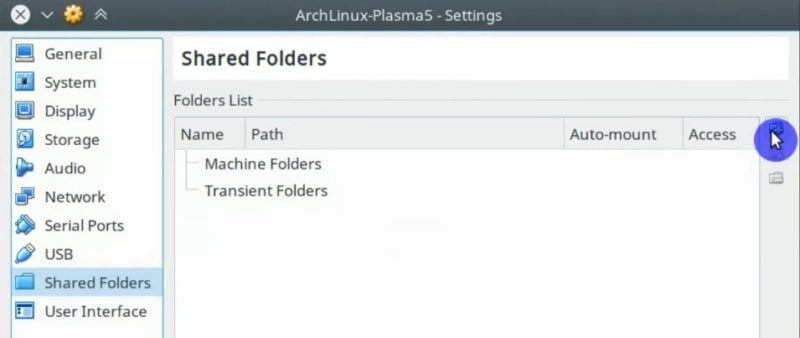
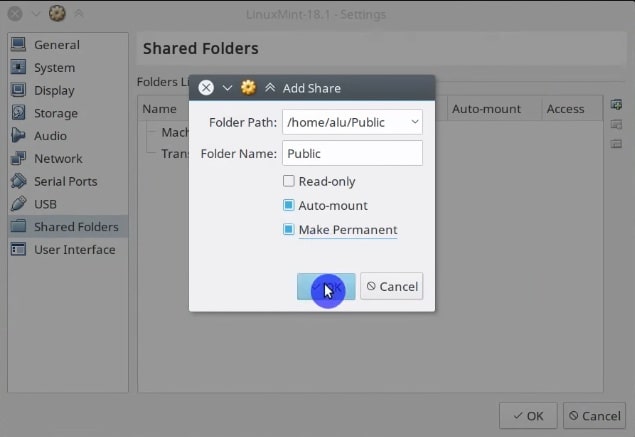
In the window that opens, on the right side, you will find the button to add a new shared folder. Click on it.
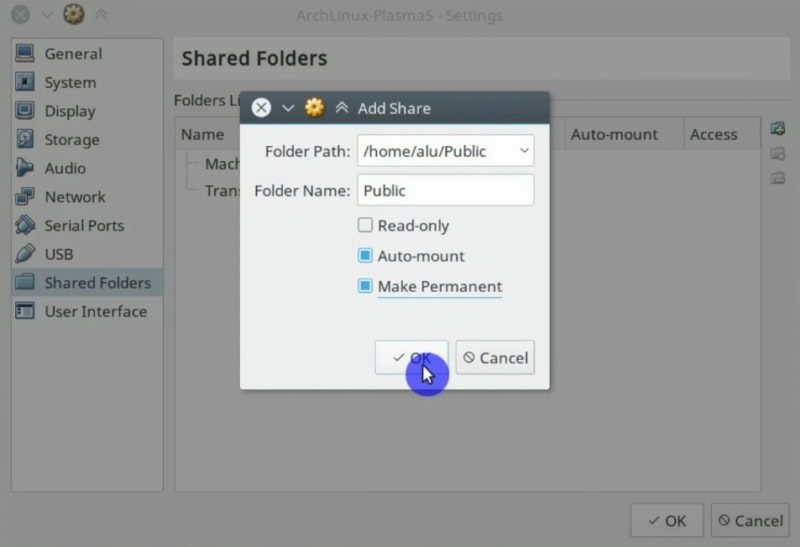
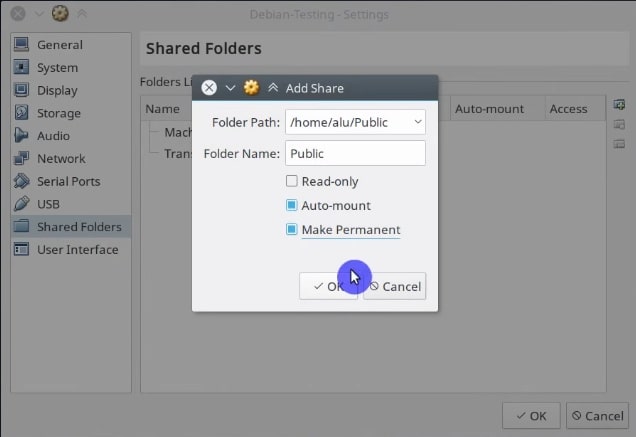
And select the folder you want to share between systems. For example, I usually share my Public folder. Make it permanent and activate auto-mounting by clicking on the options.
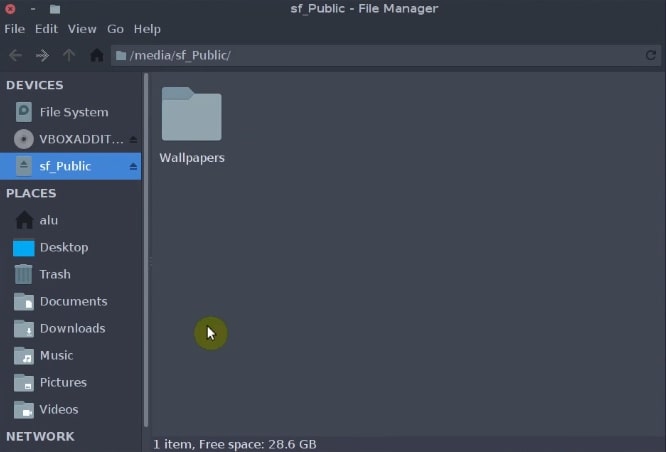
Then, you need to reboot the guest system. Once the guest system has rebooted, you can find the shared folder in the /media folder.
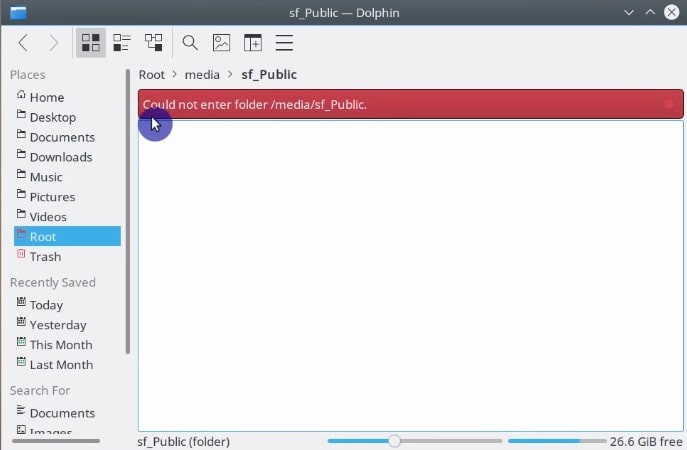
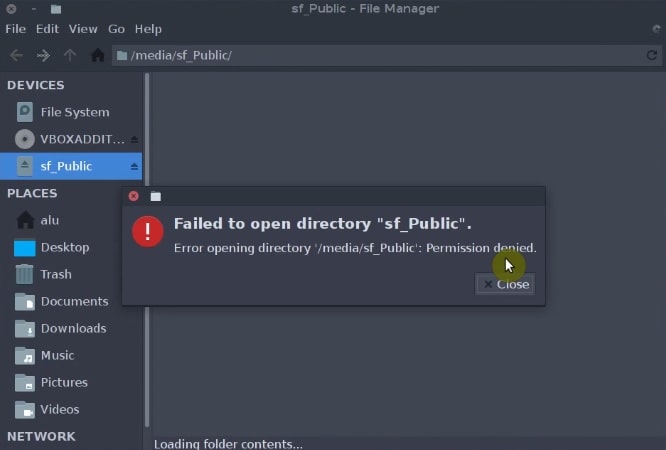
The problem is, however, that only the root user can access the folder. To gain access to this folder as a regular user, open the terminal in your guest system and add your user to the vboxsf group.
sudo usermod -a -G vboxsf `whoami` `whoami` stand there to automatically paste your username. You can also type your username directly.
Next, give that user a permission to access the media folder.
sudo chown -R `whoami`:users /media/sf_Public/ Finally, log out, and log in again. Open the file manager and you should be able to access the shared folder as a regular user.
So, this is the whole process to enable a shared folder in VirtualBox using Arch Linux. You can start placing files there.
Enable a shared folder in VirtualBox for Debian guest
Installing guest addition in Debian is a little different from in Arch Linux. For Debian, I will show you a more universal way that you can apply to any other distro including Arch Linux. However, the way I showed before is preferable for Arch Linux.
Prepare the system and add a shared folder
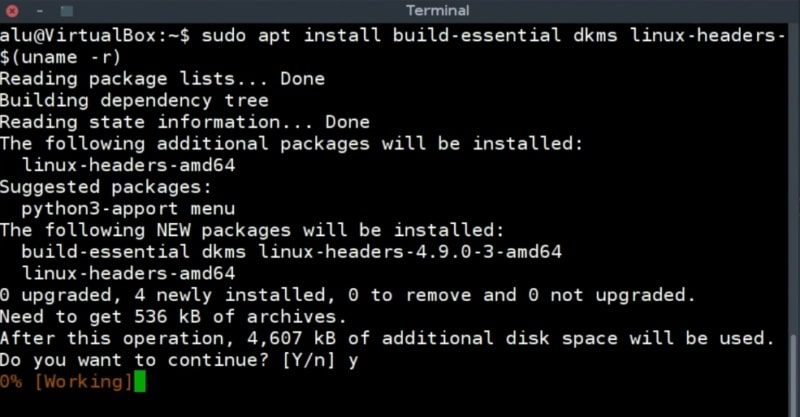
In Debian guest, open a terminal and install the build-essential, dkms, and linux-headers packages.
sudo apt install build-essential dkms linux-headers-$(uname -r) After that, you can add a shared folder. It is the same procedure as before. Go to the Devices menu -> Shared folders -> click on the Shared folder settings option.
Again, click on the button at the right to add the shared folder. Set the folder options you want and click on the Ok button.
After the packages are installed and the shared folder is added, reboot the system.
Install the GuestAddition CD Image
When your guest system has started. Go to the Devices menu and click on the Insert Guest addition image option.
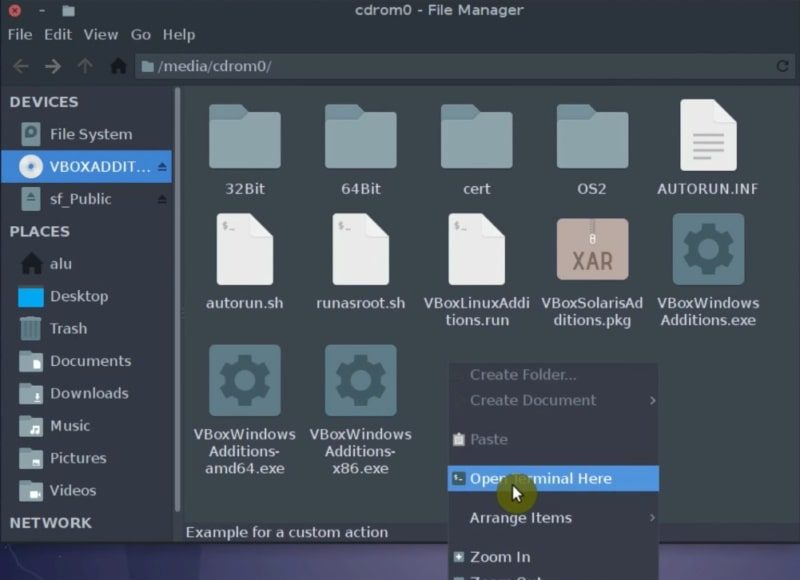
Then, open a file manager, navigate to VBOXADDITION CD, right click in that directory and click on the open Terminal here option.
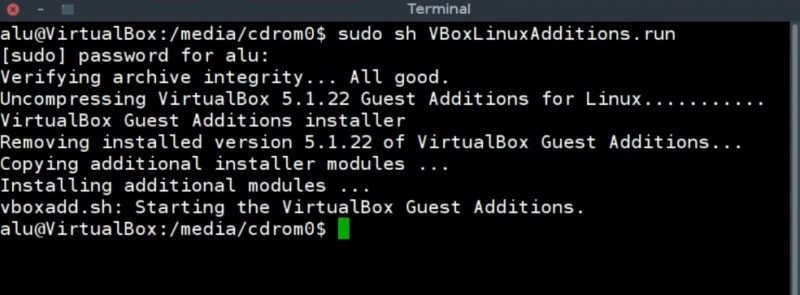
In the terminal, run the following command to install the VirtualBoxLinuxAddtions:
sudo sh VBoxLinuxAdditions.run Make sure it is installed without errors. If some errors occur, read the message, most likely the instruction for a fix will be provided. If the install is successful, you need to reboot the system.
Setting the permissions to the shared folder
If you go to the /media folder in the file manager and check if a shared folder is mounted, most likely you will not be able to access it as a regular user.
To enable the access to this folder for a regular user, do the same what we did for Arch Linux, add your user to the vboxsf group.
sudo usermod -a -G vboxsf `whoami` And change the permission of the media folder.
sudo chown -R `whoami`:users /media/ Log out, log in and you should be able to access the shared folder.
This method to enable a shared folder in VirtualBox for Debian is universal and it should work for any other distributions.
Enable a shared folder in VirtualBox for Linux Mint / Ubuntu guest
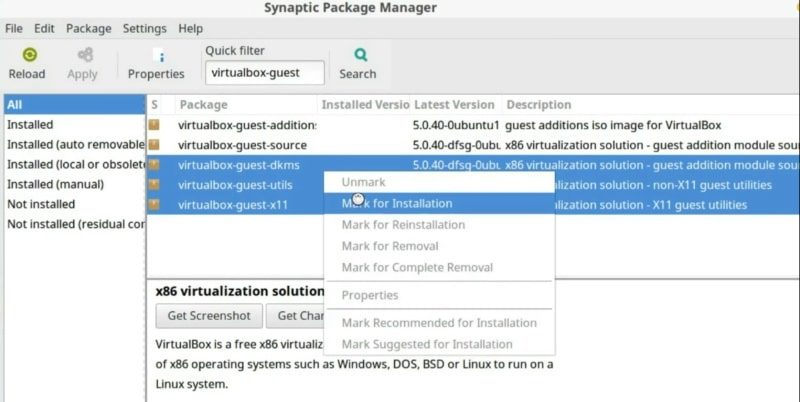
Linux Mint and Ubuntu usually come with VirtualBox guest addition pre-installed by default. If not, you can install it using a software manager like Synaptic.
Open the software manager, search and install virtualbox-guest-X11 , virtualbox-guest-utils , and virtualbox-guest-dkms .
Then do the same steps I showed for Arch Linux and Debian. First, add a shared folder.
Reboot the system. Then, add your user to the vboxsf group.
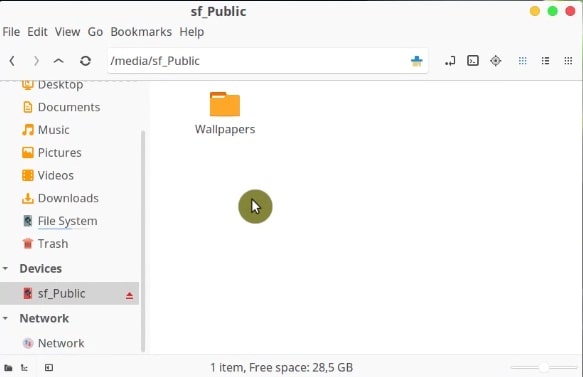
sudo usermod -a -G vboxsf `whoami` sudo chown -R `whoami`:users /media/ Finally, log out and log in, and you should have the shared folder working.
CONCLUSION
Now, you can use your VirtuaBox systems more extensively by sharing files between your host and guest systems.
If you use any other distro than Ubuntu-based ones, Arch Linux or Debian, try the way I show for Debian and let me know how it worked.
I recommend for the next read to learn how to clean Arch Linux.
Average Linux UserFollow I am the founder of the Average Linux User project, which is a hobby I work on at night. During the day I am a scientist who uses computers to analyze genetic data.
Introduction
This explains how to share files and folders (directories) between host and guest. (Files are shared over a network, in other words, you access remote files. For virtual machines, the network between host and guest is virtual since they are on the same real machine. But the steps you take are similar to setting up file sharing over real networks.)
Required: Virtualbox Guest Additions
Before sharing folders, you must install Guest Additions. For instructions on how to do this, see Guest Additions.
Creating a shared folder
- Create a folder on the Host computer (ubuntu) that you would like to share, for example ~/share
- Boot the Guest operating system in VirtualBox.
- Select Devices -> Shared Folders.
- Choose the ‘Add’ button.
- Select ~/share
- Optionally select the ‘Make permanent’ option
Prepare the folder
Linux
With a shared folder named share, as above, the folder can be mounted as the directory ~/host with the command
sudo mount -t vboxsf -o uid=$UID,gid=$(id -g) share ~/host
Windows
Now anything placed in this folder should be visible from the host in the ~/share folder.
Troubleshooting
This can be done more generically with the following:
sharename="whatever.you.want.to.call.it"; sudo mkdir /mnt/$sharename sudo chmod 777 /mnt/$sharename sudo mount -t vboxsf -o uid=1000,gid=1000 $sharename /mnt/$sharename ln -s /mnt/$sharename $HOME/Desktop/$sharename
For the above command if you get the following error:
mount: unknown filesystem type 'vboxsf'
Then just change the vboxsf to vboxfs
If you want to have it mount automatically upon each boot, put the mount command in /etc/rc.local Debian distros (e.g. Ubuntu 10.04 and later) HOWTO Use Shared Folders
See Section 4.4 «Folder Sharing» in the VirtualBox documentation.
Note: if you want to mount the directory as owned and writable only by root, omit the -o uid=1000,gid=1000 option to the mount command
/sbin/mount.vboxsf: mounting failed with the error: Protocol error
The above error could be one of the following.
The name was not valid
Make sure you specified the right name on the bash commands. If the guest machine is expecting «share» (as we did in the Prepare Host section) and you wrote
sharename="donotshare" sudo mkdir /mnt/$sharename sudo chmod 777 /mnt/$sharename sudo mount -t vboxsf -o uid=1000,gid=1000 $sharename /mnt/$sharename ln -s /mnt/$sharename $HOME/Desktop/$sharename
Ubuntu 10.04 host
Note: Running on Ubuntu 10.04 host and Mint 14 as virtual system, the system would not accept a ~/share. It complained that it was not an absolute address. I entered /home/jim/share and it worked fine.
- Create a folder on the Host computer (ubuntu) that you would like to share, for example ~/share
- Boot the Guest operating system in VirtualBox.
- Select Devices -> Shared Folders.
- Choose the ‘Add’ button.
- Select ‘/home//share‘ for Folder Path
- Select ‘share’ for Folder Name
- Optionally select the ‘Make permanent’ option
VirtualBox/SharedFolders (последним исправлял пользователь dyn005202 2014-09-26 15:49:59)
The material on this wiki is available under a free license, see Copyright / License for details
You can contribute to this wiki, see Wiki Guide for details
