- Download VirtualBox for Linux Hosts
- VirtualBox 7.0.8 for Linux
- Oracle Linux
- Debian-based Linux distributions
- RPM-based Linux distributions
- How to Install VirtualBox on Linux Mint 20
- Installing VirtualBox on Linux Mint 20 from the standard repositories
- Installing VirtualBox on Linux Mint 20 from the Oracle repositories
- Step 1: Import VirtualBox key
- Step 2: Add VirtualBox repository
- Step 3: Install VirtualBox
- Getting started with VirtualBox
- Conclusion
- About the author
- Kamran Sattar Awaisi
- How to Install VirtualBox on Linux Mint 21
- Install VirtualBox on Linux Mint 21
- How to Remove VirtualBox from Linux Mint 21
- Conclusion
- About the author
- Syeda Wardah Batool
Download VirtualBox for Linux Hosts
Note: The package architecture has to match the Linux kernel architecture, that is, if you are running a 64-bit kernel, install the appropriate AMD64 package (it does not matter if you have an Intel or an AMD CPU). Mixed installations (e.g. Debian/Lenny ships an AMD64 kernel with 32-bit packages) are not supported. To install VirtualBox anyway you need to setup a 64-bit chroot environment.
The VirtualBox base package binaries are released under the terms of the GPL version 2.
Please choose the appropriate package for your Linux distribution.
VirtualBox 7.0.8 for Linux
- Oracle Linux 9 / Red Hat Enterprise Linux 9
- Oracle Linux 8 / Red Hat Enterprise Linux 8
- Oracle Linux 7 / Red Hat Enterprise Linux 7 / CentOS 7
- Ubuntu 22.04
- Ubuntu 20.04
- Ubuntu 18.04 / 18.10 / 19.04
- Debian 11
- Debian 10
- openSUSE 15.3 / 15.4
- Fedora 36
- Fedora 35
- All distributions (built on EL6 and therefore not requiring recent system libraries)
Oracle Linux
Users of Oracle Linux 6, 7 and 8 can use the Oracle Linux yum repository and enable the ol6_developer channel for Oracle Linux 6, the ol7_developer channel for Oracle Linux 7, or the ol8_developer channel for Oracle Linux 8. After that, do
to get the latest maintenance release of VirtualBox 6.1.x installed.
Debian-based Linux distributions
Add the following line to your /etc/apt/sources.list . For Debian 11 and older, replace ‘ ‘ with ‘ bullseye ‘, ‘ buster ‘, or ‘ stretch ‘. For Ubuntu 22.04 and older, ‘replace ‘ ‘ with ‘ jammy ‘, ‘ eoan ‘, ‘ bionic ‘, ‘ xenial ‘,
deb [arch=amd64 signed-by=/usr/share/keyrings/oracle-virtualbox-2016.gpg] https://download.virtualbox.org/virtualbox/debian contrib
The Oracle public key for verifying the signatures can be downloaded here. You can add these keys with
sudo gpg --dearmor oracle_vbox_2016.asc --yes --output /usr/share/keyrings/oracle-virtualbox-2016.gpg
or combine downloading and registering:
wget -O- https://www.virtualbox.org/download/oracle_vbox_2016.asc | sudo gpg --dearmor --yes --output /usr/share/keyrings/oracle-virtualbox-2016.gpg
The key fingerprint for oracle_vbox_2016.asc is
B9F8 D658 297A F3EF C18D 5CDF A2F6 83C5 2980 AECF Oracle Corporation (VirtualBox archive signing key)
sudo apt-get update sudo apt-get install virtualbox-6.1
Replace virtualbox-6.1 by virtualbox-6.0 or virtualbox-5.2 to install the latest VirtualBox 6.0 or 5.2 build.
What to do when experiencing The following signatures were invalid: BADSIG . when refreshing the packages from the repository?
# sudo -s -H # apt-get clean # rm /var/lib/apt/lists/* # rm /var/lib/apt/lists/partial/* # apt-get clean # apt-get update
If you previously added the Oracle key(s) to your default keyring (now considered insecure), remove them again with:
sudo apt-key remove 5CDFA2F683C52980AECF sudo apt-key remove D9C954422A4B98AB5139
(As of VirtualBox 3.2, the signing key was changed. The old Sun public key for apt-secure can be downloaded here. Likewise, the Oracle public key for distributions older than Debian 8 and Ubuntu 16.04 can be downloaded here.)
RPM-based Linux distributions
We provide a yum/dnf-style repository for Oracle Linux/Fedora/RHEL/openSUSE. All .rpm packages are signed. The Oracle public key for rpm can be downloaded here. You can add this key (not normally necessary, see below!) with
sudo rpm --import oracle_vbox_2016.asc
or combine downloading and registering:
wget -q https://www.virtualbox.org/download/oracle_vbox_2016.asc -O- | rpm --import -
B9F8 D658 297A F3EF C18D 5CDF A2F6 83C5 2980 AECF Oracle Corporation (VirtualBox archive signing key)
After importing the public key, the package signature can be checked with
rpm --checksig PACKAGE_NAME
Note that importing the key is not necessary for yum users (Oracle Linux/Fedora/RHEL/CentOS) when using one of the virtualbox.repo files from below as yum downloads and imports the public key automatically! Zypper users should run
(As of VirtualBox 6.1.44/7.0.8, the same signing key as for Debian packages since 2016 is used. The Oracle public key for older rpm packages and not updated repositories can be downloaded here.)
The package signature is checked by yum/dnf/zypper as well:
- Users of Oracle Linux / RHEL can add the Oracle Linux repo file to /etc/yum.repos.d/.
- Users of Fedora can add the Fedora repo file to /etc/yum.repos.d/.
- Users of openSUSE can add the openSUSE repo file to /etc/zypp/repos.d/.
How to Install VirtualBox on Linux Mint 20
![]()
Developed and maintained by Oracle, VirtualBox is a multi-platform, open-source hypervisor that enables us to run multiple virtual machines as a guest operating system on a single host. VirtualBox is more often used for testing and development purposes.
VirtualBox can be installed on Linux Mint 20 from the standard repositories and Oracle’s official VirtualBox repository.
Installing VirtualBox on Linux Mint 20 from the standard repositories
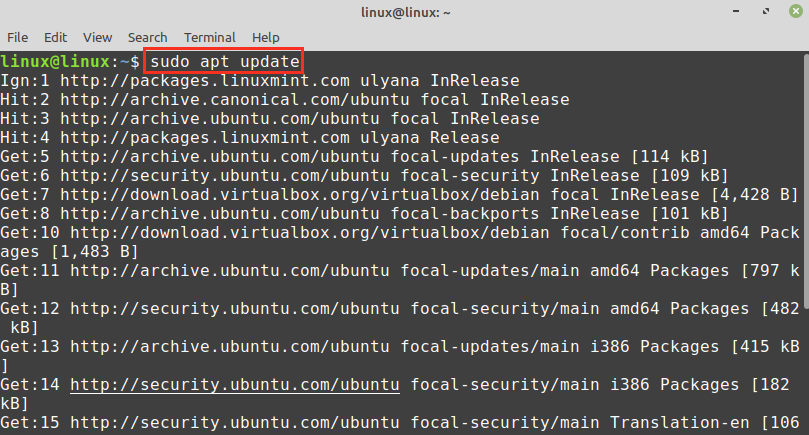
As VirtualBox is a popular and open-source tool, it is included in the Linux Mint 20 standard repositories. Fire up the terminal and update the apt cache as it is recommended to do so before installing any new application:

Next, install the VirtualBox and the extension pack with the command:

Press ‘y’ to continue installing VirtualBox.

While installing VirtualBox, you will see the VirtualBox Personal Use and Evaluation License (PEUL). Read the license agreement carefully, choose ‘OK’ and press the enter key.
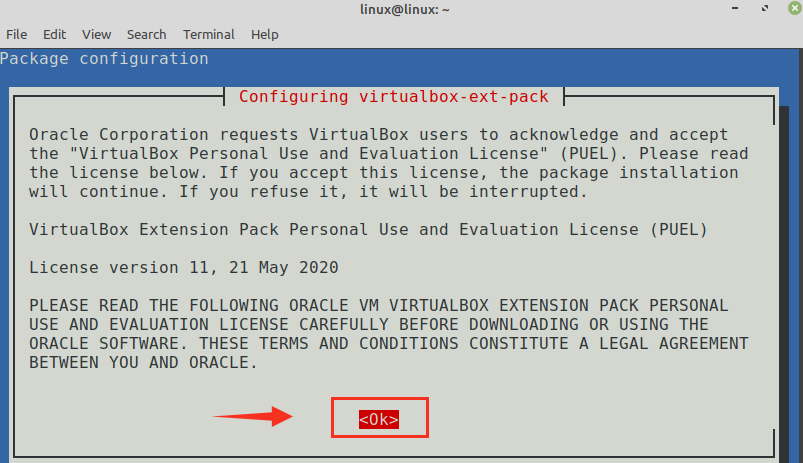
If you accept the VirtualBox PUEL license terms, select ‘Yes’ and press enter key.

The VirtualBox will be successfully installed on your Linux Mint 20 system.
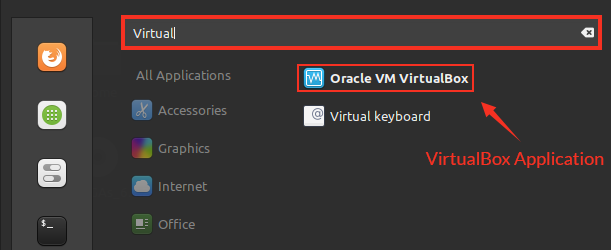
To verify the installation, click on Application Menu and search for VirtualBox. You will find the VirtualBox application in Application Menu.

Installing VirtualBox on Linux Mint 20 from the Oracle repositories
As of writing this post, the newest version of VirtualBox is 6.1.
Complete the below-given steps to install VirtualBox on Linux Mint 20 from the Oracle repositories:
Step 1: Import VirtualBox key
Fire up the terminal and import the Oracle VirtualBox’s public key on your Linux Mint 20 system using the command:

The above-given command requires the sudo privileges, enter the sudo password, and the key will be imported successfully. The ‘OK’ confirms that the key is imported.
Step 2: Add VirtualBox repository
Next, add the VirtualBox repository to your Linux Mint 20 system:
$ echo «deb [arch=amd64] http://download.virtualbox.org/virtualbox/debian focal contrib» | sudo tee / etc / apt / sources.list.d / virtualbox.list

Step 3: Install VirtualBox
First, update the apt listing with the command:
Now, install the VirtualBox with the command:

Press ‘y’ to continue installing VirtualBox.

The VirtualBox will be installed on your system.
Once the VirtualBox is installed, verify the VirtualBox installation with the command:

The above-given command checks the VirtualBox Linux Kernel module service status. The output shows that the VirtualBox is successfully installed, and the service is active.
Getting started with VirtualBox
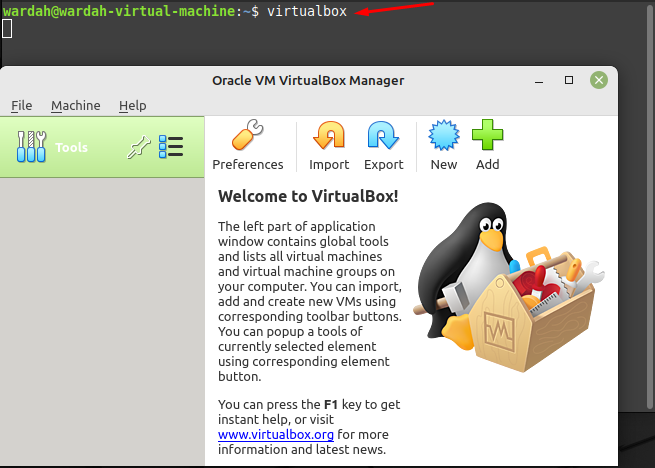
Click on the Application Menu, and search for the VirtualBox.
VirtualBox is ready for use.

Conclusion
This post has learned about installing VirtualBox on Linux Mint 20 from the Linux Mint 20 standard repositories and Oracle’s official repository. VirtualBox is a hypervisor that allows us to run multiple virtual machines on a single host machine simultaneously. It is designed and maintained by Oracle.
About the author
Kamran Sattar Awaisi
I am a software engineer and a research scholar. I like to write article and make tutorial on various IT topics including Python, Cloud Computing, Fog Computing and Deep Learning. I love to use Linux based operating systems.
How to Install VirtualBox on Linux Mint 21
![]()
VirtualBox is a cross-platform that allows the user to run multiple OS in a system at a time without rebooting. VirtualBox is a simple and powerful open-source platform that offers a free license to use it for different purposes i-e, educational or personal.
A system that runs multiple operating systems with the help of VirtualBox is known as the host. You can install and run several systems on a single host by keeping the memory limit in mind. Like you can work with Windows and Linux on a mac system.
Install VirtualBox on Linux Mint 21
The Installation process of VirtualBox on the Linux Mint 21 system is not difficult to perform but requires some attention. Problems might occur while executing commands if you missed something. So, follow this guide step-by-step carefully from start to end, and don’t miss anything.
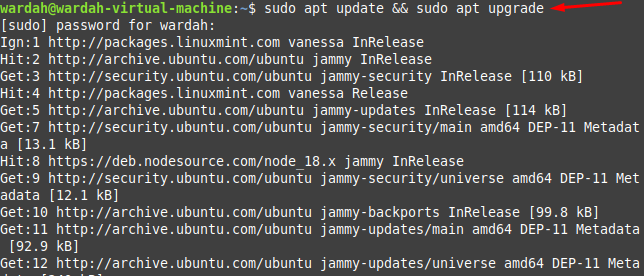
Step 1: Update the repository to ensure all system packages are updated, this would help to avoid any struggle in VirtualBox installation.
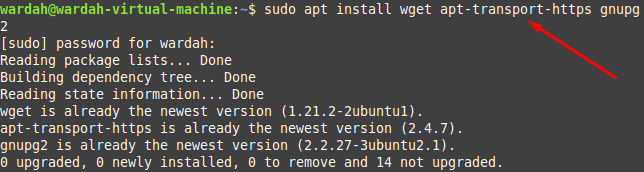
Step 2: Get all the dependencies that we need before installing VirtualBox in the system by executing the mentioned command. Some of the dependencies already exist on the Linux Mint system. But running the command will ensure you the presence of all dependencies:
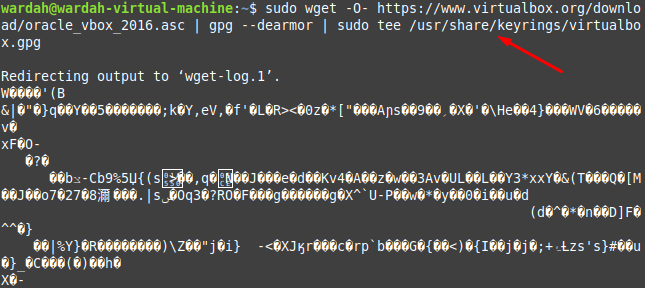
Step 3: Import the key to the system before installing VirtualBox by copying the mentioned command:
$ sudo wget -O- https: // www.virtualbox.org / download / oracle_vbox_2016.asc | gpg —dearmor | sudo tee / usr / share / keyrings / virtualbox.gpg
Step 4: In this step, you are required to import the VirtualBox repository from its official site. This would be done by executing the given command in terminal:
$ echo deb [ arch =amd64 signed-by= / usr / share / keyrings / virtualbox.gpg ] https: // download.virtualbox.org / virtualbox / debian jammy contrib | sudo tee / etc / apt / sources.list.d / virtualbox.list

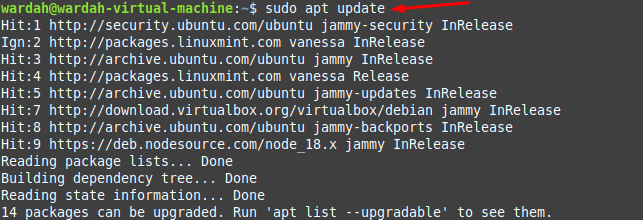
Step 5: Now update the system repository as we have added other repositories in it:
Step 6: As we have completed the required setup for VirtualBox installation. Now, we can get it through the given-below command:
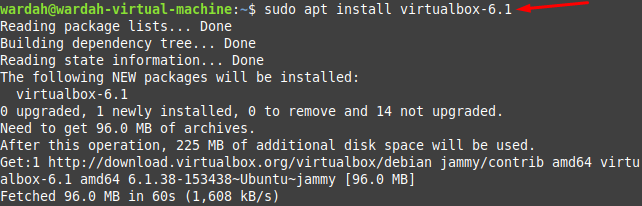
So, the VirtualBox updated version has been installed successfully on Linux Mint 21 system, to launch it, type in terminal:
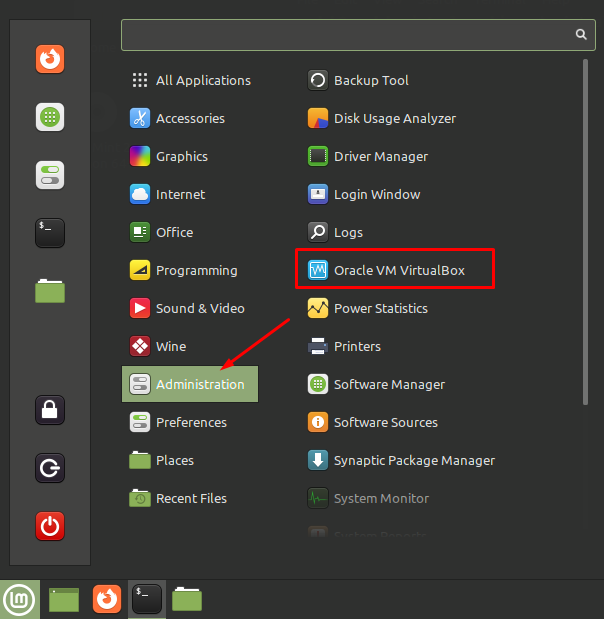
Or you can also get it by clicking on Administration from applications menu:
How to Remove VirtualBox from Linux Mint 21
To uninstall VirtualBox when there is no need of it, you can run the following command:

This command will delete the VirtualBox application from the system. But if you want to remove all the dependencies and repositories we have downloaded at the time of installation, run the following commands:
For the VirtualBox source repository, type:

For removing the GPG key (this is optional), type:

Conclusion
VirtualBox is a powerful virtualization tool for those people who wish to run several operating systems on a single host. It provides a simple interface to create virtual machines. This article has demonstrated an introduction to VirtualBox and its installation process on Linux Mint 21 system. Also, the deleting process of VirtualBox with its required source repository has been mentioned in this article.
About the author
Syeda Wardah Batool
I am a Software Engineer Graduate and Self Motivated Linux writer. I also love to read latest Linux books. Moreover, in my free time, i love to read books on Personal development.