- Перенос сервера Linux на виртуальную машину VMware
- Создание образа диска
- Конвертируем образ в формат vmdk
- Конвертируем в формат ovf (Open Virtualization Format)
- Learning Linux Virtualization With a VMware Ubuntu Install
- Prerequisites
- Downloading VMware Workstation
- Installing VMware Workstation On Ubuntu
- Creating a VM on VMware Workstation
- Conclusion
Перенос сервера Linux на виртуальную машину VMware
Любой физический можно относительно легко подвергнуть виртуализации. В этой статье будет показано, как превратить физический сервер под управлением Linux в виртуальную машину VMware.
Создание образа диска
Первым делом нужно снять образ диска для VMware с нашего физического . Никакое дополнительное программное обеспечение для начала виртуализации нам не нужно, поскольку образ можно создать стандартной командой dd:
dd if=/dev/sda of=/mnt/share/sda.img bs=8M conv=sync,noerror
Здесь мы параметром if задаем входящий файл — весь диск /dev/sda. В качестве выходного файла (of) мы устанавливаем /mnt/share/sda.img — это и будет наш образ диска. Параметр bs задает размер блока для ускорения процедуры копирования (по умолчанию 512 байт, следовательно, данные при виртуализации будут сбрасываться небольшими блоками по 512 байт, что существенно замедлит процедуру создания образа). Последний параметр указывает на необходимость копирования с игнорированием ошибок и создания точной () копии физического диска.
Примечание. В точке монтирования /mnt/share должно быть достаточно места. Как минимум, должно быть свободно столько, сколько займет копируемый физический диск после виртуализации.
Конвертируем образ в формат vmdk
После того, как образ создан, его нужно конвертировать в формат VMWare. Для этого мы будем использовать qemu, точнее утилиту , входящую в состав этого пакета эмуляции. К сожалению, для проведения виртуализации физического сервера придется установить весь пакет:
Данная команда подойдет для Ubuntu и Debian, в Fedora нужно использовать dnf, а в CentOS — yum:
sudo dnf install qemu
sudo yum install qemu
Команда конвертирования выглядит так:
convert -o compat6 /mnt/share/sda.img -O vmdk /mnt/share/vmware.vmdk
Обратите внимание, что в /mnt/share должно быть достаточно места для хранения файла vmware.vmdk, который также будет большого размера.
Конвертируем в формат ovf (Open Virtualization Format)
Для конвертирования в формат ovf нам понадобится программа VMWare Workstation, которую можно бесплатно скачать после регистрации на сайте компании. Установите приложение и создайте новую виртуальную машину (рис. 1).
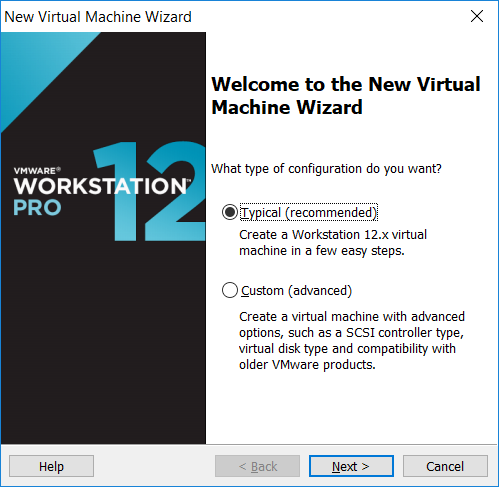
Рис. 1. Создание новой виртуальной машины в VMWare Workstation
Выберите, что вы установите операционную систему позже (рис. 2).
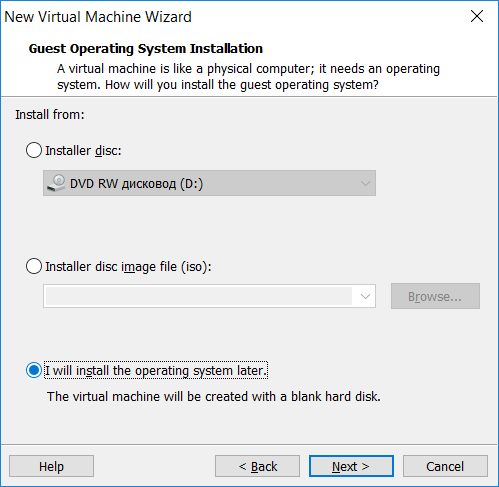
Рис. 2. Установим операционную систему позже
Выберите тип операционной системы — Linux и выберите ваш дистрибутив (либо его ближайшего «родственника»), см. рис. 3.
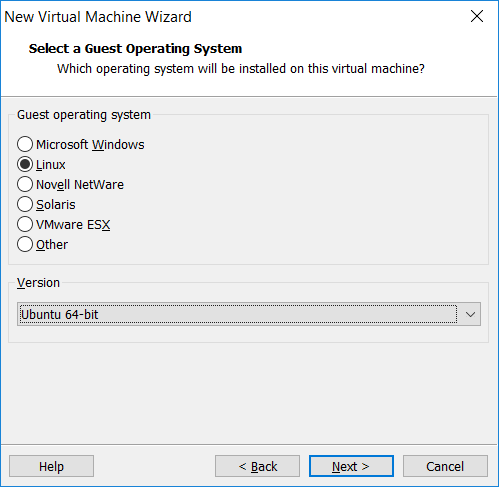
Рис. 3. Выбор типа операционной системы
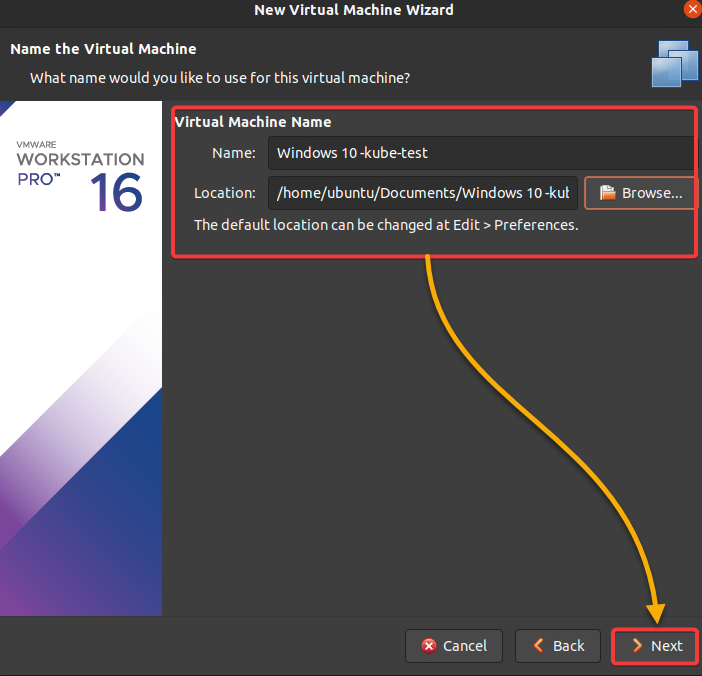
Введите название виртуальной машины VMware и путь к ней (рис. 4).
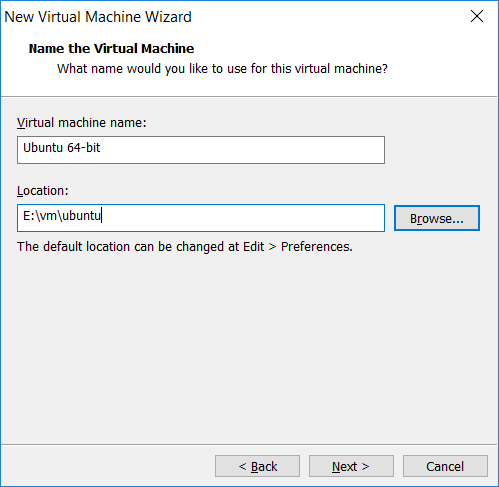
Рис. 4. Имя и путь к виртуальной машине
Learning Linux Virtualization With a VMware Ubuntu Install
Running a virtual machine (VM) natively on your Ubuntu hardware has many benefits over running it on a server. Some of those benefits are reducing latency and increasing I/O performance. Why not create a VM with VMware on Ubuntu and install a guest OS?
VMware is one of the most common methods for running a VM on Ubuntu. Not sure how? Worry not. In this tutorial, you will learn more about virtualization with VMware Ubuntu Install.
Read on to supercharge your Ubuntu VM experience!
Prerequisites
This tutorial comprises hands-on demonstrations. To follow along, ensure you have the following:
- An Ubuntu machine – This tutorial uses Ubuntu 20.04, but the steps should be similar for other versions.
Ensure your machine meets the requirements below for VMware to work correctly:
- An ISO image of the installation media for the OS you want to install in your VM – This tutorial uses Windows 10, but you can use any ISO you like.
Downloading VMware Workstation
VMware Workstation is a type-2 hypervisor that runs on top of an existing OS (Linux or Windows) that lets you create and run multiple VMs on a single machine. This hypervisor helps you save time and money by consolidating multiple physical servers into VMs.
Before using VMware Workstation, you must download and install it on your machine.
VMware offers two versions of its product, as follows:
| Version | Description |
|---|---|
| Workstation Player | Free for personal use. |
| Workstation Pro | Requires a license key for activation. This version has a 30-day free trial (full-featured). |
But in this tutorial, you can use the Pro version’s free trial, so you can later decide whether to purchase a license key.
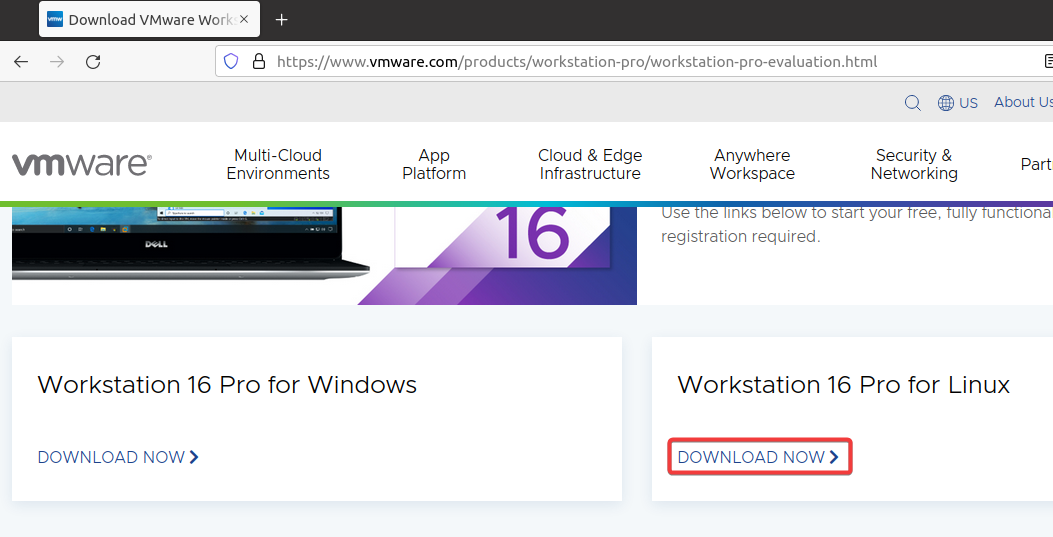
1. Open your favorite web browser, and visit VMware’s official download page.
2. Next, click DOWNLOAD NOW under the Workstation 16 Pro for Linux section to download the .bundle file. A bundle file is an executable file that contains all the files needed to install a program on any Linux distribution quickly.
3. Once downloaded, run the ls command below to verify the .bundle file is in your ~/Downloads directory.
You will see a similar output as below. At the time of this writing, the latest VMware Workstation version is 16.

Installing VMware Workstation On Ubuntu
Now that you have downloaded the VMware bundle, it is time to install it. But first, you need to make the .bundle file executable. By default, Ubuntu does not allow you to run any program unmarked as executable.
1. Open your terminal, and run the chmod command below, which does not provide output but changes the file permissions of the .bundle file. This command makes the file executable ( +x ).
chmod +x ~/Downloads/VMware-Workstation*2. Next, run the below apt install command to install the gcc compiler and other essential development tools ( build-essential ). These tools are required to build the VMware kernel modules.

3. Once installed, run the command below to extract the VMware bundle on your system. Ensure you replace VMware-Workstation-Full-16.2.4-20089737.x86_64.bundle with your VMware bundle name.
sudo ./VMware-Workstation-Full-16.2.4-20089737.x86_64.bundle
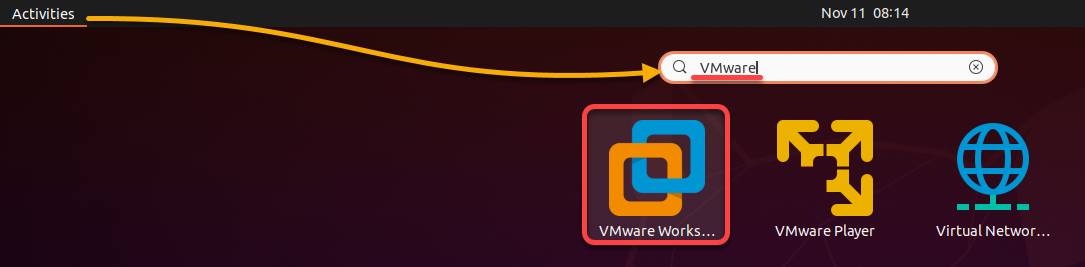
4. Now, from the Activities overview, search for VMware, and click on the VMware Workstation icon, as shown below. The first time you launch VMware Workstation, the installation wizard opens (step five).
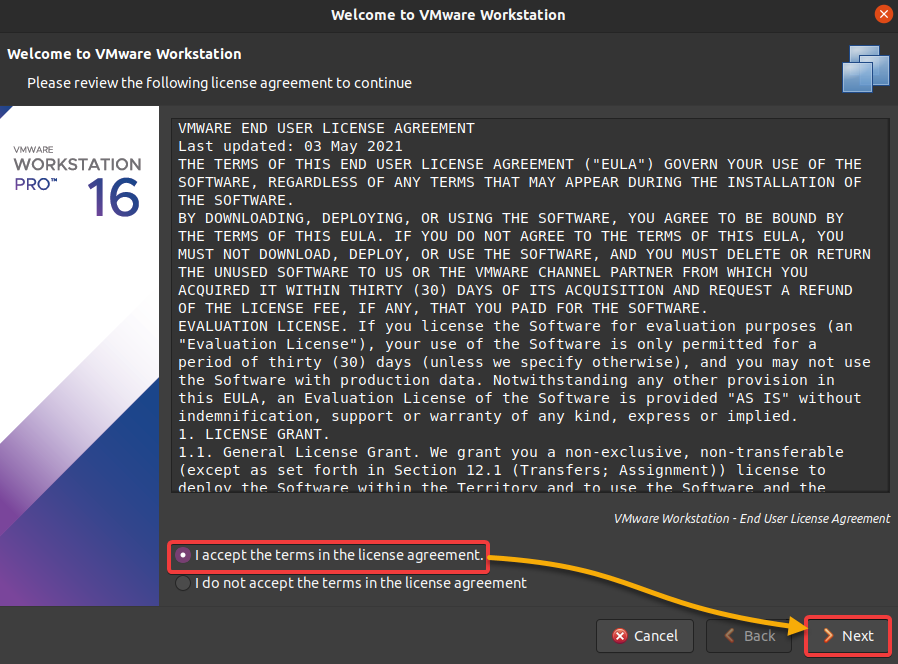
5. On the VMware Workstation installation wizard, select the first option to accept the End User License Agreement (EULA) and click Next.
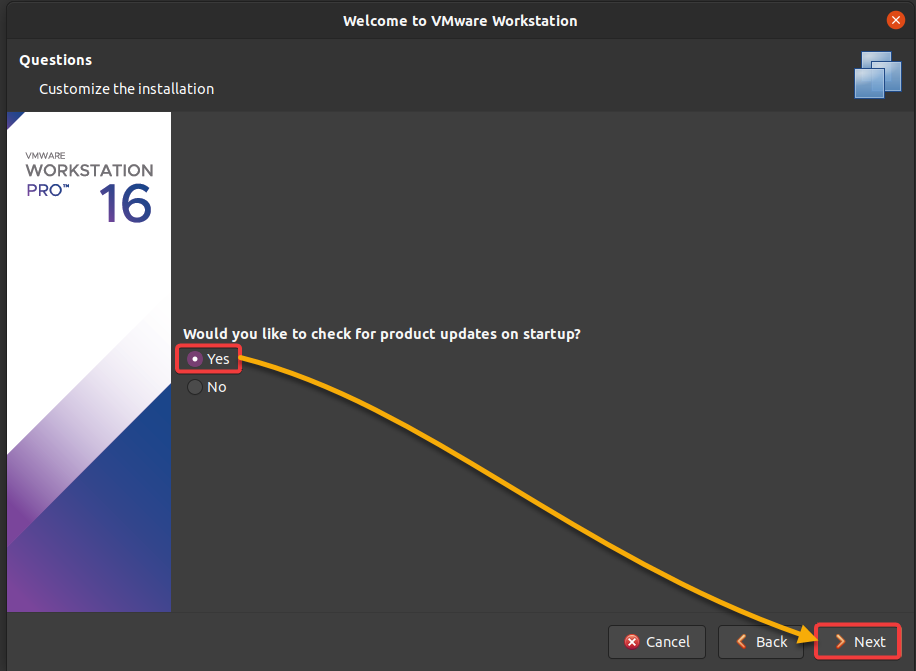
6. Next, select Yes to enable the VMware automatic updates on startup, and click Next.
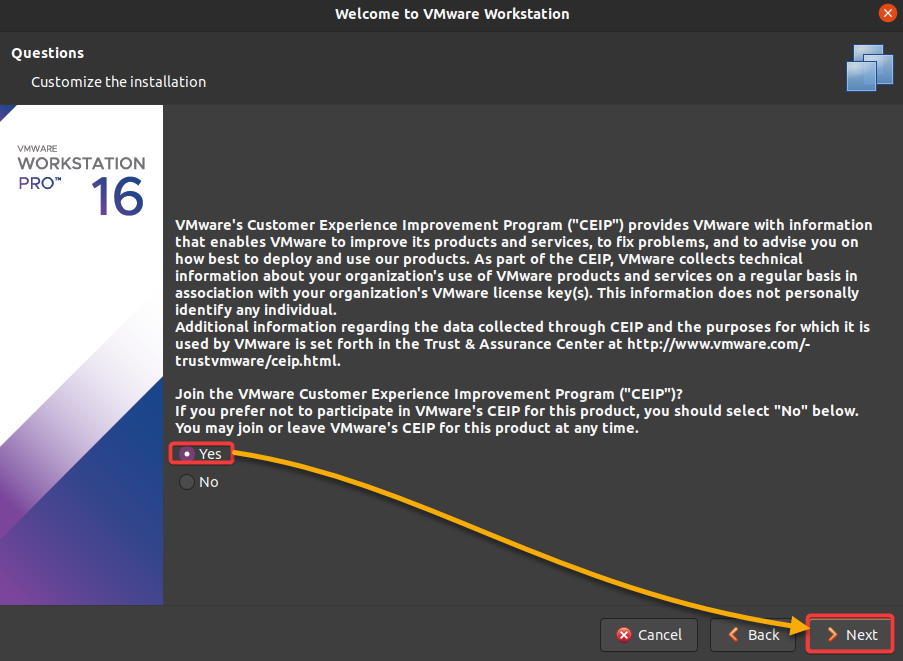
7. Select Yes if you wish to join the VMware customer experience improvement program, and click Next.
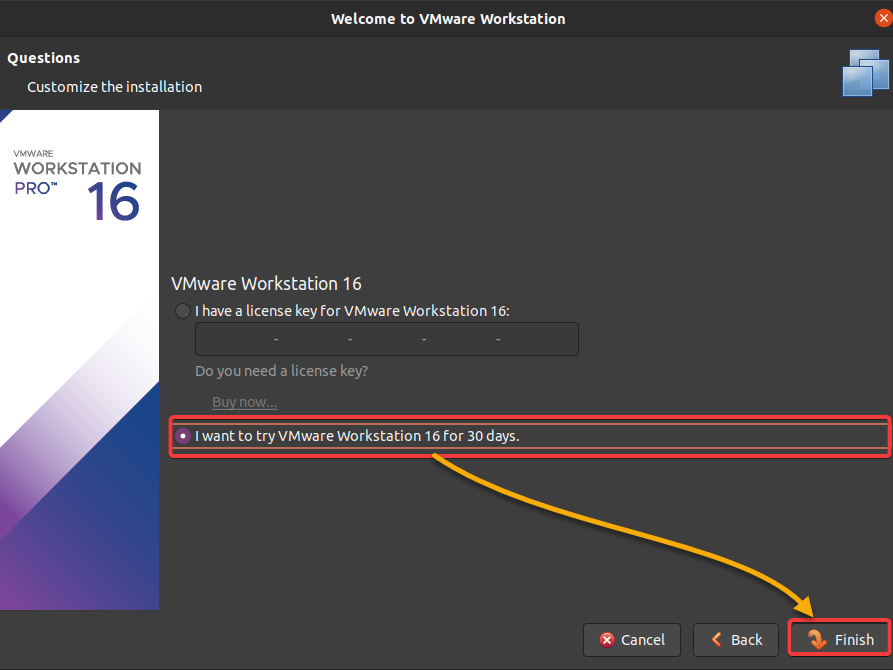
8. Next, select the bottom option to try VMware Workstation 16 for 30 days, and click Finish. Or choose the first option, and enter the Pro license key if you have one.
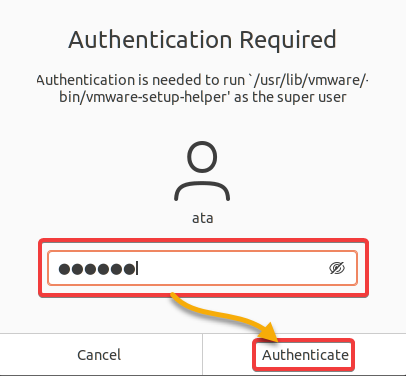
9. Lastly, enter your user account password, and click Authenticate when prompted to authenticate the installation.
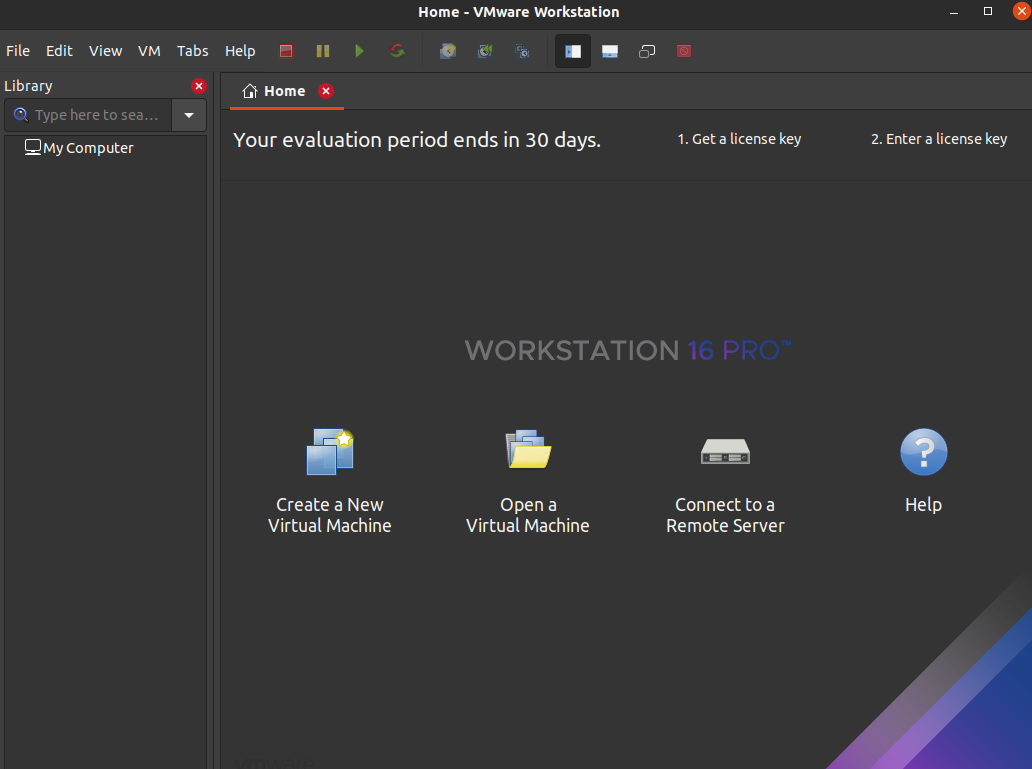
Once the installation completes, the main window of VMware Workstation shows up, as shown below.
Creating a VM on VMware Workstation
Now that you have installed VMware Workstation, you are ready to create your first VM and start saving on hardware costs. You can either create a single or multiple VMs on your machine. With a VM, you can test applications that might damage or delete data on the physical computer.
To create a VM on VMware Workstation:
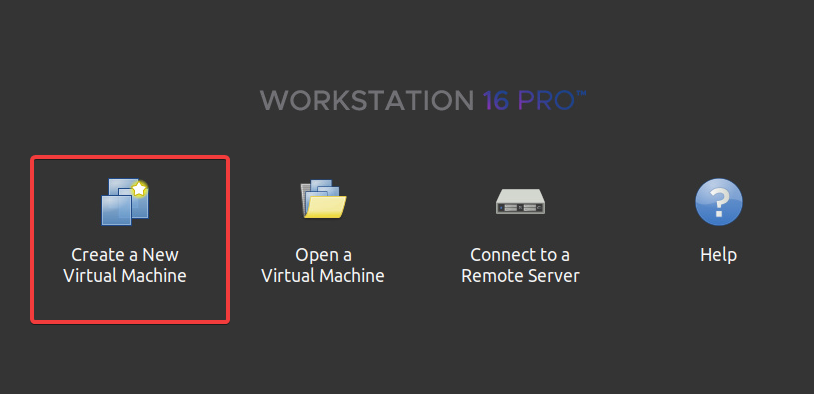
1. Click Create a New Virtual Machine on the main window, which opens a wizard to configure your new VM (step two).
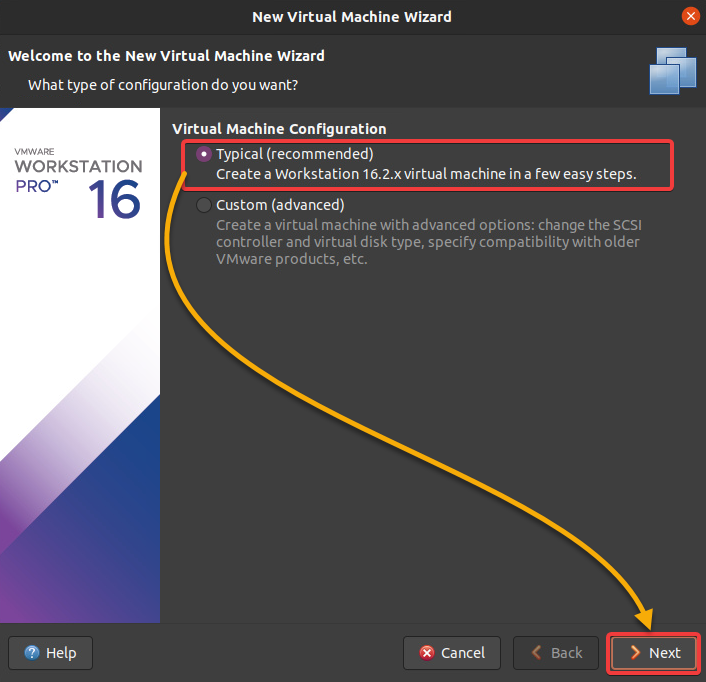
2. Next, select the Typical option, and click Next. This option lets you create a new VM with the recommended configuration for most users, especially for first-timers.
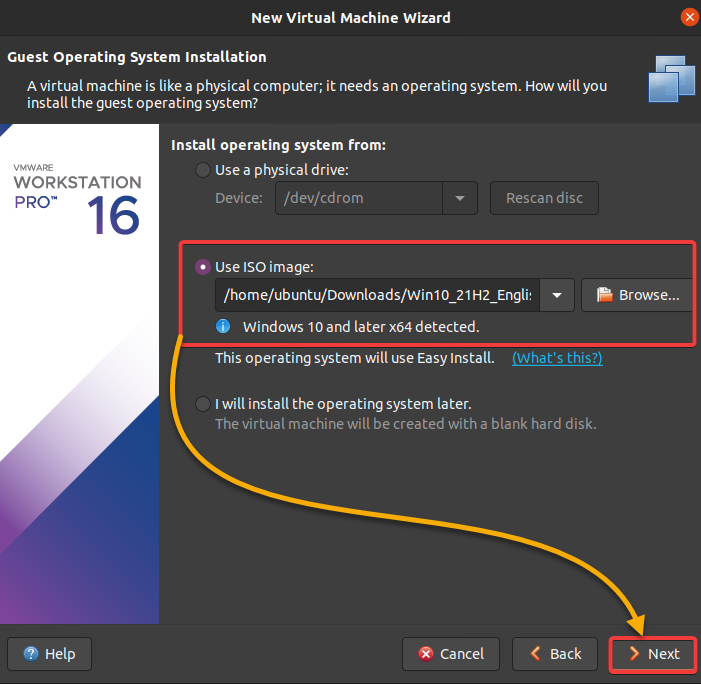
3. Select the Use ISO image option on the next screen, click Browse to locate your Windows ISO file, and click Next.
This setting lets you choose the OS you want to install on your VM.
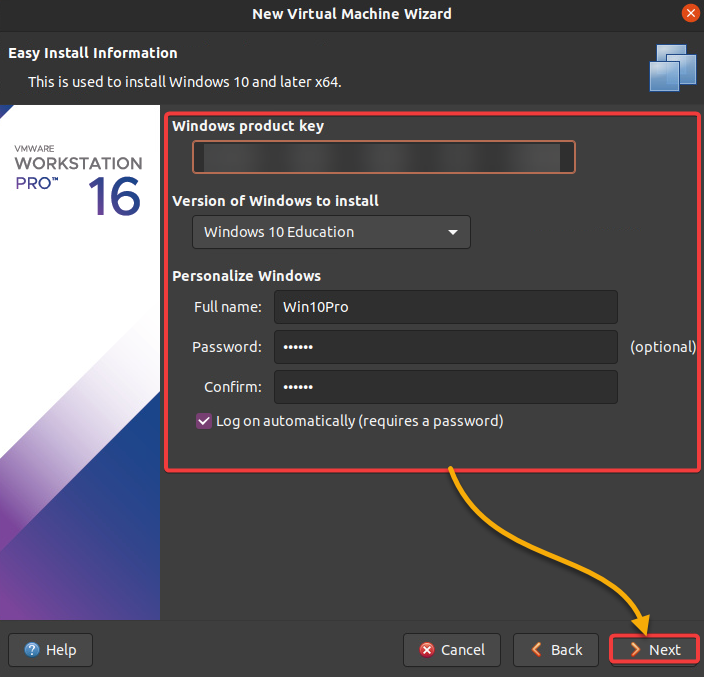
- Windows product key – Enter a Windows product key if you have one. If none, leave this field blank and click Next.Version of Windows to install – Select the version of Windows you are installing. This tutorial uses Windows 10 pro.Full name and Password – Provide, and confirm your preferred login credentials for your VM.Keep other settings as is, and click Next.
5. Configure the VM settings with the following, and click Next.
| Name | A descriptive VM Name to identify the virtual machine on your system. |
| Location | A location where VMware Workstation stores all files related to your VM. |
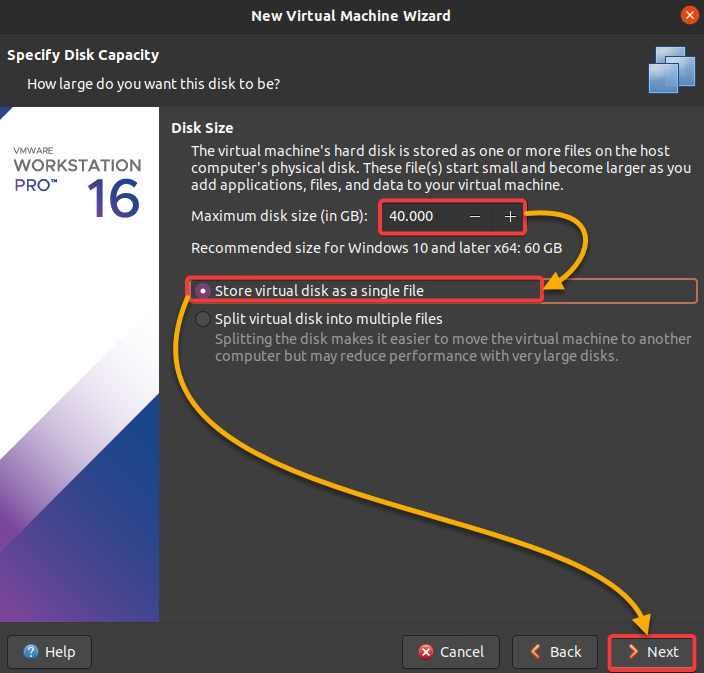
6. Next, configure your VM’s disk capacity with the below information, and click Next.
| Maximum disk size | Set the maximum amount of space (in GB) the VM can use, which is the size of the virtual hard disk (VHD) that will be created for your VM. Allocating at least 40 GB is recommended for a VM. |
| Store virtual disk as a single file | Select this option to store the virtual disk as a single file on your computer. |
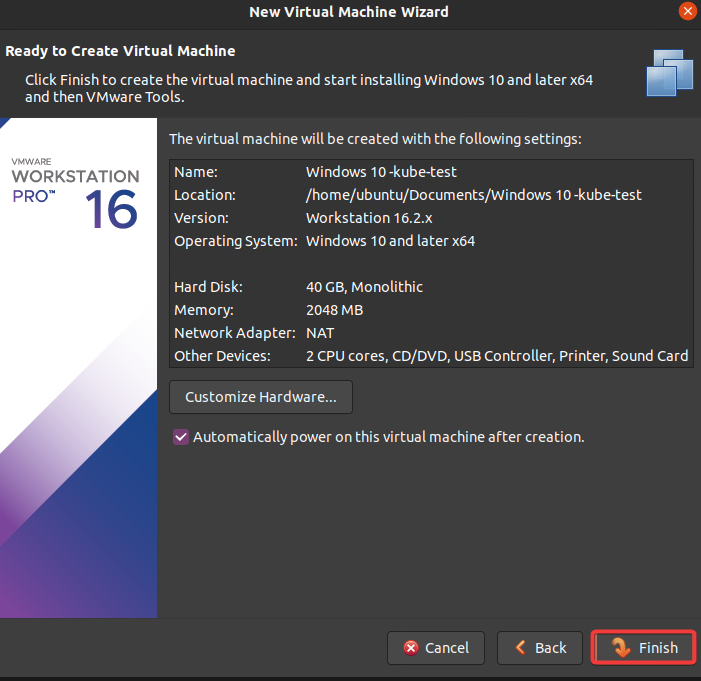
7. Finally, review your settings, click Back to change any of the settings, or click Finish to create your VM. If you keep the checkbox at the bottom enabled, your VM starts up automatically.
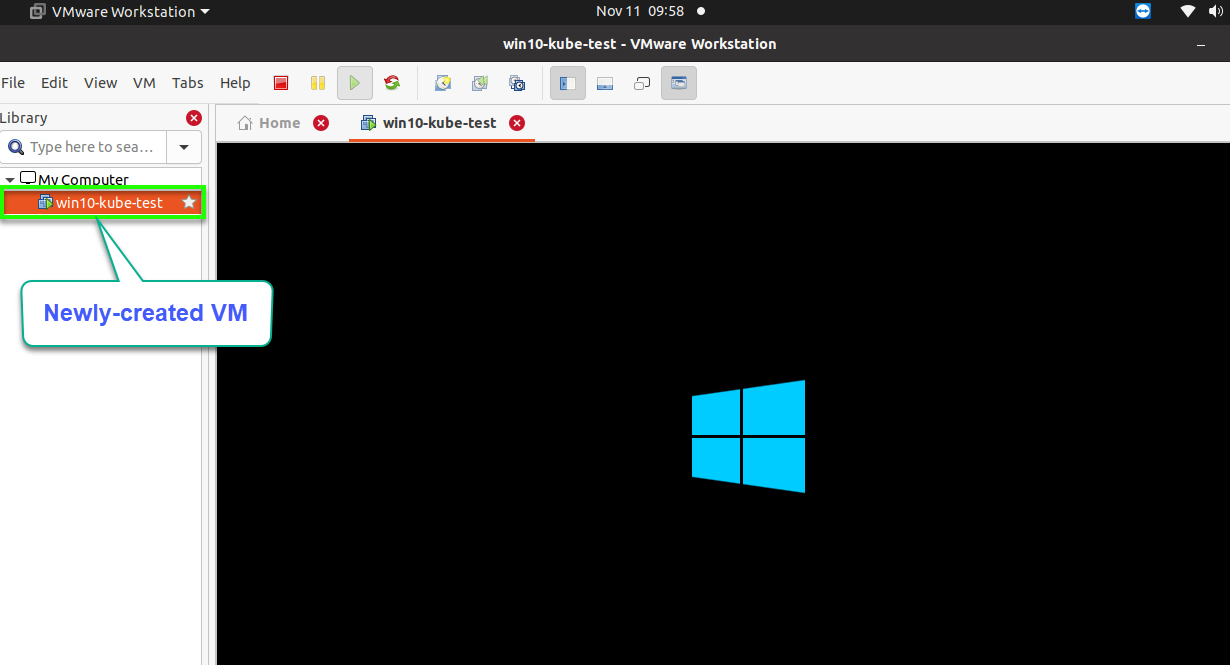
If successful, you will see the new virtual machine listed in the Library navigator (left panel) of the main window, as shown below. Moreover, your guest OS is booting up if you see the Windows logo in the console. Congratulations! You have now created your first VM in VMware Workstation Pro.
💡 The next step is to install Windows on the VM, which is out of the scope of this tutorial. But installing Windows on a VM is just like how you would on any computer.
Conclusion
Having a VM is having a perfect testing environment, whether for new or old software. And in this tutorial, you learned how to perform a VMware Ubuntu install and create your first VM in VMware Workstation Pro.
You are now one step away from mastering Linux virtualization. Now, why not explore more of the VMware Workstation? Perhaps install the VMware Tools? This tool suite enhances the performance of your VM.
Hate ads? Want to support the writer? Get many of our tutorials packaged as an ATA Guidebook.