Популярные виртуальные машины в Linux

Порою возникает необходимость одновременно или поочередно использовать несколько операционных систем на одном персональном компьютере. Если желания применять двойную загрузку нет, то можно воспользоваться одним оставшимся вариантом – установить виртуальную машину для операционной системы Linux.
При достаточном количестве оперативной и виртуальной памяти, требуемой мощности процессора имеется возможность одновременно запустить сразу несколько систем и работать с ними в полноценном режиме. Однако для этого следует подобрать правильное программное обеспечение.
Список виртуальных машин для Linux
Если вы решили использовать виртуальную машину в операционной системе, то предварительно необходимо выяснить, какая именно вам подойдет. Сейчас будут рассмотрены пять самых популярных представителя этого вида программного обеспечения.
VirtualBox
Данное приложение представляет собой универсальный продукт, который может использоваться для процесса виртуализации в Linux. Благодаря ему может осуществляться поддержка ряда других операционных систем, к которым можно отнести Windows или даже MacOS.
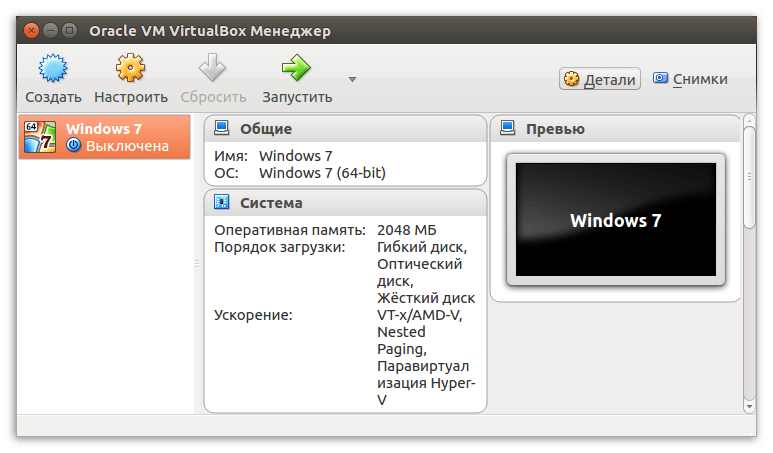
VirtualBox является одной из лучших на сегодняшний день машин, оптимизированных специально для операционных систем Linux/Ubuntu. Благодаря подобной программе можно воспользоваться всеми необходимыми возможностями, к тому же использовать ее весьма легко.
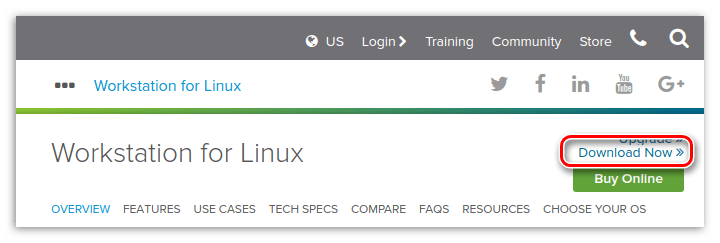
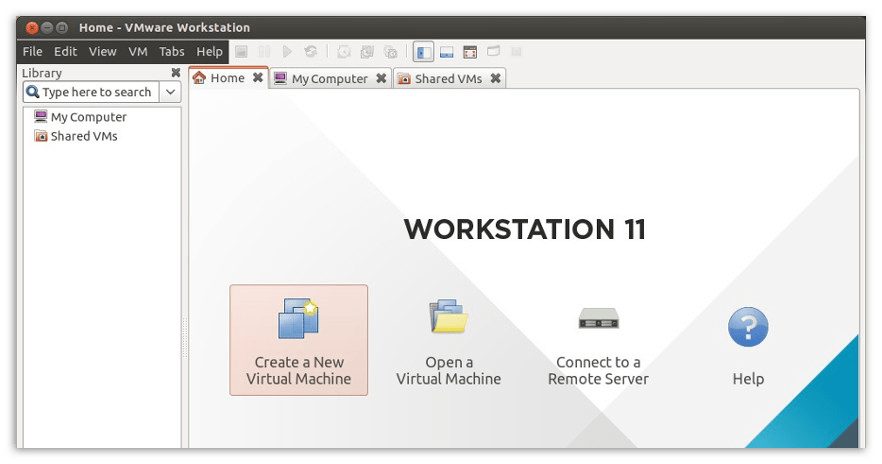
VMware
Главным отличием данной программы является то, что за ее полную версию придется заплатить, но для рядового обывателя она не так уж необходима. А вот для домашнего применения вполне возможно скачать и установить вариант, который можно применять абсолютно бесплатно.
Это программное обеспечение практически ничем не отличается от VirtualBox, однако в некоторых моментах превосходит последнюю упомянутую программу. Специалисты подчеркивают, что производительность у них примерно одна и та же, но VMWare позволяет:
- создавать виртуальные или локальные сети между установленными на компьютере машинами;
- организовывать общий буфер обмена;
- осуществлять передачу файлов.
Однако не обошлось и без недостатков. Дело в том что она не поддерживает запись видеофайлов.
При желании, эту программу можно установить в полностью автоматическом режиме, выбрать требуемые параметры, что зачастую бывает весьма удобным.
Qemu
Данная программа рассчитана для устройств на основе ARM типа Android, Raspbian, RISC OS. В настройке она весьма сложная, особенно для неопытного пользователя. Дело в том, что работа с виртуальной машиной выполняется исключительно в «Терминале» с помощью ввода специальных команд. Однако с ее помощью можно запустить абсолютно любые операционные системы, устанавливая их на жесткий диск или же записывая в специальный файл.
Отличительной чертой машины Qemu является то, что она позволяет применять аппаратное ускорение и устанавливать программы в онлайн-режиме. Чтобы установить подобное программное обеспечение в ОС на базе ядра Linux, в «Терминале» следует выполнить следующую команду:
sudo apt install qemu qemu-kvm libvirt-bin
Примечание: после нажатия Enter система запросит у вас пароль, который вы указывали при установке дистрибутива. Обратите внимание, что при его вводе никакие символы отображаться не будут.
KVM
Название программы расшифровывается как Kernel-based Virtual Machine (виртуальная машина, разработанная на основе ядра). Благодаря ей можно обеспечить довольно высокую скорость работы, во многом именно за счет ядра Linux.
Работает она значительно быстрее и надежнее по сравнению с VirtualBox, однако настраивать ее в разы сложнее, да и в обслуживании она не настолько проста. Но сегодня для установки виртуальных машин эта программа является наиболее популярной. Во многом такая востребованность обусловлена тем, что с ее помощью можно разместить собственный сервер в интернете.
Перед установкой программы следует определить, способно ли железо компьютера поддержать аппаратное ускорение. Для этого необходимо воспользоваться утилитой cpu-checker. Если все в этом плане будет в порядке, то можно приступать к установке KVM себе на компьютер. Для этого в «Терминале» введите следующую команду:
sudo apt-get install emu-kvn libvirt-bin virtinst bridge-utils virt-manager
Когда программа будет установлена, пользователь получит абсолютный доступ к созданию виртуальных машин. При желании можно разместить и другие эмуляторы, которые будут управляться за счет этого приложения.
XEN
Эта программа практически полностью идентична KVM, однако у нее есть и некоторые отличия. Главное заключается в том, что виртуальная машина XEN нуждается в пересобирании ядра, так как в противном случае она не будет нормально функционировать.
Еще одним отличительным качеством программы является возможность работать даже без применения аппаратного ускорения при запуске операционной системы Linux/Ubuntu.
Чтобы установить XEN себе на компьютер, вам необходимо выполнить поочередно ряд команд в «Терминале»:
apt-get install \
xen-hypervisor-4.1-amd64 \
xen-hypervisor-4.1-i386 \
xen-utils-4.1 \
xenwatch \
xen-tools \
xen-utils-common \
xenstore-utils
Стоит отметить, что после установки необходимо провести настройку, которая для рядового пользователя покажется чрезмерно сложной.
Заключение
Виртуализация в операционной системе Linux в последнее время развивается весьма стремительно. Регулярно появляются новые программы, направленные на это. Мы же их регулярно отслеживаем и рекомендуем пользователям для решения своих задач.
Virtualisation tools
The virt-manager source contains not only virt-manager itself but also a collection of further helpful tools like virt-install , virt-clone and virt-viewer .
Virtual Machine Manager
The virt-manager package contains a graphical utility to manage local and remote virtual machines. To install virt-manager , enter:
sudo apt install virt-manager Since virt-manager requires a Graphical User Interface (GUI) environment it is recommended to install it on a workstation or test machine instead of a production server. To connect to the local libvirt service enter:
You can connect to the libvirt service running on another host by entering the following in a terminal prompt:
virt-manager -c qemu+ssh://virtnode1.mydomain.com/system Note:
The above example assumes that SSH connectivity between the management system and the target system has already been configured, and uses SSH keys for authentication. SSH keys are needed because libvirt sends the password prompt to another process.
virt-manager guest lifecycle
When using virt-manager it is always important to know the context you’re looking at. The main window initially lists only the currently-defined guests. You’ll see their name, state and a small chart on CPU usage.

In that context there isn’t much one can do except start/stop a guest. However, by double-clicking on a guest or by clicking the open button at the top one can see the guest itself. For a running guest that includes the guest’s main-console/virtual-screen output.

If you are deeper in the guest config a click in the top left onto “show the graphical console” will get you back to this output.
virt-manager guest modification
virt-manager provides a GUI-assisted way to edit guest definitions which can be handy. To do so, the per-guest context view will have “show virtual hardware details” at the top. Here a user can edit the virtual hardware of the guest, which will alter the guest representation behind the scenes.

The UI edit is limited to the features known to (and supported by) that GUI feature. Not only does libvirt grow features faster than virt-manager can keep up – adding every feature would also overload the UI and render it unusable. To strike a balance between the two, there also is the XML view which can be reached via the “edit libvirt XML” button.

By default this will be read-only and you can see what the UI-driven actions have changed, but one can allow read-write access in this view via the preferences. This is the same content that the virsh edit of the libvirt-client exposes.
Virtual Machine Viewer
The virt-viewer application allows you to connect to a virtual machine’s console like virt-manager , but reduced to the GUI functionality. virt-viewer does require a GUI to interface with the virtual machine.
To install virt-viewer from a terminal enter:
sudo apt install virt-viewer Once a virtual machine is installed and running you can connect to the virtual machine’s console by using:
The UI will be a window representing the virtual screen of the guest, just like with virt-manager above, but without the extra buttons and features around it.

Similar to virt-manager , virt-viewer can connect to a remote host using SSH with key authentication, as well:
virt-viewer -c qemu+ssh://virtnode1.mydomain.com/system
Be sure to replace web_devel with the appropriate virtual machine name.
If configured to use a bridged network interface you can also setup SSH access to the virtual machine.
virt-install
virt-install is part of the virtinst package. It can help with installing classic ISO-based systems and provides a CLI for the most common options needed to do so. To install it, from a terminal prompt enter:
sudo apt install virtinst There are several options available when using virt-install . For example:
virt-install -n web_devel -r 8192 \ --disk path=/home/doug/vm/web_devel.img,bus=virtio,size=50 \ -c focal-desktop-amd64.iso \ --network network=default,model=virtio \ --graphics vnc,listen=0.0.0.0 --noautoconsole -v --vcpus=4 There are many more arguments that can be found in the man page. However, explaining those of the example above one by one:
- -n web_devel
The name of the new virtual machine will be web_devel in this example. - -r 8192
Specifies the amount of memory the virtual machine will use in megabytes. - —disk path=/home/doug/vm/web_devel.img,bus=virtio,size=50
Indicates the path to the virtual disk which can be a file, partition, or logical volume. In this example a file named web_devel.img in the current user’s directory, with a size of 50 gigabytes, and using virtio for the disk bus. Depending on the disk path, virt-install may need to run with elevated privileges. - -c focal-desktop-amd64.iso
File to be used as a virtual CD-ROM. The file can be either an ISO file or the path to the host’s CD-ROM device. - —network
Provides details related to the VM’s network interface. Here the default network is used, and the interface model is configured for virtio . - —graphics vnc,listen=0.0.0.0
Exports the guest’s virtual console using VNC and on all host interfaces. Typically servers have no GUI, so another GUI-based computer on the Local Area Network (LAN) can connect via VNC to complete the installation. - —noautoconsole
Will not automatically connect to the virtual machine’s console. - -v : creates a fully virtualised guest.
- —vcpus=4 : allocate 4 virtual CPUs.
After launching virt-install you can connect to the virtual machine’s console either locally using a GUI (if your server has a GUI), or via a remote VNC client from a GUI-based computer.
virt-clone
The virt-clone application can be used to copy one virtual machine to another. For example:
virt-clone --auto-clone --original focal - —auto-clone
To have virt-clone create guest names and disk paths on its own. - —original
Name of the virtual machine to copy.
Also, use the -d or —debug option to help troubleshoot problems with virt-clone .
Replace focal with the appropriate virtual machine names of your case.
Warning:
Please be aware that this is a full clone, therefore any sorts of secrets, keys and for example /etc/machine-id will be shared. This will cause issues with security and anything that needs to identify the machine like DHCP. You most likely want to edit those afterwards and de-duplicate them as needed.
Resources
- See the KVM home page for more details.
- For more information on libvirt see the libvirt home page
- The Virtual Machine Manager site has more information on virt-manager development.