- Kali Linux configure network manually a Full Guide for beginners
- Kali Linux Network Configuration for Ethernet Connection
- How do you check the Kali Linux network configuration?
- Enable/Disable network interface cards
- Assign IP Address for the network (eth0 or wlan0)
- Kali Linux network configuration with IP address and Netmask
- Add default gateway
- Add dns-namesevers
- Kali Linux network configuration from DHCP
- How to Configure Network Manually in Kali Linux Video Guide
- Как подключиться к Wi-Fi в Kali Linux
- Подключение к Wi-Fi на Kali (графический режим):
- Подключение к Wi-Fi с помощью Kali (текстовый режим):
- Подключение к Wi-Fi с помощью Kali с помощью nmcli:
- Подключение к Wi-Fi с помощью Kali с помощью nmtui:
- Команды поиска и устранения неисправностей:
- Заключение:
Kali Linux configure network manually a Full Guide for beginners
This article about the ” Kali Linux configure network manually ” In this topic, I will cover all about the Kali Linux network configuration of LAN (Ethernet) and Wireless LAN adapter as well. After reading this article you will able to assign IP manually and by DHCP server as well.
Kali Linux Network Configuration for Ethernet Connection
Network interfaces (LAN adapter, wireless adapter, usb adapter, fast Ethernet) are responsible to connect and make communication between two or more computers in a network.
If the network card is not configured properly, then you are out of network and configuration is important for network security. The network should have proper IP Address, subnet mask, Default gateway, domain name server, etc.
So configure the network and get into the network. but the most important question:
How do you check the Kali Linux network configuration?
There are different methods for windows and Linux operating systems. Here we are discussing Kali Linux, I will explain tasks used in Linux. Following command is used to check the status of the networking cards in Kali Linux:
Before run command makes sure, you are working as root. I mean “You must be root to make changes in network configuration.
If you are checking only network configuration then you don’t have a need to be root.
[email protected]:~$sudo ifconfig -a eth0: flags=4163 mtu 1500 inet 10.0.2.15 netmask 255.255.255.0 broadcast 10.0.2.255 inet6 fe80::a00:27ff:fec6:ebc6 prefixlen 64 scopeid 0x20 ether 08:00:27:c6:eb:c6 txqueuelen 1000 (Ethernet) RX packets 4 bytes 930 (930.0 B) RX errors 0 dropped 0 overruns 0 frame 0 TX packets 27 bytes 2313 (2.2 KiB) TX errors 0 dropped 0 overruns 0 carrier 0 collisions 0 lo: flags=73 mtu 65536 inet 127.0.0.1 netmask 255.0.0.0 inet6 ::1 prefixlen 128 scopeid 0x10 loop txqueuelen 1000 (Local Loopback) RX packets 20 bytes 1036 (1.0 KiB) RX errors 0 dropped 0 overruns 0 frame 0 TX packets 20 bytes 1036 (1.0 KiB) TX errors 0 dropped 0 overruns 0 carrier 0 collisions 0 [email protected]:~$
[email protected]:~$ sudo ifconfig -a eth0: flags=4163 mtu 1500 inet 10.0.2.15 netmask 255.255.255.0 broadcast 10.0.2.255 inet6 fe80::a00:27ff:fec6:ebc6 prefixlen 64 scopeid 0x20 ether 08:00:27:c6:eb:c6 txqueuelen 1000 (Ethernet) RX packets 4 bytes 930 (930.0 B) RX errors 0 dropped 0 overruns 0 frame 0 TX packets 27 bytes 2313 (2.2 KiB) TX errors 0 dropped 0 overruns 0 carrier 0 collisions 0 lo: flags=73 mtu 65536 inet 127.0.0.1 netmask 255.0.0.0 inet6 ::1 prefixlen 128 scopeid 0x10 loop txqueuelen 1000 (Local Loopback) RX packets 20 bytes 1036 (1.0 KiB) RX errors 0 dropped 0 overruns 0 frame 0 TX packets 20 bytes 1036 (1.0 KiB) TX errors 0 dropped 0 overruns 0 carrier 0 collisions 0
You have seen the result of ifconfig command, You can see assigned IP address, MAC address, Netmask, for IPv4, etc.
You can run this command as a normal user, sudo user, or root user. If you didn’t create a normal user in Kali Linux then you are using the system by the root user.
Enable/Disable network interface cards
Sometimes you find that network interface is not responding properly, you will have to enable and disable.
You have more than 1 interface, and you want to use only 1 adapter, then disable other adapters.
You can use Ifconfig command followed by up option and interface name to start the network interface and for stopping it use the down option.
You can use the following syntax to enable and disable network interface cards.
[email protected]:~$sudo ifconfig eth0 down [email protected]:~$udo ifconfig lo: flags=73 mtu 65536 inet 127.0.0.1 netmask 255.0.0.0 inet6 ::1 prefixlen 128 scopeid 0x10 loop txqueuelen 1000 (Local Loopback) RX packets 20 bytes 1036 (1.0 KiB) RX errors 0 dropped 0 overruns 0 frame 0 TX packets 20 bytes 1036 (1.0 KiB) TX errors 0 dropped 0 overruns 0 carrier 0 collisions 0 [email protected]:~$
Assign IP Address for the network (eth0 or wlan0)
Eth0 is the number of a wired network interface card. if you want to assign IP address for wireless adapter replace eth0 by wlan0. The current configuration of this adapter can be changed by using the following command and this command will assign new IP address for your computer interface
$sudo ifconfig eth0 192.168.1.10
[email protected]:~$sudo ifconfig eth0 192.168.1.10 [email protected]:~$usudo ifconfig eth0: flags=4163 mtu 1500 inet 192.168.1.10 netmask 255.255.255.0 broadcast 192.168.1.255 inet6 fe80::a00:27ff:fec6:ebc6 prefixlen 64 scopeid 0x20 ether 08:00:27:c6:eb:c6 txqueuelen 1000 (Ethernet) RX packets 15013 bytes 14434124 (13.7 MiB) RX errors 0 dropped 0 overruns 0 frame 0 TX packets 8200 bytes 881820 (861.1 KiB) TX errors 0 dropped 0 overruns 0 carrier 0 collisions 0 lo: flags=73 mtu 65536 inet 127.0.0.1 netmask 255.0.0.0 inet6 ::1 prefixlen 128 scopeid 0x10 loop txqueuelen 1000 (Local Loopback) RX packets 184 bytes 14152 (13.8 KiB) RX errors 0 dropped 0 overruns 0 frame 0 TX packets 184 bytes 14152 (13.8 KiB) TX errors 0 dropped 0 overruns 0 carrier 0 collisions 0 [email protected]:~$
Kali Linux network configuration with IP address and Netmask
Netmask is used to indentify the network address. It can be configured by using given command. This will set the ip address 192.168.1.10 and set the subnet mask 255.255.255.0
$sudo ifconfig eth0 192.168.1.10 netmask 255.255.255.0
[email protected]:~$sudo ifconfig eth0 192.168.1.10 netmask 255.255.255.0 [email protected]:~$usudo ifconfig eth0: flags=4163 mtu 1500 inet 192.168.1.10 netmask 255.255.255.0 broadcast 192.168.1.255 inet6 fe80::a00:27ff:fec6:ebc6 prefixlen 64 scopeid 0x20 ether 08:00:27:c6:eb:c6 txqueuelen 1000 (Ethernet) RX packets 15013 bytes 14434124 (13.7 MiB) RX errors 0 dropped 0 overruns 0 frame 0 TX packets 8200 bytes 881820 (861.1 KiB) TX errors 0 dropped 0 overruns 0 carrier 0 collisions 0 lo: flags=73 mtu 65536 inet 127.0.0.1 netmask 255.0.0.0 inet6 ::1 prefixlen 128 scopeid 0x10 loop txqueuelen 1000 (Local Loopback) RX packets 184 bytes 14152 (13.8 KiB) RX errors 0 dropped 0 overruns 0 frame 0 TX packets 184 bytes 14152 (13.8 KiB) TX errors 0 dropped 0 overruns 0 carrier 0 collisions 0 [email protected]:~$
Add default gateway
Default gateway is added or changed, by using following command. It will set the default gateway 192.168.1.1
#route add default gw 192.168.1.1
OR
$sudo route add default gw 192.168.1.1

Add dns-namesevers
In Linux Domain Name Server or DNS can be set or modifying the resolv.conf in the /etc directory. It can be changed by editing this file. add the following sytex in terminal
#echo nameserver 8.8.8.8 > /etc/resolv.conf
This command will remove the current nameserver and set 8.8.8.8. It can be added alternate nameserver by using following syntax
#echo nameserver 4.4.4.4 >> /etc/resolv.conf
Kali Linux network configuration from DHCP
DHCP services are one of the easiest ways to configure an Ethernet. A free DHCP server provides all required configuration settings for the network cards. Use the following method:
Save the file and exit to complete the modification. It is required to take down the network and again bring up Ethernet interfaces to applying this configuration.
Use the following command to configure the network adapter
#dhclient eth0
This will configure the network adapter using the settings provided by the DHCP Server.
How to Configure Network Manually in Kali Linux Video Guide
Как подключиться к Wi-Fi в Kali Linux
В этом руководстве объясняется, как подключиться к Wi-Fi с Kali Linux в графическом и текстовом режимах.
Прочитав это руководство, вы узнаете, как подключиться к беспроводной сети из графической среды и консоли с помощью инструментов nmtui и mncli.
Подключение к Wi-Fi на Kali (графический режим):
Подключение к Wi-Fi из Kali Linux аналогично подключению из любого другого дистрибутива Linux. Некоторые пользователи могут обнаружить, что их беспроводная карта отключена.

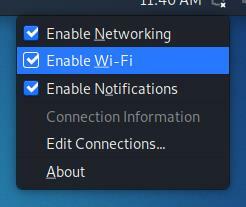
Для начала определите значок сети на панели задач, который отображается как:

Как видите, значок сети находится рядом с часами. После определения щелкните его правой кнопкой мыши, чтобы отобразить все доступные параметры, включая Включить Wi-Fi, как показано на изображении ниже. Убедитесь, что опция Включить Wi-Fi отмечен:
После включения снова щелкните левой кнопкой мыши значок сети, и вы увидите все доступные сети для подключения. Затем нажмите тот, к которому хотите подключиться:
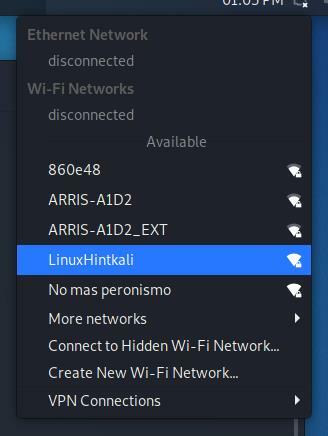
После нажатия на вашу сеть вы должны без проблем подключиться.
Подключение к Wi-Fi с помощью Kali (текстовый режим):
Перед подключением к сети с помощью терминала давайте посмотрим, как определить все доступные сети. Для поиска сетей вы можете использовать iwlist команда, за которой следует ваше беспроводное устройство и функция сканировать ниже:
iwlist сканирование wlan0
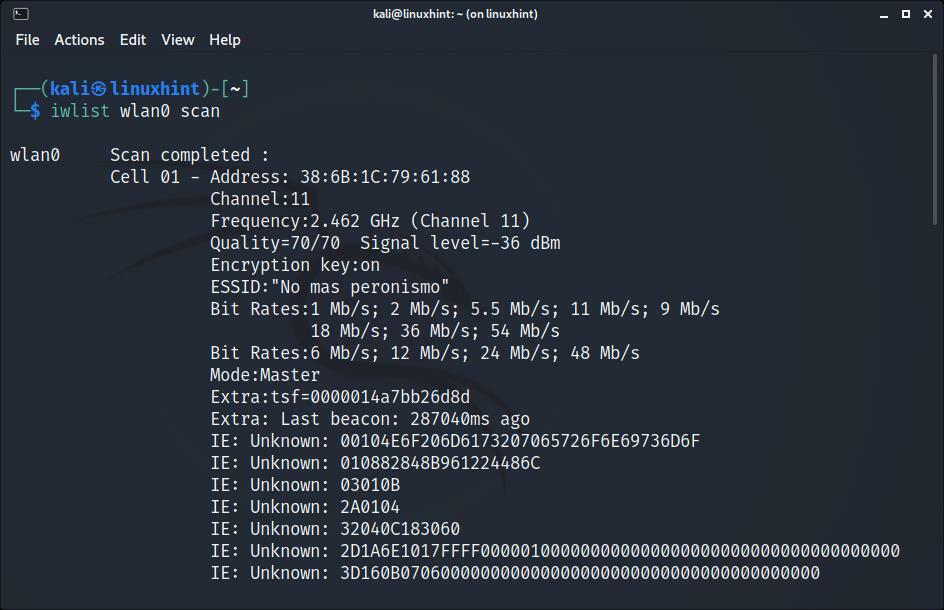
Как видите, в зависимости от количества доступных сетей на выходе будет отображаться длинный список данных, принадлежащих каждой сети, но нас интересует только ESSID.
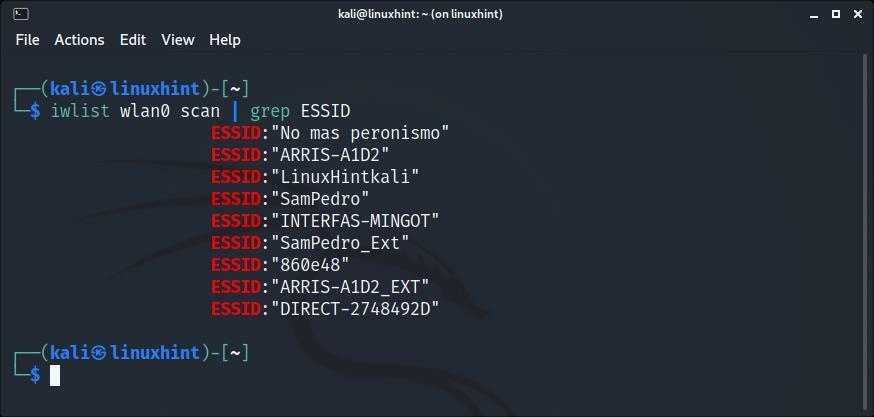
Вы можете получить более удобный результат, реализовав grep как показано ниже; таким образом, iwlist будет печатать только ESSID сетей:
iwlist сканирование wlan0 | grep ESSID
После того, как вы просканировали все сети и определили ту, к которой хотите подключиться, вы можете использовать различные методы текстового режима для установления соединения.
Подключение к Wi-Fi с помощью Kali с помощью nmcli:
В nmcli Команда позволяет нам управлять NetworkManager из командной строки, и использовать ее довольно просто. В следующем примере показано, как подключиться к сети с именем LinuxHintkali, чей пароль linuxhintpass.
После сканирования и идентификации вашей сети с помощью iwlist объясненную ранее команду, выполните команду ниже, заменив LinuxHintkali с ESSID сети, к которой вы хотите подключиться, и заменив linuxhintpass со своим паролем:
nmcli d wifi connect LinuxHintkali пароль linuxhintpass
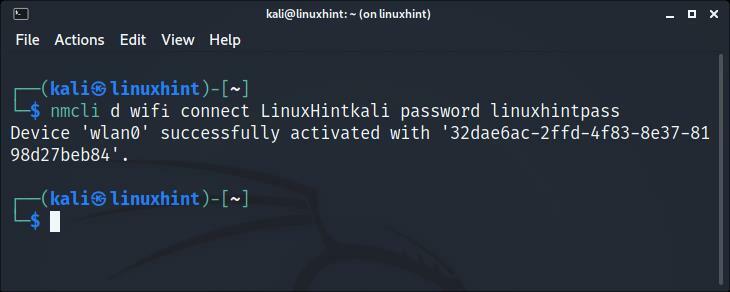
Как видите, соединение было установлено правильно.
Вы можете получить дополнительную информацию о nmcli на его странице руководства. https://linux.die.net/man/1/nmcli .
Подключение к Wi-Fi с помощью Kali с помощью nmtui:
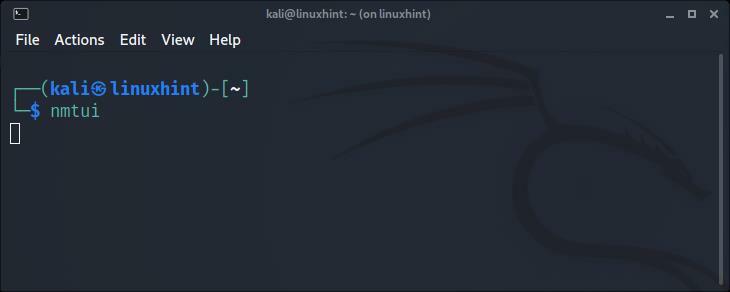
В nmtui Команда — это основанный на curses инструмент, позволяющий управлять NetworkManager в интерактивном режиме.
Чтобы запустить его, просто выполните команду ниже:
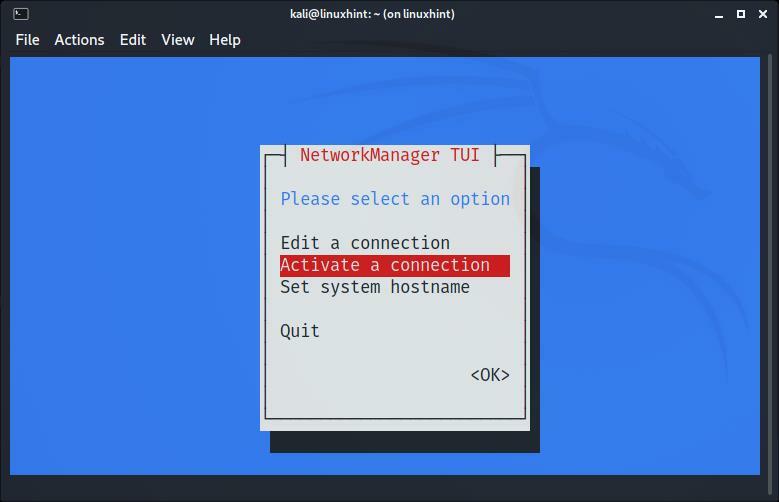
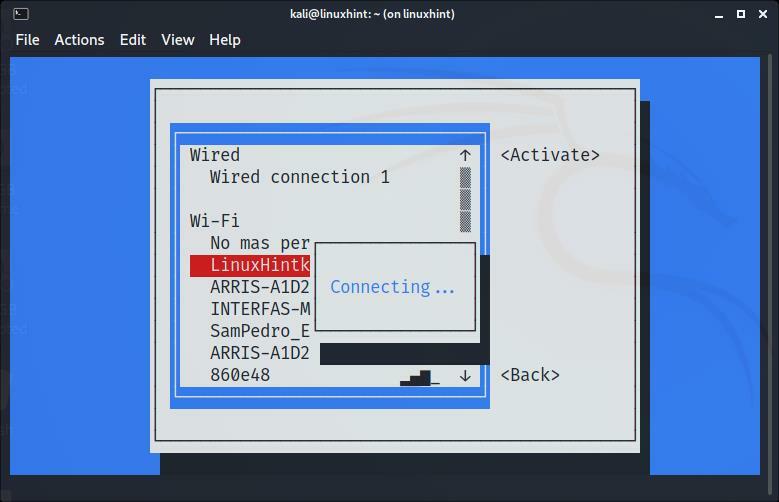
Появится следующее меню. С помощью стрелок на клавиатуре выберите «Активировать соединение»И нажмите ВХОДИТЬ:
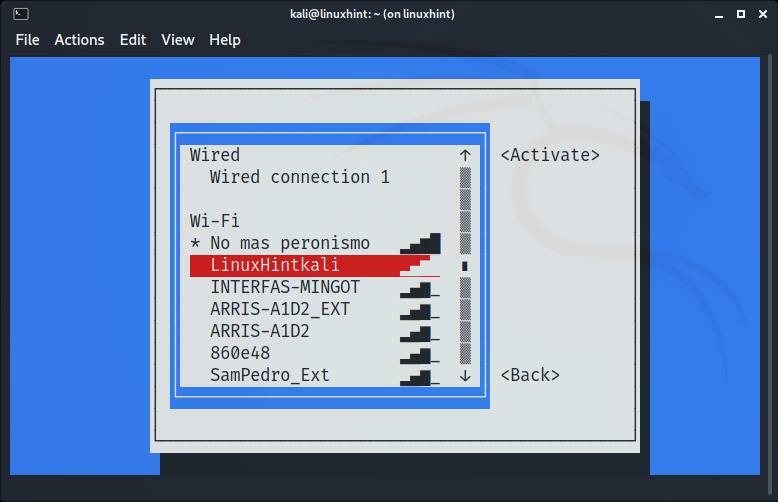
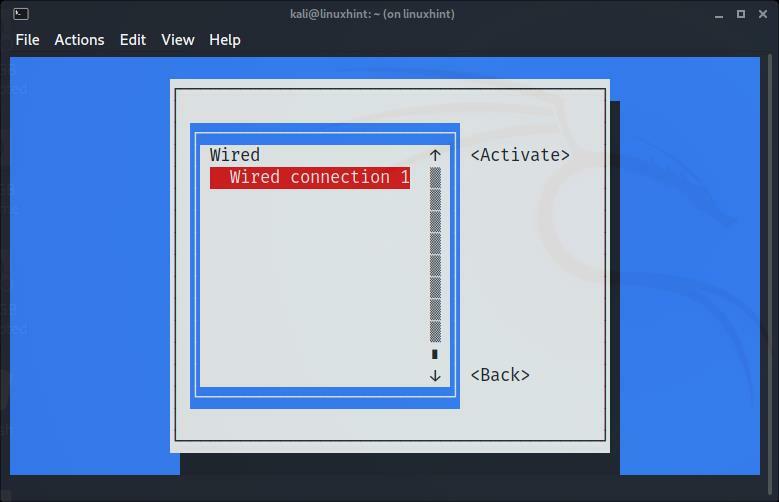
На следующем экране будут показаны все доступные сети. Опять же, используйте стрелки на клавиатуре, чтобы выбрать сеть, к которой хотите подключиться, и нажмите ВХОДИТЬ:
Будет установлено соединение. У вас уже должен быть доступ в Интернет:
После подключения выберите Назад и нажмите ВХОДИТЬ:
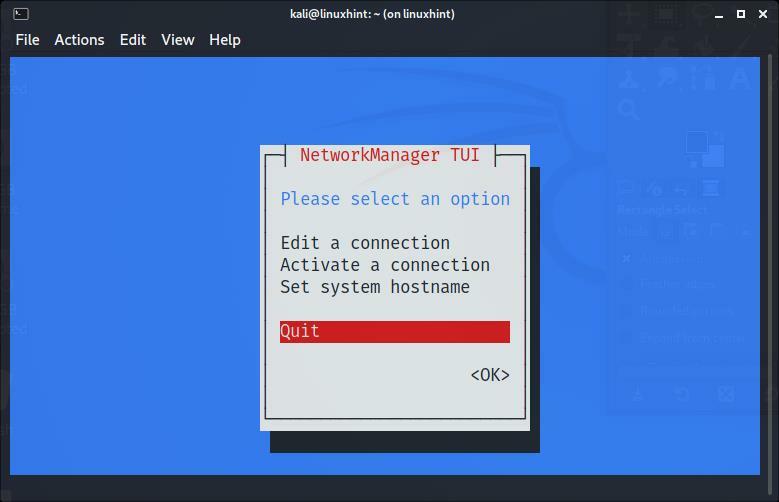
Перейти к Покидатьи нажмите Входить оставить nmtui:
Команды поиска и устранения неисправностей:
Следующие команды не были протестированы, поскольку моя сетевая карта была правильно обнаружена. Первая команда, показанная ниже, может быть полезна в случае, если драйверы вашего устройства Wi-Fi не были правильно определены. Это не распространенный сценарий при использовании Kali:
судо подходящий установить Кали-Linux-беспроводной
Более вероятно, что ваша беспроводная карта не работает, чем показанная выше команда для установки драйверов. Чтобы настроить его, сначала определите имя вашего сетевого устройства:
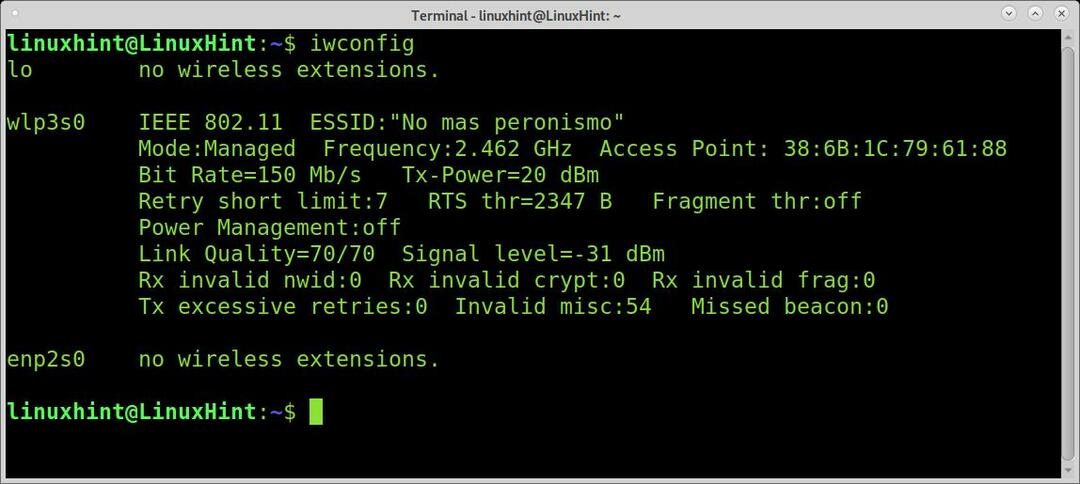
Как вы можете видеть в выходных данных выше, мое сетевое устройство называется wlp3s0. Чтобы настроить его, я запускаю следующую команду:
Не забудьте заменить wlp3s0 на имя вашей беспроводной карты.
Заключение:
Как видите, подключение к Wi-Fi в Kali Linux не должно быть проблемой даже для простых пользователей Linux. Linux, не только Kali, предлагает множество методов для установления соединения. Это руководство было написано после того, как многие пользователи Kali сообщают о проблемах с подключением. В большинстве случаев их адаптер Wi-Fi был отключен, и включение его на панели задач, как показано в первых шагах этого руководства, решило проблему. Изучение методов текстового режима, описанных в этой статье, особенно важно, поскольку они почти универсальны для всех дистрибутивов Linux и не зависят от их графической среды.
Спасибо, что прочитали это руководство, в котором объясняется, как подключиться к Wi-Fi в Kali Linux, следите за нами, чтобы получить больше советов и руководств по Linux.