- How to Install VMware Workstation 17 on Linux Mint 21
- How to Set Up and Use VMware Workstation 17 Pro on Linux Mint 21 Vanessa
- How to Download and Install VMware Workstation
- How to Create a New Virtual Machine
- How to Delete the Virtual Machine
- How to Uninstall VMware Workstation
- How To Install Linux Mint in VMware
- Install Linux Mint in VMware
How to Install VMware Workstation 17 on Linux Mint 21
![]()

Last Updated: November 24, 2022 | VMware Workstation | Tolga Bagci
In this article, we will examine how to set up and use VMware Workstation 17 Pro in Linux Mint 21 Vanessa distribution, which allows you to create a virtual machine and run either Windows or Linux systems on your computer without dual-boot.
How to Set Up and Use VMware Workstation 17 Pro on Linux Mint 21 Vanessa
VMware Workstation Pro is the most popular virtualization program for setting up and running virtual machines on your computer. You can use VMware Workstation for free for 30 days and then purchase it.
You can easily install VMware Workstation software on Windows and Linux-based operating systems. By creating new virtual machines, you can install operating systems such as Windows, Linux, Solaris, or macOS on your physical computer.
In Windows operating systems, the setup file extension of a program is usually exe, while in Linux systems you can see file extensions such as bundle. The setup file extension of the VMware program for Linux distributions is also published as a bundle.
How to Download and Install VMware Workstation
We recommend installing Workstation Pro, the paid and professional version of the VMware program on your Linux Mint computer. If you want, you can consider purchasing it after the 30-day trial period or continue using the Player version for free.
To download the VMware program, view the official website from the link here and then click the Download button in the “Workstation 17 Pro for Linux” section as in the image below.
Instead of downloading the Workstation software manually, you can perform this process faster by executing the commands below in the terminal.
cd ~/Downloads wget https://download3.vmware.com/software/WKST-1700-LX/VMware-Workstation-Full-17.0.0-20800274.x86_64.bundle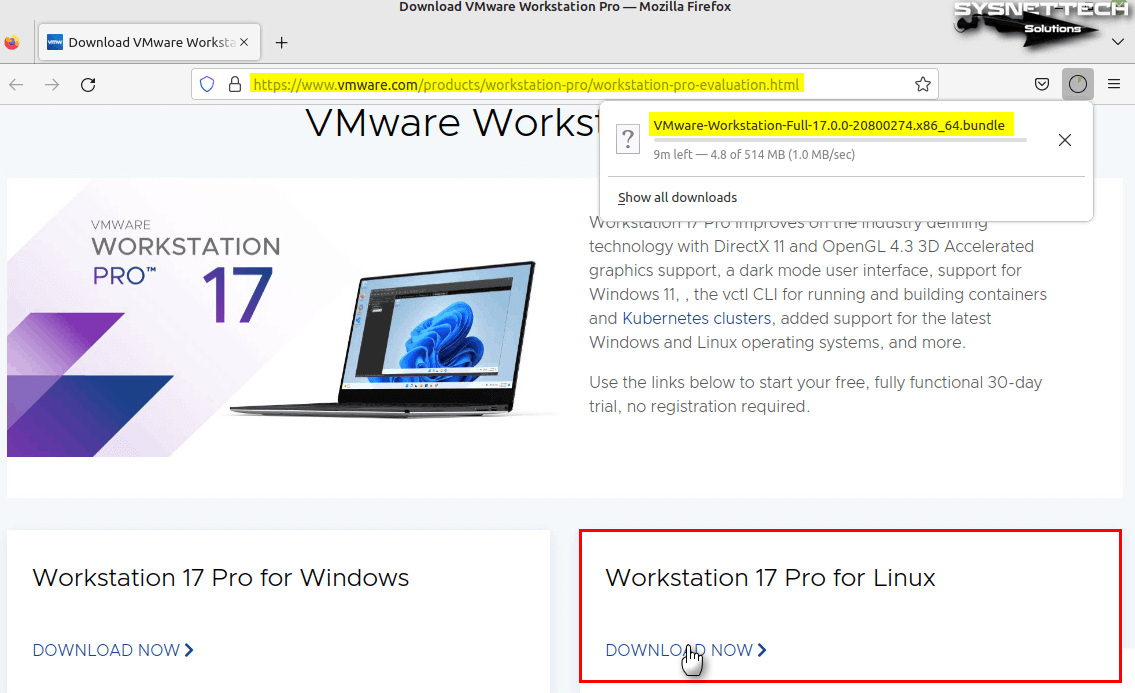
After installing VMware Workstation, execute the “sudo apt install build-essential” command in the terminal to install the dependent packages required for the virtualization software.
sudo apt install build-essential dkms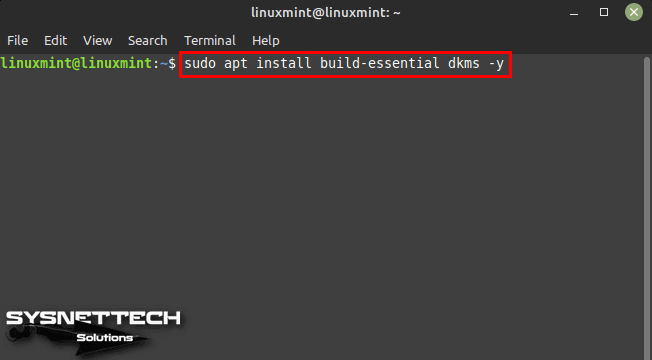
After downloading the Workstation.bundle file to your computer, open the terminal by pressing the CTRL + Alt + T keys together and execute the “sudo apt update” and “sudo apt upgrade” commands to update your system before installation.
After updating your Linux Mint system, execute the “cd ~/Downloads/” command to go to the location where you downloaded the bundle file and view the contents of the Downloads directory with the “ls” command.
To make the bundle file executable, first, execute the chmod command and then “sudo ./filename.bundle” to start the installation.
chmod +x VMware-Workstation-Full-17.0.0-20800274.x86_64.bundle sudo ./VMware-Workstation-Full-17.0.0-20800274.x86_64.bundle
After installing additional packages for VMware, run the program from the applications.

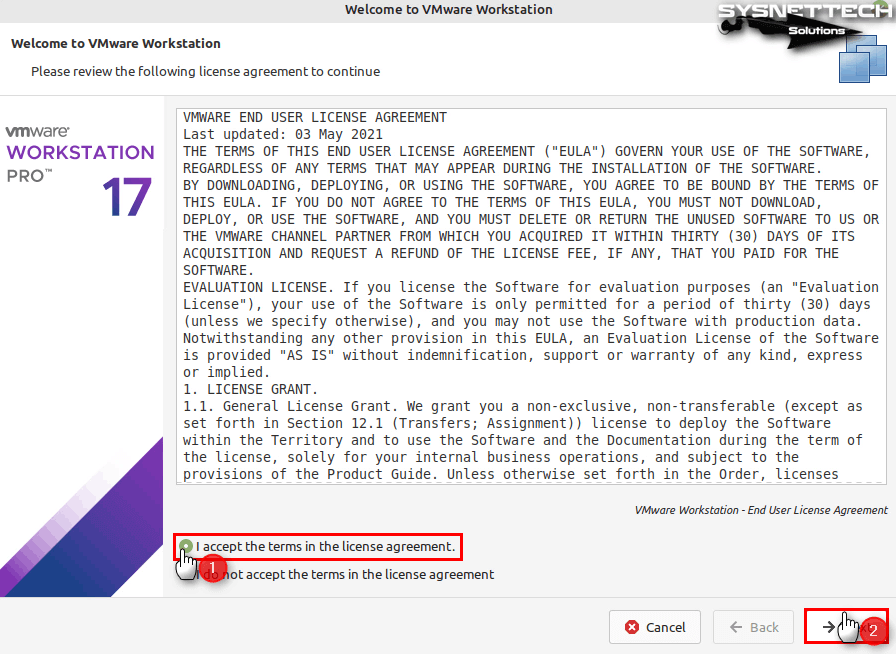
When the Welcome window opens, accept the license agreement of the Workstation program and click Next.
Also, accept the “VMware OVF Tool Component for Linux” license agreement and click Next.

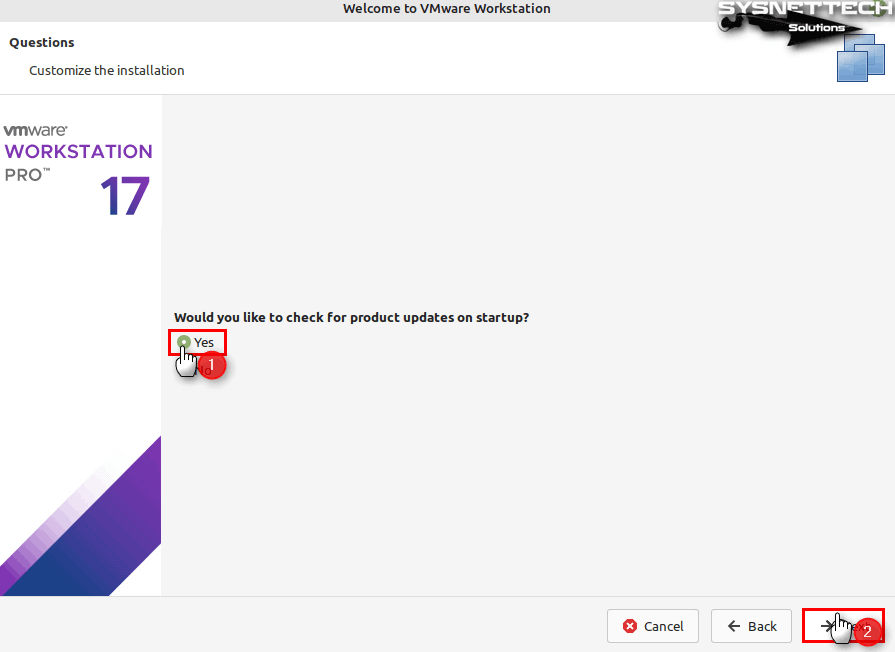
Enable checking for new versions every time you run VMware Workstation and click Next.
By participating in the VMware Customer Experience Improvement (CEIP) program, you can help fix bugs and improve the user experience. If you don’t want to join CEIP, you can choose No.

If you have purchased the VMware software, you can enter your license key from this screen. If you prefer to use the program with a 30-day trial period, select the option below and click Finish.
When the Authenticate window opens, type your Linux Mint user account password and continue.

After installing VMware Workstation 17 Pro, you can check the version in Help / About.

How to Create a New Virtual Machine
After installing VMware Workstation on Linux Mint, you can start creating a new virtual machine. You can easily run a second OS on your host system by installing Windows or one of the other operating systems on the VM you created.
Open the wizard by clicking Create a New Virtual Machine on the main screen of VMware Pro.

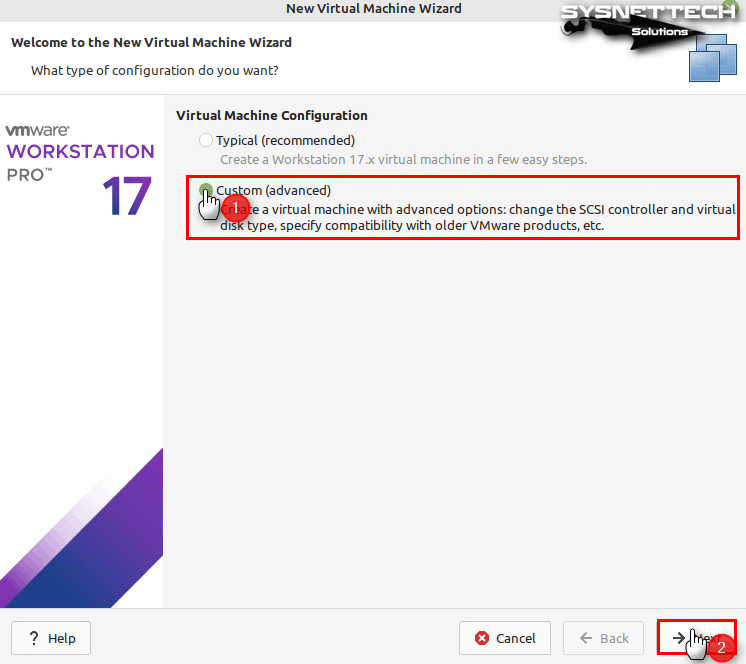
Check Custom (Advanced) and click Next to make more advanced settings in the virtual machine configuration wizard.
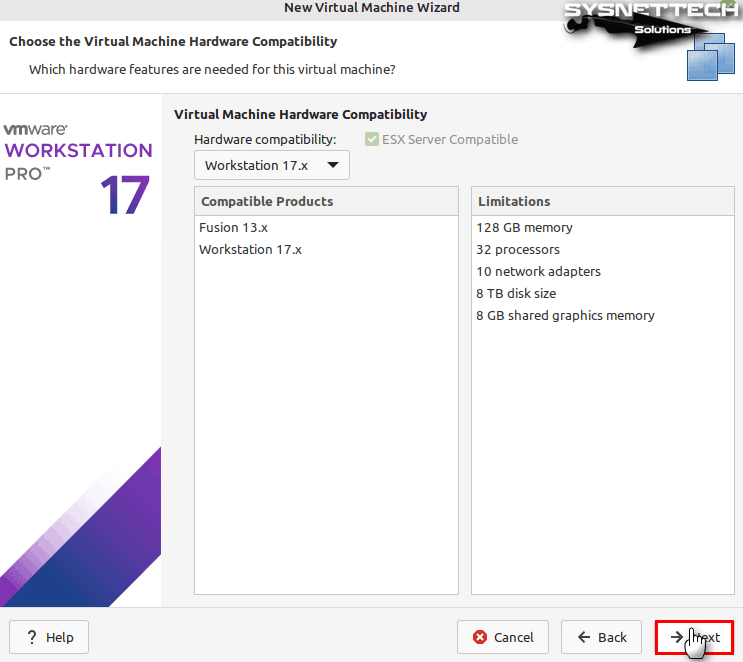
By default, the hardware version of the virtual machine is configured with the latest version of the Workstation software. If you plan to install one of the older Windows systems, don’t forget to change the hardware compatibility version.
Since Windows 10 is an up-to-date operating system, configure the hardware version as the latest.
Since you will be installing Windows 10, select “I will install the operating system later” and click Next to continue configuring more advanced settings.

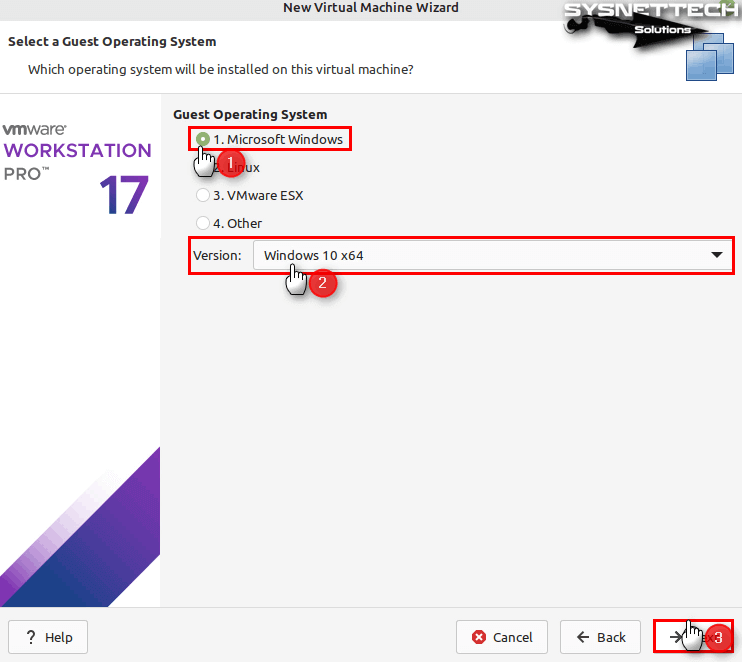
Select Microsoft Windows for the platform of the guest operating system that will run on the virtual computer and choose the version “Windows 10 x64”.
You can choose to install Windows 10 in the default location or you can install it in another location. You can change the default location where the virtual machine will be installed from Edit / Preferences.

Configure the firmware type of the Windows 10 VM as UEFI / Secure Boot.

Configure the number of processors and cores according to the processor characteristics of your host computer. The processor settings here are configured to run the VM at its minimum.

For Windows 10 VM, configure the virtual memory size to a suitable value according to the RAM capacity of your host computer.

Select the NAT adapter type for the network connection of the virtual machine.

Select the recommended LSI Logic SAS as the I/O controller type.

For the virtual disk type, select the NVMe type, which is faster than other disk types.

Choose to create a new virtual disk as you will be installing a clean Windows operating system.

Configure the size of the virtual disk and choose to backup the disk file as the only file type on your computer.

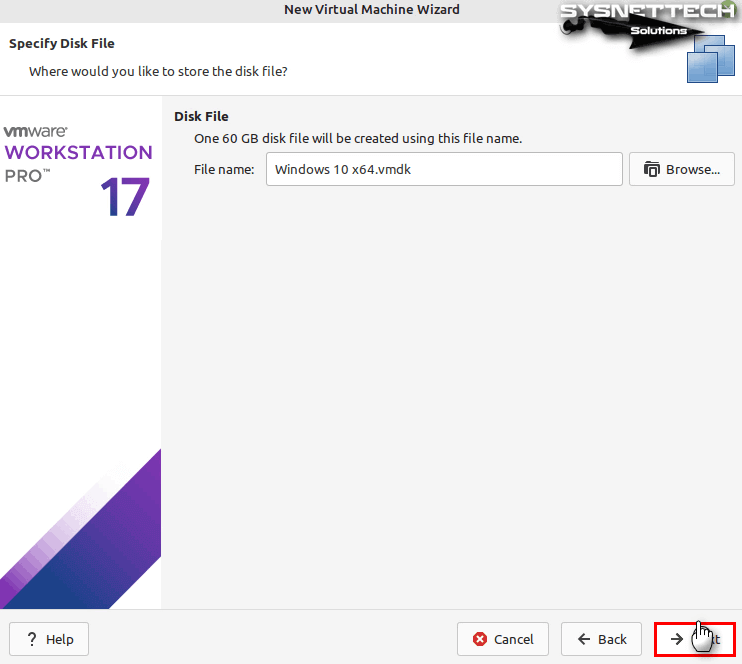
Continue without changing the name and location of the Windows 10 virtual disk file.
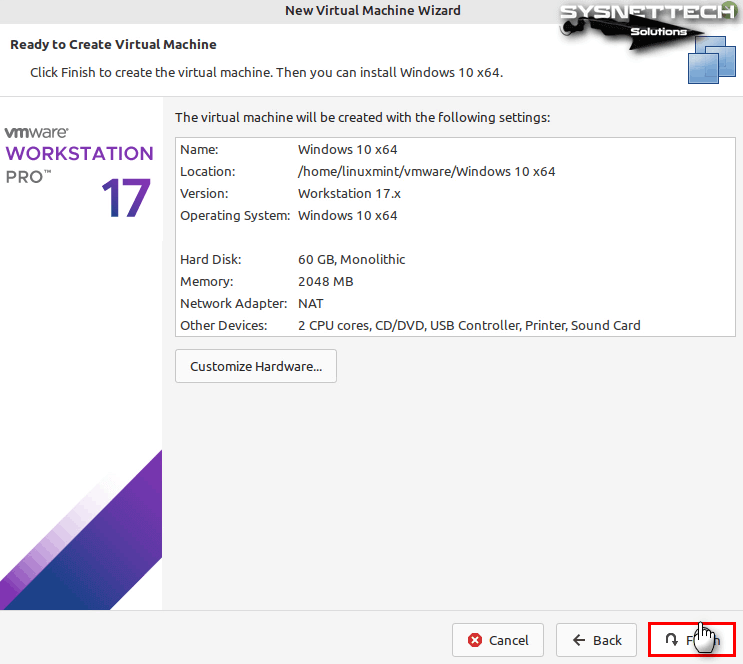
After configuring the guest operating system, check the settings you have made in the summary window and click Finish.
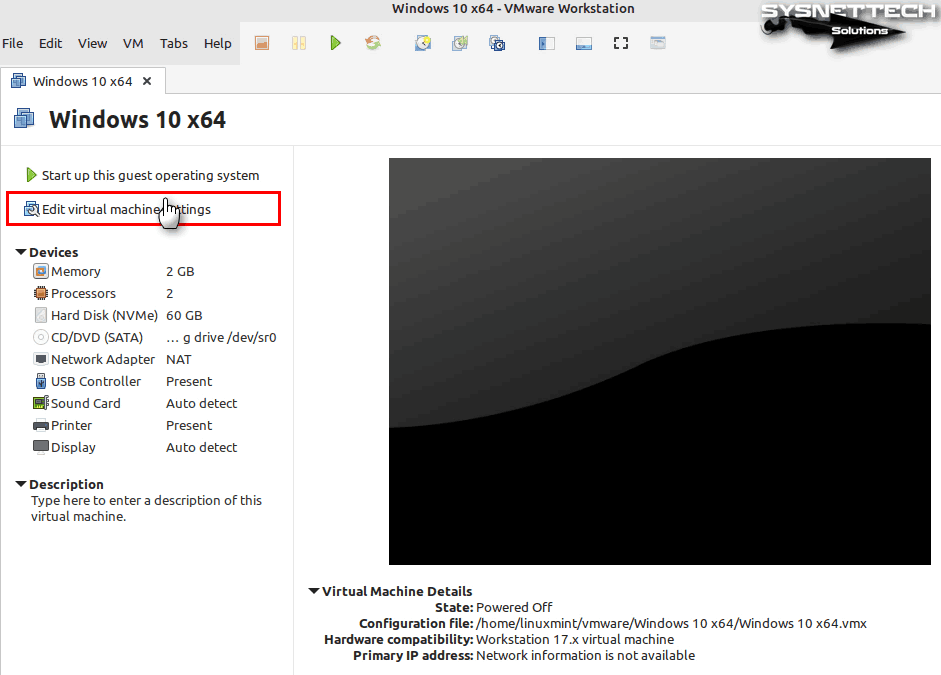
After preparing the virtual computer, close the window that tells you to install the guest operating system and VMware Tools.

Click Edit Virtual Machine Settings to further configure the virtual machine.
After selecting the processors from the hardware area, select all the features under Virtualization Engine.
- Virtualize Intel VT-x/EPT or AMD-V/RVI
- Virtualize CPU Performance Counters
- Virtualize IOMMU (IO Memory Management Unit)

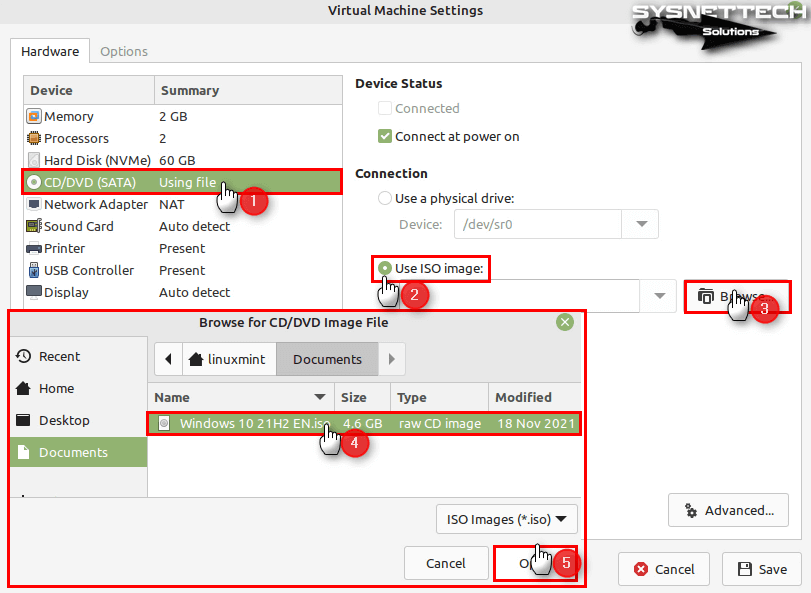
To add a Windows 10 ISO file to the virtual machine, select the CD/DVD hardware and then enable the Use ISO Image option and click the Browse button to specify the location of the file.
Go to the location where you downloaded the installation media and select the Windows 10 ISO file and open it.
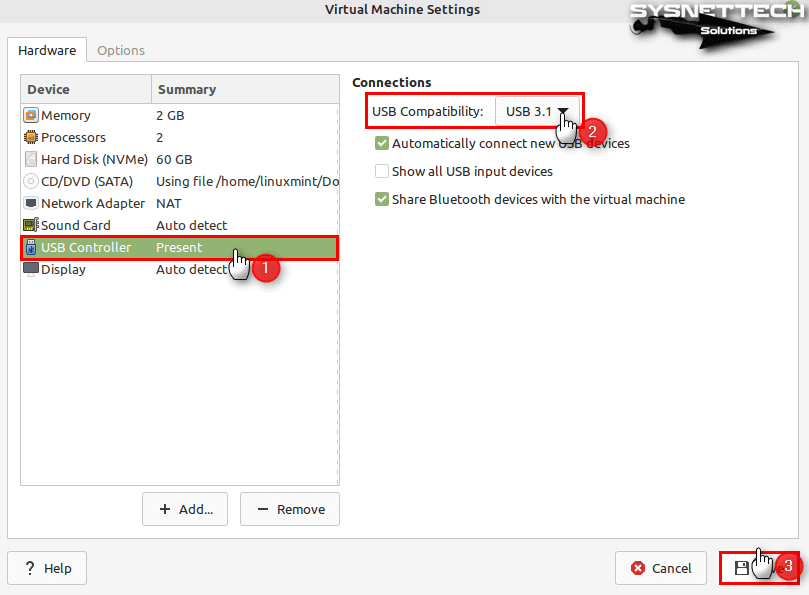
In order to use your USB 3.x storage devices in your Windows 10 virtual system, change the Compatibility setting to USB 3.1 from the settings of the USB Controller.
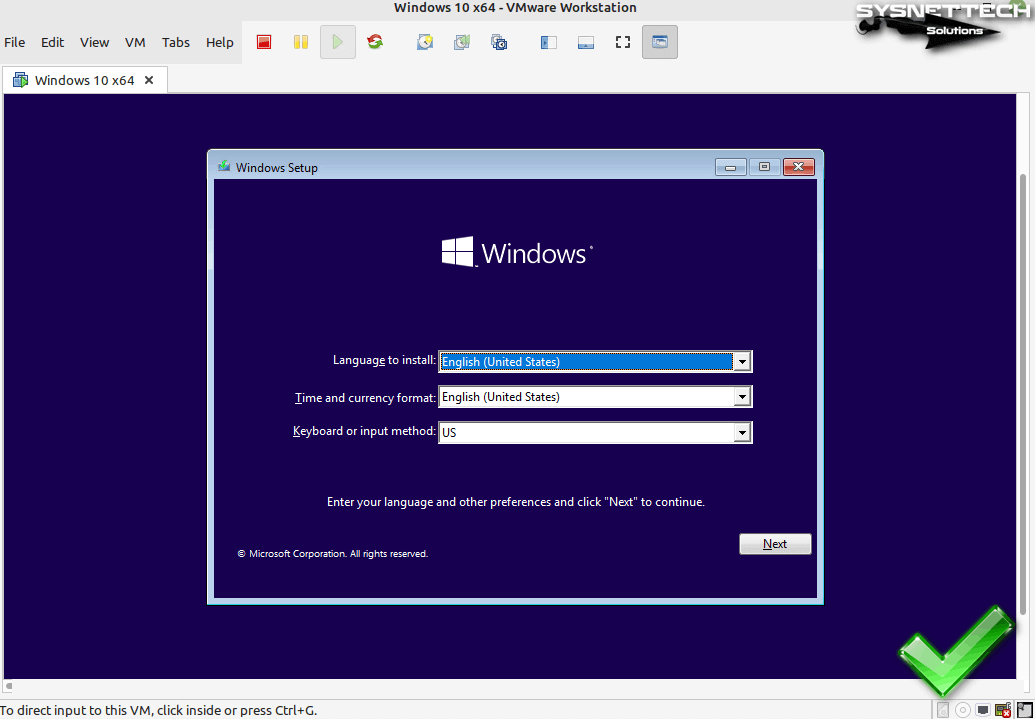
Run the virtual machine to start installing Windows 10.

On your Linux computer, you can now install the Windows 10 system in your VMware virtualization software.
How to Delete the Virtual Machine
If for some reason you want to completely delete the virtual machines you have installed from your computer, you can easily delete all the files of the relevant VM both from the library of the Workstation program and from your host disk.
You can see your virtual systems installed from the Library section of VMware Workstation. Right-click on your guest system in the Library section, click Manage / Delete from Disk, and then click Yes to confirm the deletion in the Question window.
Finally, go to the location where you installed the VM on your Linux system and check if the relevant folder exists.

How to Uninstall VMware Workstation
When you plan to remove VMware Workstation from your computer, you can easily do this using the terminal on your Linux system.
After opening the terminal, execute the command “vmware-installer –list-products” and check which VMware products are installed.
vmware-installer --list-productsTo completely uninstall VMware software, execute the “sudo vmware-installer -u vmware-workstation” command in the terminal and type No in confirmation to confirm the deletion of configuration files as well.
sudo vmware-installer -u vmware-workstation
How To Install Linux Mint in VMware
Linux Mint is one of the most simple, beautiful and beginner friendly Linux-based OS. Linux Mint basically evolved from Ubuntu and provides the same functionality and security just as Ubuntu. Moreover, if you are a Windows user and want to try out the new Linux ecosystem, Linux Mint would be a good choice. In fact, Linux Mint closely resembles the Windows user interface. That being said, if you are new to Linux environment or if you just want to test out the new operating system then installing it virtually will give you ample space and opportunities. In case you are wondering, here is how you can easily install Linux Mint in VMware Player or Workstation.
Using VirtualBox for virtual machines? Step by step guide on how to install Linux Mint in VirtualBox.
Install Linux Mint in VMware
First off, head to the Linux Mint official website and download the ISO file. Depending on your preference, you can either download 32-bit version or 64-bit version.
1. To make things clear, I’ve already downloaded the 32-bit version of Linux Mint 16 featuring Cinnamon desktop. If you want you can download other flavors like XFCE or KDE.
2. Now, open up the VMware player or workstation from the start menu and click File and select the option “New Virtual Machine.” This action opens the New Virtual Machine wizard. Here select the radio button “Typical” and click on the button “Next” to continue.

3. As you have already downloaded the Linux Mint ISO, select the radio button “Installer disk image file,” browse for the downloaded ISO file and click the “Next” button.

4. Here, select your guest operating system as “Linux” and the kernel version as “Other Linux 3.x kernel” from the drop-down menu.

5. Now, name your virtual machine and click on the button “Next” to continue. If you want to change the location where the virtual machine is stored, you can do that by clicking on the “Browse” button. For instance, I’ve selected my location as G:\ drive.

6. Here in this screen, enter the space you want to allot of the new virtual machine and click “Next” button. But do remember that the minimum space required is 8GB.

7. Here in this area you can easily review and customize your hardware requirements. To do that, click on “Customize Hardware” button. Once you are done with the changes, click on the “Finish” button to complete your setup process.

8. Now, click on “Power on this virtual machine” on the main screen of VMware to boot into your new Linux Mint OS. Now wait a few seconds and you will be in the OS installation screen. Here, click on the button “Install Linux Mint” to start the installation process.

9. Now the OS screen will show minimum space required and other stuff, just review them once and click “Continue” button.
Note: If you are connected to the internet, Linux Mint will automatically download and install all the required updates and other restricted software, which is good. But, if you want to make the installation faster or if you have a slow internet connection then I would recommend that you disconnect from the internet by right-clicking on that little monitor icon on your VMware taskbar and selecting the option “Disconnect.”

10. Here select the radio button “Erase disk and install Linux Mint” and click on “Install Now” button.

11. Now, just select your time zone, keyboard layout, username and password and click on the “Continue” button.

12. After completing the installation, just restart your VM and you are ready to experience the new Linux Mint OS.

As this is a virtual machine, you can do whatever you want without any worries about breaking your system. But, before you do that just take a snapshot of the current state so that you can roll back when things are out of your hands.
That’s all there is to do and it is that simple to install Linux Mint in VMware Player or Workstation.
Do comment below sharing your thoughts and experiences about installing Linux Mint in VMware Player or Workstation