- Полноценная замена Denwer или разворачиваем Ubuntu-server на VMware (часть 1)
- Создаем виртуальную машину
- Ставим Ubuntu
- Запуск Ubuntu
- Пара слов о руководстве
- Установка Ubuntu Server 20.04 LTS на виртуальную машину VMware ESXi 6.7
- Ссылки
- Подготовка
- Installing Ubuntu Server in VMware
- Configuring VMware player
- Installing Ubuntu Server edition
- Initial steps (language and keyboard layout)
- Choosing the right edition
- Network configuration
- Proxies and mirrors
- Disk configurations
- User configurations
- Miscellaneous software
- Reboot!
- First boot and SSH
- Want to enable live patching on the Ubuntu server?
Полноценная замена Denwer или разворачиваем Ubuntu-server на VMware (часть 1)
Все кто занимается разработкой сайтов под windows, наверняка сталкивались с различными проблемами после запуска сайта на сервере. Проблемы эти появляются из-за того, что сервера обычно работают под ОС Linux. Кроме того, время от времени появляются очень интересные штуки на подобие NodeJS (портировали на win, но не сразу), которые очень хочется покрутить, но нельзя – на windows их нет. Однако, при всех этих недостатках с windows уходить не хочется, ведь здесь куча своих плюсов и привычно ведь в конце-то концов.
Но не стоит огорчаться, ведь есть виртуализация, которая спешит нам на помощь.
Создаем виртуальную машину
Есть много различных программ для решения этой задачи, я воспользуюсь VMware player.
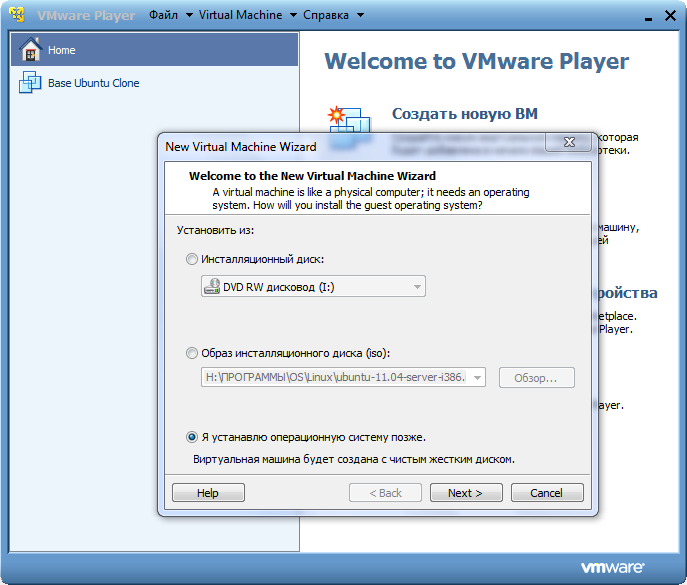
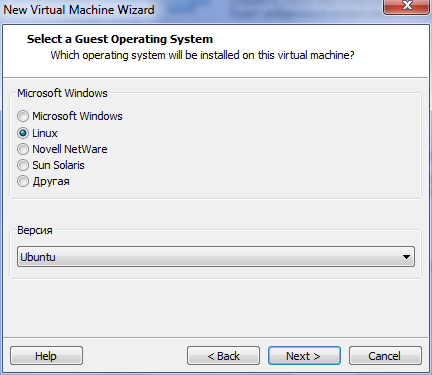
Запускаем VMware player и переходим в «Создать новую ВМ». Далее делаем все как на скринах или на свое усмотрение (в зависимости от доступных вам ресурсов).
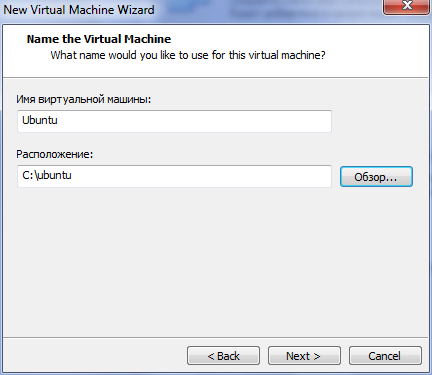


После завершения процесса создания ВМ в правой колонке появится созданная вами виртуальная машина.

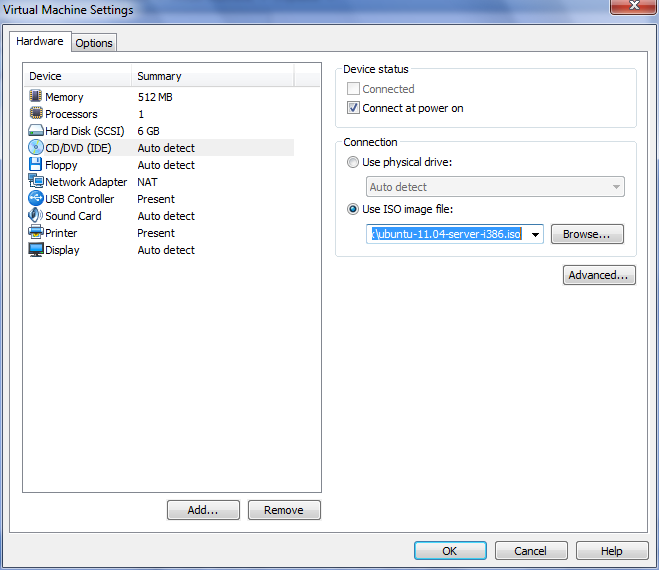
Теперь, ее надо настроить. Переходим в настройки «Изменить настройки виртуальной машины» > CD/DVD(IDE). Ставим переключатель на «Use iso image file» и выбираем образ нашей Ubuntu.
Примечание
Ubuntu естественно надо скачать с официального сайта. Я выбрал Ubuntu 11.04 x32, т.к. x64 у меня не запустилась (кажется из-за отсутствия поддержки аппаратной виртуализации).
Теперь идем в раздел «Network Adapter» и ставим NAT.
Ставим Ubuntu
- В окне Language выберите язык «Русский».
- Далее выберите «Установить Ubuntu Server».
- Выберите страну и область (регион) — Российская Федерация.
- Определить раскладку клавиатуры? — Нет.
- Для кого предназначена клавиатура? — Россия.
- Раскладка клавиатуры — Россия.
- Способ переключения между национальной и латинской раскладкой — Control+Shift.
- Основной сетевой интерфейс (может не появится, если в системе только одна сетевая карта) но нас это не устраивает. По этому, нажмите клавишу Escape и настройте сеть вручную.
- IP-адрес — свободный локальный IP-адрес в вашей локальной сети (например: у меня, 192.168.80.3).
Примечание
IP выбираем следующим образом: пуск > все программы > VMware > Virtual Network Editor

Здесь нас интересует интерфейс VMnet8 (выберите его) и зайдите в NAT Settings. Теперь запомните или запишите Gateway IP. У меня он 192.168.80.2, а значит моя сеть это 192.168.80.x (у вас они скорее всего другие). Также в сети уже занят IP 192.168.80.1 — он у основной OS (windows). По этому, IP нашей Ubuntu будет 192.168.80.3 (не забывайте, что эта «192.168.80. » часть у вас своя).
- Имя вашей учётной записи — нажмите Enter.
- Введите пароль для нового пользователя.
- Зашифровать домашний каталог — Нет.
- Информация о HTTP-прокси — ничего не вводите, нажмите Enter (если прокси нет — оставьте поле пустым).
- Каким образом Вы хотите управлять обновлением системы? — Без автоматического обновления.
- Выберите устанавливаемое программное обеспечение — выберите только OpenSSH server.
- Установить системный загрузчик GRUB в главную загрузочную запись? — Да.
- Когда появится предупреждение, что установка завершена удалите диск из привода. Зайдите еще раз в настройки виртуальной машины раздел CD/DVD(IDE) и поставьте переключатель на «Use physical drive» (Auto detect).
- Установка завершена.
Запуск Ubuntu
И так Ubuntu установлена и запущена (если нет, то запустите виртуальную машину еще раз). Авторизируйтесь в Ubuntu под своей учетной записью (логин и пароль, который вы вводили во время установки Ubuntu).
- Обновляем список пакетов и затем – полностью – систему:
sudo apt-get install openssh-server
sudo apt-get install ntp ntpdate
sudo nano -w /etc/network/interfaces
и редактируем настройки (не забывайте ваш IP отличается).
auto lo
iface lo inet loopback
Для этого скачиваем putty, запускаем его и в настройках сессии указываем наш IP адрес (смотрите: «IP нашей Ubuntu»).

Все теперь вы можете спокойно подконектиться к нашей гостевой OS (Ubuntu) по SSH.
На этом все. Во второй части я расскажу как подмонтировать общую папку с windows к Ubuntu, и работать с ней как с локально директорией. А вы пока займитесь настройкой php(PHP-FPM уже встроен в версиях старше 5.3.3)+nginx+MySQL+ еще что-то. Благо подробных руководств по этому делу полно.
Пара слов о руководстве
В первую очередь оно для новичков и сам я в делах администрирования Linux, нахожусь на уровне новичек+1 (т.е. только то что мне необходимо по долгу службы). По этому если я где-то ошибся, то комментарии профи приветствуются.
Установка Ubuntu Server 20.04 LTS на виртуальную машину VMware ESXi 6.7

Установим на виртуалку сервер Ubuntu Server 20.04 LTS 64-bit. Используем гипервизор ESXi 6.7 U3.
Ссылки
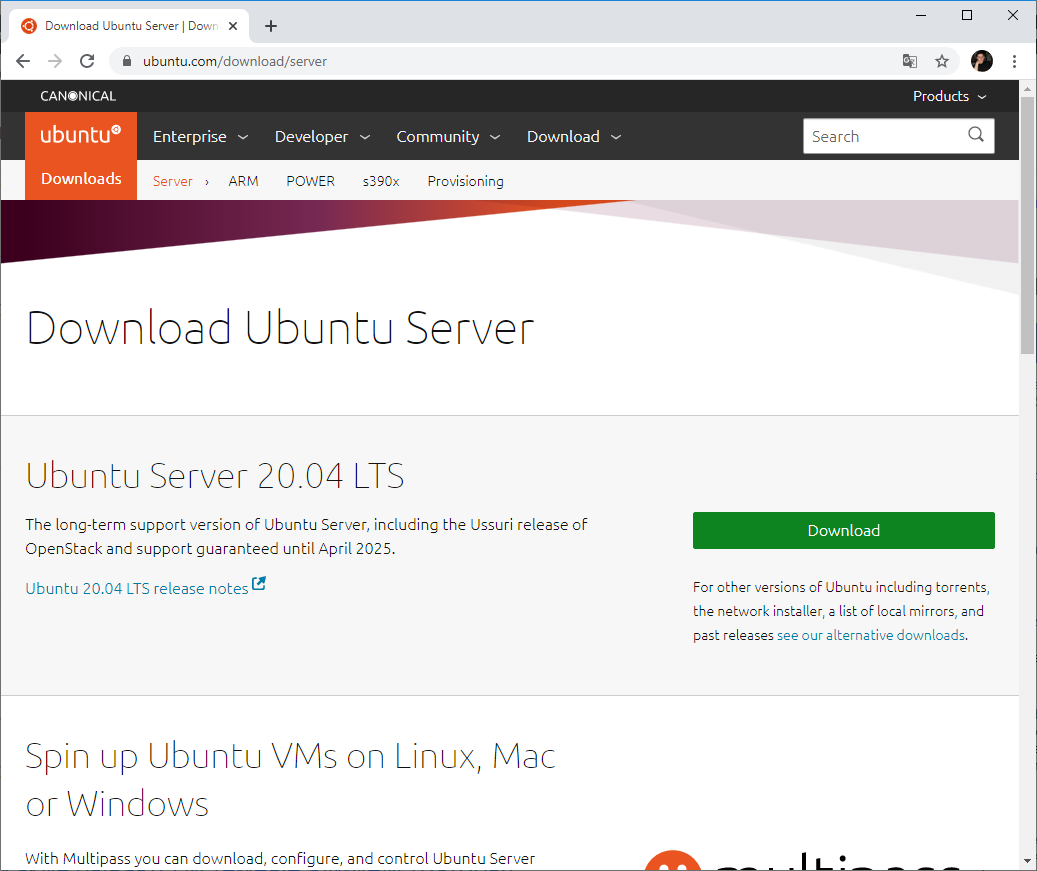
Дистрибутив Ubuntu Server скачиваем с сайта:
Ubuntu Server 20.04 LTS — гарантированная поддержка до апреля 2025 года.
Подготовка
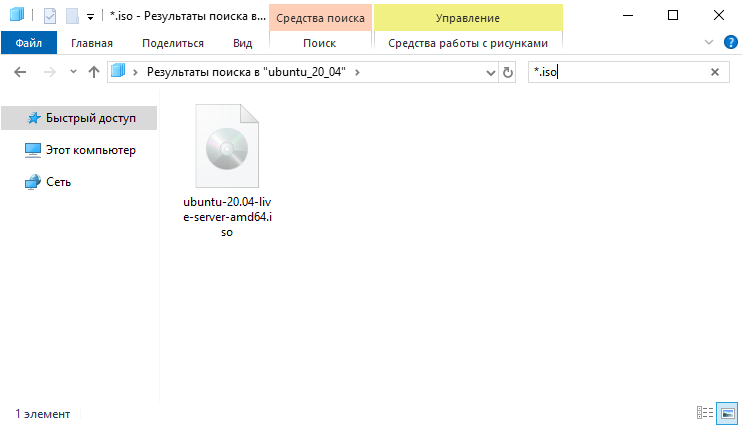
Скачиваю дистрибутив ubuntu-20.04-live-server-amd64.iso:
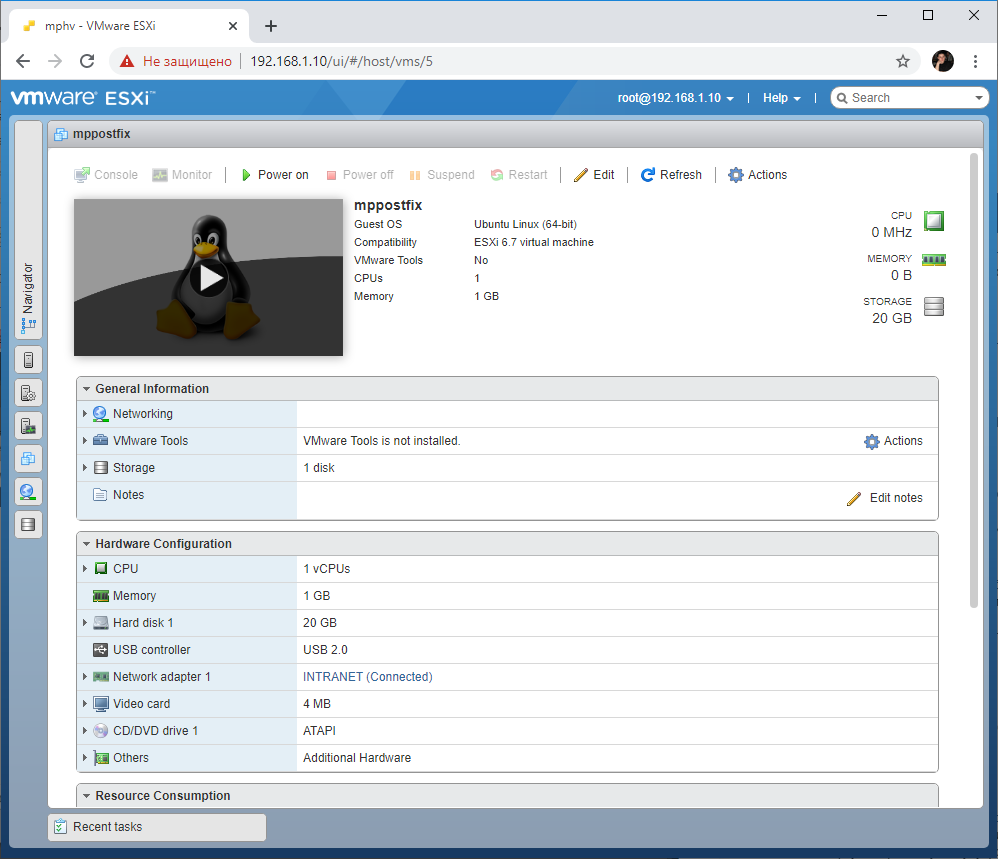
Создаю виртуальную машину. 1 процессор, 1Гб оперативки, 20 Гб жёсткий диск.
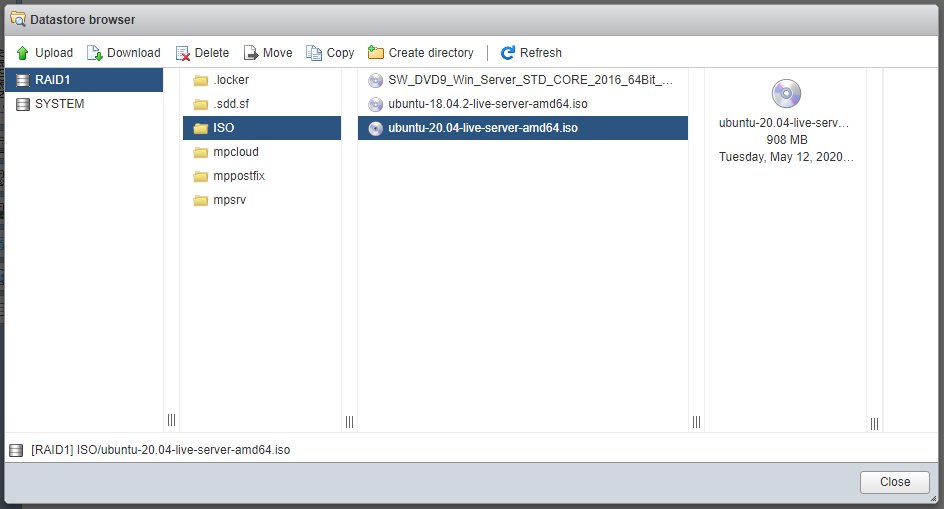
ISO образ дистрибутива загружаем в хранилище ESXi:
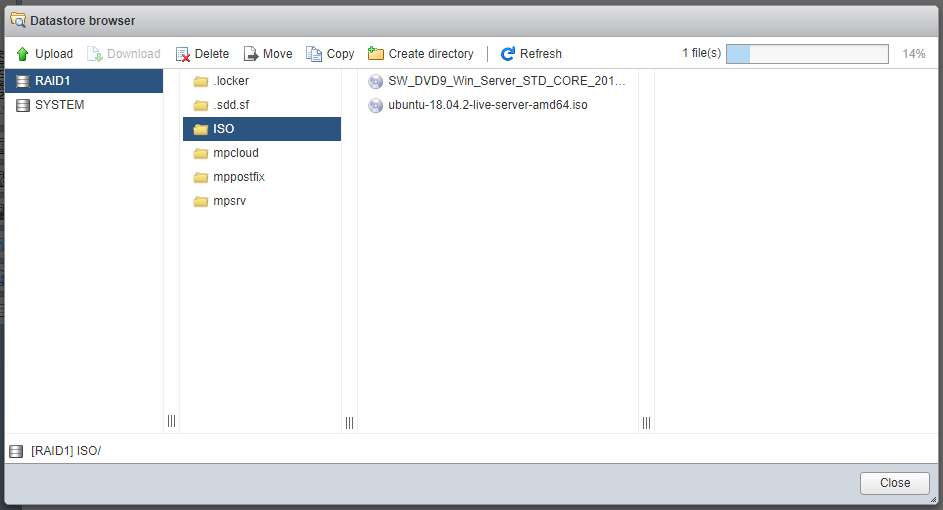
Через некоторое время образ Ubuntu 20.04 загружен в хранилище.
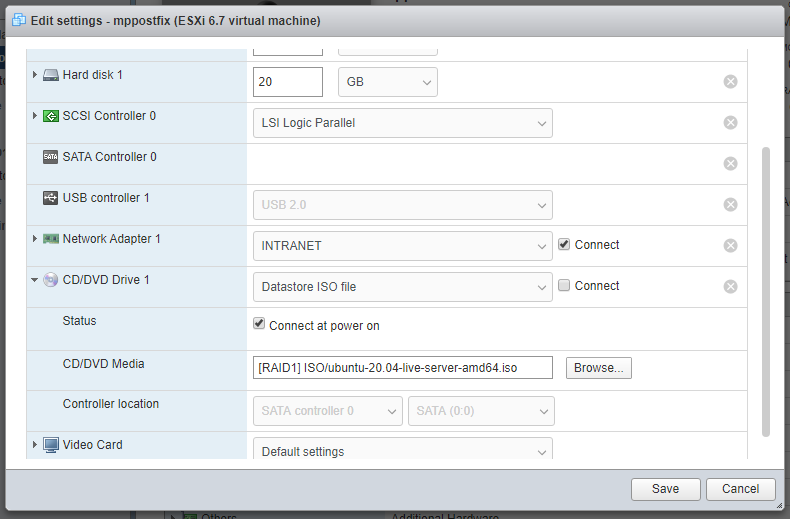
Загружаю виртуальную машину.
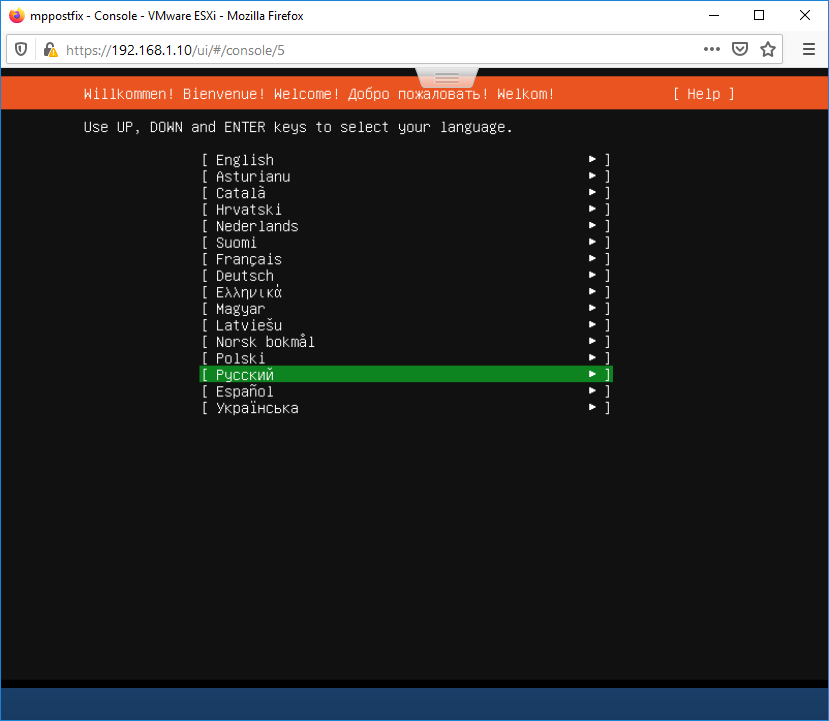
Выбираю язык — Русский. Enter.
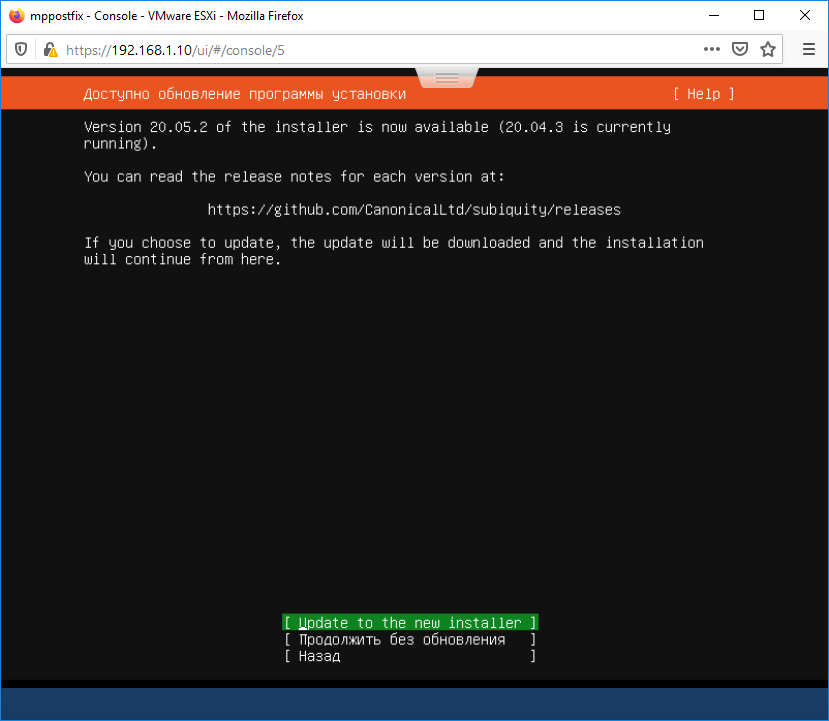
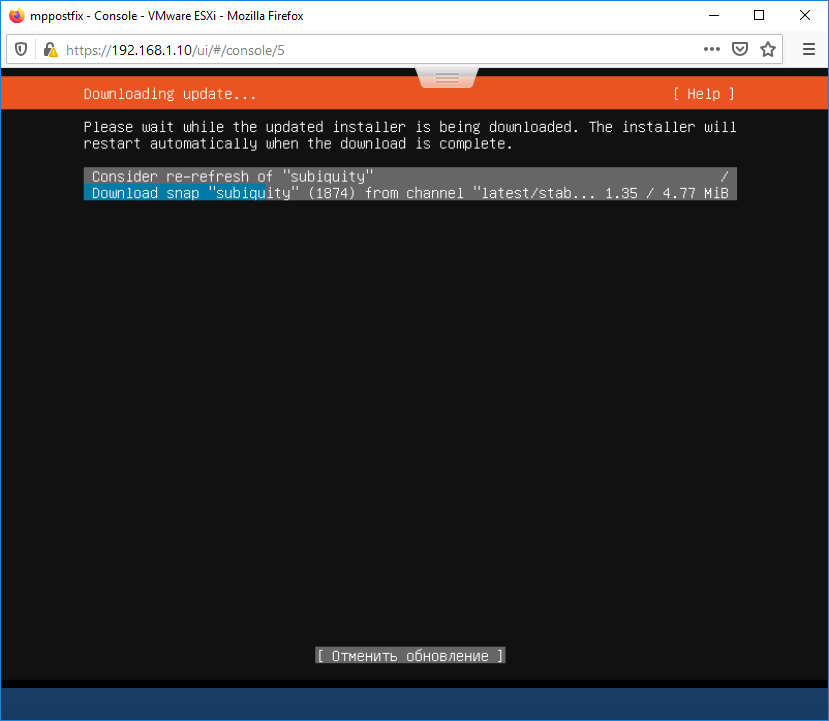
Найдена новая версия инсталлятора Subiquity, попробую обновиться, Update to the new installer.
Продолжаю установку. Странно, язык не везде русский, не продолжаю установку. Назад. Выбираю язык — Русский. Enter. Другое дело.
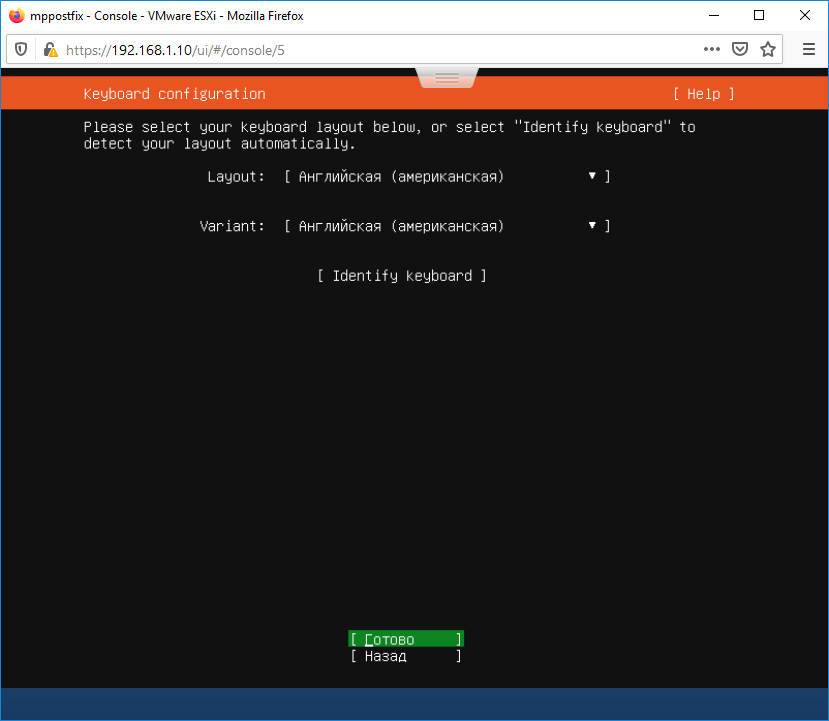
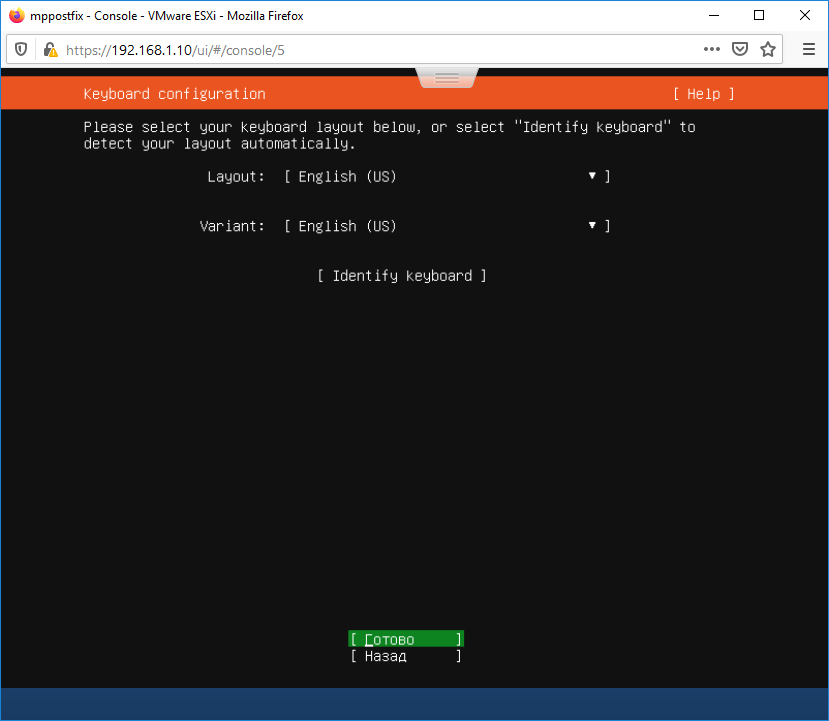
Выбираю раскладку клавиатуры. Я привык к Английской. Готово.
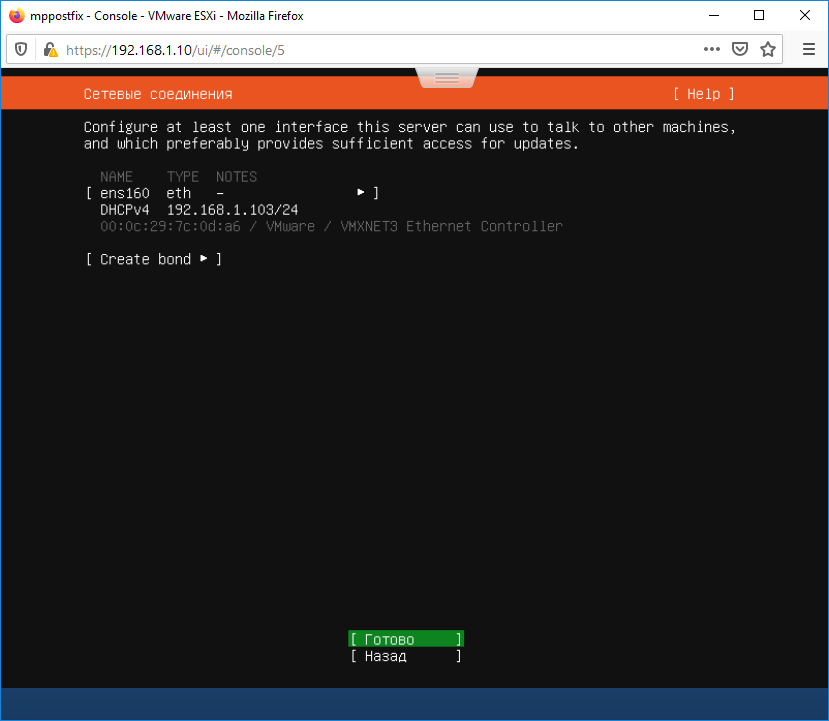
Настрою сеть. DHCP сервер уже выдал какой-то IP адрес, поэтому и смог обнаружиться новый установщик, но я хочу использовать статический IP адрес.
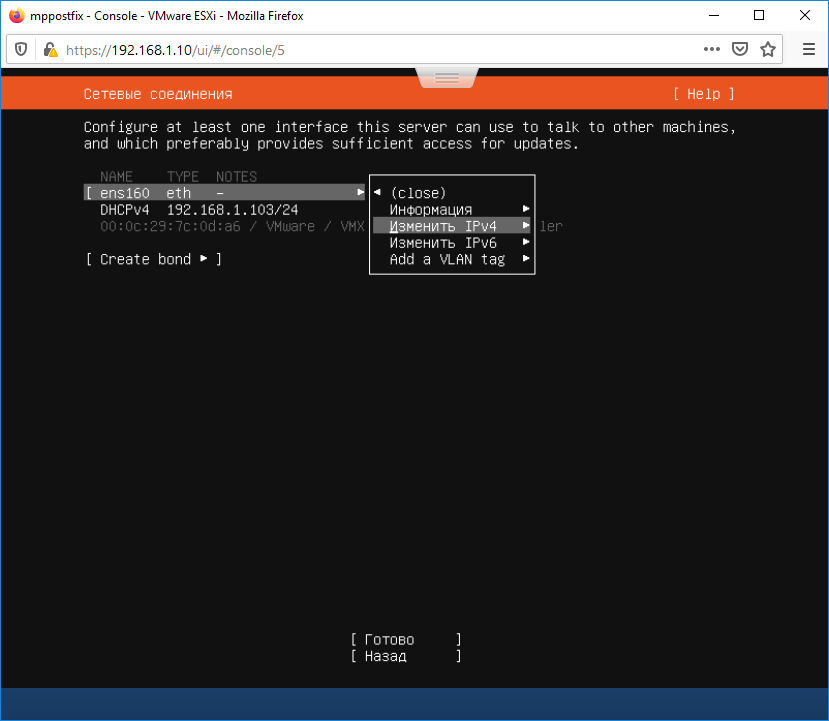
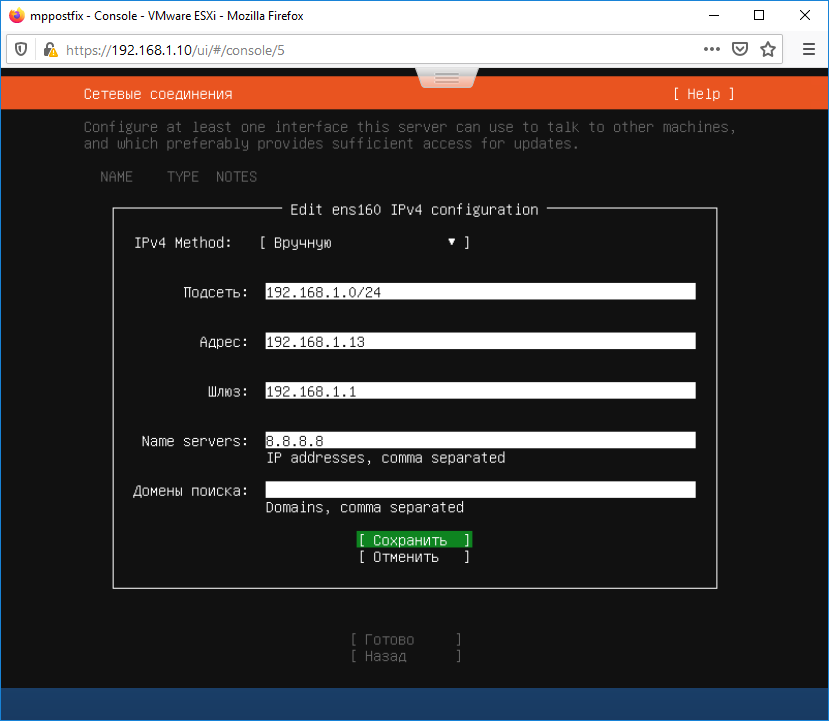
Указываю настройки сети. Сохранить.
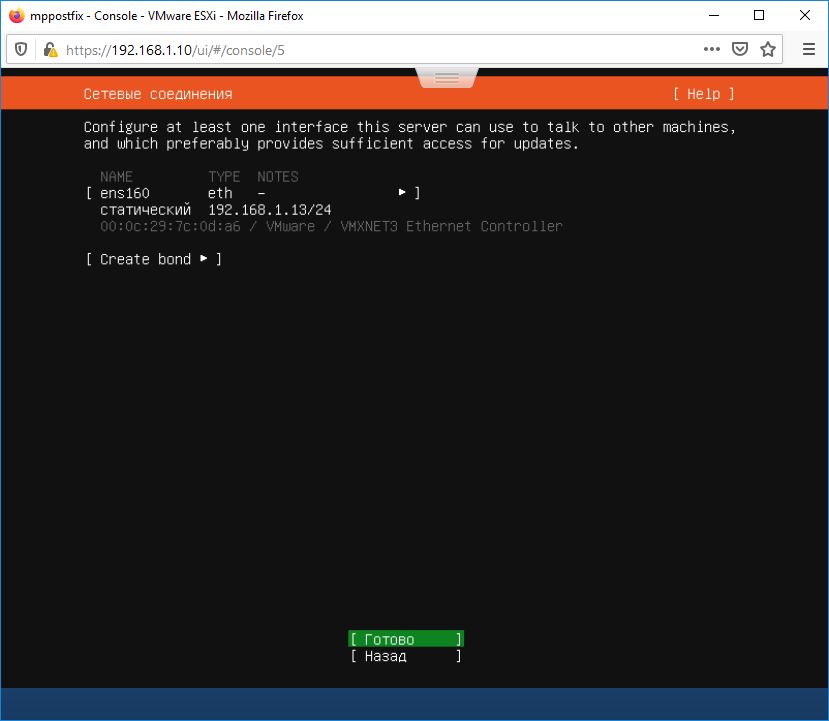
Здесь можно настроить агрегацию портов. Мне не нужно. Готово.
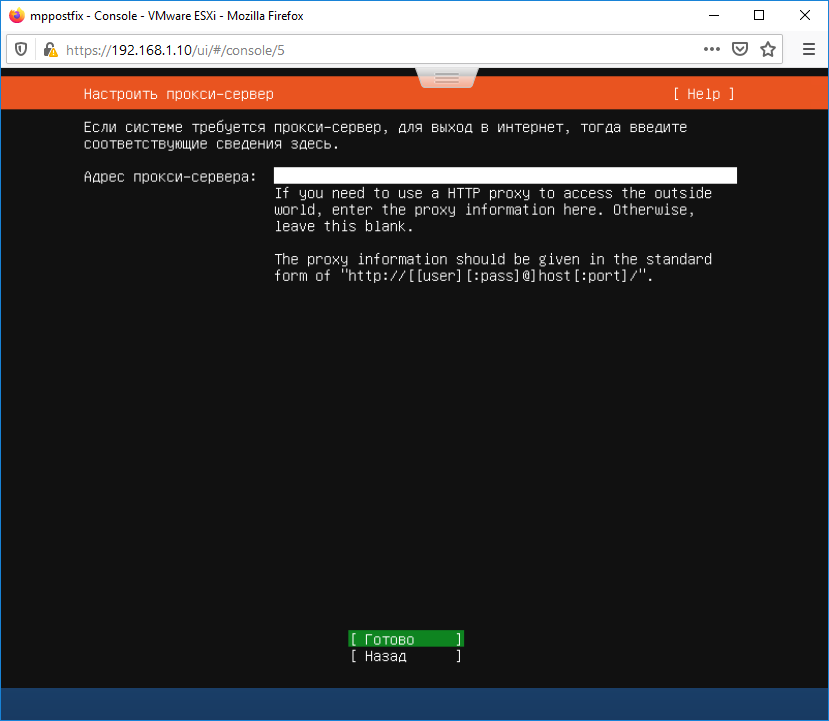
Настройка прокси. Мне не требуется. Готово.
Можно указать зеркало для Ubuntu. Я оставляю значение по умолчанию. Готово.

Use An Entire Disk — выделяю весь диск под систему.
Подтверждаю очистку диска. Продолжить.
Указываю имя пользователя для входа в систему, пароль, hostname. Готово.
Выбираю галку Install OpenSSH server. Я планирую работать с сервером через консоль Putty. Здесь же можно при желании сразу импортировать SSH ключи. Готово.
Предлагают установить дополнительные пакеты. Ничего из перечисленного мне не нужно. Готово.
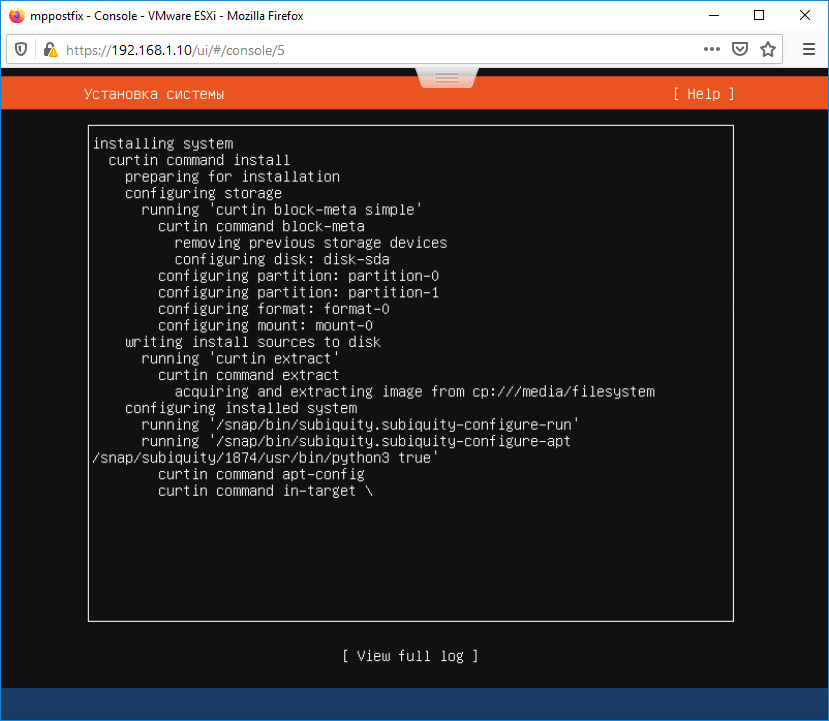
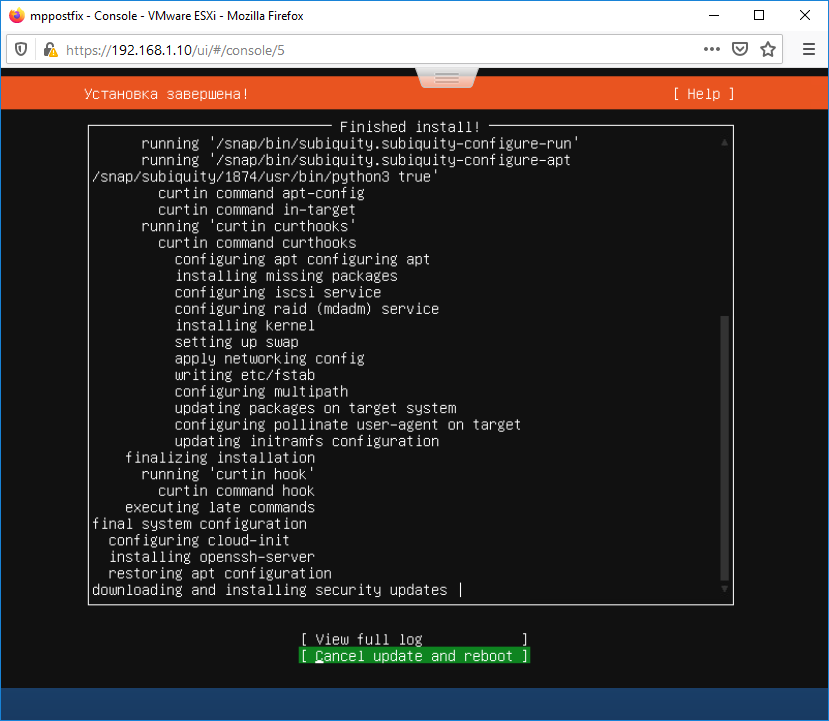
Установка завершена. Но почему-то продолжают скачиваться обновления безопасности. Подожду.

Установка подошла к завершающему этапу. Перезагрузить сейчас.
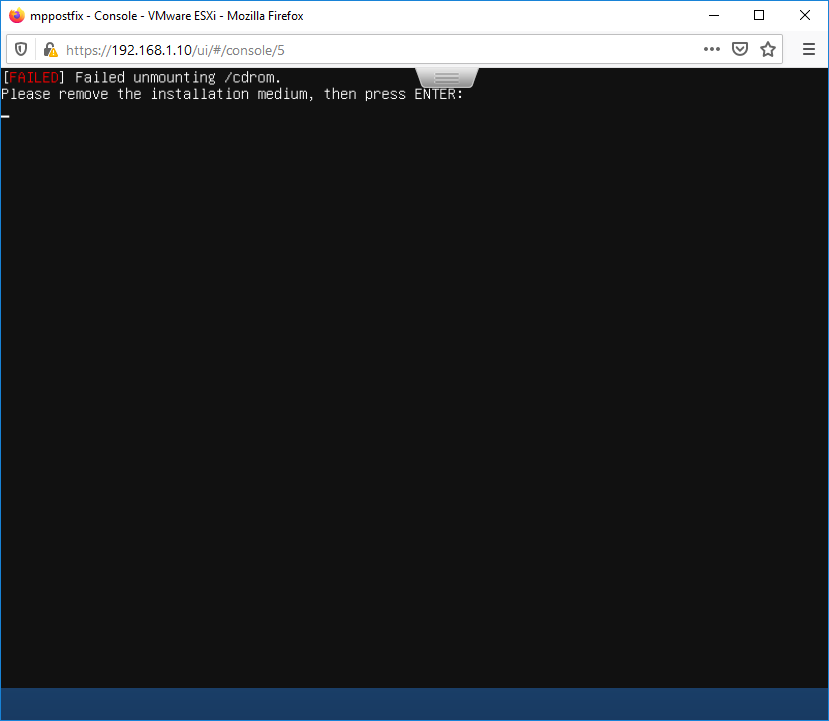
Please remove the installation medium, then press ENTER. Вытаскиваю ISO образ из CD/DVD ROM, нажимаю Enter. Сервер перезагружается.
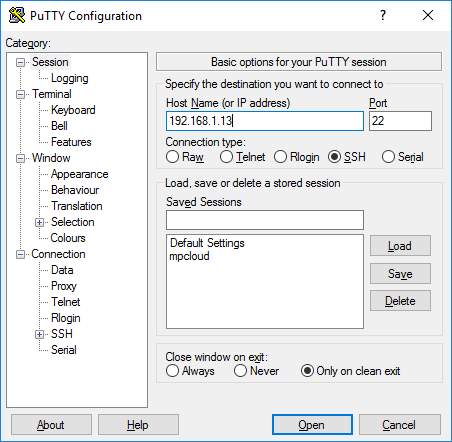
Пробую войти на сервер по SSH с помощью Putty.

Всё работает. Установка Ubuntu 20.04 LTS на виртуальную машину VMware ESXi 6.7 успешно завершена.
Installing Ubuntu Server in VMware

One of the most popular distributions in the Linux server world is undoubtedly the Ubuntu server. This is because its installation process is quite simple and straightforward, compared to other distributions in this realm.
I will uncover the wonderful process of installing an Ubuntu server as a virtual machine in VMware Workstation Player.
Here are the prerequisites:
- Any computer that supports virtualization with at least 4 GB of RAM
- Minimum 10 GB of disk space
- VMWare player
- Ubuntu Server ISO (prefer LTS version rather than normal releases)
And you can visit the official download page of canonical to download the latest ISO of the Ubuntu server.
Configuring VMware player
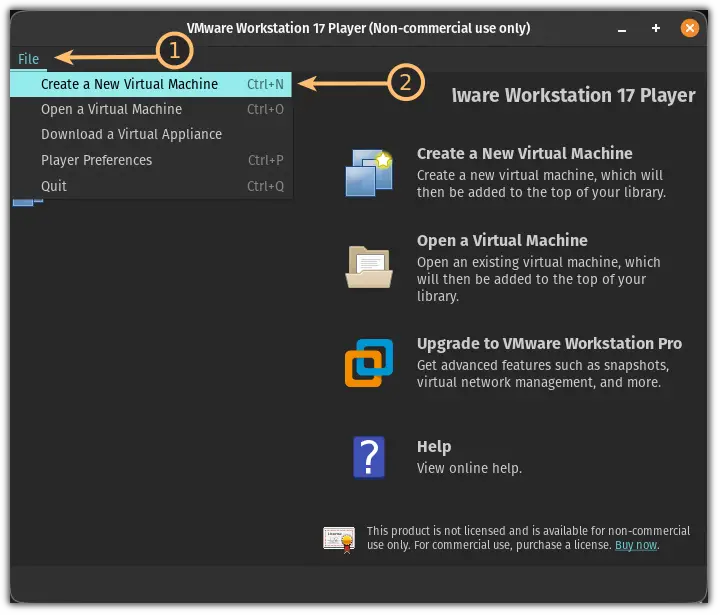
So let’s start with creating a new VM. To do so, you can use the shortcut Ctrl + n or by clicking on the File and selecting Create a New Virtual Machine :
Next, click on the Browse button and select the ISO from the file manager:
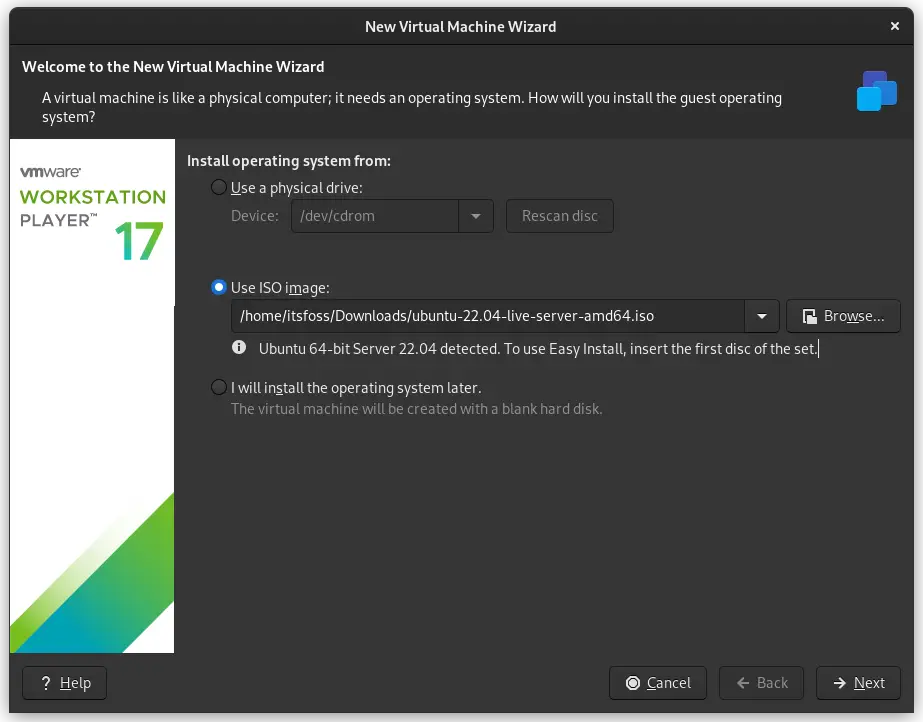
Now, the next step will be taken care of by VMWare itself as it will select the type Linux and version Ubuntu :
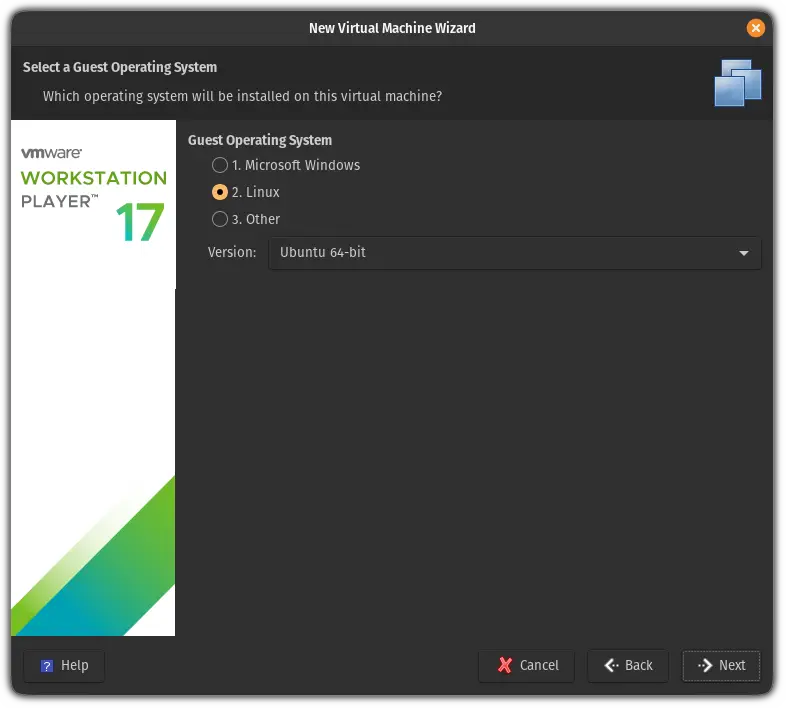
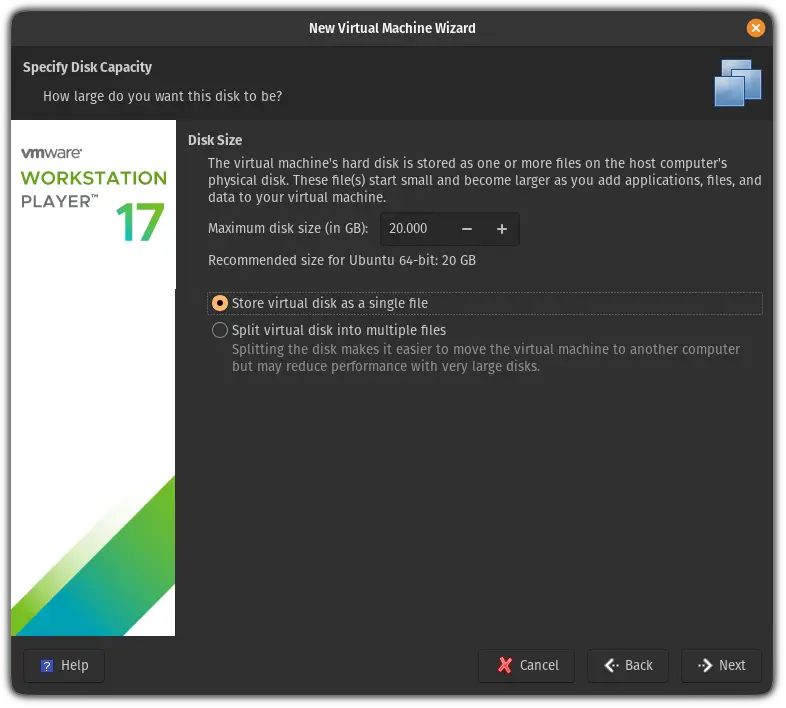
Next, it will ask you to select the disk size and how you want to store the disk. Allocate the disk space as per your needs (you can always increase the size after the installation).
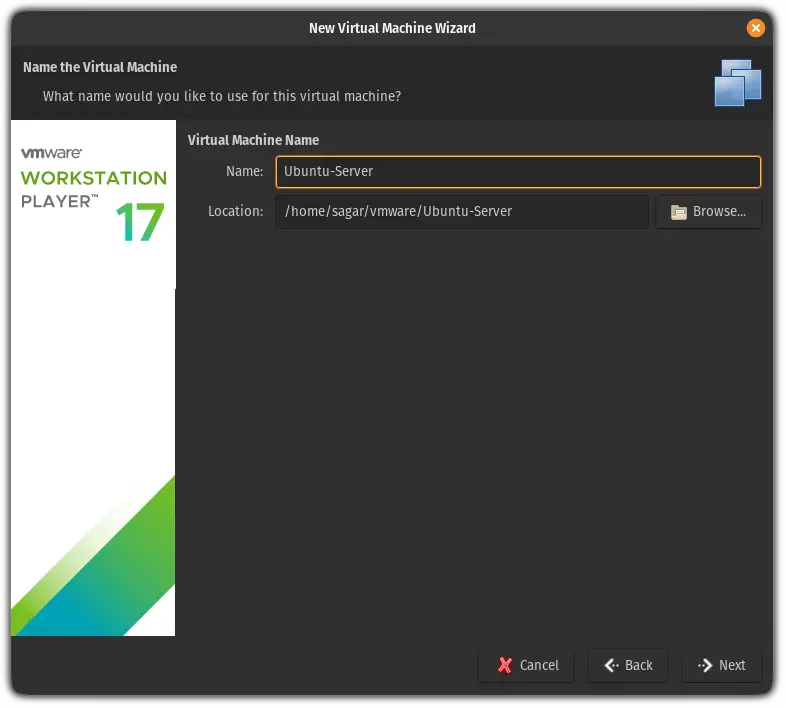
In the next step, it will ask you to name this VM. So make sure to give this relevant name. I went with Ubuntu-Server :
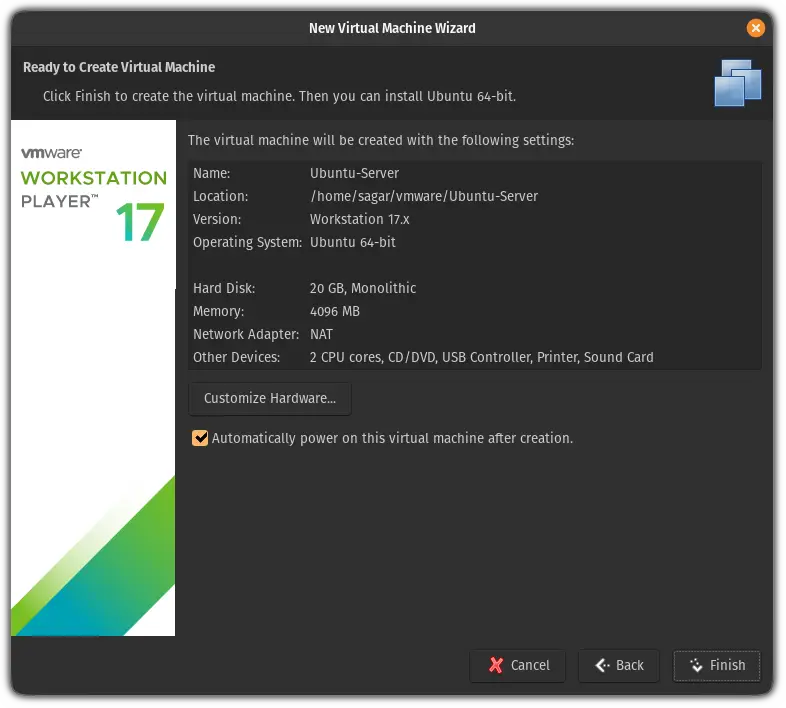
And it will show the summary of configurations you went with to create this VM.
Sure, many options were selected automatically such as processor count, RAM, networking configuration, etc. To do so, click on the Customize Hardware :
For instance, you’d have to enable the Bridged connection from the Network Adapter options:
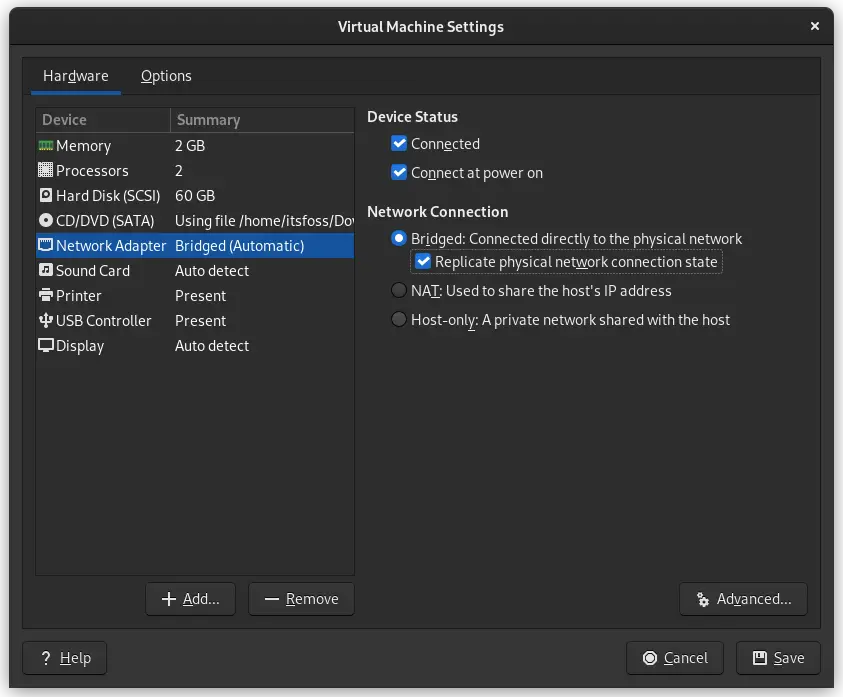
Once done save the configuration and start the VM.
Installing Ubuntu Server edition
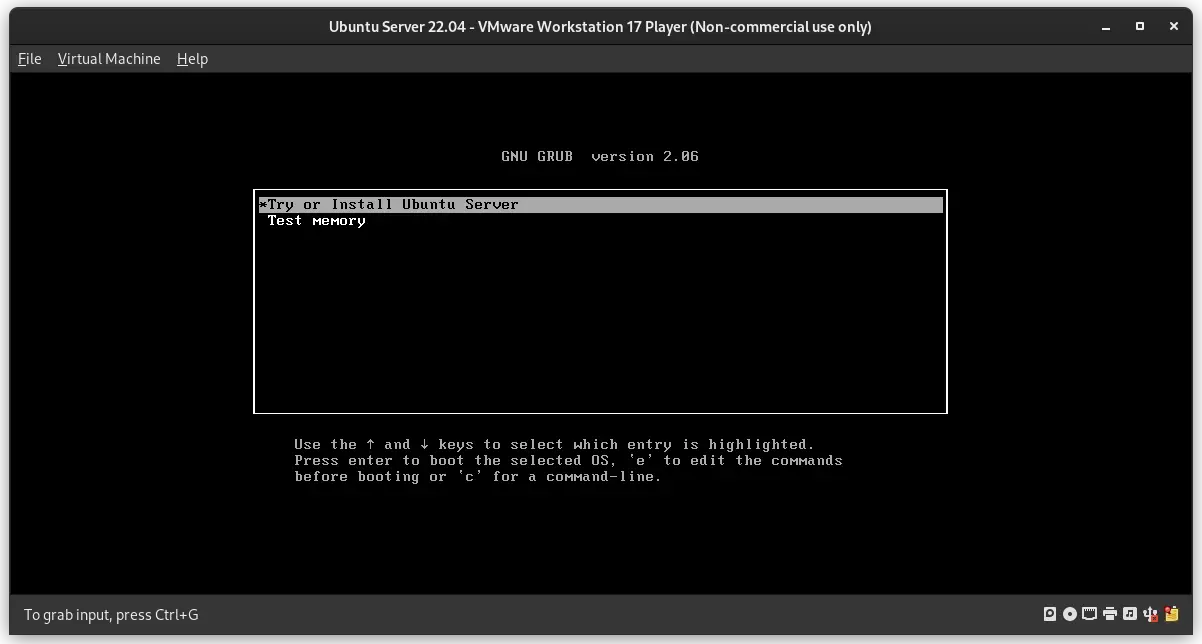
The virtual machine starts up like this with a GRUB screen, and you are greeted with a terminal-based installation wizard.
Click on the Try or Install Ubuntu Server to start the installation process:
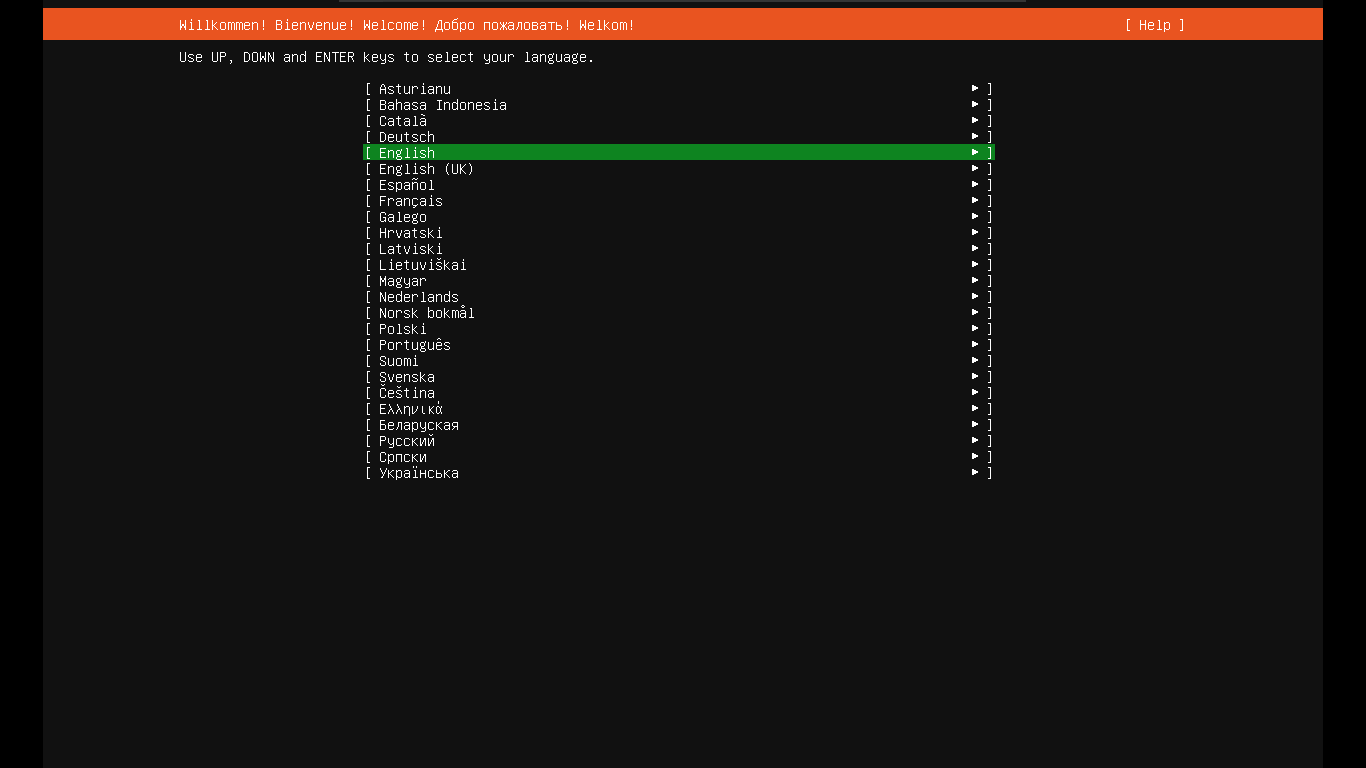
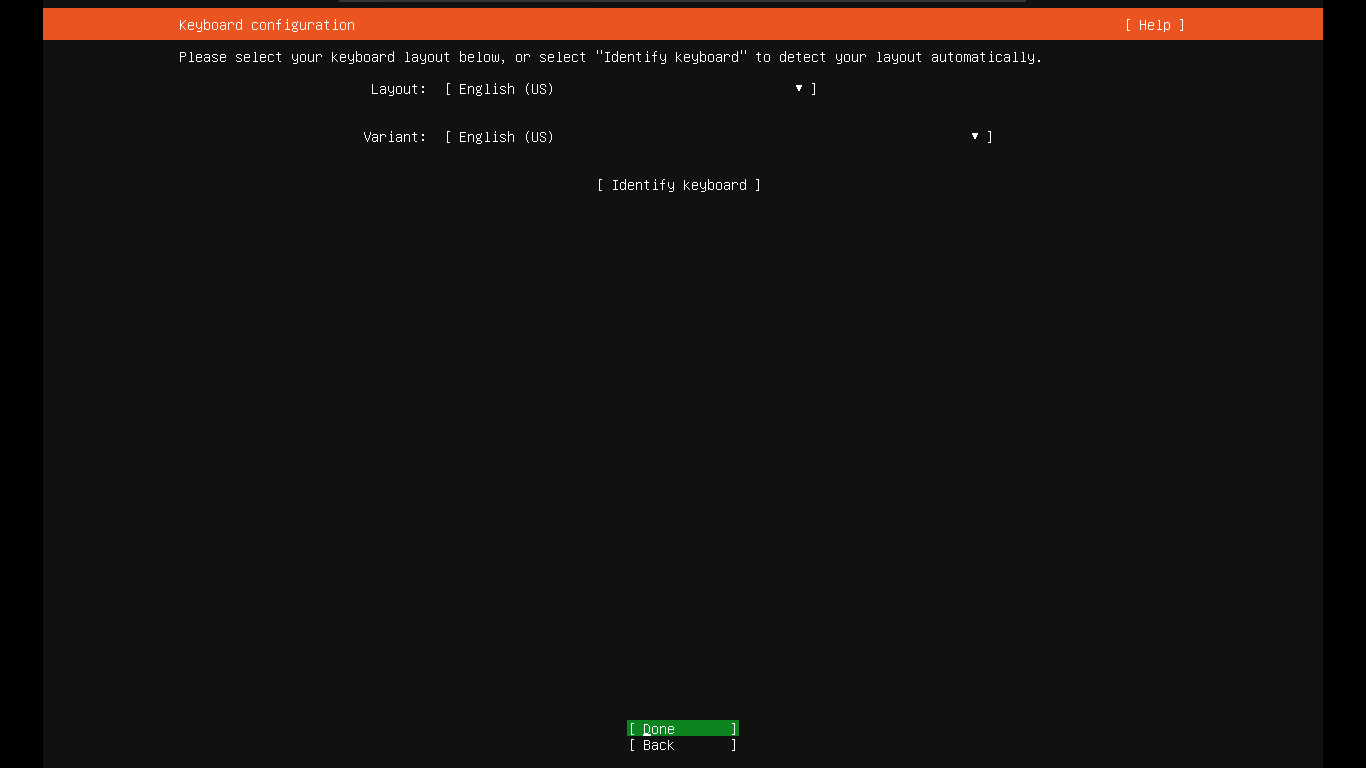
Initial steps (language and keyboard layout)
Select your language and keyboard layout on the following pages.
Choosing the right edition
There will be two editions of the Ubuntu server that you can install:
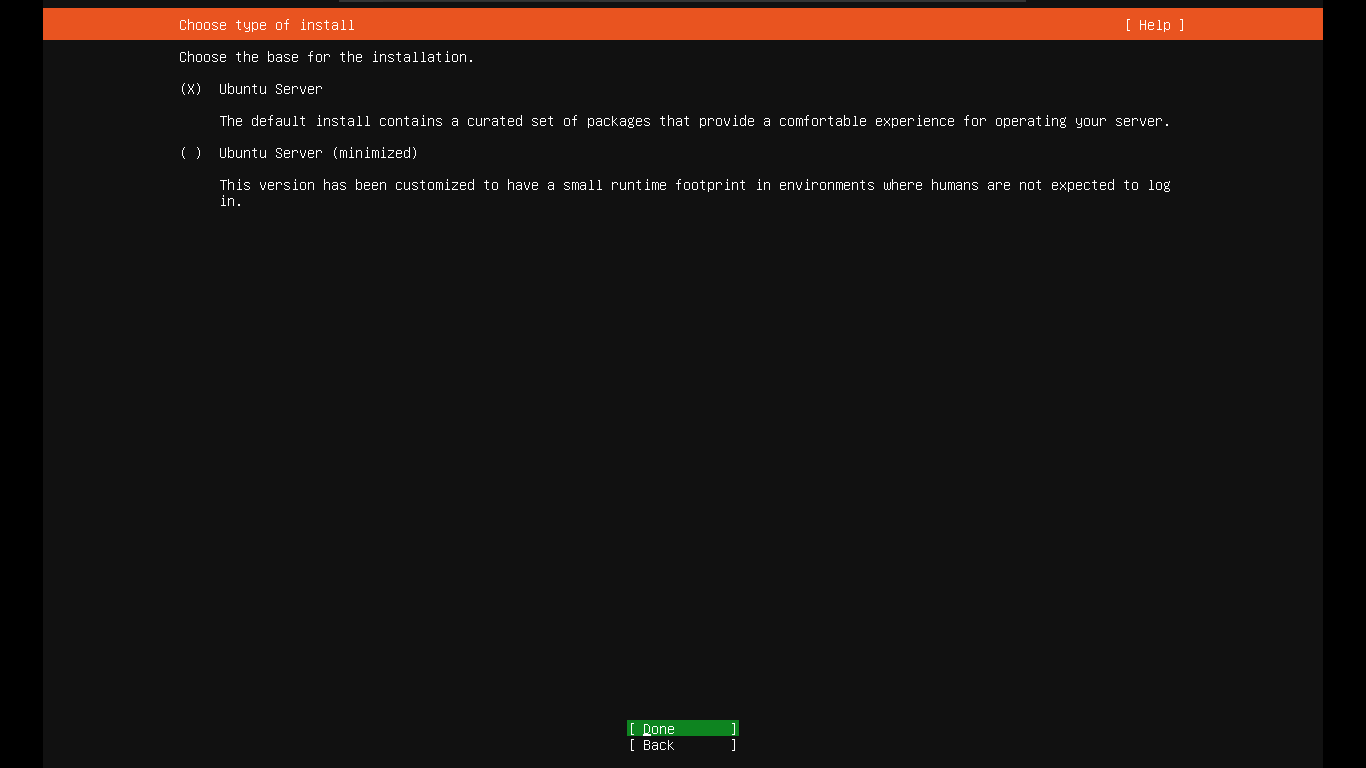
- The normal version (equipped with utilities for an average server)
- Minimal version (a stripped-down version that includes only the basic utilities)
If you don’t know what to choose, just select the normal version and continue.
Network configuration
For the network configuration, the installer will automatically set up a few things for you (such as IP address, gateway, etc) according to the network, to which your host system is connected.
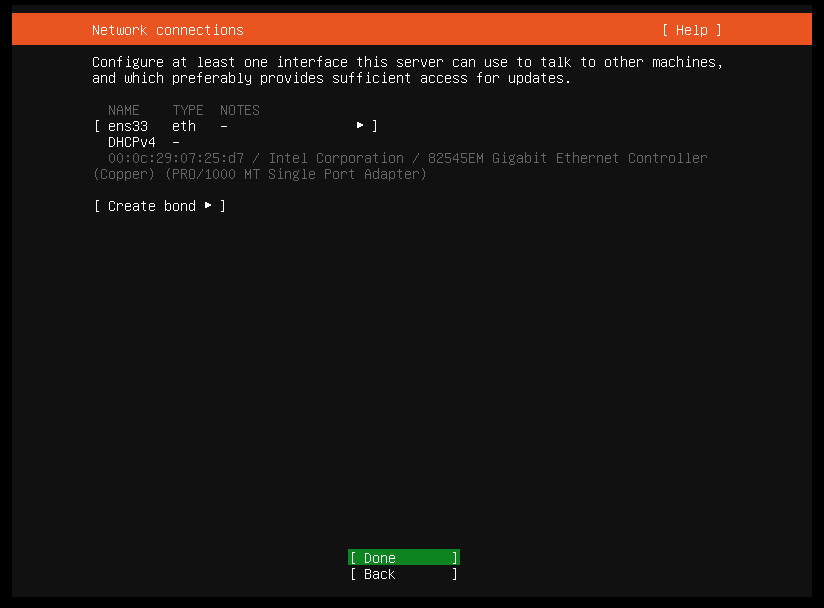
But if you want a static IP address for SSH and other stuff, select the interface (here, it’s an ethernet — ens33), followed by Edit IPv4, and then finally, the Manual option in the resulting dropdown.
If you are unsure what to configure, you can follow something similar:
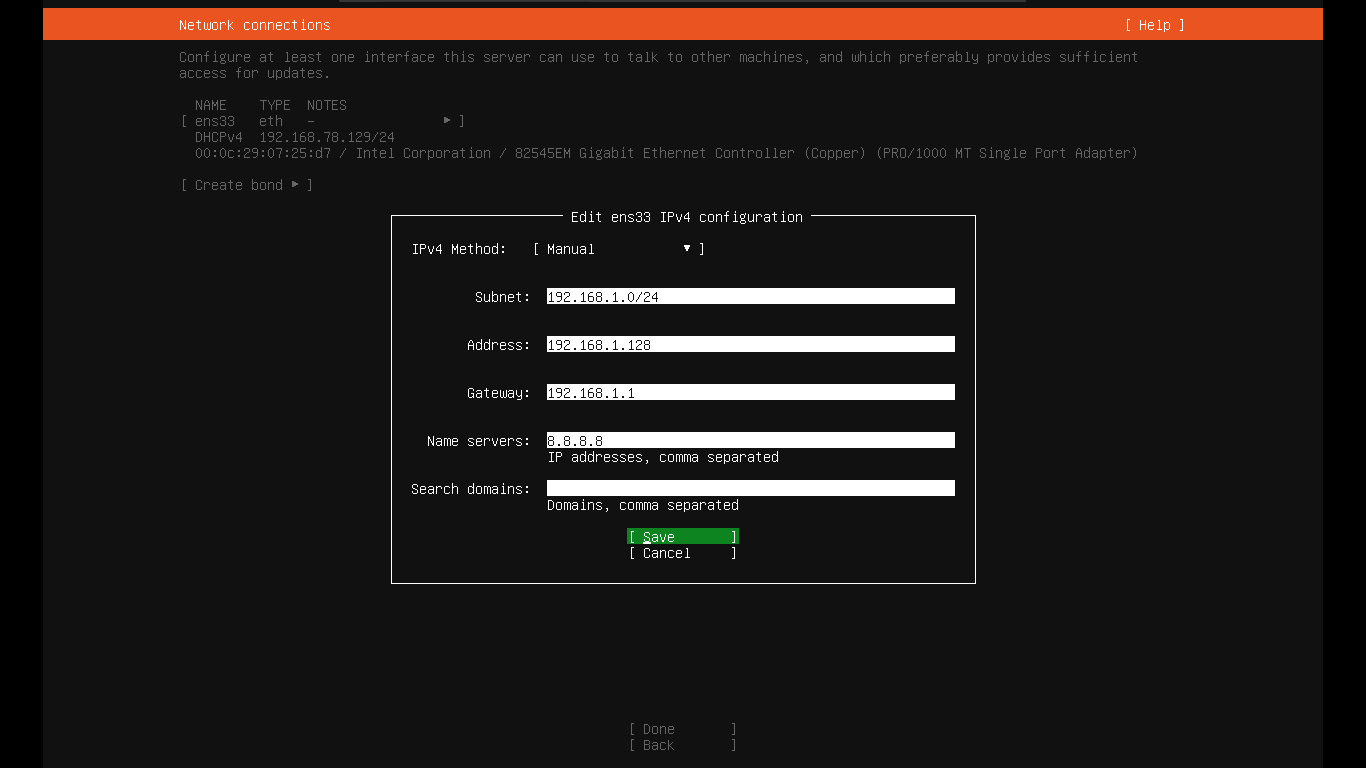
- Subnet — The address followed by the port that defines the entire network (usually 192.168.1.0 followed by port 24)
- Address — The IP address is allocated for this machine (your preference)
- Gateway — The address for the gateway of the router (usually 192.168.1.1)
- Name servers — the DNS addresses that the server can access
- Domains — Domain names that can be allocated for this server (optional)
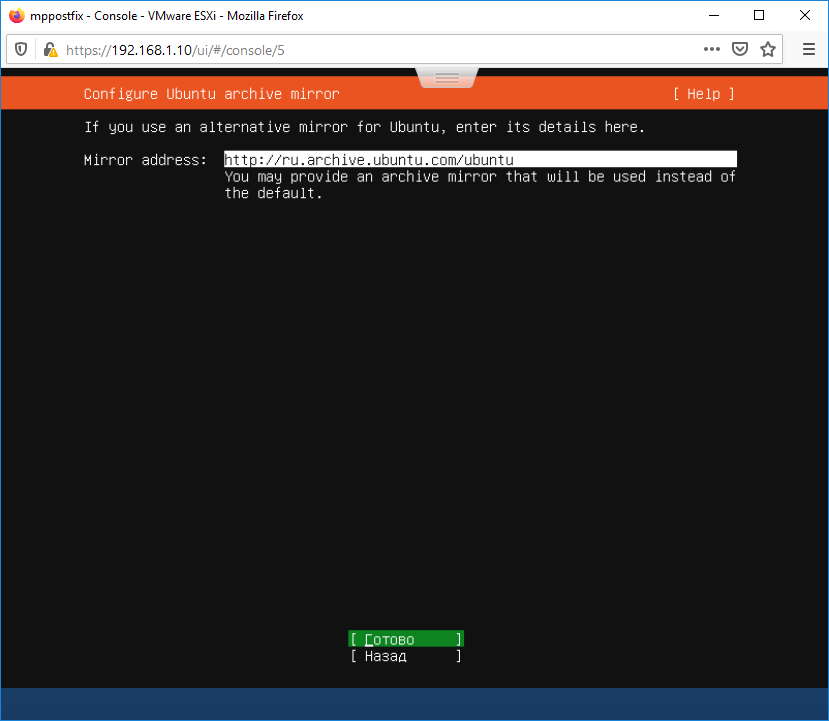
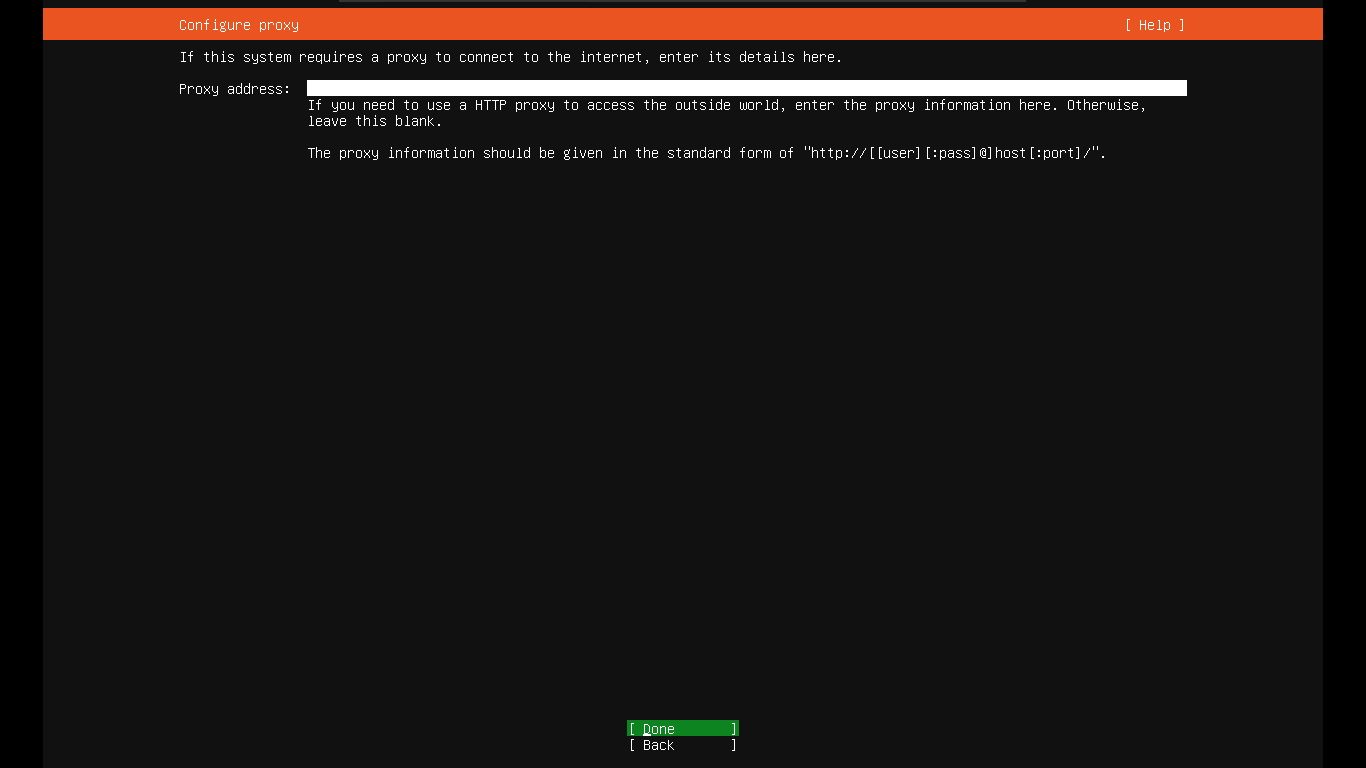
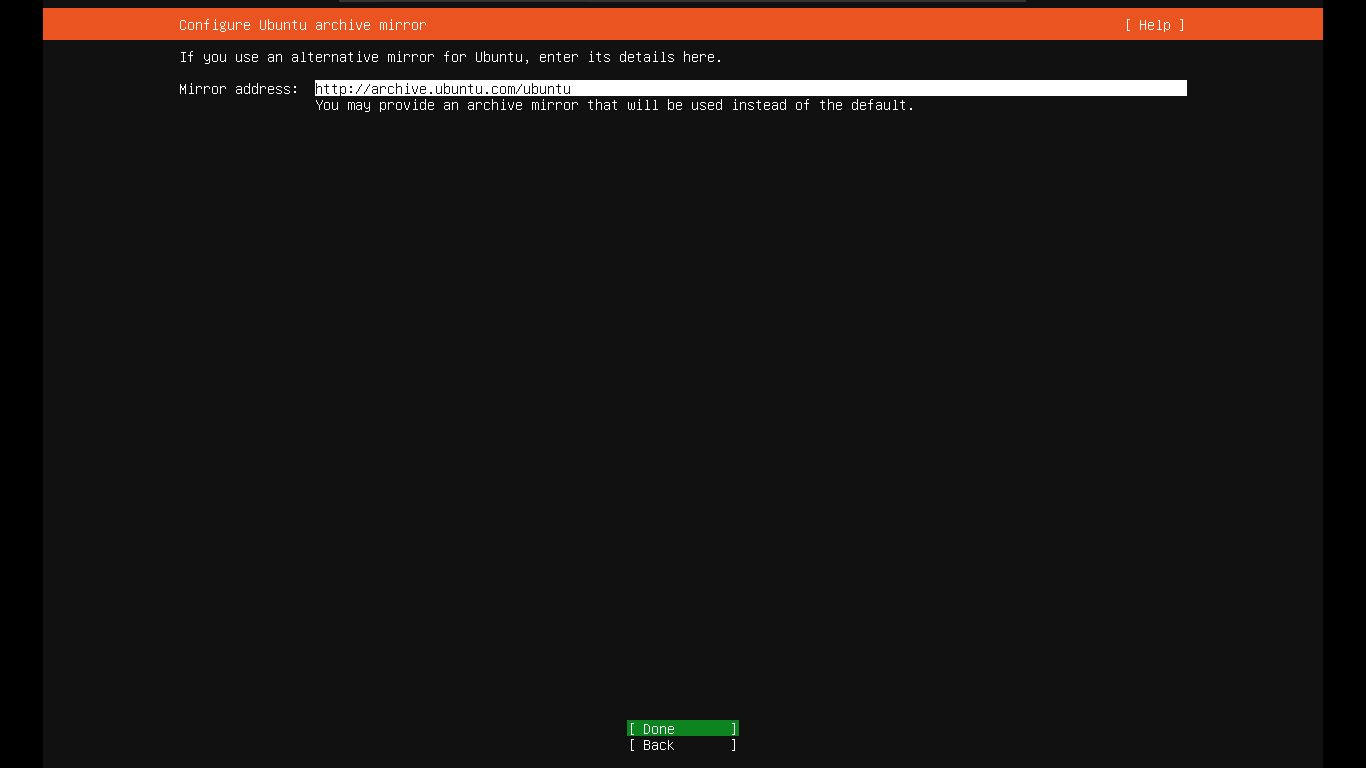
Proxies and mirrors
If your network is configured with a proxy, it can be entered here. If none, it can be left unattended.
You can also configure the mirror(s) from which you will be getting packages and updates. Check with the official site for the availability of mirrors in your region, and modify the address if necessary.
Or you can opt for the default mirror address.
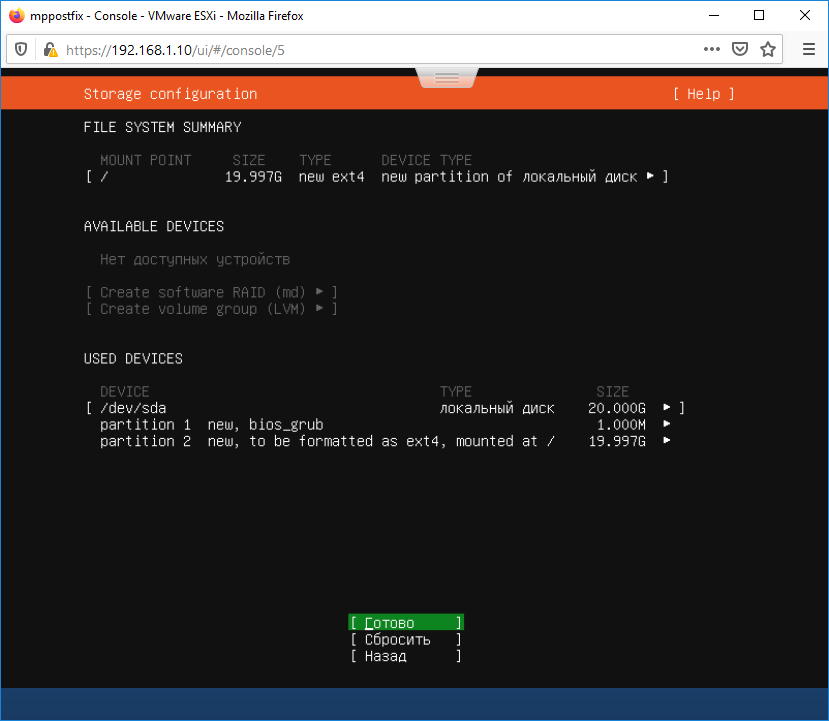
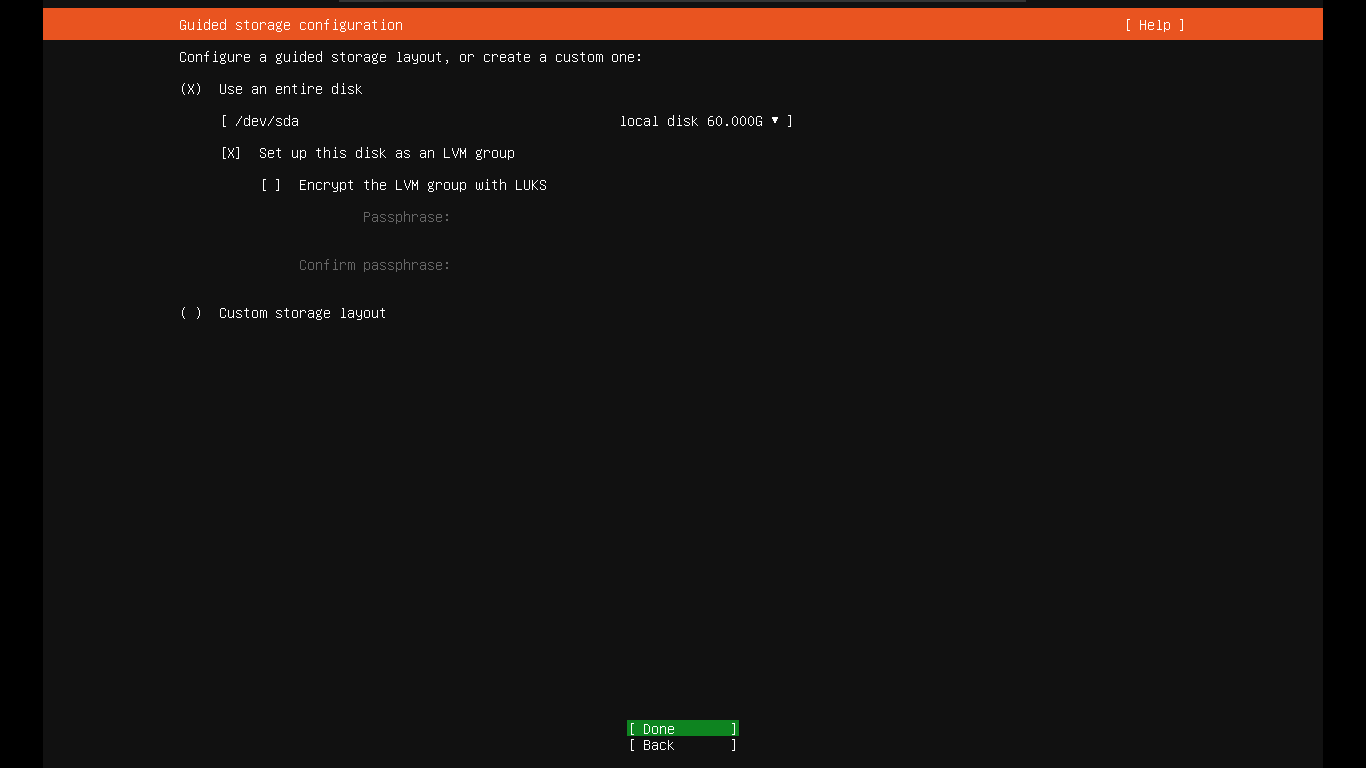
Disk configurations
Here, the available disks are listed below. Configure the disks and partitions according to your convenience, and continue.
If you’re new to this installation process, continuing with the automatically configured storage layout is recommended.
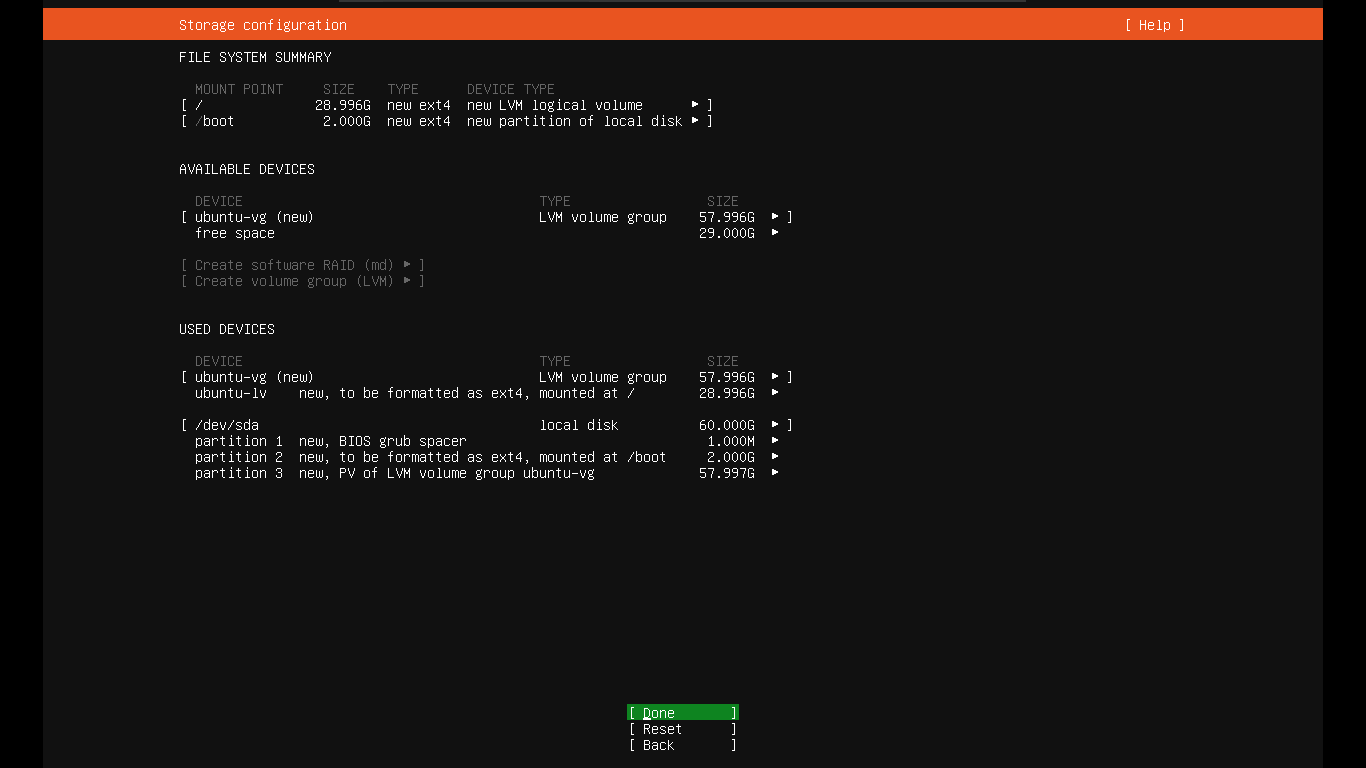
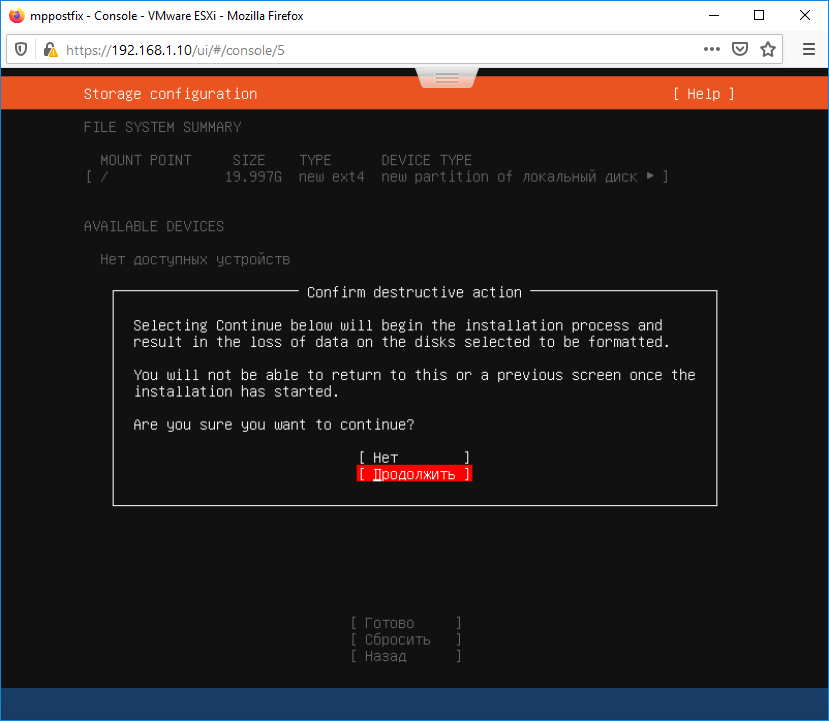
Once done, you’ll be asked for confirmation twice in order to continue the installation wizard. It will start from the moment you select continue.
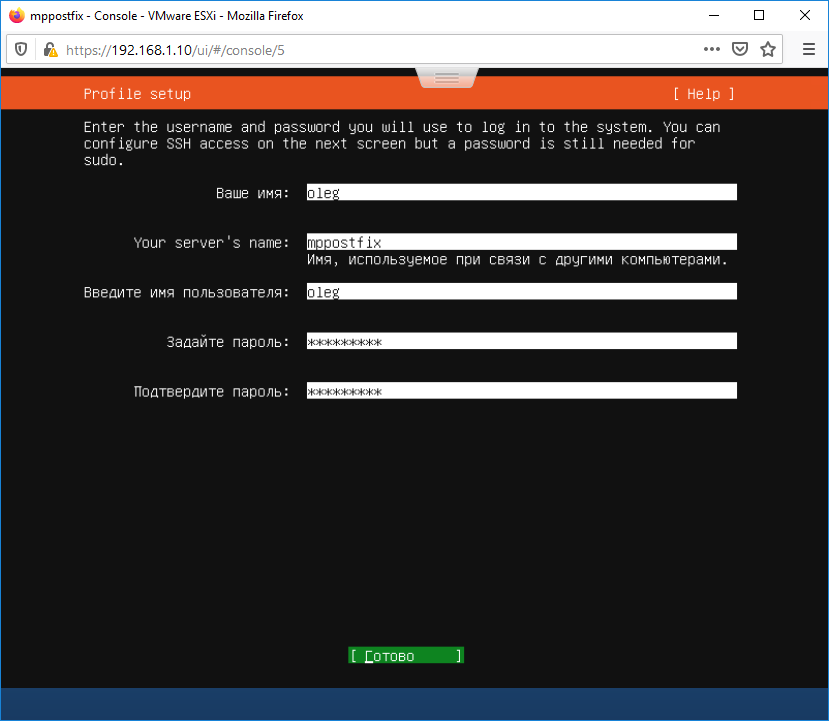
User configurations
The administrator user account will be configured on this screen along with the hostname. More accounts can be added only after the installation. Here is an example.
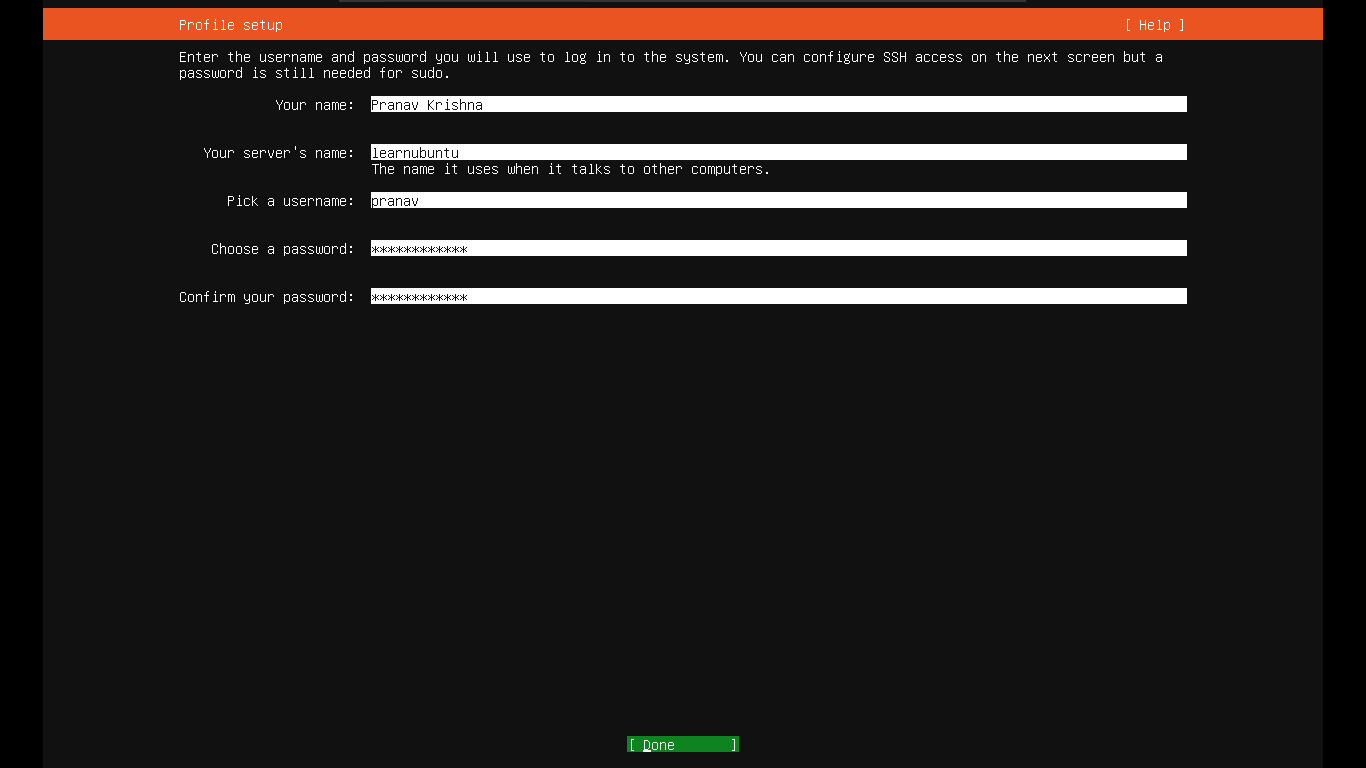
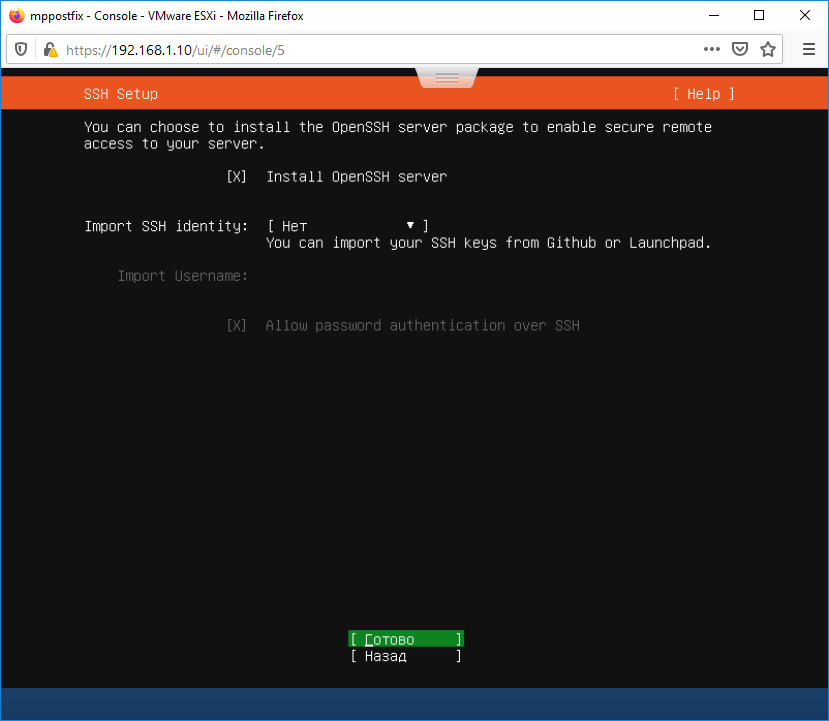
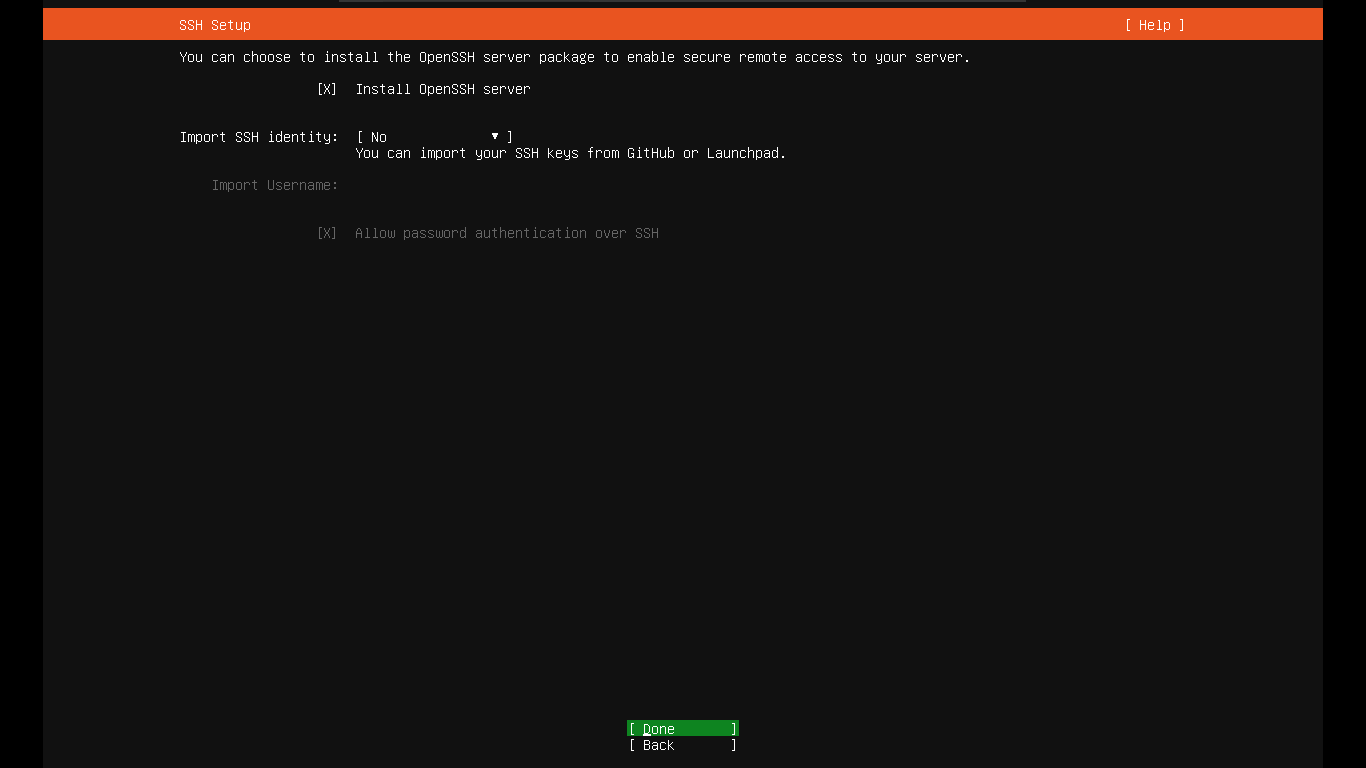
There’s an option to install OpenSSH in the installation wizard itself, which is actually a great thing.
Provided that you have the necessary set-ups, SSH access (aka Remote login) will come in handy. You can also choose to import already configured profiles here.
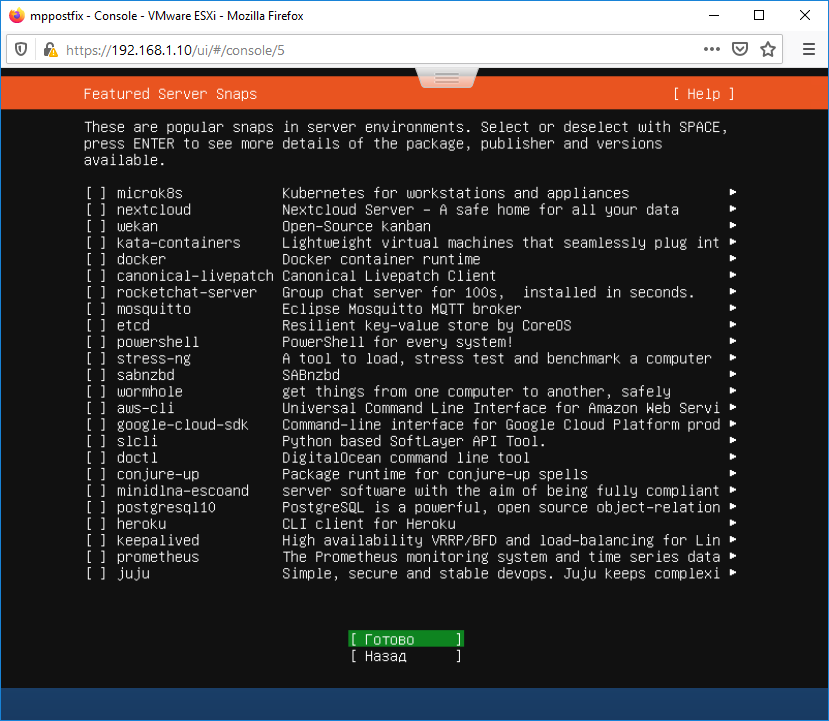
Miscellaneous software
Here are a few different utilities that you can choose to install here. It includes docker, next cloud, AWS, etc. Select the required ones and continue.
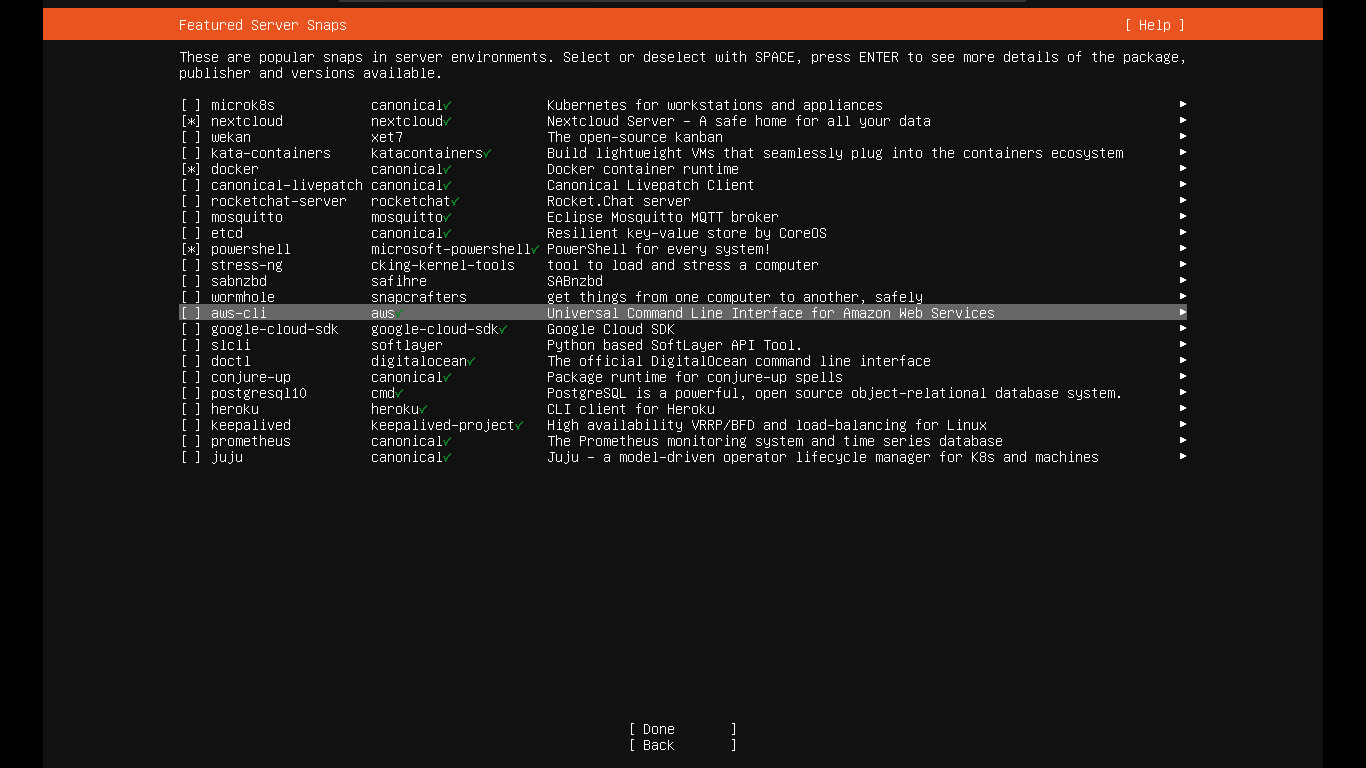
Note that the above-selected software will be installed as snap packages; you can skip this step if you will configure these packages differently.
Reboot!
The installation process is continuing in the background from the moment you confirmed. Once these steps are complete, the installer will check for and install the latest updates and hence you are good to go.
The installer should be manually rebooted at the same installation screen.
First boot and SSH
Upon reboot, the installation media (ISO file) is ejected automatically and you will be greeted with a TTY screen, where you can log in.

To connect via SSH, first, you’d have to know the IP address of the Ubuntu server:
Once done, you can use the ssh command in the following manner:
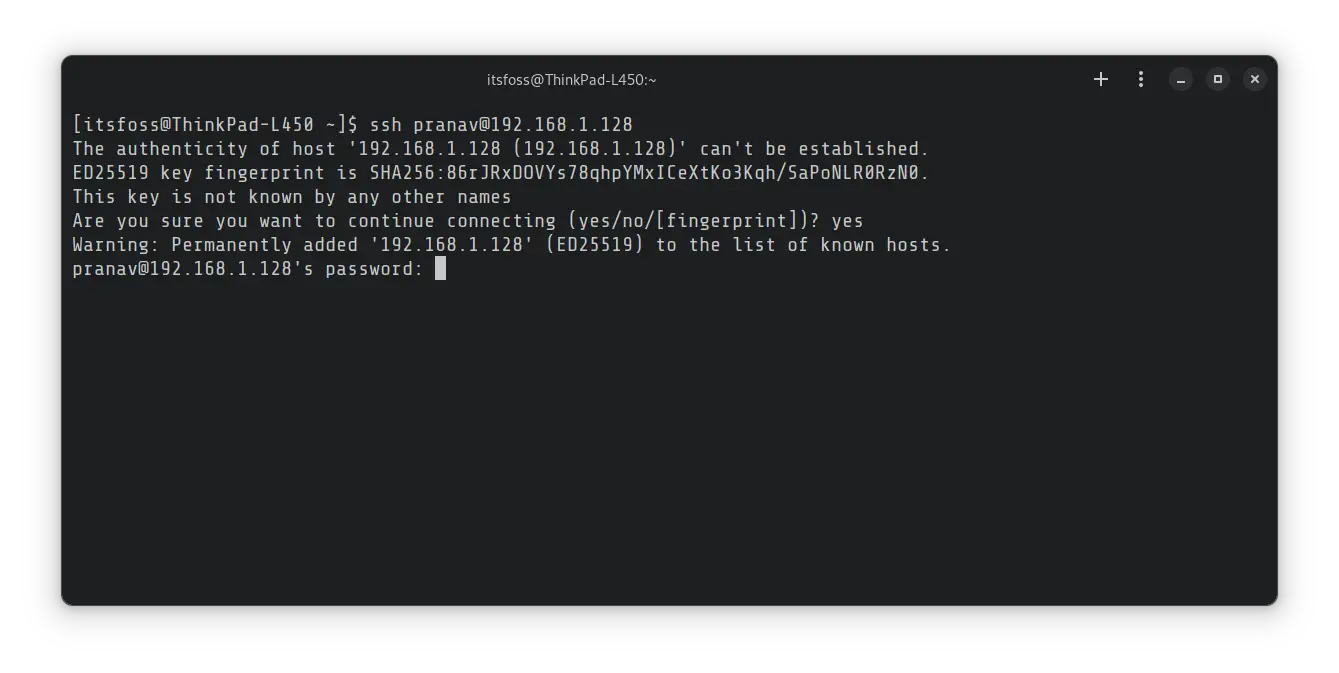

That’s all about the installation of the Ubuntu Server in VMware. Now with the bridged network configuration, you can access it via SSH, which requires the VM just to be running in the background without the output screen.
Want to enable live patching on the Ubuntu server?
Live patching means you can apply security patches even without rebooting your system.
Sounds super cool. Isn’t it?
To enable live patching, you can refer to our detailed guide:
Have any doubts? Feel free to drop a comment.