Как установить Kali Linux на VMware Workstation
В статье мы подробно расскажем, что такое Kali Linux и покажем, как проходит установка Kali Linux на VMware Workstation Player.
Что такое Kali Linux
Kali Linux — это дистрибутив ОС Linux. Его разработала американская компания Offensive Security, которая занимается тестированием на проникновение, информационной безопасностью и цифровой криминалистикой. Kali создавался для проекта по проведению тестов на безопасность. В основу его разработки легли такие проекты, как Auditor Security Collection и WHAX.
Kali создан на базе двух дистрибутивов: Debian и BackTrack. BackTrack — это ПО, специально созданное для тестирования безопасности и проведения цифровой криминалистической экспертизы. Первая его версия появилась в 2006 году в формате LiveCD. Уже через шесть лет, с появлением Kali Linux, BackTrack потерял свою актуальность.
В дистрибутив Кали входят такие программы, как Metasploit, Nmap, Aircrack-ng, Ettercap и сотни других приложений и инструментов для пентестинга. С помощью встроенных инструментов Кали можно:
- собирать информацию,
- анализировать уязвимости,
- тестировать беспроводные атаки,
- проводить стресс-тестирования,
- устраивать атаки паролем,
- делать обратный инжиниринг,
- проверять аппаратный взлом и другое.
Сейчас Kali Linux очень активно развивается, новые версии дистрибутива выходят раз в несколько месяцев.
Кому подойдет Kali Linux
Kali стал популярен благодаря сериалу «Mr. Robot» — в картине все взломы и тестирования проходят именно с помощью этой операционной системы. Фигурирование Кали в сериале вызвало резкий рост интереса к ОС среди обычных пользователей. Однако ОС не подходит для решения повседневных задач. Дело в том, что в Кали отсутствуют стандартные офисные программы и пользователь по умолчанию в ней root.
Kali Linux активно используют как добросовестные специалисты по информационной безопасности, так и хакеры и хакерские группировки. Кто чаще всего использует Kali Linux:
- сетевые администраторы поддерживают эффективность и безопасность сети, отвечают за конфиденциальность данных;
- сетевые архитекторы разрабатывают надежные и безопасные среды;
- пентестеры анализируют корпоративную среду на уязвимость и проводят аудит;
- разработчики сетевого оборудования используют дистрибутив для внутреннего аудита и проверки приложений;
- «этичные» хакеры (White Hat Hackers) находят и анализируют уязвимости в мирных целях;
- хакеры «в черной шляпе» (Black Hat Hackers) ищут слабые места и уязвимости системы, чтобы совершить атаки или другие мошеннические действия;
- частные специалисты используют дистрибутив в личных целях.
Кали Linux можно установить как с помощью ISO-файла, так и с помощью готового образа. В инструкциях ниже мы покажем оба способа настройки.
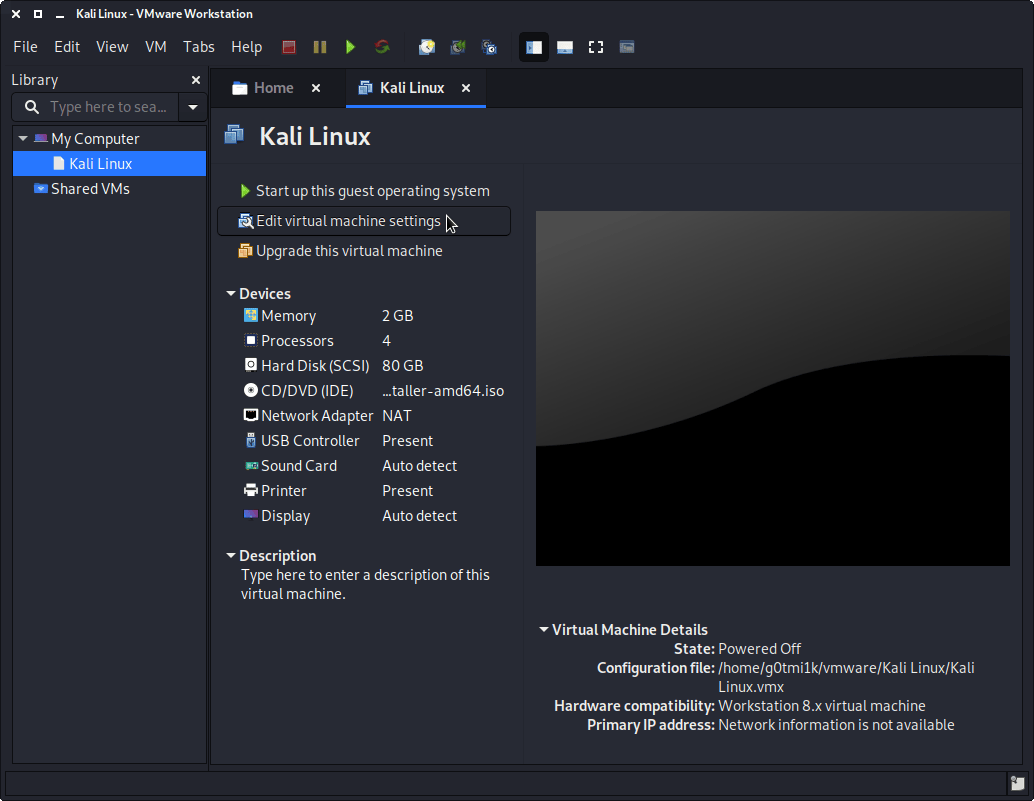
Как установить Kali Linux на VMware Workstation
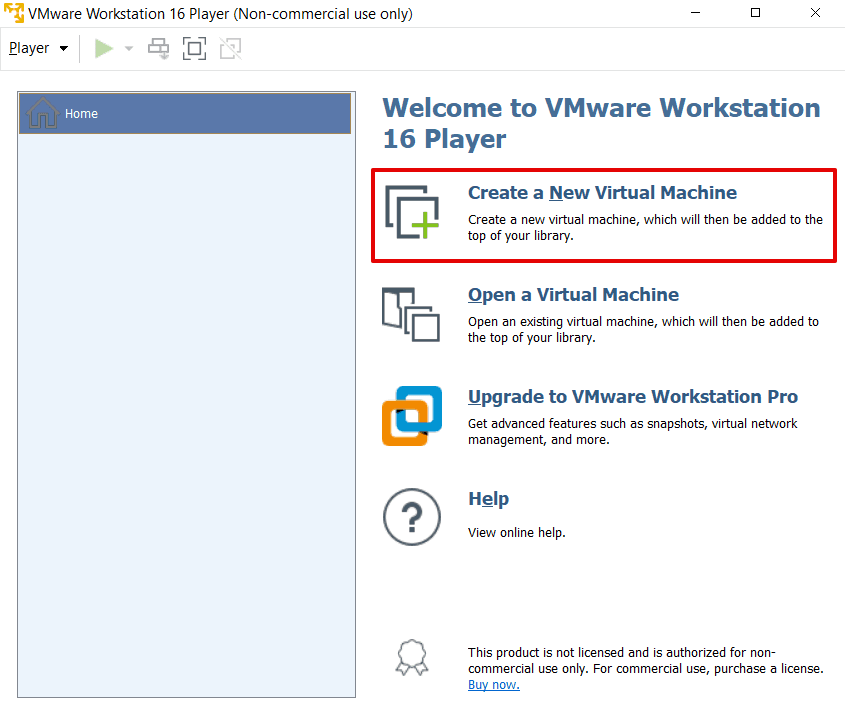
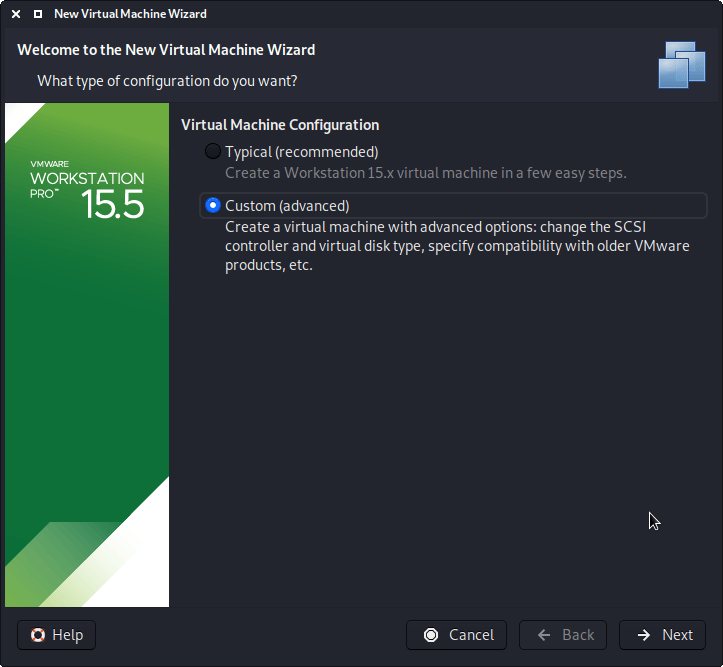
Запустите Workstation Player и нажмите Create a New Virtual Machine:
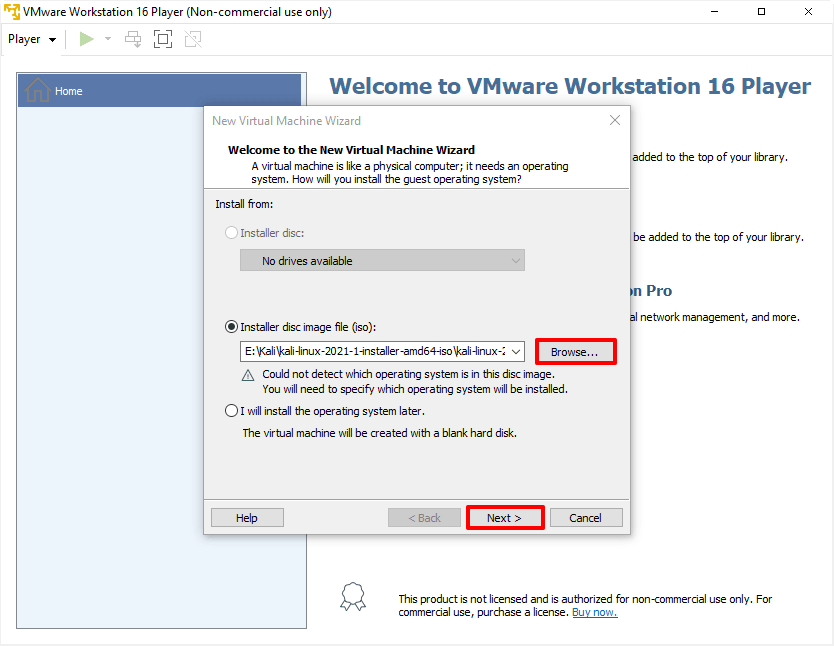
Нажмите Browse и в локальной папке компьютера выберите ISO-образ Kali Linux. После этого кликните Next:
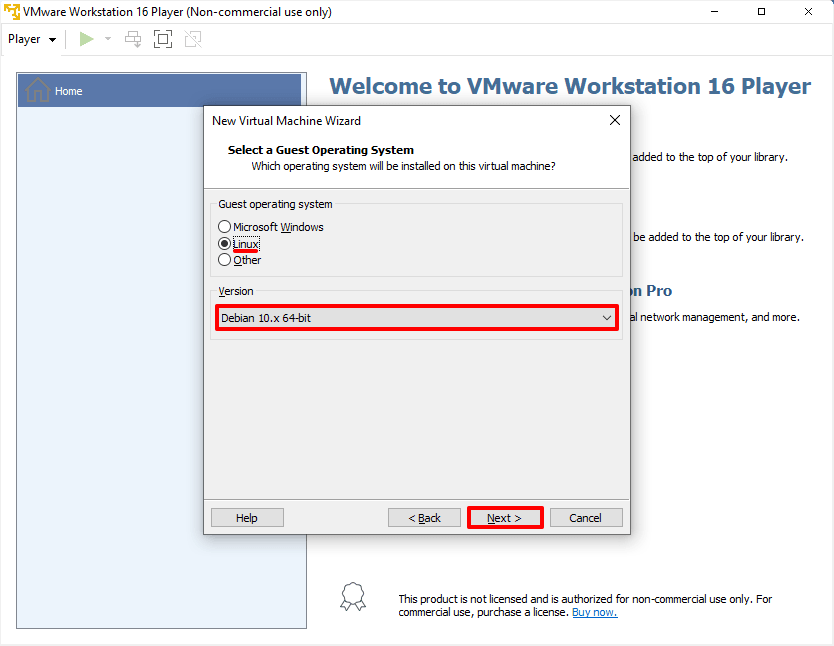
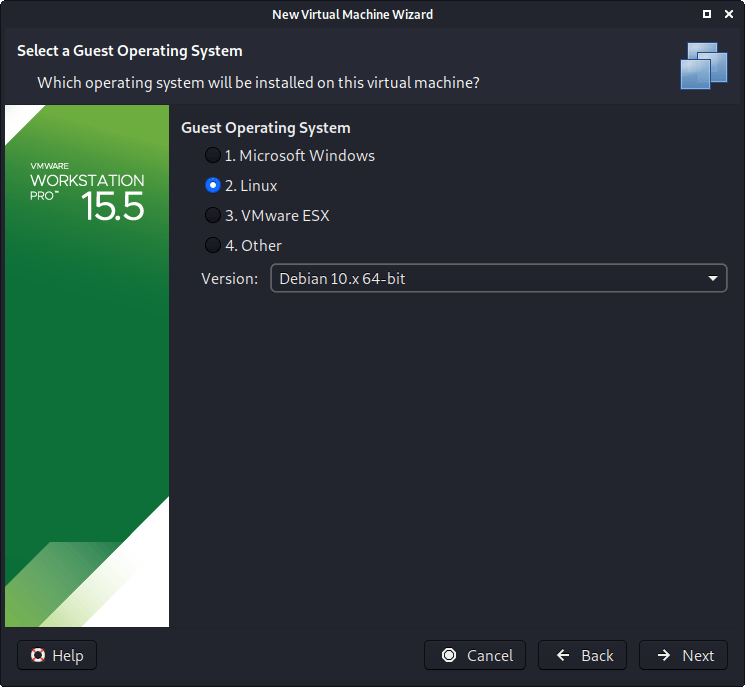
Кликните на строку Linux. Так как Kali Linux разработана на основе Debian, выберите в выпадающем списке Debian 10.x 64-bit и нажмите Next:

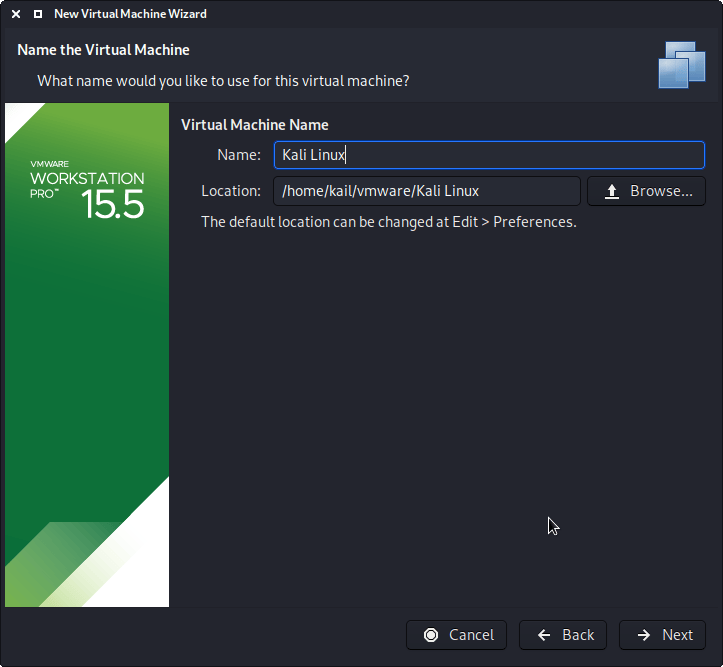
Введите имя виртуальной машины и выберите директорию для установки. Вы можете оставить параметры по умолчанию и нажать Next:
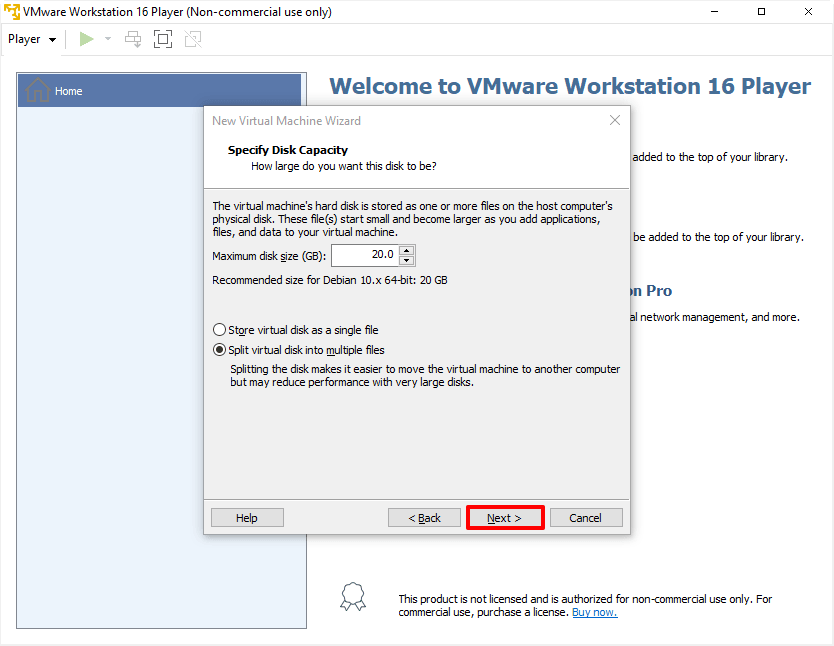
- Storage virtual disk a single file — в одном большом файле. Если не планируете переносить виртуальную машину на другие компьютеры, выберите этот тип;
- Split virtual disk into multiple files — в нескольких файлах меньшего размера.
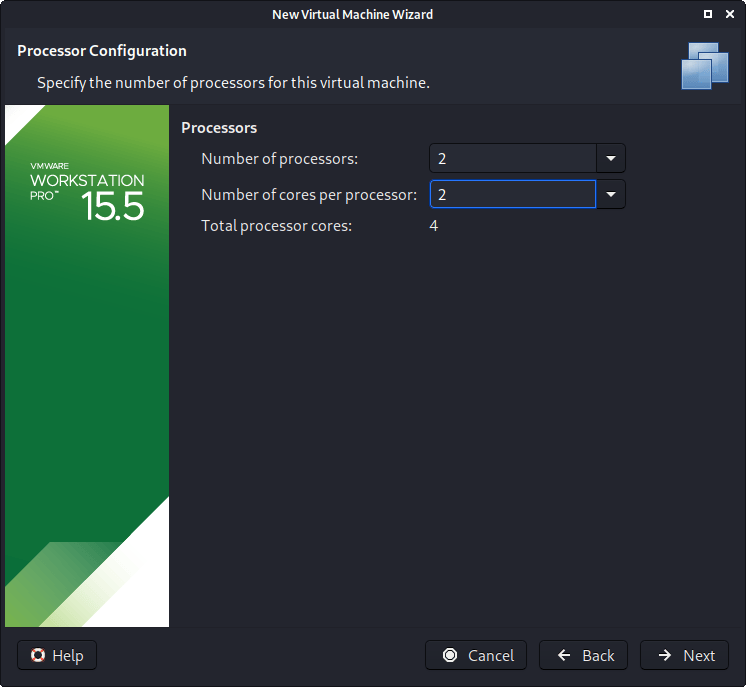
По умолчанию для виртуальной машины выделяется одно ядро процессора. Для лучшей производительности выделите как минимум два ядра. Для этого нажмите Customize Hardware: 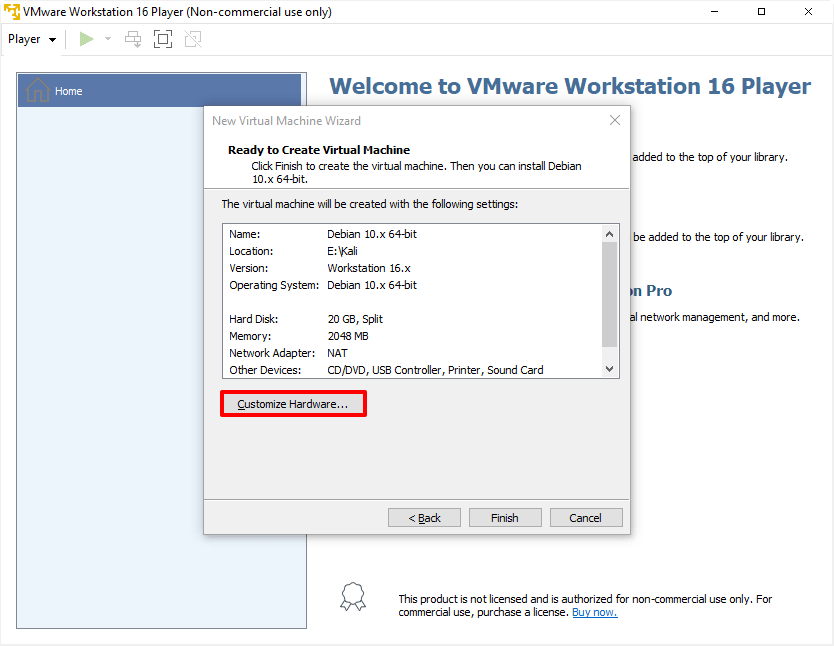 Затем нажмите Processors и в выпадающем списке «Number of processor cores» выберите значение 2. После этого кликните Close:
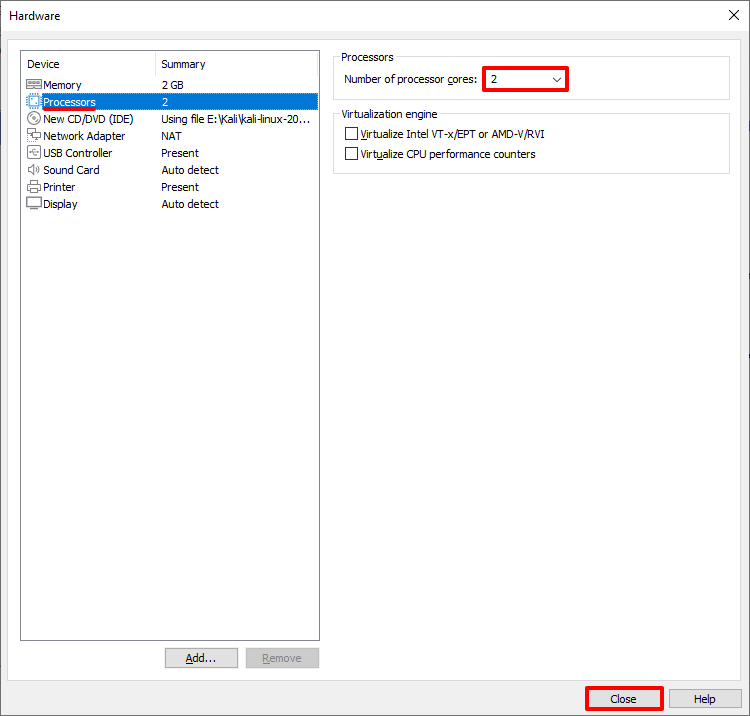

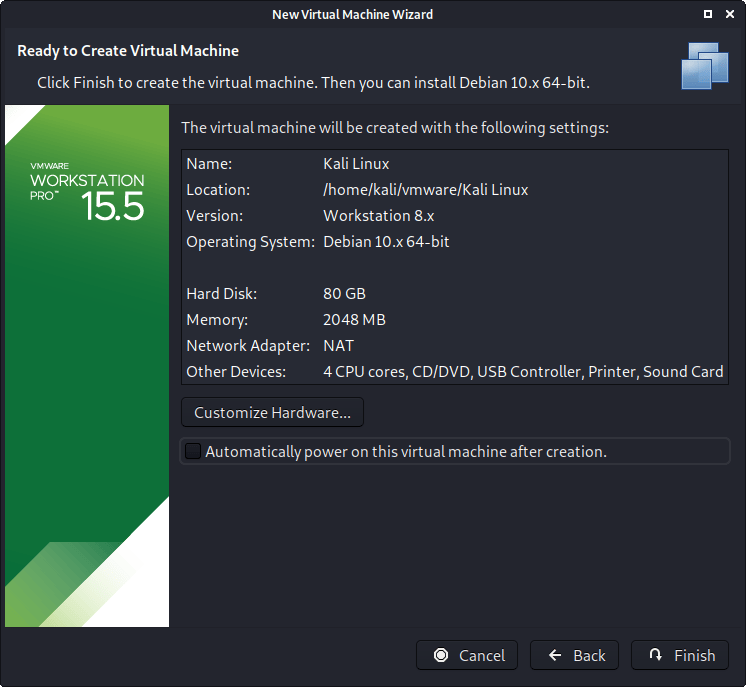
Чтобы завершить настройку, нажмите Finish:
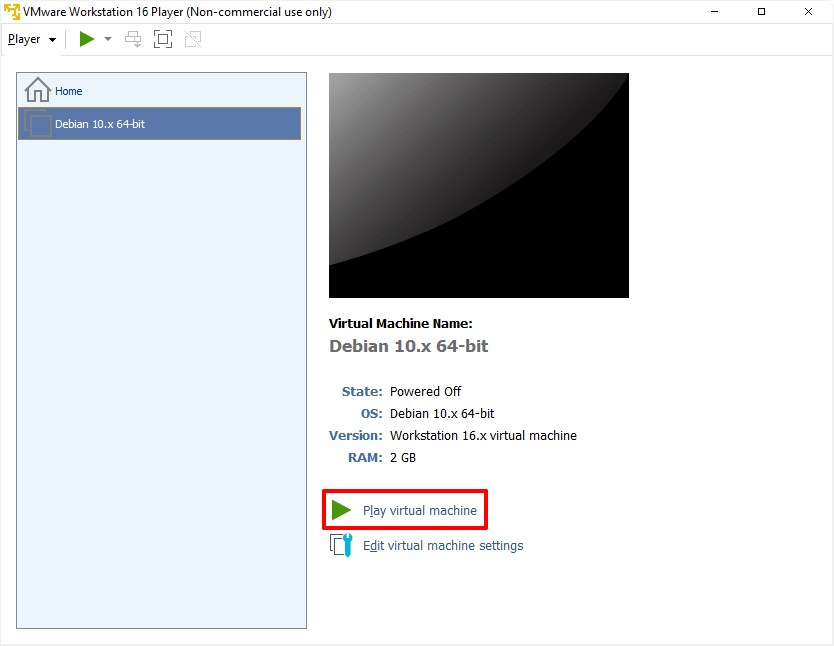
После этого запустите виртуальную машину:
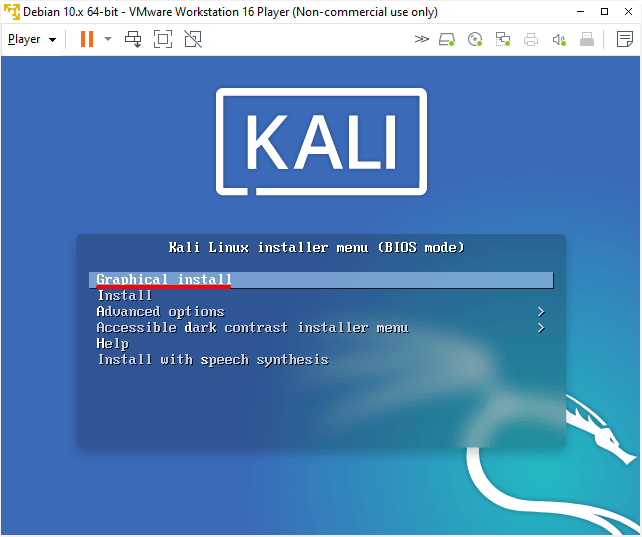
Нажмите Enter, чтобы выбрать установку с графическим интерфейсом. Это самый простой способ установки ОС без работы в командной строке:
Для завершения установки следуйте подсказкам системы. На последнем этапе виртуальная машина будет перезагружена.
Готово, установка завершена.
Как запустить готовую виртуальную машину Kali Linux на VMware Workstation
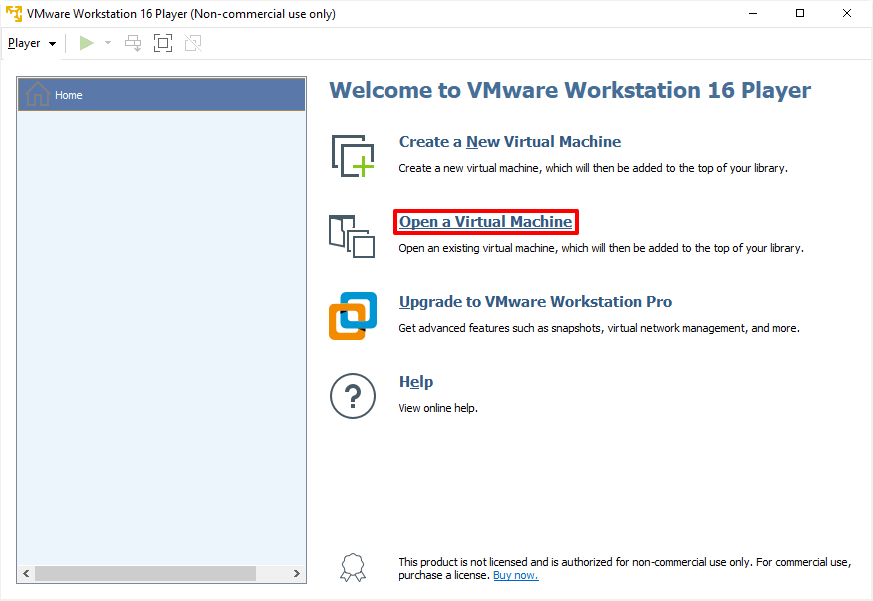
Запустите WMware Workstation Player и нажмите Open a Virtual Machine:
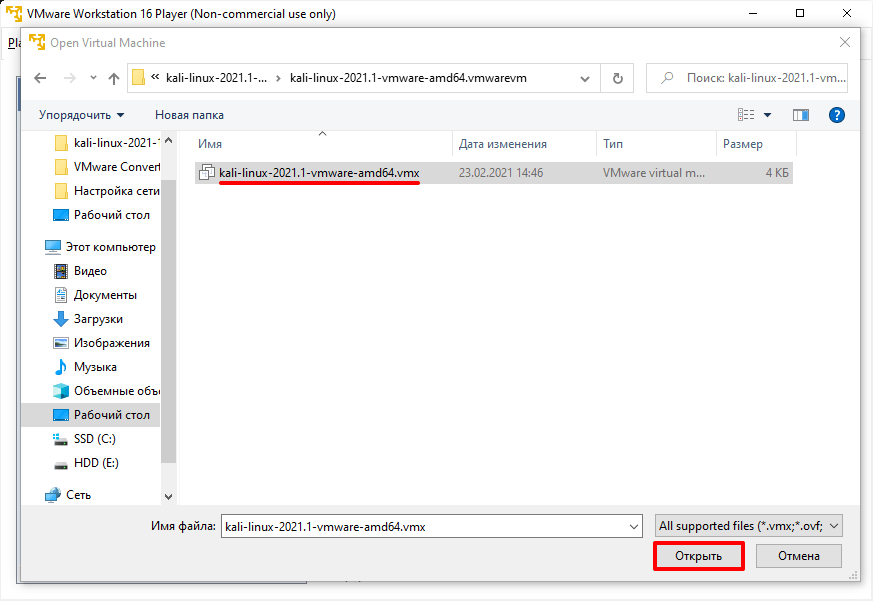
Откройте папку с файлами виртуальной машины, выберите файл в формате .vmx и нажмите Открыть:
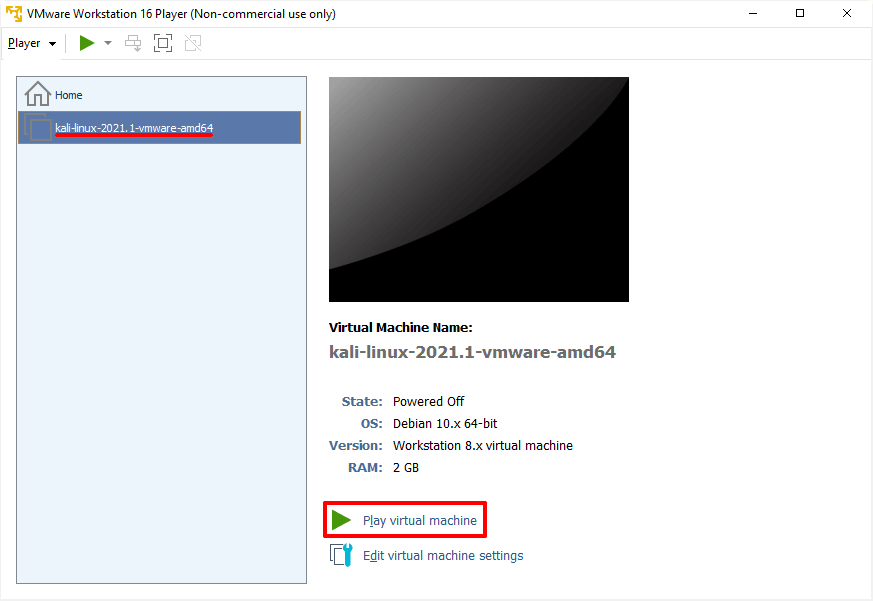
Виртуальная машина появится в списке. Запустите её:
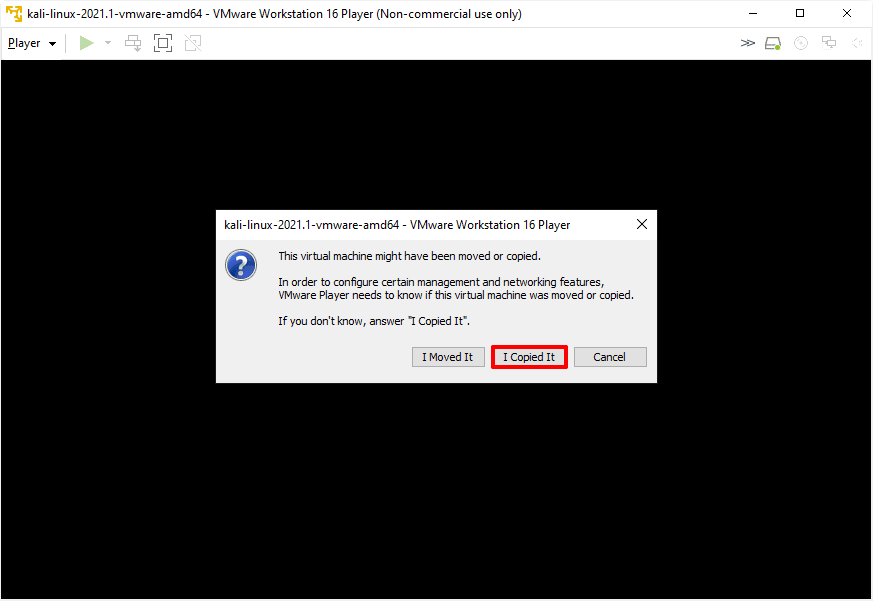
Нажмите I copied It и дождитесь загрузки операционной системы:
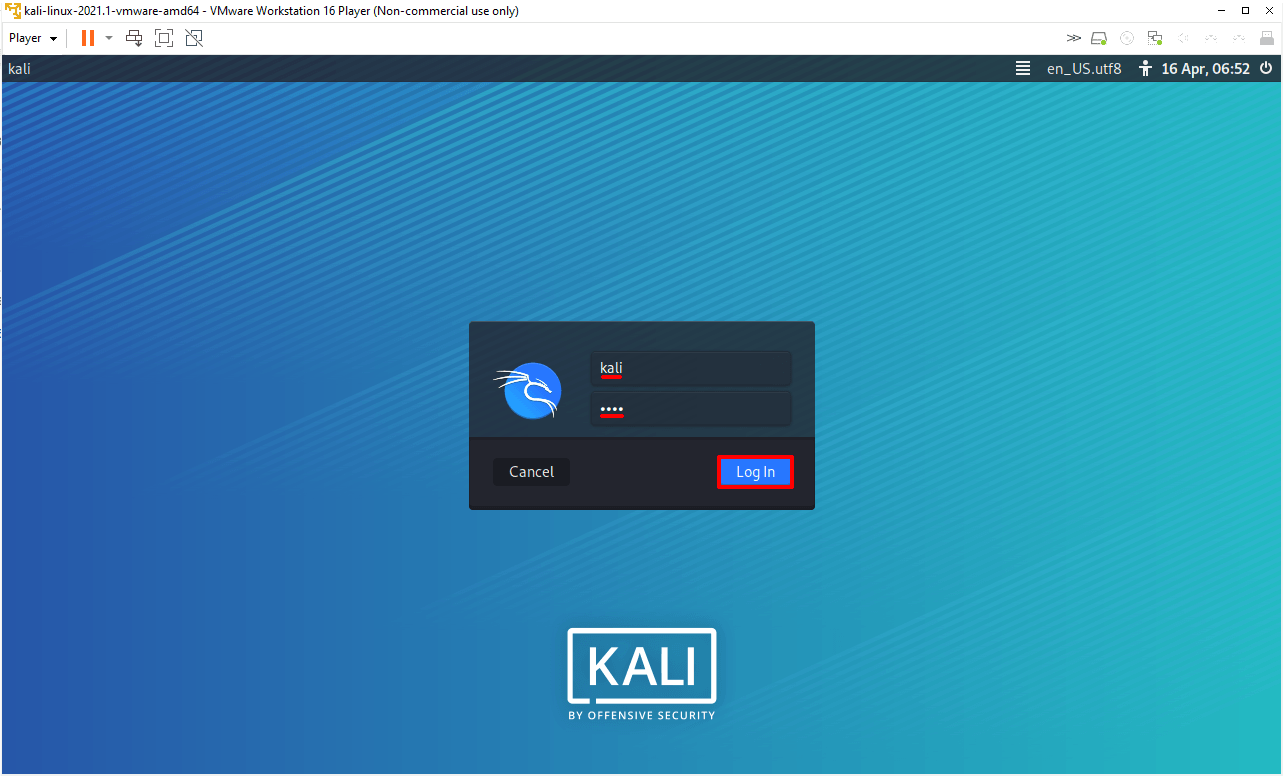
Затем нажмите Log In:
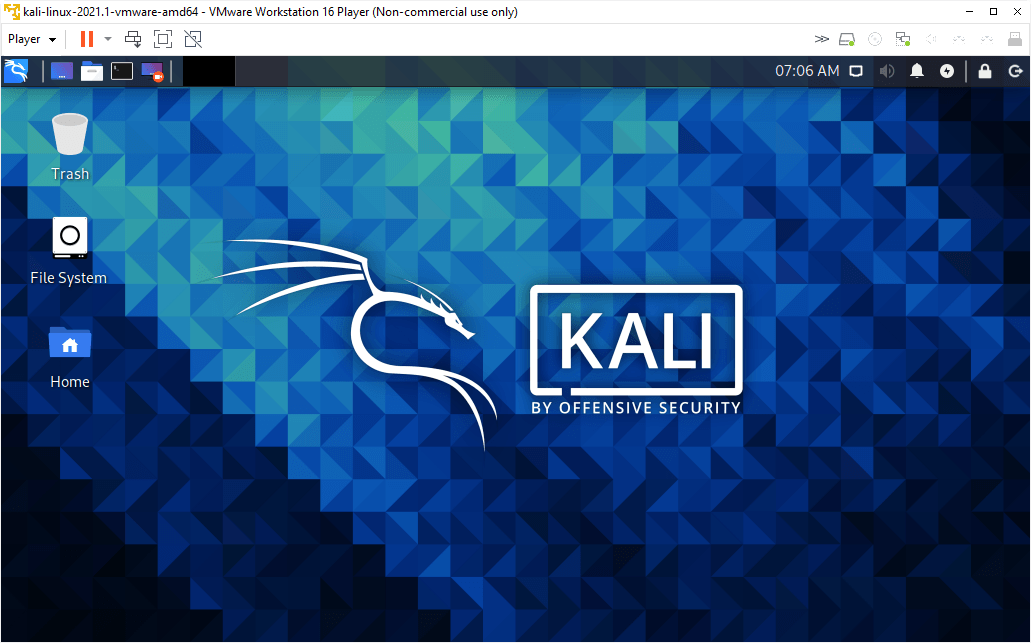
Готово, вы запустили операционную систему:
Теперь вы знаете, каким способом можно установить Kali Linux на VMware Workstation и сможете быстро создать виртуальную машину по одной из наших инструкции.
Vmware workstation кали линукс
This guide is about virtualizing Kali Linux inside of VMware, allowing you to have a Kali VM. This is a great way to use Kali, as it is completely separate from the host, allows you to interact with other VMs (as well as the host, and other machines on the network), and allows you to revert to snapshots.
If you are trying to install VMware on Kali Linux (as a host), please see our guide.
The guide below is what we use to generate our pre-made Kali Linux VMware images. You may alter this to your needs. We always generate the images using the latest version of VMware Workstation, as Player and Fusion don’t have the same level of functionally and controls over settings.
You will need to enable virtualization in your BIOS/UEFI for (e.g. Intel VT-x/AMD-V)
Wizard
Upon starting up VMware Workstation, select “Create a New Virtual Machine”.

When you have the option, select “Custom (advanced)” for the Virtual Machine Configuration, as this will allow us to have more control over the creation of the VM.
The next screen is “Virtual Machine Hardware Compatibility”, which we use “Workstation 8.x”.
This allows for more users to benefit from Kali Linux out of the box (without having to edit the .vmx file to downgrade). If you are using a later version of VMware than v8, upon start up, VMware will prompt about upgrading the VM. This will remove any limitations caused by older VMware profiles. However, most users do not have their Kali Linux VM using all these extra resources (see screenshot below), so they wouldn’t benefit from having the latest profile, which is why we ship with a older profile.

On this screen, we select the Kali Linux image to use to install from. We select “Browse”, and navigate to the location of the ISO that we downloaded. For more information on what image to download, we have written up a guide.
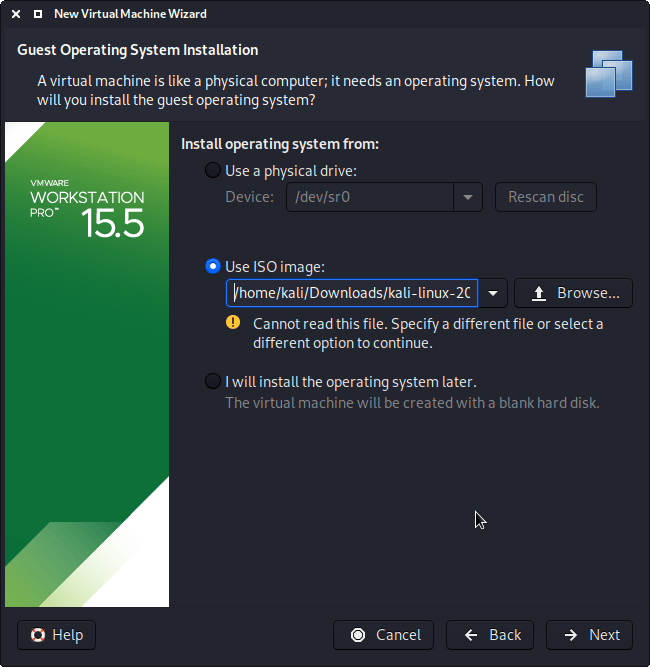
When you see the “Guest Operating System” screen, select “Linux”, and then the latest version of Debian for the version (as Kali is based on Debian). In this example, its Debian 10. We are going to be use the x64 image to install Kali, so we have selected 64-bit.
The next screen is “Virtual Machine Name”, which is where you name the VM. This name is also used as the filename (such as the configuration, hard disk and snapshot — which is not changed from this point).
We are keeping it generic in this guide, by using “Kali Linux” (as Kali Linux is a rolling distribution, and we update Kali Linux). However for our releases, we use the version number in the name as it is a fixed release ( kali-linux-YYYY.N-vmware-ARCH . Example: kali-linux-2023.2-vmware-amd64 ).
The next screen is “Processors”. Here we can start to define how many resources we give the VM. Kali will be able to perform more tasks simultaneously and quicker if it is allocated more resources. We select “2 processors” and “2 cores per processors”, giving a total of 4 cores. You may wish to use more or less depending on your system requirements.
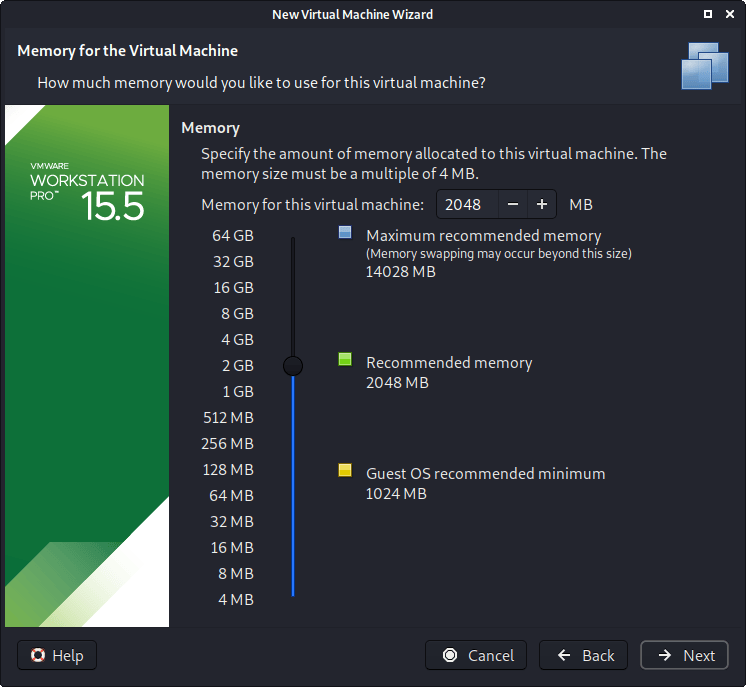
“Memory” is the next section, where we can define how much RAM to use. Again, the higher amount of RAM, the more applications can be open and at increased performance. Various tools inside of Kali can be demanding of resources. When we make the general VMs, we select 2GB (2048 MB) for RAM, but we often increase this for our personal machines as we have high-performing devices with spare RAM which Kali can utilize.
We are then presented with “Network Connection”. We default to using a NAT connection. However, this can easy be altered (even when the VM is powered on). This allows for Kali VM to talk to the Internet, as well as the rest of the LAN connection, without it taking up an additional IP address. The downside to this is it will not be able to receive reverse shells (without port forwarding inside of VMware).

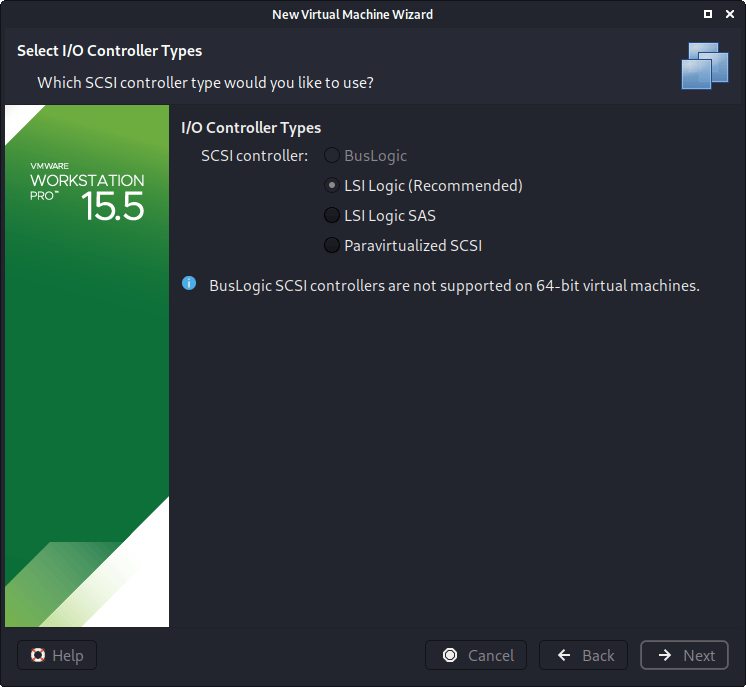
Next is “I/O Controller Types”. We accept the default value of “LSI Logic”.
Next is “Virtual Disk Type”. We accept the default value of “SCSI”

The following screen is “Disk”, which allows us to “create a new virtual disk”

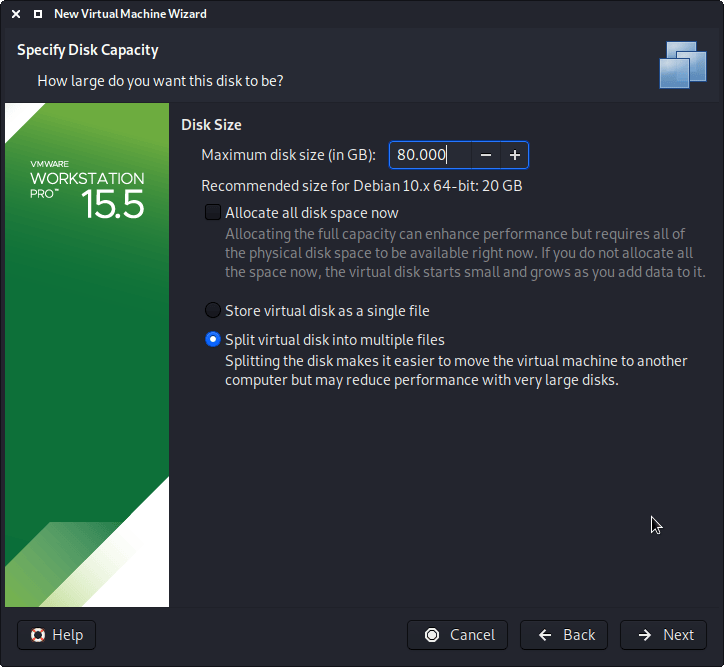
This screen below, “Disk Size”, allows us to define how large the virtual hard disk will be. We use “80 GB” for our VMs.
We also don’t have it in a single file, but instead “Split virtual disk into multiple files”. The VM hard disk will grow over time, to the maximum size, as we do not enable the “Allocate all disk space”.
It is possible to increase/decrease the hard disk after the VM has been created, however, if you have installed Kali, you’ll need to then also grow or shrink the partition for the space to reflect that.
When it comes to the “Disk File” screen, we accept the default value, which has been defined from our VM name earlier in the setup process.

We are then presented the final screen for the VM setup wizard, which gives us an overview of the settings we picked.
We are happy with what’s shown to us, so we then press “Finish”. If you try and “Customize Hardware” at this stage, before the VM is fully created, not every setting is visible.
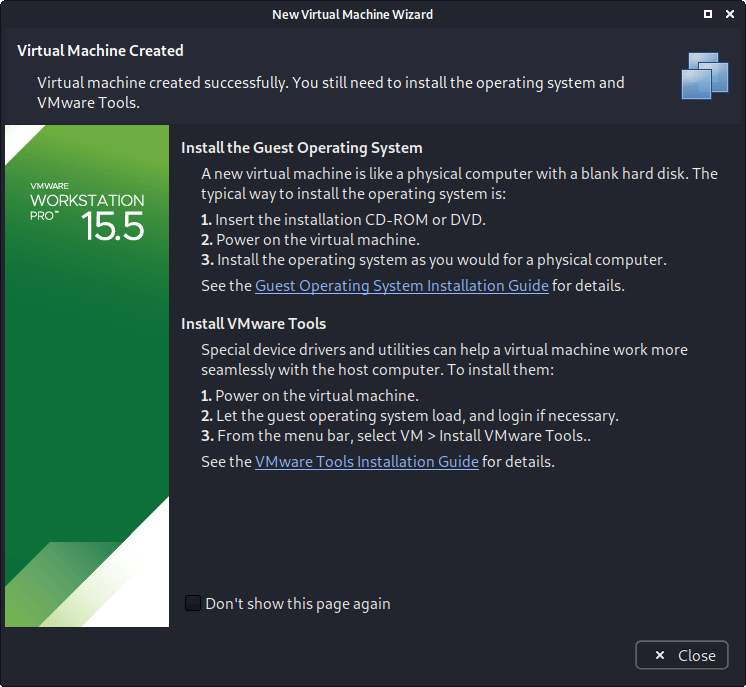
If this is the first time using the wizard, you may have the following prompt explaining how installing “VMware tools” will give you a better experience when using the VM.
After reading and understanding the page, you may wish to tick the “Don’t show this page again”, before pressing close.
Edit Settings
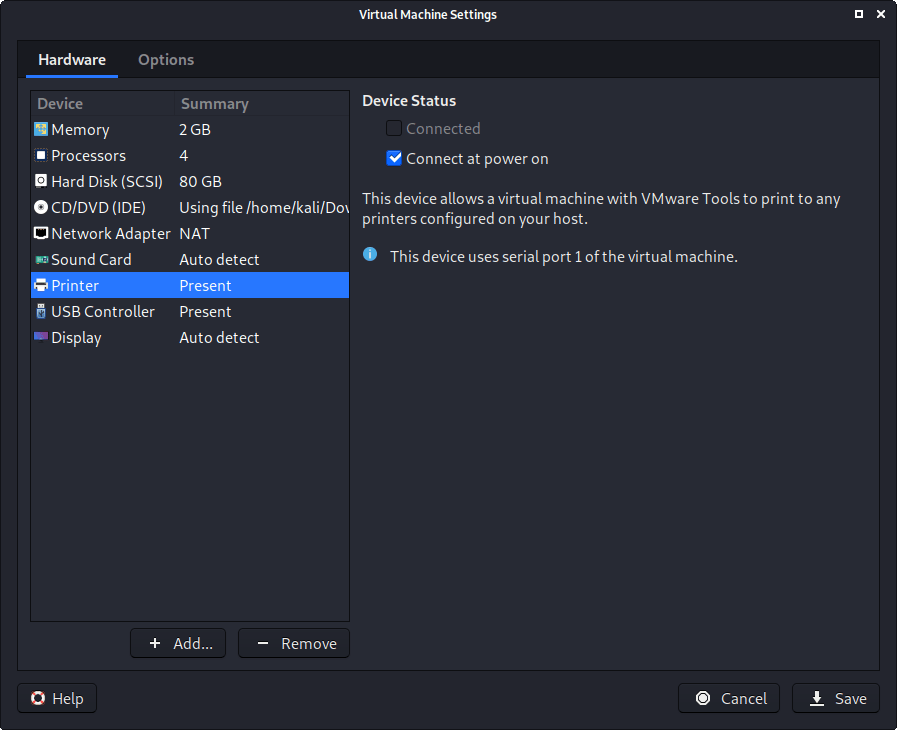
Before we start up the VM, we now edit its settings, by pressing “Edit virtual machine settings”.
We do not have a use for a printer, so we remove it. Navigate to the “Printer” section, and then press “Remove”.
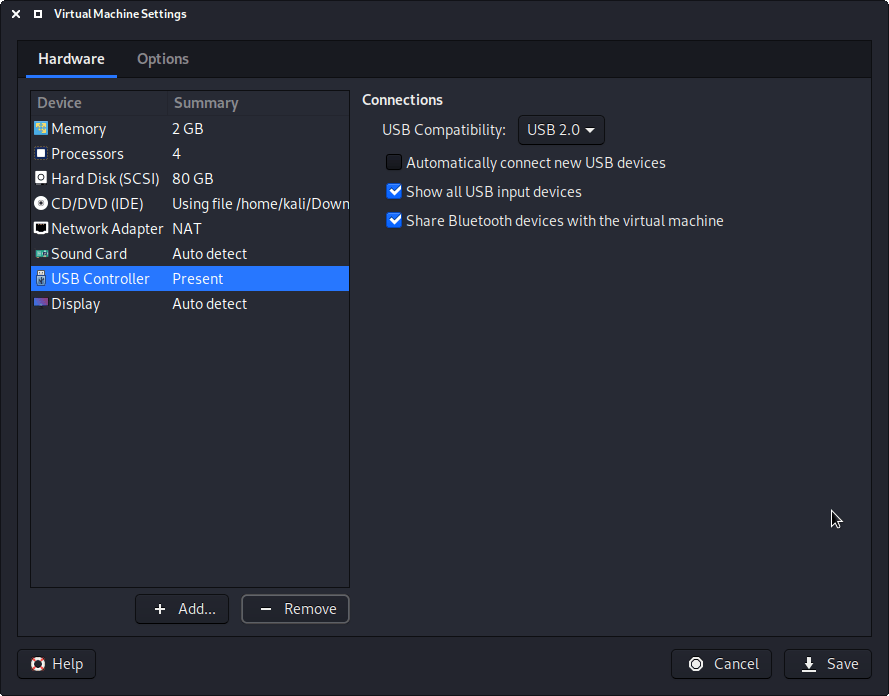
You may wish to edit the “USB” settings to alter how USB devices behave. Here we have disabled “Automatically connect new USB devices” (may not have the option depending on your VMware version) and enabled “Show all USB input devices”.
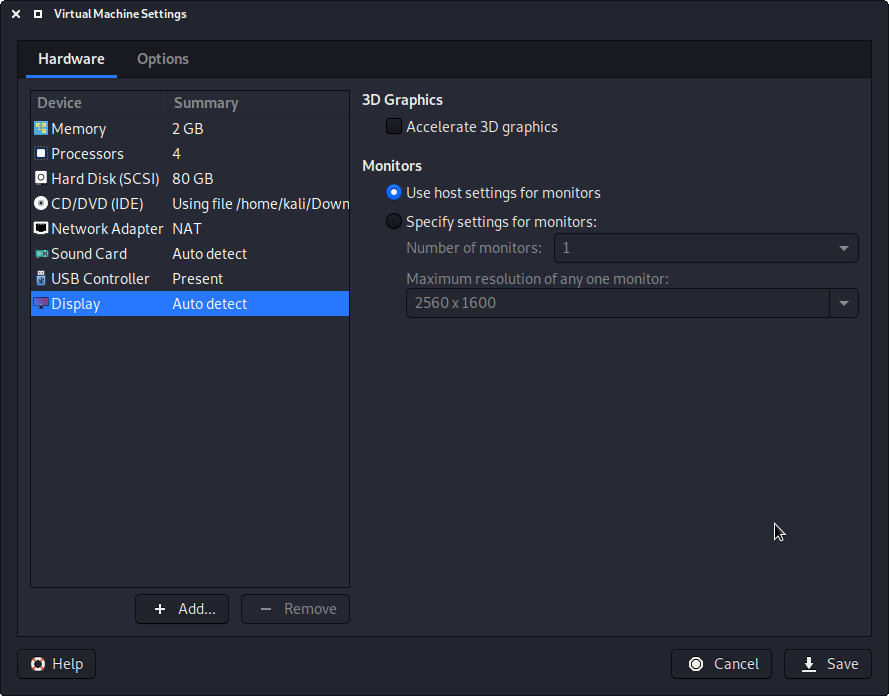
Another item to point out is in the “Display” section. Make sure that “Accelerated 3D graphics” is disabled, as people have reported that causes issues.
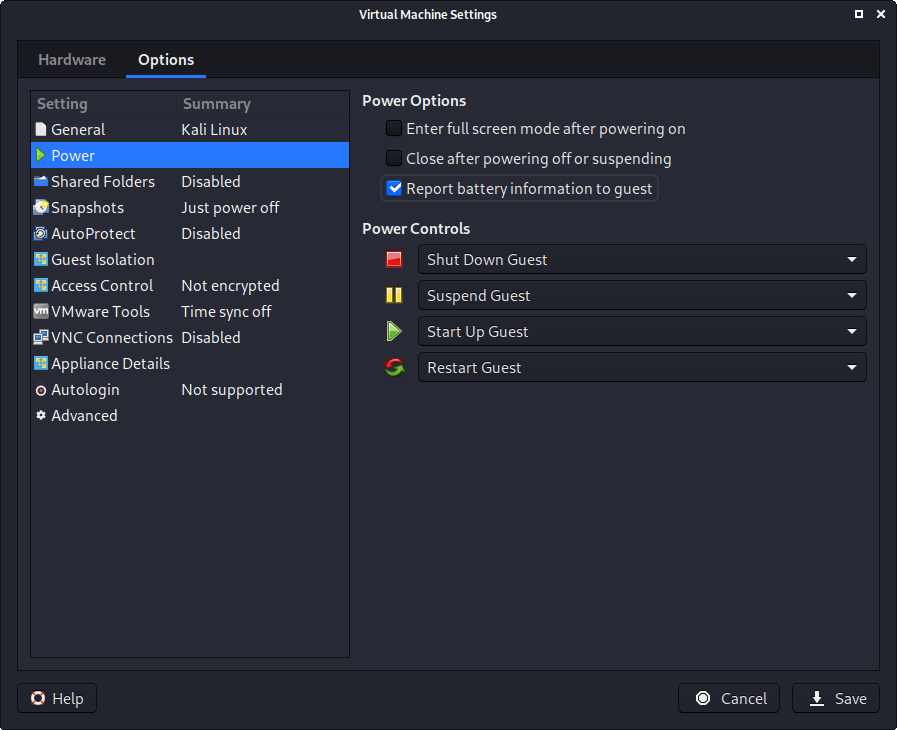
We then move over to the “Options” tab, and move down to “Power”. We choose to enable “Report battery information to guests”, as it is a handy thing for users who use Kali on a laptop/notebook.
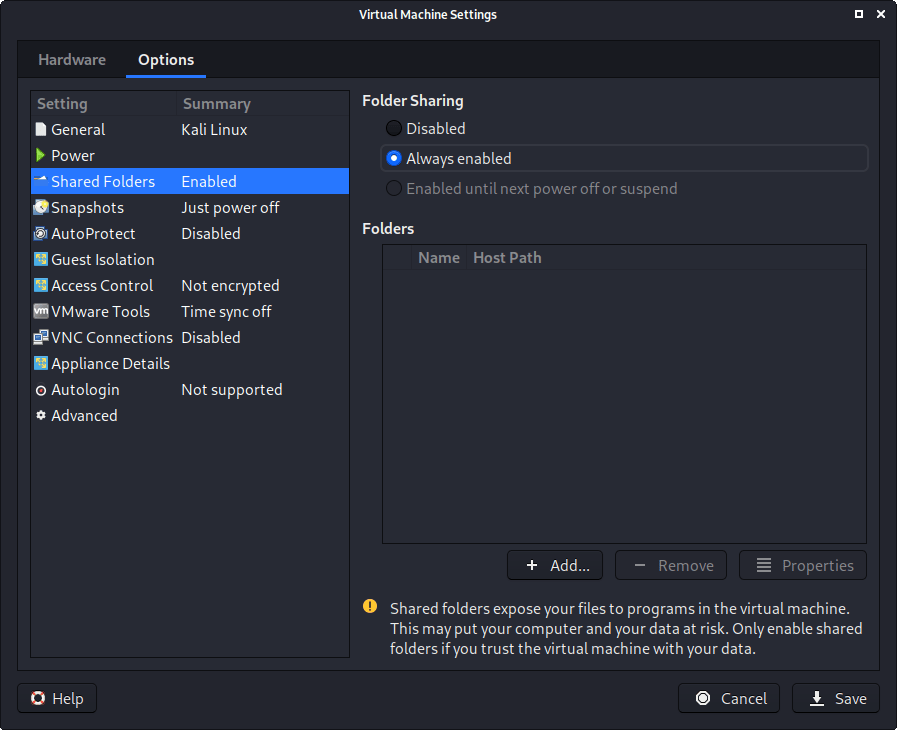
In “Shared folders”, we select “Always enable”. At this stage, do not share any paths, as some users may not wish for it.
The final option we alter is “VMware Tool”, where we enable “Synchronize guest time with host”.

After all this is done, we save, start up the VM, and then continue installing Kali Linux as we normally would for a bare metal install.
During Kali Linux setup process, the install wizard should detect if its inside a VM. If it is, should then automatically install any additional tools (such as open-vm-tools ) to give a better user experience. If you want to manually re-install it, you can see our VMware Guest Tools Guide.
Updated on: 2023-May-30
Author: g0tmi1k