- How to configure VPN on Linux
- Content
- What is a VPN?
- What are the benefits?
- Your data is encrypted
- Mask your IP address
- Access restricted content
- Avoid internet speed throttling
- Access office computer
- How to configure VPNs on Linux
- VPN software (DEB, RPM, sh, etc.)
- OpenVPN
- Cisco AnyConnect VPN
- SSL-VPN
- L2TP/IPsec
- Troubleshooting
- Conclusion
- Configure a VPN
- Configuring an OpenVPN connection
- Configuring a WireGuard connection
- Configuring a VPN programmatically
How to configure VPN on Linux
Everyone wants to have secure and private access to the Internet and using a VPN is one of the ways to achieve that. In this article, you will learn how to configure the most popular VPN protocols on Linux (OpenVPN, Cisco AnyConnect, SSL-VPN, L2TP/IPsec)
Content
- What is a VPN?
- What are the benefits?
- Your data is encrypted
- Mask your IP address
- Access restricted content
- Avoid internet speed throttling
- Access office computer
- VPN software (DEB, RPM, sh, etc.)
- OpenVPN
- Cisco AnyConnect VPN
- SSL-VPN
- L2TP/IPsec
- Troubleshooting
What is a VPN?
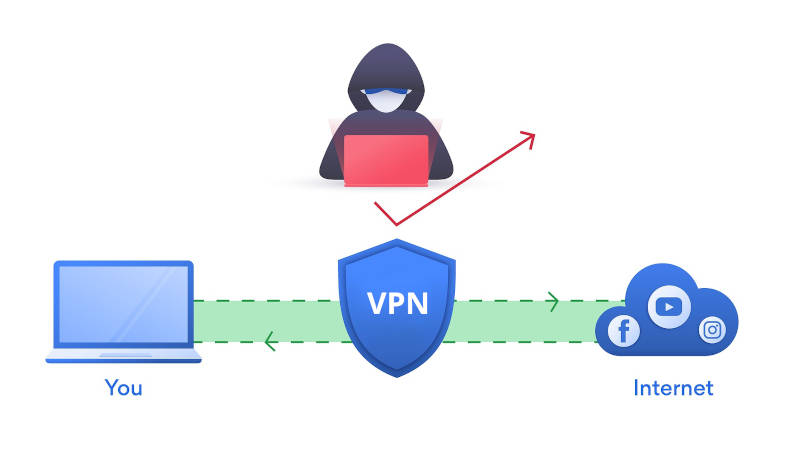
A VPN (Virtual Private Network) is software that encrypts your data and moves it through a “tunnel” between your computer and a remote network. This makes your data secure and safe when you are connected to any network online because your computer is not directly exposed to the Internet. It is shielded by a remote network to which you connect with the VPN software.
What are the benefits?
Using a VPN can be very beneficial, even for those who think one is not needed. It bears several benefits.
Your data is encrypted
When you are connected to a public network, any information is at risk to hackers. Bank details, personal information, and more can be at risk if you are not protected. Some internet service providers (IPS) are not fair and may collect and sell your internet activity data. By using a VPN, you encrypt all the traffic going to and from your computer and thus protect yourself from these issues.
Mask your IP address
When you use a VPN, your IP address is not known to the Internet, because all your activity looks like it goes from the IP address of your VPN instead of your real IP. This may be extremely useful if you need to protect your identity.
Access restricted content
Certain websites restrict access to their content only to local users. For example, many media websites have such restrictions and you may not be able to access them when you are abroad. I showed how you can fix this issue by using the IP settings in the TOR browser. Using a VPN is a more elegant solution because there is no connection slow-down as in TOR. Many VPN services provide an option to select an IP of any country. So, you may pretend that you access a website from within a country but in fact, you are located outside of it.
Avoid internet speed throttling
Besides selling your data, your internet service provider (IPS) may also be unfair and may throttle or slow down your internet connection when you use too much bandwidth. There are several ways to check if your connection is throttled Using a VPN allows avoiding the monitoring by IPS and thus speed throttling.
Access office computer
You may also need to configure a VPN to be able to connect to your office computer or your work server. Office computers are often protected by the corporate network firewall, and you won’t be able to connect to them directly. You first need to connect to that corporate network using VPN software and only then to your computer/server. Recently many of us started to work remotely, and if configuring a VPN on Linux doesn’t look easy, this tutorial must help you.
How to configure VPNs on Linux
There are many versions of VPNs and they require different settings to make them work. We will have a look at the most common ways to configure VPN on Linux and we will focus on the programs that are available in Linux default repositories and enable VPN connection through the graphical network manager. Our goal is to see an established VPN connection using different VPN protocols. An example of the network manager icon that indicated working VPN in GNOME and KDE:
VPN software (DEB, RPM, sh, etc.)
Many VPN services provide a software package or a script that you download and install to get their VPN configured automatically. This is the easiest way to get a VPN working Unfortunately, these packages and scripts may not work equally well on all Linux distros because they are usually tailored only for the most popular Linux distros.
OpenVPN
OpenVPN is one of the most popular software to set up a VPN service. It is open-source software that is used by many businesses. You can even use OpenVPN to set up your own private VPN server.
Most Linux distros have OpenVPN pre-installed and you can find it in the Network settings. If you do not see the OpenVPN option in your network manager, you need to install it:
sudo apt install openvpn network-manager-openvpn network-manager-openvpn-gnomeAfter the installation, open the OpenVPN settings:
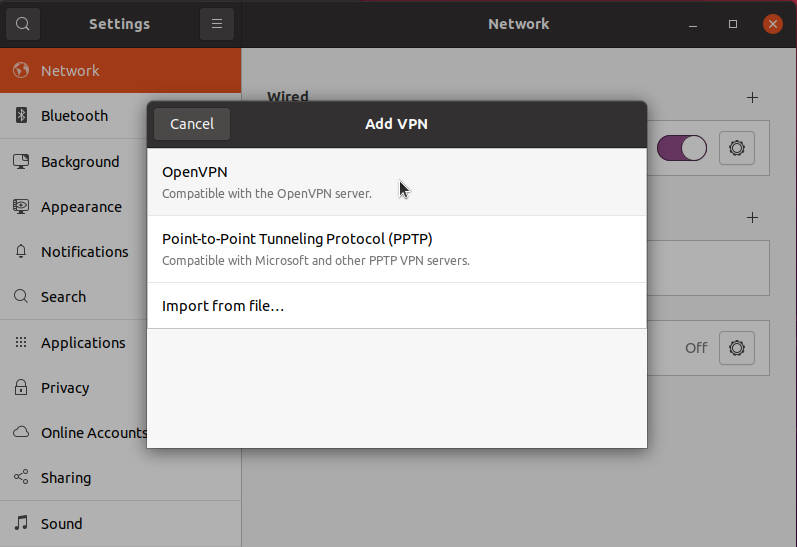
Settings -> Network -> add a new VPN -> OpenVPN
And add your VPN credentials. Depending on how your OpenVPN server is configured, you need to use different authentication methods:
- Certificates (TLS)
- Password
- Password with Certificates (TLS)
- Static key
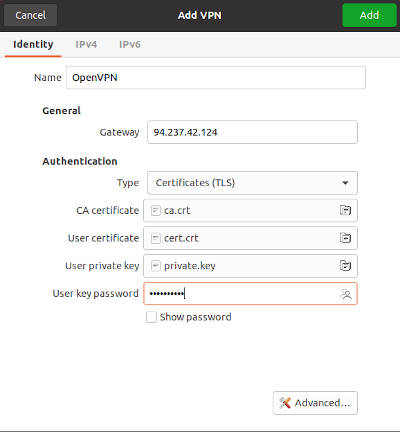
I used the Certificates (TLS) method when I set up my private OpenVPN server, so I download all the certificates and keys and specify them this way:
Alternatively, if you have the OpenVPN.ovpn configuration file (file name may be different), you can import it and all the settings will be extracted from it automatically:
Settings -> Network -> VPN -> Import from file…
However, the import option doesn’t work correctly all the time, you can also open the OpenVPN.ovpn configuration file with a text editor and copy-paste the credentials to the network manager.
Cisco AnyConnect VPN
Cisco AnyConnect VPN is another popular VPN software that is used by many businesses and institutions. Often they require you to install Cisco proprietary software that will run on your computer and connect you to the Cisco AnyConnect VPN:
However, you do not need to install it to be able to connect to the Cisco AnyConnect VPN. Actually, I have had problems with installing the Cisco AnyConnect proprietary client on some computers. I prefer to have more control over my system and use open-source software when possible. Luckily, there is an open-source protocol that is compatible with Cisco AnyConnect. Just install OpenConnect:
sudo apt install openconnect network-manager-openconnect network-manager-openconnect-gnomeAfter the installation, go to the VPN settings:
Settings -> Network -> add a new VPN -> OpenConnect (Cisco AnyConnect)
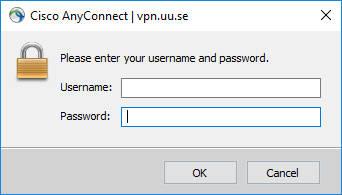
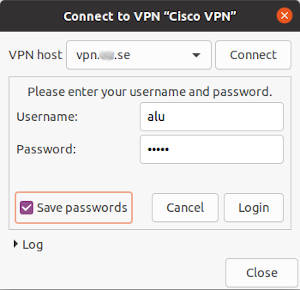
Add the VPN address of your Cisco AnyConnect VPN provides to the Gateway and try to connect. You are likely to see this log-in window, where you enter your username and password:
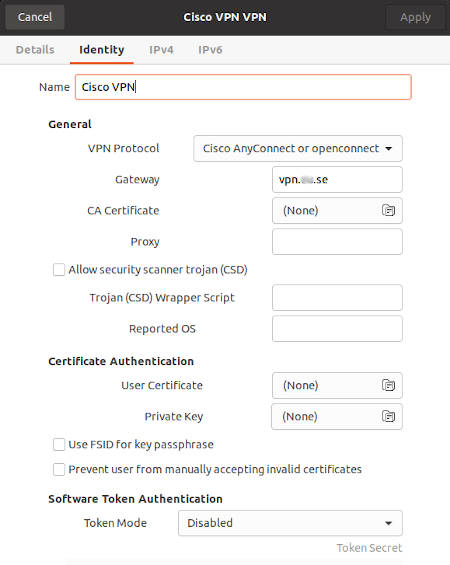
If your Cisco AnyConnect VPN configuration also requires setting up certificates and scripts, you can add them in the settings window:
SSL-VPN
I also have experience working with organizations that use an SSL-VPN (Secure Sockets Layer Virtual Private Network). The documentation on the VPN configuration stated that it was necessary to download and install FortiClient. I prefer to avoid installing third-party software and search for build-in Linux tools to configure an SSL-VPN. Turned out, it exists and it is straightforward to install and configure.
First, install fortisslvpn packages:
sudo apt install network-manager-fortisslvpn network-manager-fortisslvpn-gnomeThen, open its settings and configure it:
Settings -> Network -> add a new VPN -> select Fortinet SSLVPN (fortisslvpn) -> configure using your VPN account credentials
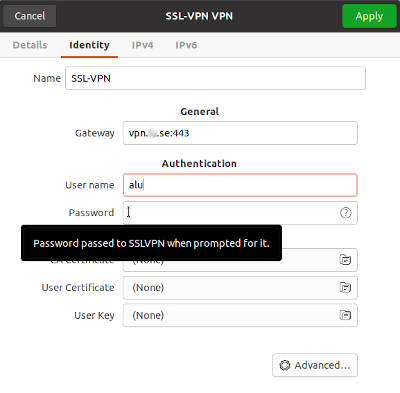
Usually, you only provide the address/gateway and the user name. You are prompted to enter your password when you try to connect.
L2TP/IPsec
L2TP/IPsec (Layer 2 Tunneling Protocol) is one more protocol of a VPN connection. I use it only occasionally as a backup VPN when the SSL-VPN connection doesn’t work. Its configuration on Linux is similar to other VPNs.
sudo apt install network-manager-l2tp network-manager-l2tp-gnomeSettings -> Network -> add a new VPN -> select VPN (l2tp) -> add the L2TP credentials -> IPsec Settings -> _add the IPsec credentials
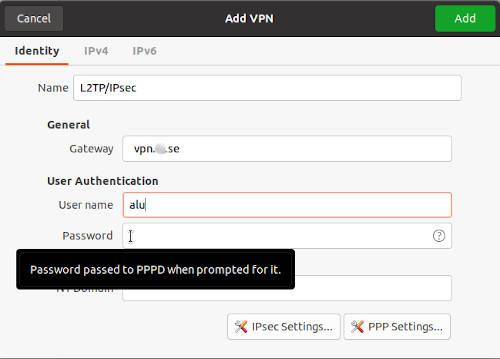
An example of the L2TP settings:
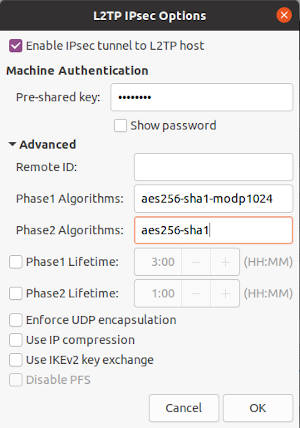
An example of the IPSec settings:
Troubleshooting
Most VPN services are simple and straightforward to configure on Linux. You usually need only provide these settings:
- Name: Whatever you want to call your VPN
- Gateway: It is a web address or IP of your VPN. Sometimes you also need to provide a port number like this: vpn.somewebsite.com:443 .
- User name: your VPN account username. If your username is your email, try to use only the username without @somewebsite.com .
- Password: Usually you can enter and save a password during the configuration in the network manager. But for some VPN, you only enter the user names and you are prompted to type the password when you try to connect.
- Keys and certificates: many VPNs require to add keys and certificates to be able to establish a connection. Make sure you have downloaded and added to your configuration all the keys and certificates from your VPN provider. If you cannot find where to add them, check the “Advanced” setting for that VPN connection.
Finally, I have highlighted only the graphical configuration of a few VPNs, but all VPNs can also be configured and tested in the command line. If you have trouble establishing a VPN connection with GUI, try the command-line way. Here, is an example how to configure VPN in the command line on Linux.
Conclusion
Unfortunately, very few organizations provide clear instructions on how to configure a VPN on Linux. Often you have to follow the instructions for Windows and Mac and guess how to adapt them to Linux. However, almost any VPN can be configured on Linux. There was no VPN which I was not able to make work on Linux. I’ve shared my experience of configuring a VPN on Linux. If you have experience configuring other VPN protocols on Linux, please share it in the comments below. Also, if you have problems configuring a VPN on Linux, please comment below and we will try to help you.
Average Linux UserFollow I am the founder of the Average Linux User project, which is a hobby I work on at night. During the day I am a scientist who uses computers to analyze genetic data.
Configure a VPN
VPN support requires both the use of core22 and network-manager from a 22/* channel. Currently, two types of VPN are supported:
Configuring an OpenVPN connection
Network Manager supports two methods to create an OpenVPN connection:
- import an OpenVPN credentials file
- set required parameters manually with nmcli invocations
In both cases, files used in the definition must be copied to folders where the network-manager snap has access, which is usually in SNAP_DATA or SNAP_COMMON folders.
The first method requires only that the OpenVPN configuration file is copied to one of these locations:
sudo nmcli c import type openvpn file /var/snap/network-manager/common/myopenvp.ovpnThis command needs to be run as root because it creates certificate and key files with data extracted from the configuration file. These need to be accessible by the network-manager snap, which itself runs with root id.
Using the second method requires copying around certificates and keys and creating/modifying the connection as required. For instance:
nmcli c add connection.id vpntest connection.type vpn \ vpn.service-type org.freedesktop.NetworkManager.openvpn \ ipv4.never-default true \ ipv6.never-default true \ +vpn.data ca=/var/snap/network-manager/common/creds/server_ca.crt \ +vpn.data cert=/var/snap/network-manager/common/creds/user.crt \ +vpn.data cert-pass-flags=0 \ +vpn.data cipher=AES-128-CBC \ +vpn.data comp-lzo=adaptive \ +vpn.data connection-type=tls \ +vpn.data dev=tun \ +vpn.data key=/var/snap/network-manager/common/creds/user.key \ +vpn.data ping=10 \ +vpn.data ping-restart=60 \ +vpn.data remote=: \ +vpn.data remote-cert-tls=server \ +vpn.data ta=/var/snap/network-manager/common/creds/tls_auth.key \ +vpn.data ta-dir=1 \ +vpn.data verify-x509-name=name:access.isConfiguring a WireGuard connection
The recommended way to configure a WireGuard connection is to place a configuration file in a folder readable by the network-manager snap, such as SNAP_DATA or SNAP_COMMON folders, and to import the configuration with a command similar to the following:
nmcli c import type WireGuard file /var/snap/nm-vpn-client/common/wg.confAs with an OpenVPN connection, it is also possible to create a WireGuard connection using only nmcli with multiple parameters. Unfortunately, configuring peers in this way is not currently possible (see WireGuard in NetworkManager).
Configuring a VPN programmatically
To create a VPN connection programmatically, that is, from another snap, the user snap must define a content interface. The connection must have a slot that connects to the vpn-creds plug defined in the network-manager snap.
Once connected, any files necessary for the connection can be placed into the directory shared by the content interface. This folder is seen by the Network Manager snap /var/snap/network-manager/common/creds , which means that file path configuration also needs also use this prefix. After that, a connection can be created using Network Manager’s dbus interface where a connected network-manager plug is required.
