- How to Install Apache 2.4 on Arch Linux
- Disabling Indexes
- User Directories
- Virtual Hosts
- Want to contribute?
- How to Install Apache Web Server on Arch Linux
- How to install Apache Web Server on Arch Linux
- Conclusion
- How to Install LAMP Stack with PhpMyAdmin in Arch Linux
- Step 1: Update Arch Linux System
- Step 2: Install Apache in Arch Linux
- Step 3: Install PHP in Arch Linux
- Step 4: Install MySQL in Arch Linux
- Step 5: Secure MySQL in Arch Linux
- Step 6: Configure Apache in Arch Linux
- Step 7: Testing Apache in Arch Linux
- Welcome to LinuxShellTips
- Step 8: Install PhpMyAdmin in Arch Linux
How to Install Apache 2.4 on Arch Linux
If you are using a firewall, you will need to enable incoming TCP traffic to port 80 .
Start Apache, and make it start after every boot:
# systemctl enable --now httpd Test that Apache is running. Visit http://YOUR-SERVER-WEB-ADDRESS-OR-IP , and you will see a page showing «Index of /». Run ip addr if you need to know the IP address.
Apache’s configuration file is /etc/httpd/conf/httpd.conf . Although Apache is started by the root user, User http makes it immediately switch to running as this user for security reasons. DocumentRoot «/srv/http» sets where it will look for web files. CustomLog «/var/log/httpd/access_log» common sets where accesses to Apache that are successful will be logged. ErrorLog «/var/log/httpd/error_log» sets where accesses to Apache that error will be logged.
Disabling Indexes
By default, if Apache is given a directory that it does not find an index file with an extension it’s configured to use, it will automatically generate an index showing the directory’s contents. This can be considered a security vulnerability. To disable it, edit /etc/httpd/conf/httpd.conf and within , from Options , delete Indexes . Once restarted, Apache will give an «Access forbidden!» error message, unless a file like /srv/http/index.html exists.
User Directories
By default, a user’s ~/public_html/ directory will be shown at http://YOUR-SERVER-WEB-ADDRESS-OR-IP/~USERNAME/ . But, the user http must have executable bit access to the user directory and its public_html directory:
$ mkdir ~/public_html $ chmod o+x ~/ $ chmod o+x ~/public_html Additionally, the user http must have read access to individual files. If necessary, run the following command:
If you want to disable user’s public_html directories from being on your web server, regardless of directory and file permissions, comment this line (add # to the beginning) in /etc/httpd/conf/httpd.conf :
Include conf/extra/httpd-userdir.conf Virtual Hosts
You can host multiple domain names from the same Apache server, and serve them different content.
Create a folder to hold your virtual host configurations:
Create a configuration file for each virtual host, such as /etc/httpd/conf/vhosts/YOUR-DOMAIN-NAME.com :
ServerAdmin webmaster@YOUR-DOMAIN-NAME.com DocumentRoot "/srv/YOUR-DOMAIN-NAME.com" ServerName YOUR-DOMAIN-NAME.com ServerAlias YOUR-DOMAIN-NAME.com ErrorLog "/var/log/httpd/YOUR-DOMAIN-NAME.com-error_log" CustomLog "/var/log/httpd/YOUR-DOMAIN-NAME.com-access_log" common Require all granted Make the virtual host serving directory:
# mkdir /srv/YOUR-DOMAIN-NAME.com At the end of /etc/httpd/conf/httpd.conf , include each of these virtual host configuration files:
Include conf/vhosts/YOUR-DOMAIN-NAME.com Requests Apache receives to YOUR-DOMAIN-NAME.com will be served out of /srv/YOUR-DOMAIN-NAME.com . Note requests to Apache not matching a specific ServerName or ServerAlias , just the IP address, or another domain name resolving to your IP, will still be served out of the first virtual host that is included. That said, you should still consider anything in the general DocumentRoot , which defaults to /srv/http , to be somehow accessible.
Want to contribute?
You could earn up to $600 by adding new articles.
How to Install Apache Web Server on Arch Linux
![]()
Linux-based systems primarily use Apache as the Web Server. Clients request content from web servers that is displayed using any browser. For instance, a user enters a URL in the address bar of the browser. It is a web server that takes the input and processes it to get the relevant information for a client.
Apache is open-source and has a flexible structure which allows extra functionality as well. A volunteer community of developers maintains Apache, and anyone can download/use it easily. Keeping in view the importance of Apache, this article provides the installation of Apache on Arch Linux.
How to install Apache Web Server on Arch Linux
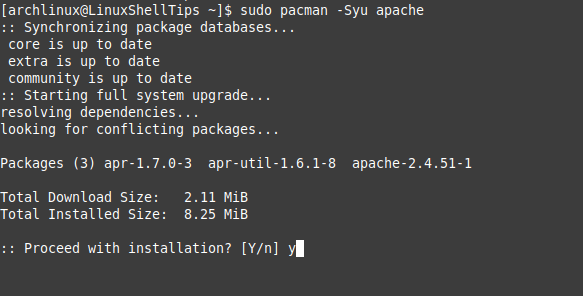
Apache Web Server is available on the official repository of Arch Linux. So, one can install it using the Arch package manager named “Pacman”.
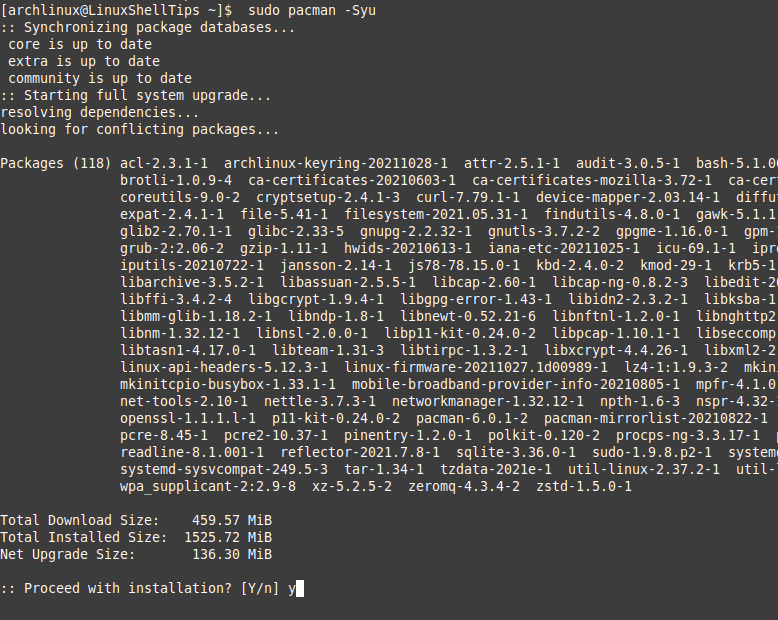
Step 1: Before installing, synchronize and update the system’s database via the following command.
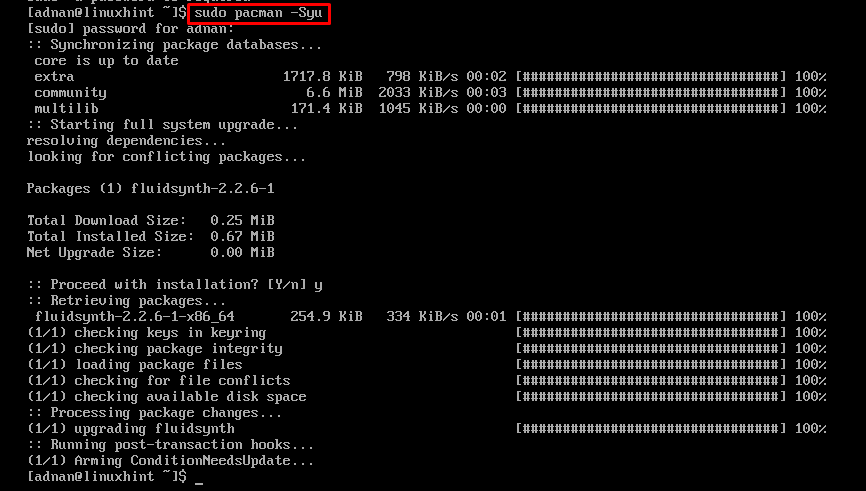
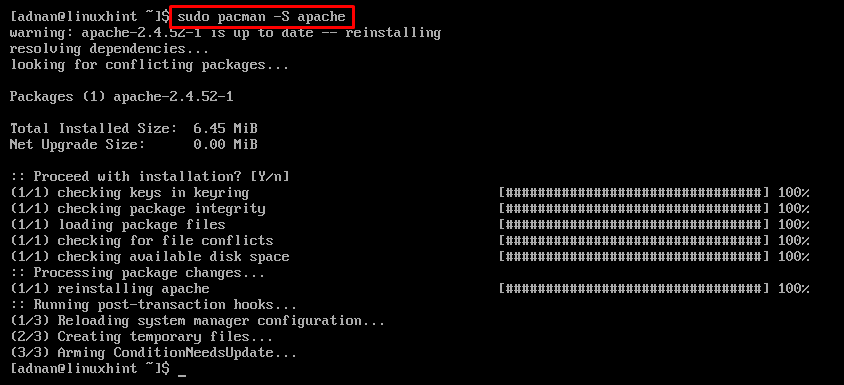
Now, install the Apache Web Server on Arch Linux by issuing the following command.
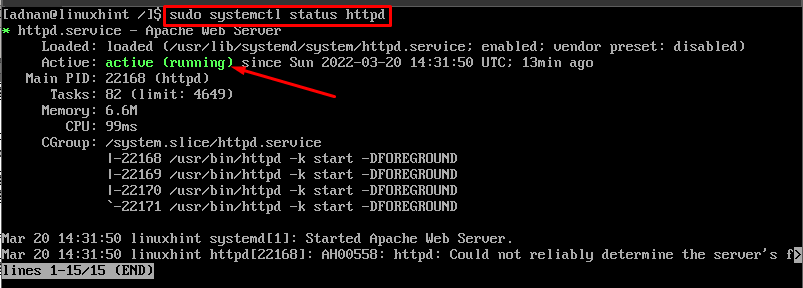
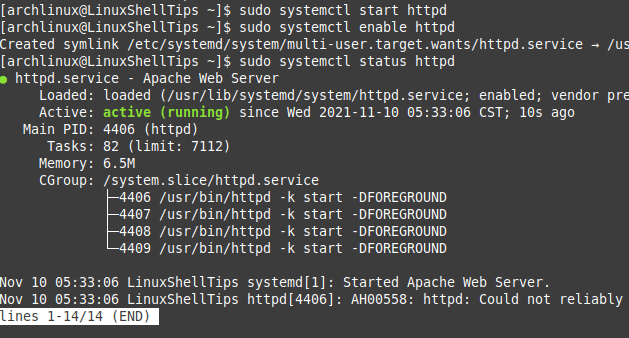
Step 2: The apache service is associated with httpd and it must be enabled for the proper working of apache.
$ sudo systemctl enable httpd
$ sudo systemctl restart httpd

After doing so, get the status of Apache service via the following command.
Note: If step 2 does not work or testing cannot be performed. After successful installation, edit the following file
Uncomment the highlighted line as shown below.
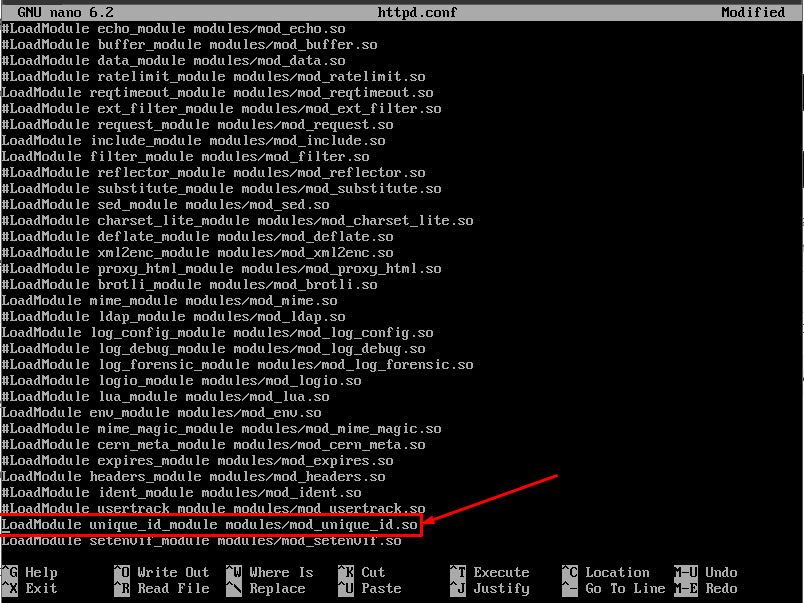
After doing so, check the status of the Apache service, the error would be solved.
Conclusion
The Apache Web Server is available on the official repository of Arch therefore its installation is simple and authentic. Apache is well known for its open-source and free-to-download/use support and therefore, Linux users prioritize it over other servers. This article provides the process of installation of Apache Web Server on Arch Linux.
How to Install LAMP Stack with PhpMyAdmin in Arch Linux
Technically, the LAMP stack consists of Linux, Apache, MySQL, and PHP modules. A LAMP stack environment is ideal for web software developers that want to experience how their web application(s) is likely to behave in a server-hosted/production environment.
It is the perfect testing/debugging platform for your web app until you are confident enough to decouple it and host it on a dedicated server.
In this article, you will learn how to install and configure the LAMP environment along with the PhpMyAdmin database management tool in Arch Linux.
Afterward, you should be able to comfortably develop and test your first web application before making it production-ready and taking it online.
Step 1: Update Arch Linux System
An up-to-date Linux system is a performant system and will not break down easily.
Step 2: Install Apache in Arch Linux
The following command installs the latest version of the Apache webserver.
Once Apache is installed, next, you need to start, enable and check the status of the Apache server daemon.
$ sudo systemctl start httpd $ sudo systemctl enable httpd $ sudo systemctl status httpd
Step 3: Install PHP in Arch Linux
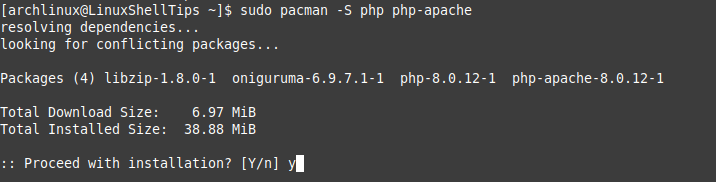
The following command installs PHP and its Apache module.
$ sudo pacman -S php php-apache
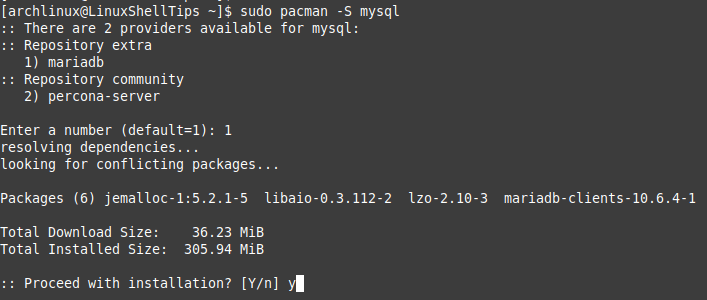
Step 4: Install MySQL in Arch Linux
MariaDB is a community-supported MySQL fork and therefore a good idea to go with it.
Choose the option 1) to install MariaDB.
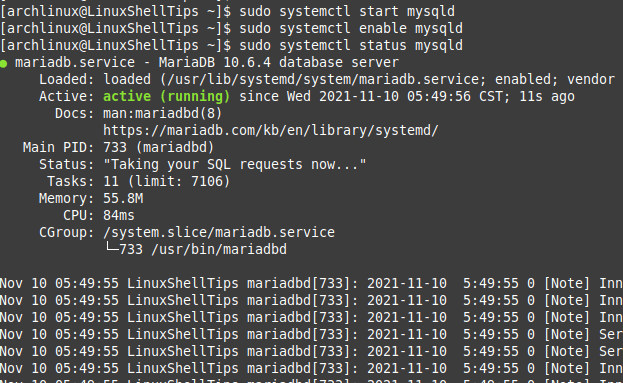
We also need to start, enable and check the MySQL daemon to make sure it is running.
$ sudo systemctl start mysqld $ sudo systemctl enable mysqld $ sudo systemctl status mysqld
If you run into unnecessary errors while trying to execute the above command, for example.
[ERROR] Fatal error: Can't open and lock privilege tables: Table 'mysql.host' doesn't exist
Switch to the root user of the Arch Linux system:
Navigate to the directory path /var/lib/mysql and delete everything inside it.
# mysql_install_db --user=mysql --basedir=/usr --datadir=/var/lib/mysql
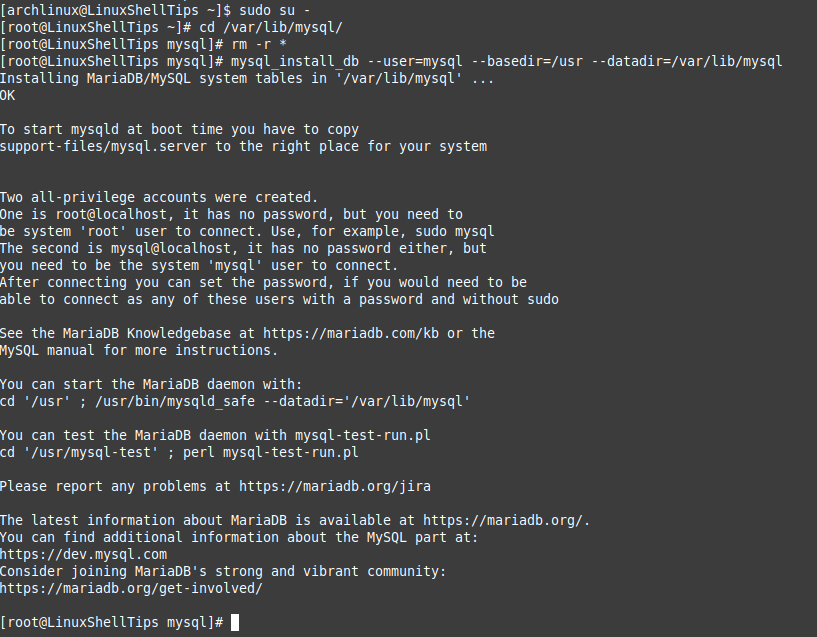
Switch back to your sudoer user and finally, rerun the following command to make sure the mysqld daemon is active:
$ sudo systemctl start mysqld $ sudo systemctl enable mysqld $ sudo systemctl status mysqld
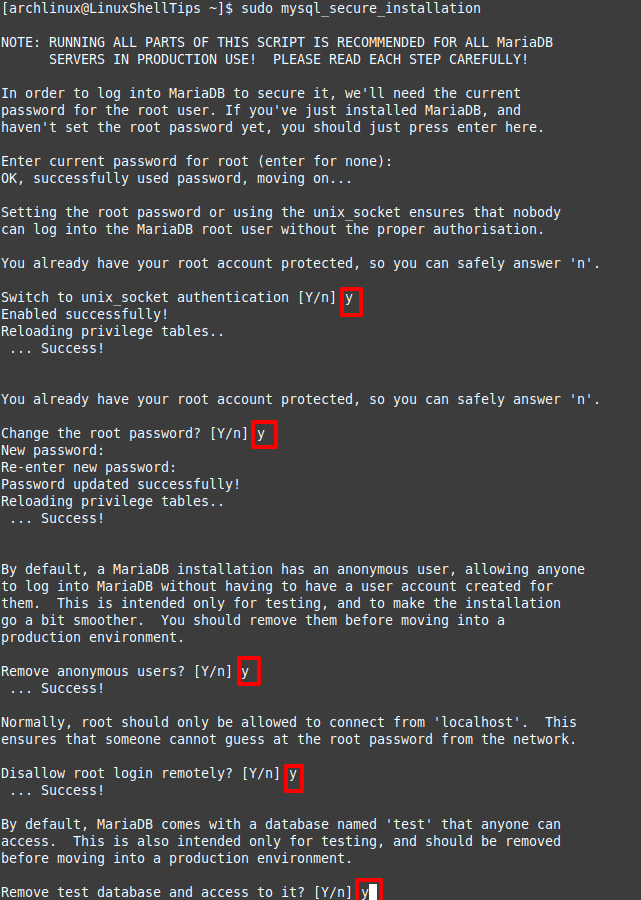
Step 5: Secure MySQL in Arch Linux
Next, you need to secure your MySQL installation by running the following security script.
$ sudo mysql_secure_installation
You will be asked some questions which you can answer as per your preference.
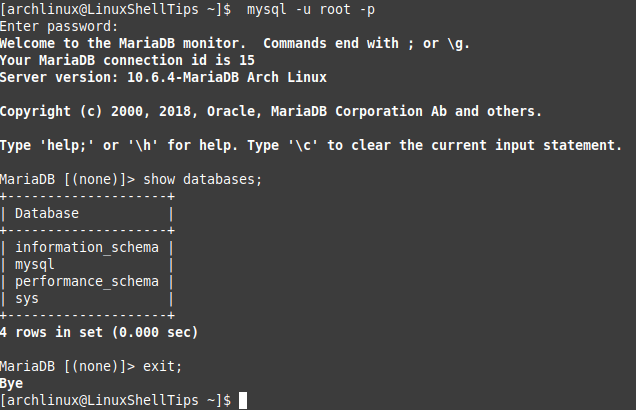
Finally, connect to your MySQL database as the root user.
Step 6: Configure Apache in Arch Linux
Open the apache configuration file.
$ sudo nano /etc/httpd/conf/httpd.conf
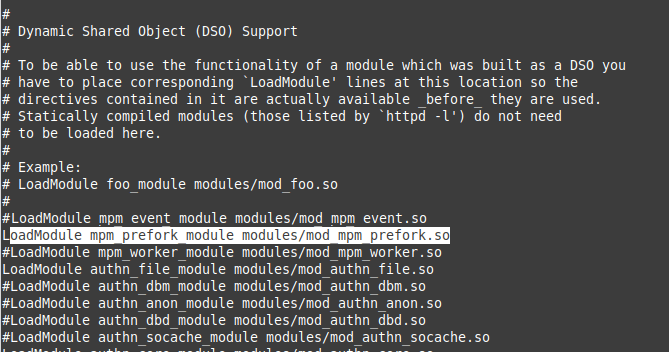
Search for the lines starting with LoadModule mpm_prefork_ and uncomment it.
Also, at the bottom of this file, add the following lines:
LoadModule php_module modules/libphp.so AddHandler php-script php Include conf/extra/php_module.conf

Restart Apache webserver to apply configuration changes.
$ sudo systemctl restart httpd
Step 7: Testing Apache in Arch Linux
To test Apache, we will create a custom home page (index.html) file.
$ sudo nano /srv/http/index.html
Add the following HTML code.
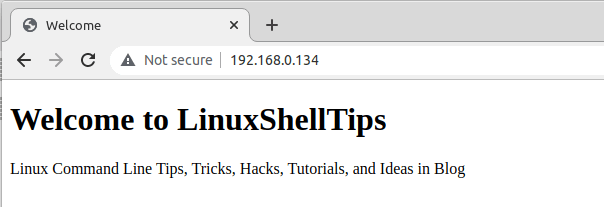
Welcome to LinuxShellTips
Linux Command Line Tips, Tricks, Hacks, Tutorials, and Ideas in Blog
Save the file and go to the following URL on your browser to access the page.
http://localhost Or http://IP-Address
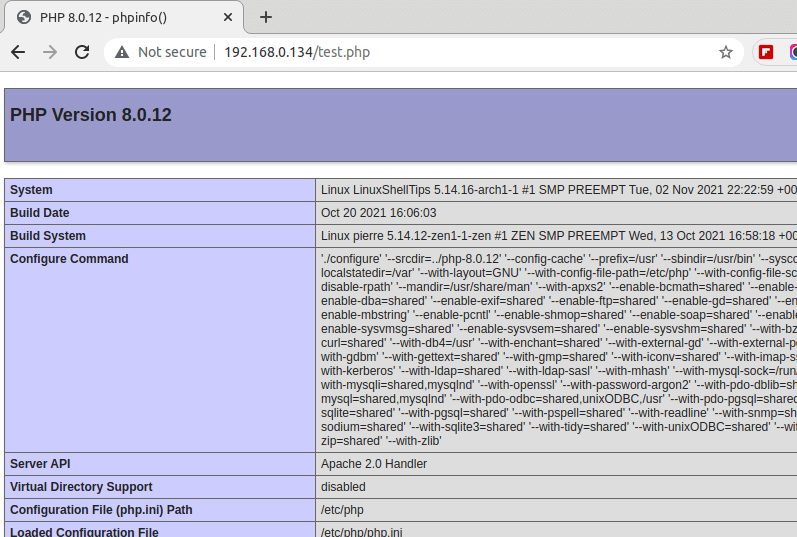
To test if Apache serves PHP scripts, create and edit the following file:
Add the following PHP code.
Save the file and go to the following URL on your browser to access the page.
http://localhost/test.php Or http://IP-Address/test.php
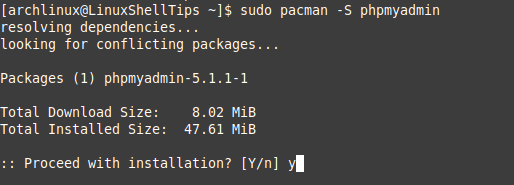
Step 8: Install PhpMyAdmin in Arch Linux
PhpMyAdmin is an open-source web-based database management tool for MySQL/MariaDB.
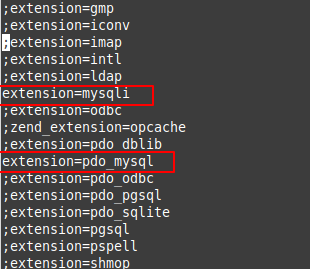
Open the file /etc/php/php.ini and uncomment the lines extension=mysqli, extension=pdo_mysql and extension=iconv by removing the semicolon (;) preceding them.
Now set up Apache to work with phpmyadmin by creating phpmyadmin’s main configuration file.
$ sudo nano /etc/httpd/conf/extra/phpmyadmin.conf
Populate this file with content similar to the following screen capture:
Alias /phpmyadmin "/usr/share/webapps/phpMyAdmin"DirectoryIndex index.php AllowOverride All Options FollowSymlinks Require all granted
Next, include the path to this configuration file on Apache’s main configuration file.
$ sudo nano /etc/httpd/conf/httpd.conf
Add the following line at the bottom.
Include conf/extra/phpmyadmin.conf
Finally, restart the Apache web service.
$ sudo systemctl restart httpd
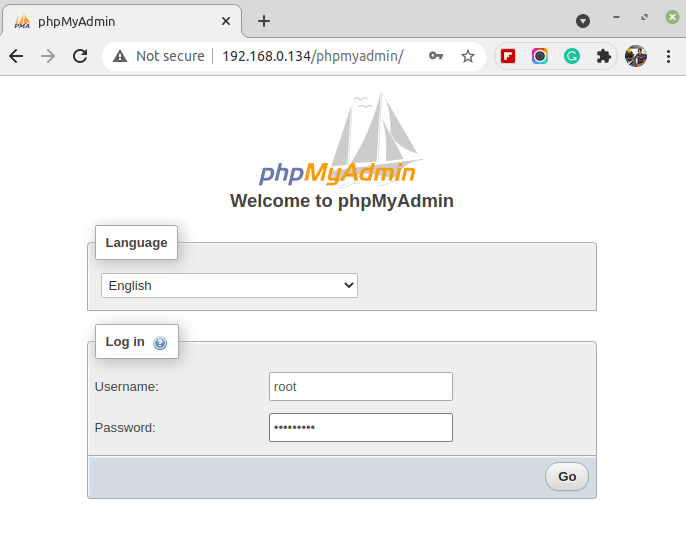
Now access the PhpMyAdmin from the browser.
http://localhost/phpmyadmin Or http://IP-Address/phpmyadmin
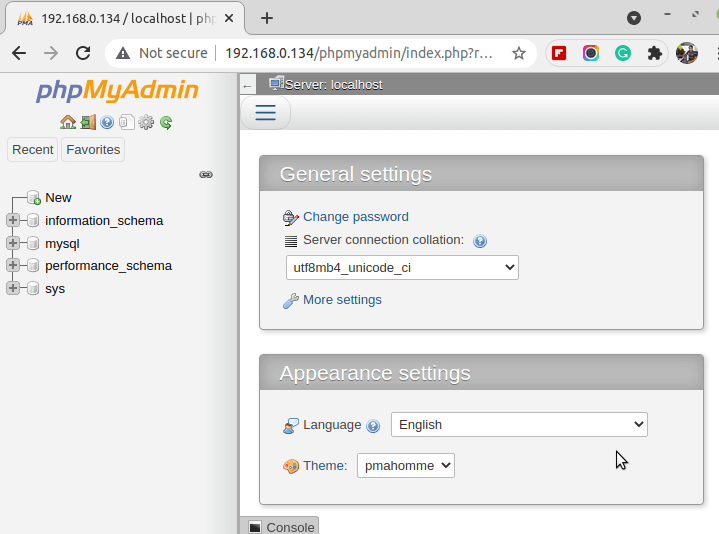
With this article guide, you can comfortably start testing the behavior of your web app in a production-like environment. You are now familiar with the needed extensions and configurations required to keep your server environment running.