- How to Host a Website on an Apache Web Server
- Install Apache Web Server in Linux
- Host a Simple HTML Website on Apache
- Linux Shell Tips
- Manage Apache Web Server in Linux
- Install and Configure Apache
- What you’ll learn
- What you’ll need
- 2. Installing Apache
- 3. Creating Your Own Website
- 4. Setting up the VirtualHost Configuration File
- 5. Activating VirtualHost file
- End result
- Install the Apache Web Server
- Prerequisites
- Objectives
- Installing and configuring the web server package
- Configuring Apache
- Securing the web service
- More Learning Resources
How to Host a Website on an Apache Web Server
The Apache HTTP Server (commonly referred to simply as Apache), is a free and open-source web server software brought to you by the Apache Software Foundation. Apache has been around for more than 2 decades and is considered beginner-friendly.
In this tutorial, you will learn how to install an Apache webserver to host a simple HTML website running on a Linux platform.
Install Apache Web Server in Linux
On Ubuntu Linux and other Debian-based distributions such as Linux Mint, Apache can be installed with the following command.
$ sudo apt install apache2 -y
On Red Hat Enterprise Linux and related distributions such as CentOS, Fedora, and Oracle Linux, Apache can be installed with the following command.
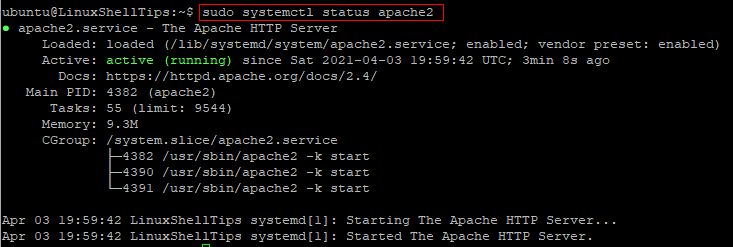
On Ubuntu Linux and other Debian-based distributions, you can start and check the status of the Apache webserver by running the commands below.
$ sudo systemctl start apache2 $ sudo systemctl status apache2
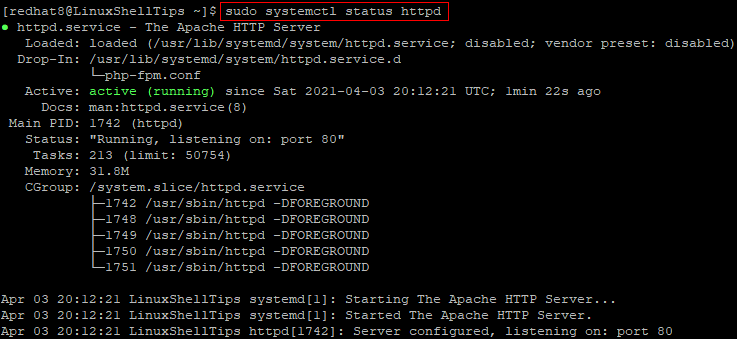
On Red Hat Enterprise Linux and related distributions, run the following commands to start and check the status of Apache.
$ sudo systemctl start httpd $ sudo systemctl status httpd
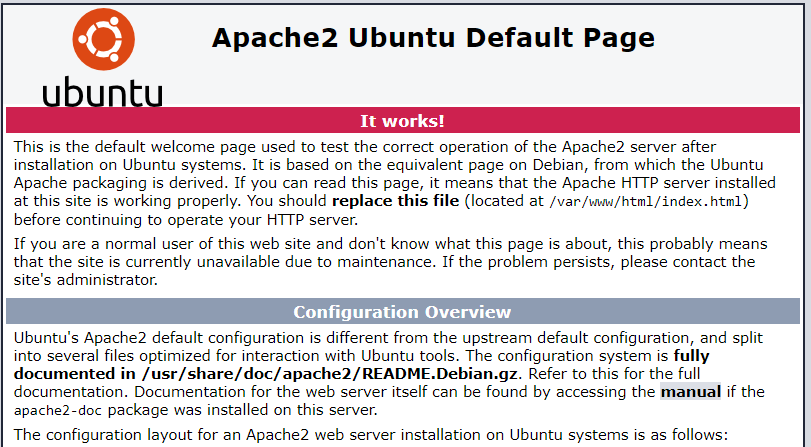
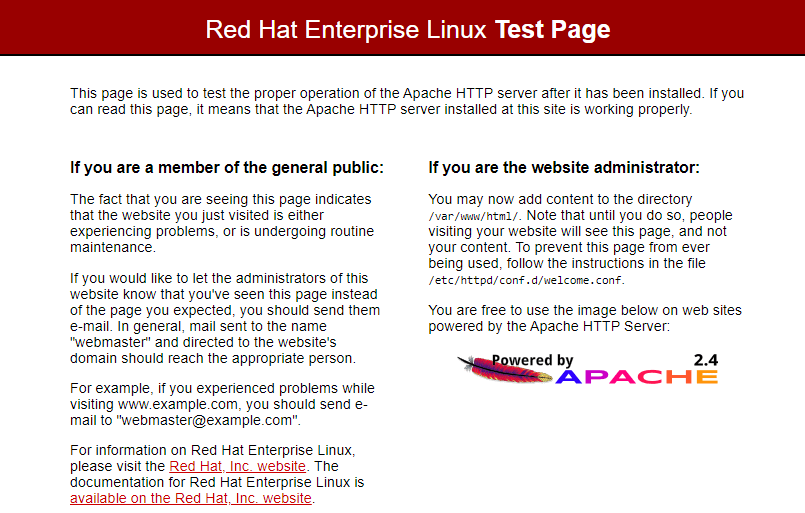
Once you have confirmed that Apache is active, open a web browser and enter the IP address of your Linux server. You may also enter localhost in place of your server IP.
You should see a test page that confirms that Apache is up and running properly.
http://IP-Addresss OR http://localhost
Host a Simple HTML Website on Apache
After you have confirmed that Apache is working properly, you are now ready to add your website content. On Apache, the default location where publicly accessible web content is stored in /var/www/html. This is commonly referred to as the website root.
The first page that is loaded when users visit your website is called the index page. Let us create one as follows.
Firstly, change into the website root with the command below.
On Ubuntu Linux, run the command below to rename the default index page file.
$ sudo mv index.html index.html.bk
On Red Hat, there is nothing to rename here as the default index page file is not stored in this location.
Next, create a new index file with:
Copy and paste the sample HTML code below into the open text editor.
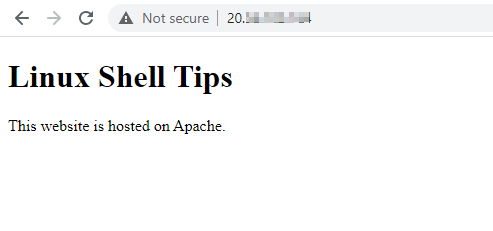
Linux Shell Tips
This website is hosted on Apache.
Save and close the index.html file.
Now, go back to your web browser and refresh the page. You should see your new website as shown in the image below.
Manage Apache Web Server in Linux
As we wrap up this tutorial, let us highlight some basic commands for managing Apache in addition to the ones that we have already used. As you may have noticed, the Apache web service is referred to as apache2 on Ubuntu while it is called httpd on Red Hat Linux.
To configure Apache to automatically start when the Linux server is rebooted, run:
$ sudo systemctl enable apache2 $ sudo systemctl enable httpd
To disable automatic starting of Apache when the Linux server is rebooted, run:
$ sudo systemctl disable apache2 $ sudo systemctl disable httpd
$ sudo systemctl restart apache2 $ sudo systemctl restart httpd
$ sudo systemctl stop apache2 $ sudo systemctl stop httpd
Conclusion
In this tutorial, we have described how to install Apache on Ubuntu Linux as well as Red Hat Linux. We also showed you how to replace the default Apache web page with your own content.
Install and Configure Apache
Apache is an open source web server that’s available for Linux servers free of charge.
In this tutorial we’ll be going through the steps of setting up an Apache server.
What you’ll learn
What you’ll need
- Ubuntu Server 16.04 LTS
- Secure Shell (SSH) access to your server
- Basic Linux command line knowledge
Got everything ready? Let’s move on to the next step!
Originally authored by Aden Padilla
2. Installing Apache
To install Apache, install the latest meta-package apache2 by running:
sudo apt update sudo apt install apache2 After letting the command run, all required packages are installed and we can test it out by typing in our IP address for the web server.

If you see the page above, it means that Apache has been successfully installed on your server! Let’s move on.
3. Creating Your Own Website
By default, Apache comes with a basic site (the one that we saw in the previous step) enabled. We can modify its content in /var/www/html or settings by editing its Virtual Host file found in /etc/apache2/sites-enabled/000-default.conf .
We can modify how Apache handles incoming requests and have multiple sites running on the same server by editing its Virtual Hosts file.
Today, we’re going to leave the default Apache virtual host configuration pointing to www.example.com and set up our own at gci.example.com .
So let’s start by creating a folder for our new website in /var/www/ by running
We have it named gci here but any name will work, as long as we point to it in the virtual hosts configuration file later.
Now that we have a directory created for our site, lets have an HTML file in it. Let’s go into our newly created directory and create one by typing:
cd /var/www/gci/ nano index.html Paste the following code in the index.html file:
I'm running this website on an Ubuntu Server server!
Now let’s create a VirtualHost file so it’ll show up when we type in gci.example.com .
4. Setting up the VirtualHost Configuration File
We start this step by going into the configuration files directory:
cd /etc/apache2/sites-available/ Since Apache came with a default VirtualHost file, let’s use that as a base. ( gci.conf is used here to match our subdomain name):
sudo cp 000-default.conf gci.conf Now edit the configuration file:
We should have our email in ServerAdmin so users can reach you in case Apache experiences any error:
ServerAdmin yourname@example.com We also want the DocumentRoot directive to point to the directory our site files are hosted on:
The default file doesn’t come with a ServerName directive so we’ll have to add and define it by adding this line below the last directive:
This ensures people reach the right site instead of the default one when they type in gci.example.com .
Now that we’re done configuring our site, let’s save and activate it in the next step!
5. Activating VirtualHost file
After setting up our website, we need to activate the virtual hosts configuration file to enable it. We do that by running the following command in the configuration file directory:
You should see the following output
Enabling site gci. To activate the new configuration, you need to run: service apache2 reload root@ubuntu-server:/etc/apache2/sites-available# To load the new site, we restart Apache by typing:
End result

Now is the moment of truth, let’s type our host name in a browser. Hooray!
Further reading:
Install the Apache Web Server
Apache has been in active development since 1993 and over time has become one of the most popular web servers in the world. The Apache web server is a key component of the LAMP (Linux, Apache, Oracle MySQL and Perl/PHP) software stack and continues to be widely used today.
The Apache web server is directly available from the Application Streams repository in Oracle Linux 8 or later and is simple to deploy and configure.
Prerequisites
Objectives
At the end of this tutorial, you should be able to do the following:
- Install and configure the Apache package
- Configure the firewall
- Apply Apache configurations
- Secure web services
Installing and configuring the web server package
sudo systemctl enable --now httpd.service sudo systemctl status httpd sudo firewall-cmd --add-service=http --permanent sudo firewall-cmd --reload Configuring Apache
To change the root path for your web server, do not edit the /etc/httpd/conf/httpd.conf file directly. Instead, as a preferred method, create a site-specific configuration file in the /etc/httpd/conf.d directory.
In the following example, the file /etc/httpd/conf.d/example.com.conf is created to contain configurations for virtual hosts.
- Create virtual hosts by adding the following information in /etc/httpd/conf.d/example.com.conf :
ErrorLog /var/log/httpd/example.com_error.log
CustomLog /var/log/httpd/example.com_access.log combined
sudo mkdir -p /var/www/example.com/html sudo echo "example.com" > /var/www/example.com/html/index.html sudo chown -R apache:apache /var/www/example.com/html On systems where SELinux is enabled in enforcing mode and pages are not served from within the /var/www directory , you must apply the correct security context to the DocumentRoot directory. For example, to serve web pages from the /mnt/example.com directory, type:
sudo semanage fcontext -a -t httpd_sys_content_t "/mnt/example.com(/.*)?" sudo restorecon -Rv /mnt/example.com/ sudo systemctl restart httpd Securing the web service
As a best practice, secure all communications between a web browser and your Apache server by using HTTPS. For a secure setup, a TLS certificate is required.
Note:
Oracle strongly recommends that you use a TLS certificate that has been signed by an external Certificate Authority (CA). See Oracle Linux: Managing Certificates and Public Key Infrastructure for more information.
sudo dnf install mod_ssl sudo systemctl restart httpd SSLEngine on SSLCertificateFile /etc/pki/tls/private/certificate.crt
SSLCertificateKeyFile /etc/pki/tls/private/private.key
ErrorLog /var/log/httpd/example.com_error.log
CustomLog /var/log/httpd/example.com_access.log combined
sudo systemctl restart httpd sudo firewall-cmd --add-service=https --permanent sudo firewall-cmd --reload More Learning Resources
Explore other labs on docs.oracle.com/learn or access more free learning content on the Oracle Learning YouTube channel. Additionally, visit education.oracle.com/learning-explorer to become an Oracle Learning Explorer.
For product documentation, visit Oracle Help Center.
Install the Apache Web Server
Copyright © 2020, Oracle and/or its affiliates.