- How to configure LDAP client on Linux Mint
- How LDAP client works
- How to configure LDAP client on Linux Mint
- Create User Home Directory
- How to remove LDAP client from Linux Mint
- Conclusion
- How to Configure LDAP Server and Client on Linux Mint
- What You’ll Need
- Configure LDAP Server on Linux Mint
- 1. Set Up Hostname for the Server
- 2. Install LDAP Server on Linux Mint
- 3. Start the LDAP Service
- 4. Configure the Firewall
- 5. Configure LDAP on Linux Mint to Add base dn for Users
- 6. Add User Accounts and Groups
- Install and Configure LDAP Client on Linux Mint
- 1. Install LDAP Client on Linux Mint
- 2. Add Configuration Files
How to configure LDAP client on Linux Mint
![]()
The LDAP (acronym of Lightweight Directory Access Protocol) is an industry-standard application protocol to access and maintain Directory Information Services on IP networks. The directory information services map the information of network resources to respective IP addresses. One common example is DNS. The primary purpose of the LDAP clients is to store emails, usernames, and passwords in a central place, and then this data can be used by several applications to validate the users. In this article, LDAP client configuration is performed on Linux Mint.
Before getting to the configurations, let’s have a look at the working of the LDAP client.
How LDAP client works
LDAP servers back up the LDAP clients, and all the stored information is made available to LDAP clients via servers. When a new database needs to be added, the LDAP client changes to the LDAP database as per the users’ requirements. When a change occurs, it is synchronized with existing data and thus nullifies the act of updating. Moreover, with the help of the LDAP client, you can perform the following key actions:
- Search and retrieve data from directories
- Add/Update/Delete/Rename entries in a database
How to configure LDAP client on Linux Mint
The following steps follow the configuration of the LDAP client. Firstly, you have to install the utilities associated with the LDAP client. To install LDAP client and its associated utilities, provide the following command in terminal.
The time you run the above command, you get an interface like shown below in Step 1.
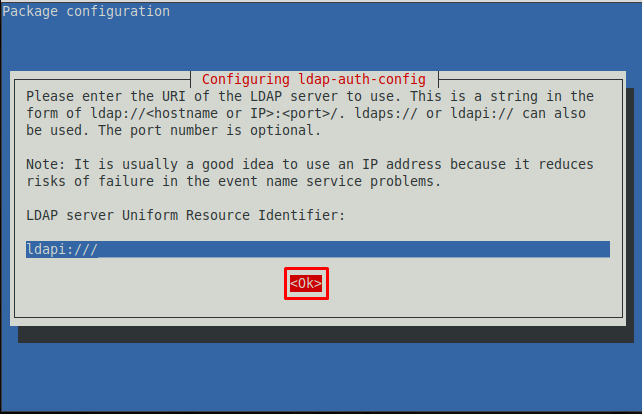
Step 1: You have to enter the details of the LDAP server. The following image requires the URI(Unique Resource Identifier) of the LDAP server.
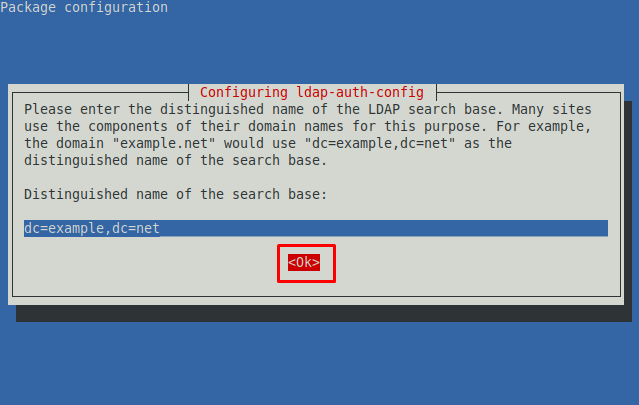
Step 2 : The next prompt asks you to set up a distinct name for the LDAP search base. Navigate to OK and go with the default.
ote : The dc and dc in the image below represent the domain name. For instance, considering linuxhint.com, the distinguished name would be dc=linuxhint and dc=com.
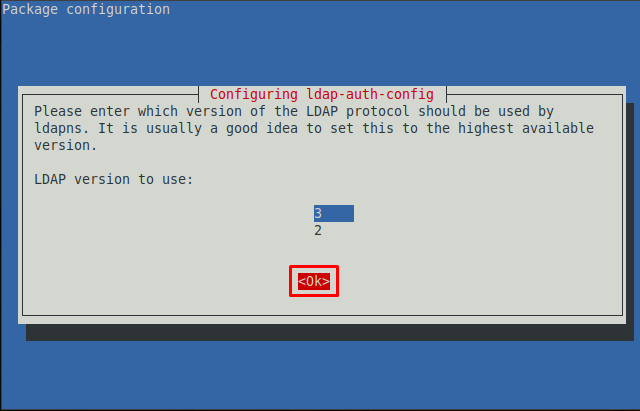
Step 3 : Choose the latest LDAP version from the available. As the image below shows that 3 is the latest version.
Step 4 : Here, you have to allow LDAP’s root account like a local root. Navigate to “Yes” and hit Enter.

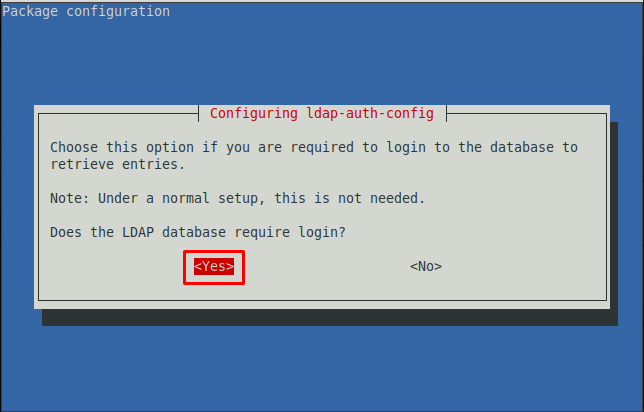
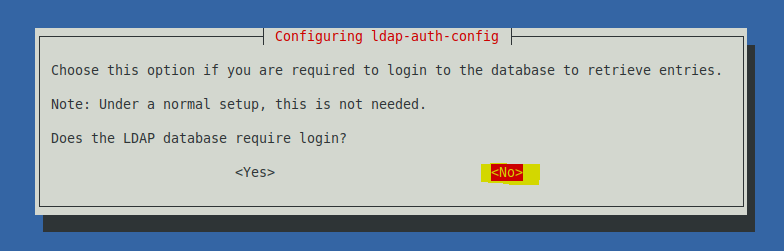
Step 5 : Choose the authentication for the LDAP database. Navigating to “Yes” will require login for the LDAP database. However, if you do not want the authentication step while logging in to the database, you must choose “NO“. Here we are going with “Yes“.
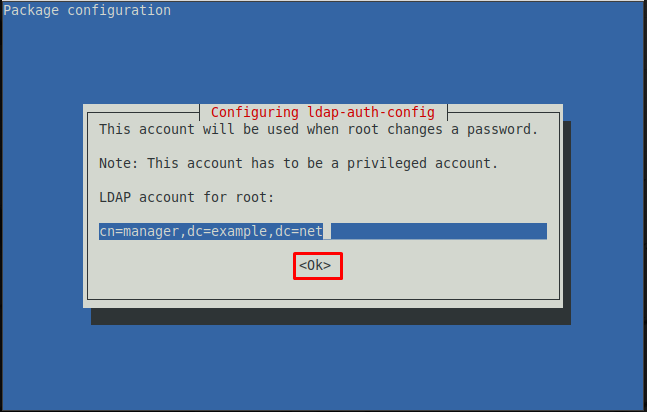
Step 6 : Choose the account to use when the root password is changed.
Note : The cn in the image below shows the user associated with the distinguished database.
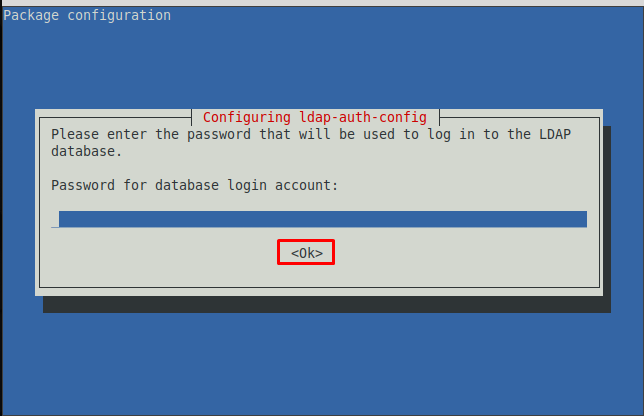
Step 7 : Choose a password to use when ldap-auth-config uses the root account of LDAP.

Step 8 : Enter the password that you set earlier to log in to the LDAP database.
After doing the above steps the command will be executed completely that was initiated before Step 1.
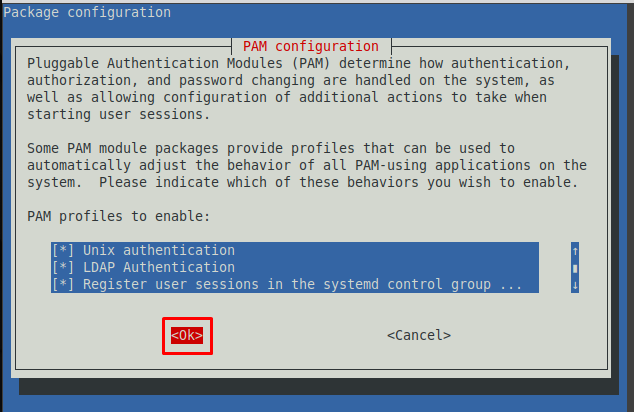
Step 9 : You must configure the Linux Mint to use LDAP for authentication. Firstly, update the PAM-auth file.
The following prompt will appear, and you can enable any profile from the provided list. Keep the default settings and choose “OK“.
The steps provided above do most of the configurations automatically. There are several steps that need to be performed manually.
Create User Home Directory
The common-session file of PAM directory can be edited to perform some comigration changes. For instance, you can create a user home directory by accessing the common-session file inside pam.d directory.
The command provided below opens the common-session file in nano editor.
Now, at the end of this file, add the following line to create a new user home directory.

How to remove LDAP client from Linux Mint
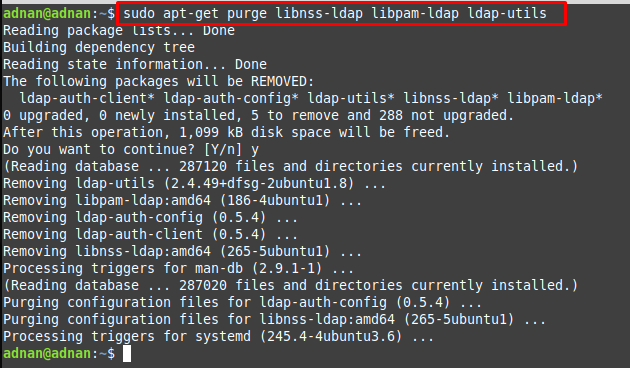
If you want to remove LDAP client from your Linux Mint, it is recommended to adopt the following way. The below-mentioned command removes the installed LDAP and the associated libraries.
Conclusion
The LDAP is an authentication platform that is used to authenticate the users for web applications or servers. The usernames and passwords are obtained and then LDAP uses them to check for the authentication. This writeup demonstrates the way to configure LDAP client on Linux Mint. The LDAP configuration is mostly system based and the user may require very few manual steps. This guide also provides the commands to install or uninstall the LDAP client from Linux Mint.
How to Configure LDAP Server and Client on Linux Mint

OpenLDAP, a free open-source integration of the Lightweight Directory Access Protocol, is a protocol for centralized directory access in Linux. You can easily configure LDAP Server and Client on Linux Mint to allow system administrators to manage users on a centralized directory.

In the Microsoft environment, we have Active Directory which is used to authenticate the desktop with server machines to a centralized directory. This is very useful when we want to manage multiple users and allow users to log in on any system without having the actual account on their local machine. However, in Linux, there is no concept of Active Directory.
Instead, we utilize the OpenLDAP protocol to manage users on the server. We configure OpenLDAP such that the desktop machine can authenticate with the server.
In this tutorial, we will cover how to configure the LDAP server and client on the Linux Mint machines. The tutorial is suitable for those configuring the LDAP from scratch.
What You’ll Need
In this tutorial, we are configuring both the LDAP Server and Client on Linux Mint machines. Furthermore, all the necessary configurations will be performed with the sudo privilege.
Configure LDAP Server on Linux Mint
1. Set Up Hostname for the Server
Before starting with the installation, it is crucial to set up the server name. For this step, use the hostnamectl command and set the hostname. For example:
sudo hostnamectl set-hostname example.example.comSecondly, add the IP and FQDN to the hosts file located at file /etc/hosts . Edit the file using the vim or nano editor. For example:
IP_Address example.example.com
Replace example.example.com and IP Address with correct hostname here.
2. Install LDAP Server on Linux Mint
After the configuration in the host’s file, the next step is to install the OpenLDAP server. To install the packages, use the install command followed by the package name. Make sure to update the installed packages first.
sudo apt update sudo apt -y install slapd ldap-utils The process will ask you to set up the password for the LDAP administrator.
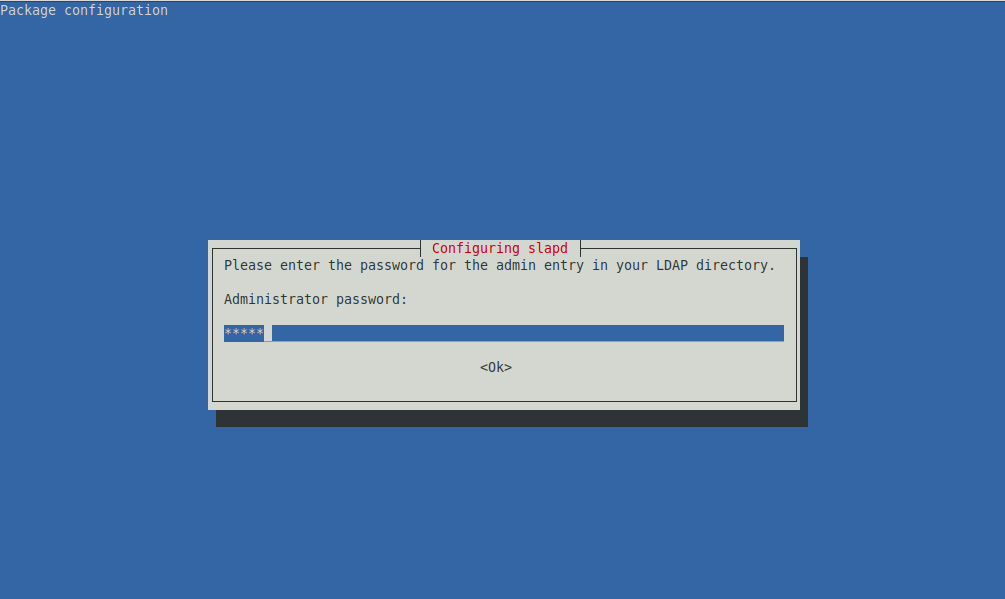
Provide your desired password and hit the “Enter” key to continue with the installation.
3. Start the LDAP Service
OpenLDAP configuration required slapd and slurpd daemon. The slapd and slurpd daemons are UNIX-based daemons responsible for providing replicated services on any number of ports. In this tutorial, we are covering the configuration of the server without replication, hence, we will focus on the slapd daemon only.
Now, start the installed service using the start command. Secondly, enable it and then check its status using the status command. For example:
sudo systemctl start slapd systemctl enable slapd systemctl status slapd
4. Configure the Firewall
Additionally, update the firewall settings to allow the LDAP server daemon. For this step, use the allow command with the ufw firewall. For example:

5. Configure LDAP on Linux Mint to Add base dn for Users
In this step, we will create a file to add base DN for users and groups that will be accessing our server. To create the file, you can use the vim or nano command. For example:
Next, add the following code to the file and save the file. Make sure to replace “example” and “com” with your domain and domain name.
dn: ou=people,dc=example,dc=com objectClass: organizationalUnit ou: peopleYou can add the following entry for the group:
dn: ou=groups,dc=example,dc=com objectClass: organizationalUnit ou: groupsAfter that, add the LDAP entry of the file that we have created above. For example:
sudo ldapadd -x -D cn=admin,dc=example,dc=com -W -f basedn.ldif
6. Add User Accounts and Groups
In this step, we will first generate the password for the user accounts. For example:

Secondly, we will create one file for users and one for groups. For users, create that file using the nano or vim command. For example:
Thirdly, add the user and group information in the file. Make sure to use your own username, domain name, and path in this step.
dn: uid=ldap,ou=people,dc=example,dc=com objectClass: inetOrgPerson objectClass: posixAccount objectClass: shadowAccount cn: ldap sn: Wiz userPassword: Zn4/E5f+Ork7WZF/alrpMuHHGufC3x0k loginShell: /bin/bash uidNumber: 2000 gidNumber: 2000 homeDirectory: /home/ldapAfter that, add that file in the OpenLDAP configuration.
ldapadd -x -D cn=admin,dc=example,dc=com -W -f ldapusers.ldif 
Similarly, you can create a file for group accounts by following the same steps.
Finally, you have configured the LDAP Server on Linux.
Install and Configure LDAP Client on Linux Mint
LDAP servers provide information to the LDAP clients. Therefore, a separate client account is not required. When a new user is added, you can simply edit the user file and add its configuration.
1. Install LDAP Client on Linux Mint
In this step, we will install and configure LDAP Client on Linux to access the LDAP server. Firstly, add the LDAP server address to the etc/hosts file. Edit the file using vim or the nano editor. For example:
Add the following content:
IP_ADDRESS YOUR_DOMAIN_NAMEMake sure to save the file before exiting the editor.
Secondly, install the LDAP client utilities on your system using the install command.
sudo apt -y install libnss-ldap libpam-ldap ldap-utils
You will be asked to configure various settings. Here is a summary of the default settings that you should opt for.


- LDAP account for root – For example: cn=admin,cd=example,cn=com
- LDAP root account Password – Enter your LDAP root account password
2. Add Configuration Files
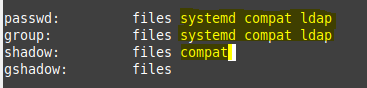
Thirdly, add the following configuration in the /etc/nsswitch.conf file. You can access the file using the nano or vim editor.
passwd: compat systemd ldap group: compat systemd ldap shadow: compatNext, edit the /etc/pam.d/common-password file and remove use_authtok . The file would contain a similar string like that:
password [success=1 user_unknown=ignore default=die] pam_ldap.so try_first_passAfter that, edit the /etc/pam.d/common-session file and enable the creation of the home directory by adding the following settings:
session optional pam_mkhomedir.so skel=/etc/skel umask=077Finally, you have configured the OpenLDAP client on Linux.
Now, reboot the client machine. After that, try to log in to your server machine with the user you just created. It should authenticate and log in as well. Similarly, you can configure your other clients to access the server using the OpenLDAP server.
In this article, we have covered how to configure the LDAP server and the client on Linux Mint machines. The LDAP utility can also be used to authenticate users coming from web applications. The tutorial has covered how to configure LDAP on Linux Mint only. Furthermore, you can also configure your LDAP server with SSH to enforce a layer of security to your directory services. For more details, check out its official documentation.
If this guide helped you, please share it.
Sidrah is a staff writer at Distroid and has a Masters in Computer Science, with her key two focus areas being SQL and DevOps. She has written over 100 posts and specializes in all things Linux. She also has experience trying out various other distros, BASH scripting, Git, and software testing. LinkedIn GitHub
Leave a Reply
You must be logged in to post a comment.