Connecting the Nano 33 IoT to a Wi-Fi Network
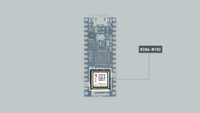
This tutorial will connect an Arduino Nano 33 IoT to the Wi-Fi network, by using the NINA-W102 module embedded on the board. To do so, we will use the module to create an application that will connect to the Wi-Fi network, measure its strength signal, and make a LED blink based on the strength of the signal.
Goals
The goals of this project are:
- Understand what the NINA-W102 module is.
- Use the WiFiNINA library.
- Measure the signal strength of a Wi-Fi network.
- Convert the signal strength values in blinking speed of the LED.
Hardware & Software Needed
- This project uses no external sensors or components.
- In this tutorial we will use the Arduino Web Editor to program the board.
The NINA-W102 Module
The NINA-W102 module is a stand-alone multiradio MCU modules module that integrate a powerful microcontroller (MCU) and a radio for wireless communication. The radio provides support for Wi-Fi 802.11 b/g/n in the 2.4 Hz ISM band and Bluetooth® v4.2 (Bluetooth® BR/EDR and Bluetooth® low energy) communications.
If you want to learn more about Wi-Fi and how it works, you can the check this link.
The NINA-W102 includes the wireless MCU, Flash memory, crystal, and components for matching, filtering, antenna and decoupling, making it a very compact stand-alone multiradio module. The module can be used to design solutions with top grade security, thanks to integrated cryptographic hardware accelerators.
The Library
The WiFiNINA library allows us to use the Arduino Nano 33 IoT NINA-W102 module without having to go into complicated programming. The library supports WEP, WPA2 Personal and WPA2 Enterprise encryptions and it can serve as either a server accepting incoming connections or a client making outgoing ones. Some of the most common applications for the module are the following:
- Internet of Things
- Wi-fi networks
- Bluetooth® and Bluetooth® low energy applications
- Telematics
- Access to laptops, mobile phones, and similar consumer devices
- Medical and industrial networking
- Home/building automation
If you want to read more about the NINA-W102 module see here.
In this tutorial we will read the information of a Wi-Fi network as the SSID, the IP of the board and the strength signal. With this information we will be able to make the LED_BUILTIN of the board blink faster or slower based on the signal strength of the network.
Creating the Program
1. Setting up
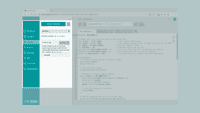
Let’s start by opening the Arduino Web Editor and creating a new sketch, this can be named «WiFi_Connection». Then, navigate to the Libraries tab, search for the WiFiNINA library and click on the Include button.
2. Connecting the board
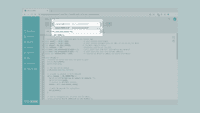
Next, connect the Arduino Nano 33 IoT to the computer and make sure that the Web Editor recognizes it. If so, the board and port should appear as shown in the image below. If they don’t appear, follow the instructions to install the plugin that will allow the Editor to recognize your board.
3. Connecting to Wi-Fi
After including the library, we can begin by building the rest of the code.
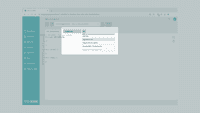
Let’s start by creating a header file to store our credential for the Wi-Fi network which we will connect to. In this way we don’t accidentally store our credentials in a code we may share on the internet. To do this, we need to click the downward arrow next to our sketch tab, and click «Add Secret Tab». This will create a tab called Secret.
We now need to head back to the original sketch file, and enter the following code:
1//please enter your sensitive data in the Secret tab 2char ssid[] = SECRET_SSID; // your network SSID (name) 3char pass[] = SECRET_PASS; // your network password (use for WPA, or use as key for WEP)This will automatically create two fields in the Secret tab. If we go back to this tab, we can enter our credentials there.
Now, back to the sketch, we can continue coding. We need to initialize five more variables to store some information as the Wi-Fi radio’s status, the state of the LED and time of the last update.
1int status = WL_IDLE_STATUS; // the Wi-Fi radio's status 2 int ledState = LOW; //ledState used to set the LED 3unsigned long previousMillisInfo = 0; //will store last time Wi-Fi information was updated 4unsigned long previousMillisLED = 0; // will store the last time LED was updated 5const int intervalInfo = 5000; // interval at which to update the board information1void setup() 2 //Initialize serial and wait for port to open: 3 Serial.begin(9600); 4 while (!Serial); 5 6 // set the LED as output 7 pinMode(LED_BUILTIN, OUTPUT);status = WiFi.begin(ssid, pass);1// attempt to connect to Wi-Fi network: 2 while (status != WL_CONNECTED) 3 Serial.print("Attempting to connect to network: "); 4 Serial.println(ssid); 5 // Connect to WPA/WPA2 network: 6 status = WiFi.begin(ssid, pass); 7 8 // wait 10 seconds for connection: 9 delay(10000); 10 >functions to print out in the serial monitor that we are now connected to the network and to separate the block of data.
1// you're connected now, so print out the data: 2 Serial.println("You're connected to the network"); 3 Serial.println("---------------------------------------");1void loop() 2 unsigned long currentMillisInfo = millis();1// check if the time after the last update is bigger the interval 2 if (currentMillisInfo - previousMillisInfo >= intervalInfo) - Board’s IP address using the
1previousMillisInfo = currentMillisInfo; 2 3 Serial.println("Board Information:"); 4 // print your board's IP address: 5 IPAddress ip = WiFi.localIP(); 6 Serial.print("IP Address: "); 7 Serial.println(ip); 8 9 // print your network's SSID: 10 Serial.println(); 11 Serial.println("Network Information:"); 12 Serial.print("SSID: "); 13 Serial.println(WiFi.SSID()); 14 15 // print the received signal strength: 16 long rssi = WiFi.RSSI(); 17 Serial.print("signal strength (RSSI):"); 18 Serial.println(rssi); 19 Serial.println("---------------------------------------"); 20 >After this, we need to initialize another two variables, one to keep track of the time for the LED and another one to convert the signal strength measured for the
1unsigned long currentMillisLED = millis(); 2 3 // measure the signal strength and convert it into a time interval 4 int intervalLED = WiFi.RSSI() * -10;statement to check if the time after the last blink is bigger than the interval, in the same way we did before. Inside the
1// check if the time after the last blink is bigger the interval 2 if (currentMillisLED - previousMillisLED >= intervalLED) 3 previousMillisLED = currentMillisLED; 4 5 // if the LED is off turn it on and vice-versa: 6 if (ledState == LOW) 7 ledState = HIGH; 8 > else 9 ledState = LOW; 10 > 11 12 // set the LED with the ledState of the variable: 13 digitalWrite(LED_BUILTIN, ledState); 14 > 15 >4. Complete code
If you choose to skip the code building section, the complete code can be found below:
1#include 2 3 //please enter your sensitive data in the Secret tab 4char ssid[] = SECRET_SSID; // your network SSID (name) 5char pass[] = SECRET_PASS; // your network password (use for WPA, or use as key for WEP) 6 int status = WL_IDLE_STATUS; // the Wi-Fi radio's status 7 int ledState = LOW; //ledState used to set the LED 8unsigned long previousMillisInfo = 0; //will store last time Wi-Fi information was updated 9unsigned long previousMillisLED = 0; // will store the last time LED was updated 10const int intervalInfo = 5000; // interval at which to update the board information 11 12 void setup() 13 //Initialize serial and wait for port to open: 14 Serial.begin(9600); 15 while (!Serial); 16 17 // set the LED as output 18 pinMode(LED_BUILTIN, OUTPUT); 19 20 // attempt to connect to Wi-Fi network: 21 while (status != WL_CONNECTED) 22 Serial.print("Attempting to connect to network: "); 23 Serial.println(ssid); 24 // Connect to WPA/WPA2 network: 25 status = WiFi.begin(ssid, pass); 26 27 // wait 10 seconds for connection: 28 delay(10000); 29 > 30 31 // you're connected now, so print out the data: 32 Serial.println("You're connected to the network"); 33 Serial.println("---------------------------------------"); 34 > 35 36 void loop() 37 unsigned long currentMillisInfo = millis(); 38 39 // check if the time after the last update is bigger the interval 40 if (currentMillisInfo - previousMillisInfo >= intervalInfo) 41 previousMillisInfo = currentMillisInfo; 42 43 Serial.println("Board Information:"); 44 // print your board's IP address: 45 IPAddress ip = WiFi.localIP(); 46 Serial.print("IP Address: "); 47 Serial.println(ip); 48 49 // print your network's SSID: 50 Serial.println(); 51 Serial.println("Network Information:"); 52 Serial.print("SSID: "); 53 Serial.println(WiFi.SSID()); 54 55 // print the received signal strength: 56 long rssi = WiFi.RSSI(); 57 Serial.print("signal strength (RSSI):"); 58 Serial.println(rssi); 59 Serial.println("---------------------------------------"); 60 > 61 62 unsigned long currentMillisLED = millis(); 63 64 // measure the signal strength and convert it into a time interval 65 int intervalLED = WiFi.RSSI() * -10; 66 67 // check if the time after the last blink is bigger the interval 68 if (currentMillisLED - previousMillisLED >= intervalLED) 69 previousMillisLED = currentMillisLED; 70 71 // if the LED is off turn it on and vice-versa: 72 if (ledState == LOW) 73 ledState = HIGH; 74 > else 75 ledState = LOW; 76 > 77 78 // set the LED with the ledState of the variable: 79 digitalWrite(LED_BUILTIN, ledState); 80 > 81 >Testing It Out
After you have successfully verified and uploaded the sketch to the board, it’s time to put it to the test. Don’t forget to enter the credentials of the network in the Secret tab. Once the board it’s connected to the network we can see the information in the Serial Monitor.
Move the board around and you will see how the signal strength changes as well as the blinking speed of the board’s LED. The signal strength is measure in dBm (decibel-milliwatts) which means that the lower the number is, the stronger the connection, and the faster the LED will blink.
Troubleshoot
Sometimes errors occur, if the code is not working there are some common issues we can troubleshoot:
- Missing a bracket or a semicolon.
- Arduino board connected to the wrong port.
- Missing the SSID and PASS in the Secret tab. Remember, it is a case sensitive.
Conclusion
In this tutorial, we have learned how to simply connect to a Wi-Fi network by using the credentials in the code. We also learned how to obtain specific information regarding our connection, such as signal strength, IP address and name of our network, and then use that information to make a LED blink faster or slower.
