- How to create a Wi-Fi hotspot on Ubuntu PC to share internet connection
- Using Wi-Fi hotspot on Ubuntu
- Step 1: Open Ubuntu Settings
- Step 2: Open Wifi Settings
- Step 4: Turn on Wi-Fi hotspot on Ubuntu
- Wifi hotspot details
- Change Ubuntu Wi-Fi hotspot password
- Switch off and On Wifi hotspot to reflect changes
- How to Share Wired Internet Via Wi-Fi and Vice Versa on Linux
- Sharing Wired(Ethernet) Internet Connection Via Wi-Fi Hotspot
- Sharing Wi-Fi Internet Connection via Wired(Ethernet) Connection
- 2 Ways to Create WiFi Hotspot in Ubuntu 20.04 LTS Focal Fossa
- requirements
- Enable Wifi Hotspot in Ubuntu 20.04
- Turn on Wifi Adapter
- Turn on Ubuntu 20.04 Wi-Fi Hotspot
- Create a new hotspot connection
- Visible networks
- Open NM Connection Editor in Ubuntu 20.04
- Select the type of connection you want to create
- Create SSID and select connection Mode
- Set Wi-Fi hotspot security in Ubuntu 20.04
- Turn off or On Wi-Fi hotspot on Ubuntu 20.04
How to create a Wi-Fi hotspot on Ubuntu PC to share internet connection
There is no doubt, accessing the internet has gone easier nowadays with the goodness of Wi-Fi. You just need a Wi-Fi router at your home and all the devices that you have can connect to the internet connection through the home Wi-Fi network. Nowadays, you can even find some portable Wi-Fi hotspots, which can give you access to Wi-Fi networks even on the go. This can be really useful if you’re on a trip for your business or with your family. But most people have cellular data packages on the mobile or use a data card to access the internet on a laptop, while they are moving.
Creating a Wi-Fi hotspot is undoubtedly the best way to share the internet connection among multiple devices if you don’t want to pay for using the internet on individual devices. It is a piece of pie on Android and Windows to create a Wi-Fi hotspot, using multiple apps that are available for Windows, or even from the command line. The same is also possible for a Linux computer if you are using one. Ubuntu is the most popular distribution of Linux, which most people are comfortable with, and it also has an easy way to create a Wi-Fi hotspot with the help of an existing internet connection. So, I will discuss how you can create a Wi-Fi hotspot to share your internet connection with Ubuntu.
Using Wi-Fi hotspot on Ubuntu
Before you start sharing your internet connection through Wi-Fi hotspot from a Ubuntu computer, make sure you are connected to the internet through the Ethernet or any other mode of connection. This tutorial has been performed on Ubuntu 19.04, however, it will work for Ubuntu 18.04, 16.04 and other previous versions too.
Step 1: Open Ubuntu Settings
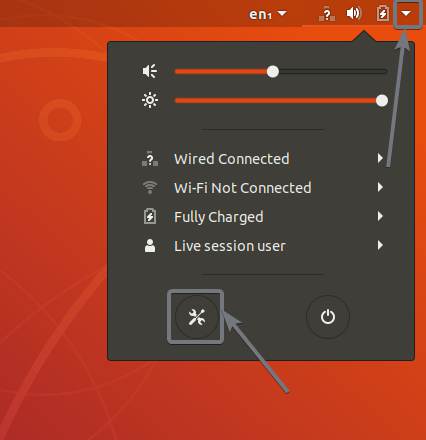
Now click on the dropdown menu, just beside the battery on the top right corner of Ubuntu and click on the ‘Settings’ cog.
Step 2: Open Wifi Settings
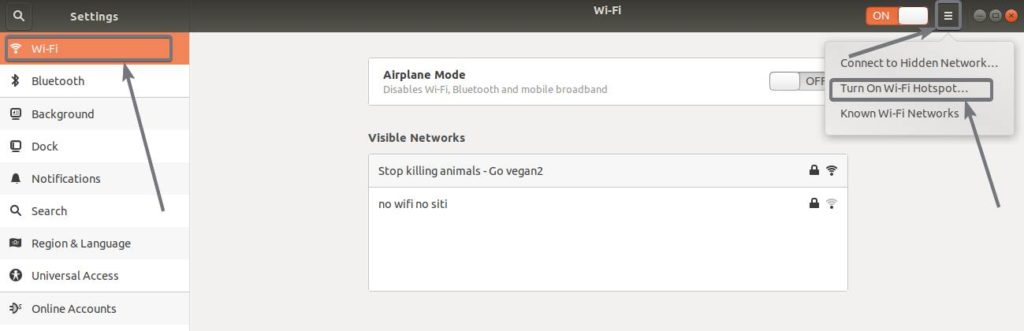
You should by default be landed in the Wi-Fi settings. If not, simply click on the ‘ Wi-Fi ’ option on the left panel of the ‘Settings’ window.
Step 4: Turn on Wi-Fi hotspot on Ubuntu
Now click on the hamburger menu as shown in the screenshot below and click on ‘ Turn On Wi-Fi hotspot… ’.
Now, click on the ‘ Turn On ’ the button in the message box that appears.

Wifi hotspot details
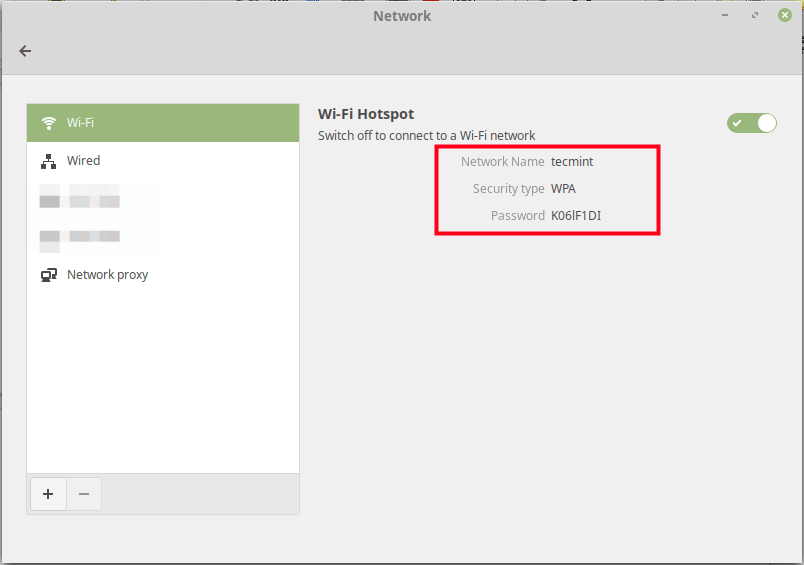
Now the details of your Wi-Fi hotspot should be displayed. Such as Network name, Security type and Password.
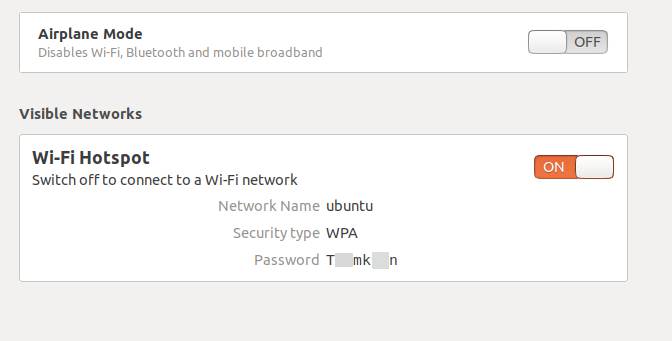
Now, you can connect to the hotspot from your Android, or any other device using the password as displayed. It automatically comes with a complex uncrackable password, however, you can even change it either from the command line or from the GUI.
Change Ubuntu Wi-Fi hotspot password
Let’s not find out, how you can change the Wi-Fi hotspot password right from the terminal window.
Simply type in the following command in a Linux Terminal window.
nmcli connection modify Hotspot 802-11-wireless-security.key-mgmt wpa-psk 802-11-wireless-security.psk 'password'
Just replace the password with the password that you want to add without the quotes and hit the enter key. Just make sure that the password is 8 characters long.

Switch off and On Wifi hotspot to reflect changes
Now the password for the Wi-Fi hotspot created by you has been saved. However, to make the changes take place, first turn off the hotspot by using the on and off switch, corresponding to the Wi-Fi hotspot that has been created. Now turn the hotspot on again.
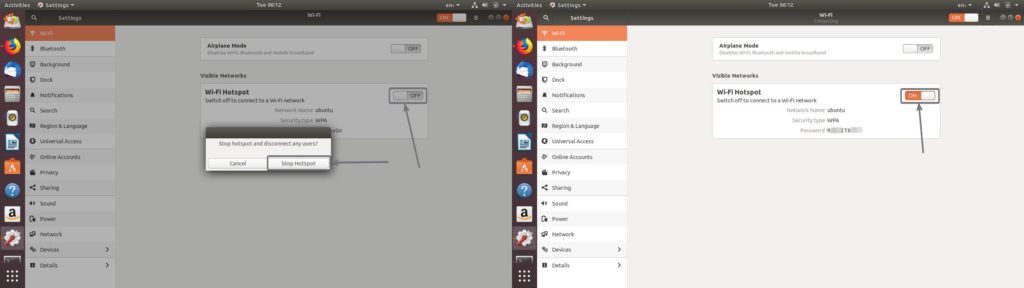
After you turn on the hotspot again on the Ubuntu computer, the password will be changed now and if you have already connected to the Wi-Fi hotspot from the other devices, you will have to authenticate once again, obviously with the new password for the connection to take place.
If you want to change the password and other necessary details of the Wi-Fi hotspot from the GUI, simply type in the following command to open the connection editor, where you can change the password for the Wi-Fi hotspot, the name, and the other necessary details.

Now, you can find all the network connections here. Simply select ‘Hotspot’ under Wi-Fi and click on the settings cog as shown in the screenshot.

To change the password, simply click on the ‘ Wi-Fi Security ’ tab and change the password. Alternatively, you can even change the security mode to get the exact level of security that you are looking for. You can even see the password by marking on ‘ Show password ’. Once you have made all the necessary changes simply click on ‘Save’ .

In several other tabs, which you can find, you can even change the hotspot name, use some proxy to connect to the internet, change the IPv4 and IPv6 settings and so on.
Just like the previous case, you have to stop the connection and start it again for the new password, and other settings to work with your Wi-Fi hotspot.
Using a Wi-Fi hotspot can definitely be helpful if you don’t have a Wi-Fi router at your home or you want to share the internet connection that is connected to your computer, with other devices in your home. I also did a speed test and the performance didn’t disappoint me in any way. However, it all depends upon the computer you are using, the Wi-Fi adaptor and other factors.
So, that was all about how you can create a Wi-Fi hotspot on your Ubuntu computer to share your existing internet connection. Did you face any kind of trouble? Feel free to comment on the same below.
Other Articles:
How to Share Wired Internet Via Wi-Fi and Vice Versa on Linux
In this article, you will learn how to share a wired (Ethernet) internet connection via a wireless hotspot and also how to share a wireless internet connection via a wired connection on a Linux desktop.
This article requires you to have at least two computers: a Linux desktop/laptop with a wireless card and an Ethernet port, then another computer (which may not necessarily be running Linux) with either a wireless card and/or an Ethernet port.
Sharing Wired(Ethernet) Internet Connection Via Wi-Fi Hotspot
First, connect your computer to a source of internet using an Ethernet cable as shown in the following screenshot.
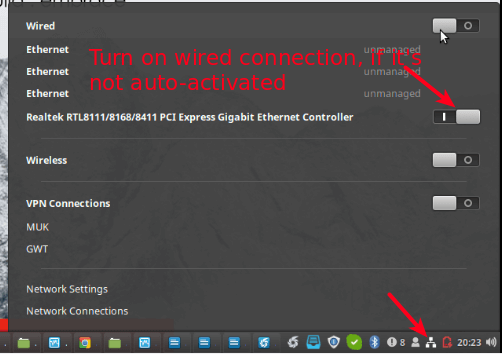
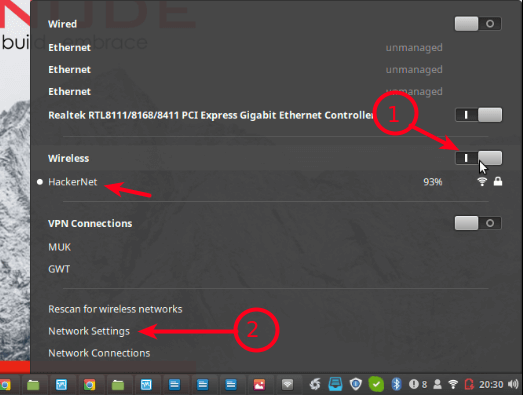
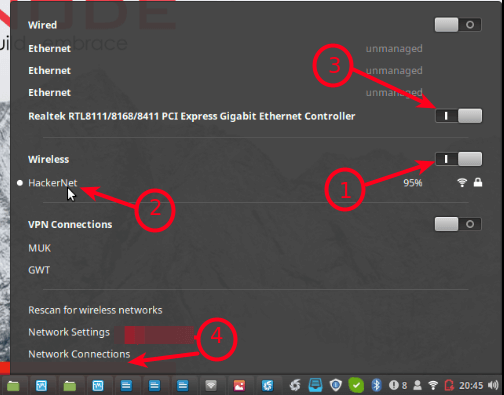
Next, enable Wireless connections, then go to Network Settings as highlighted in the following screenshot.
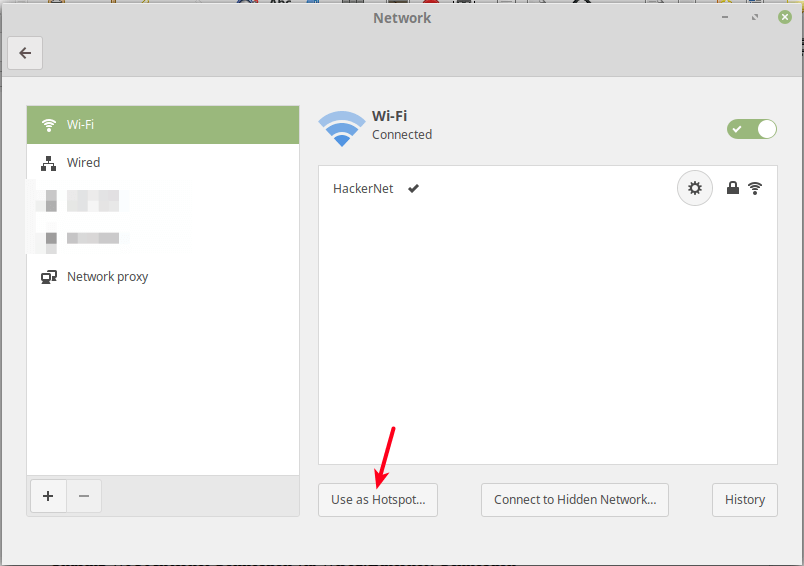
Then click Use as Hotspot as shown in the following screenshot.
Next, from the pop-up window, click Turn On to activate the wireless hotspot.
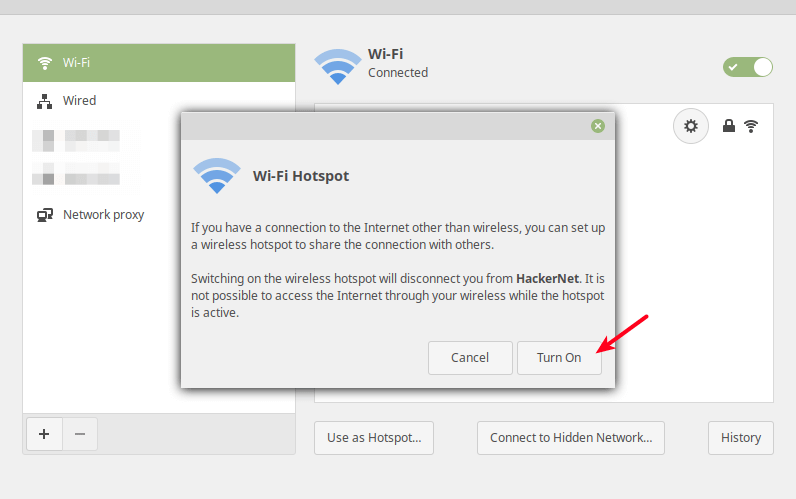
Now a wireless hotspot should be created with a name defaulting to the hostname e.g tecmint.
Now you can connect another computer or device via the hot-spot to the internet.
Sharing Wi-Fi Internet Connection via Wired(Ethernet) Connection
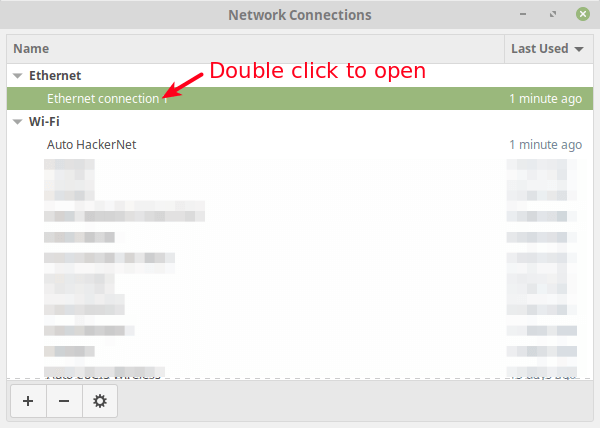
Start by connecting your computer to a wireless connection with access to the internet e.g HackerNet in the test environment. Then connect an Ethernet cable to it and go to Network Connections.
From the pop-up window, select the Wired/Ethernet connection, then go to its settings as described in the following screenshot.
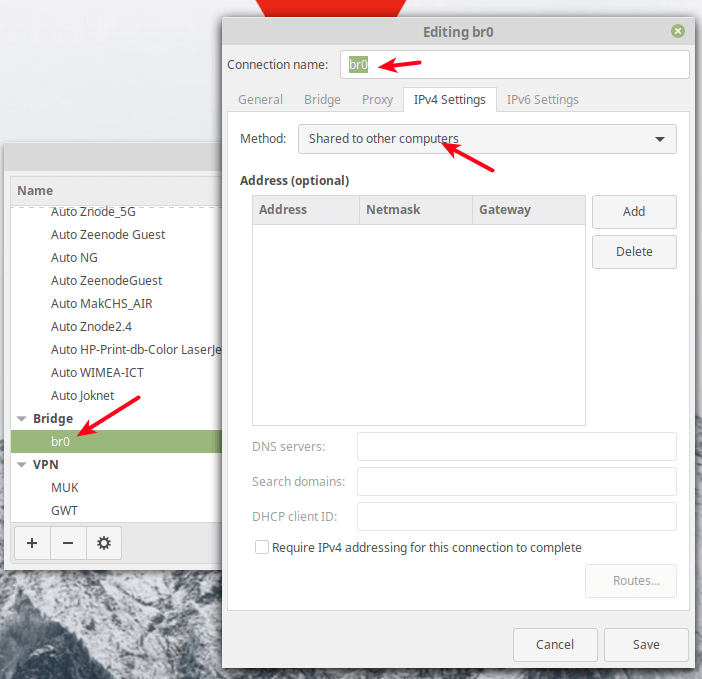
Under the connection settings, go to IPv4 Settings.
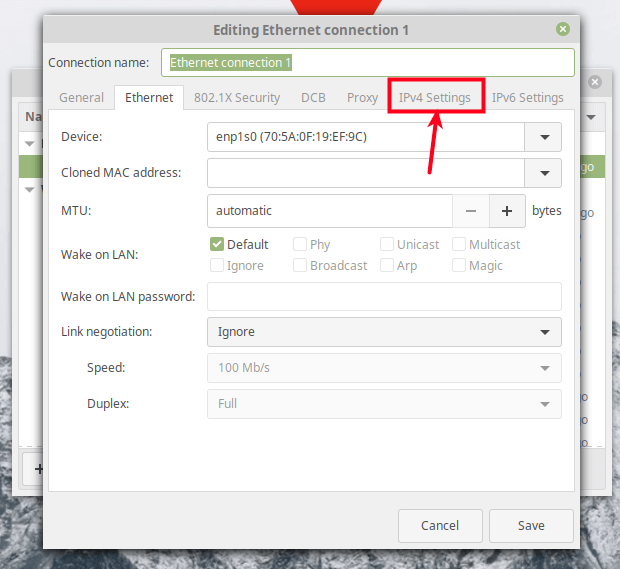
Under the IPv4 settings, set the Method to Shared to other computers as shown in the following screenshot. Optionally, you can add the IP address to define the network to use. Then click Save.

Next, turn the wired connection off then on, to activate it once more. Then open it under Network Connections, it should now be configured for sharing (by having a default IP address of 10.42.0.1) as shown in this screenshot.
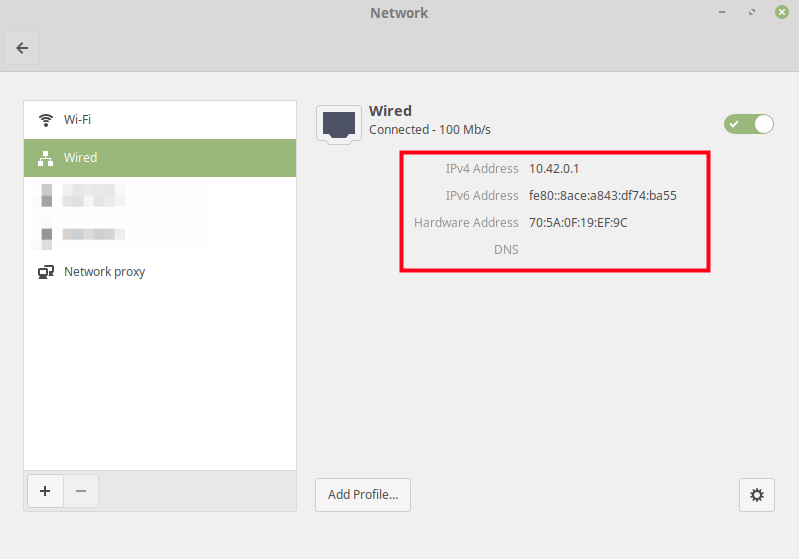
Note: You can also share a bridged interface the same way as the wired interface as shown in the following screenshot.
Go ahead and connect another computer to the other end of the Ethernet cable or an access point to serve many computers/devices. For any inquiries, reach us via the feedback form below.
2 Ways to Create WiFi Hotspot in Ubuntu 20.04 LTS Focal Fossa
Believe it or not but when it comes to handling networking nothing is like Linux and of course, Ubuntu is the part of that. Indeed, the enabling of a hotspot in Windows 10 is super easy just one click and Ubuntu is not behind as well, here you also just need to go through few steps, to get and activate a hotspot connection.
requirements
- Ubuntu 20.04 LTS or older versions such as Ubuntu 19.04/18.04/16.04…
- Wifi supported hardware interface
- If you want to share the internet than an Ethernet connection with active internet.
Enable Wifi Hotspot in Ubuntu 20.04
There are two ways to create a Hotspot, one is through the general settings and the other one is by directly accessing the Gnome connection editor.
Method 1#: Using the General Settings.
Turn on Wifi Adapter
Click on the top right side arrow symbol given on Ubuntu 20.04 to reveal quick settings and then Turn ON the Wifi Adapter. Once you have done that click on the “Wifi Settings” option.

Turn on Ubuntu 20.04 Wi-Fi Hotspot
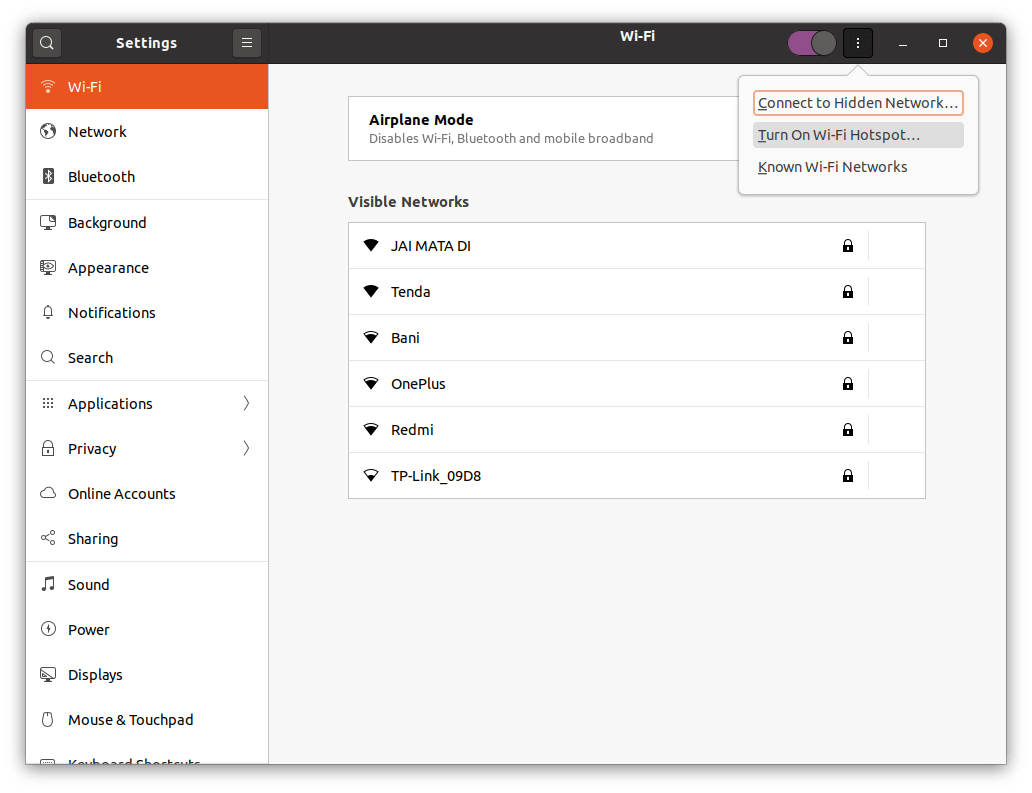
Under the Settings of Ubuntu 20.04 LTS, select the WiFi from the left side panel. After that click on the three dots given near the minimize icon in the top bar. This will pop-up further settings related to Wi-Fi. Here select the “Turn On Wi-Fi Settings“.
Create a new hotspot connection
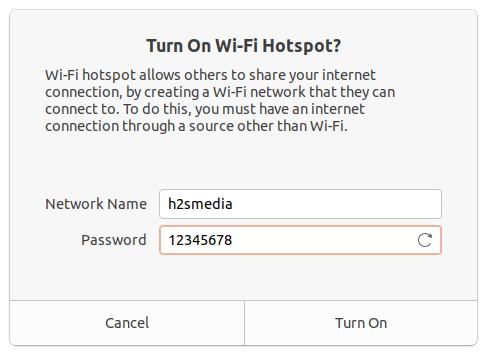
You will see a new window. Here you have to give some name to your Ubuntu hotspot connection which acts as SSID along with the password you want to use for the same. Finally, click on the Turn On option to start it.
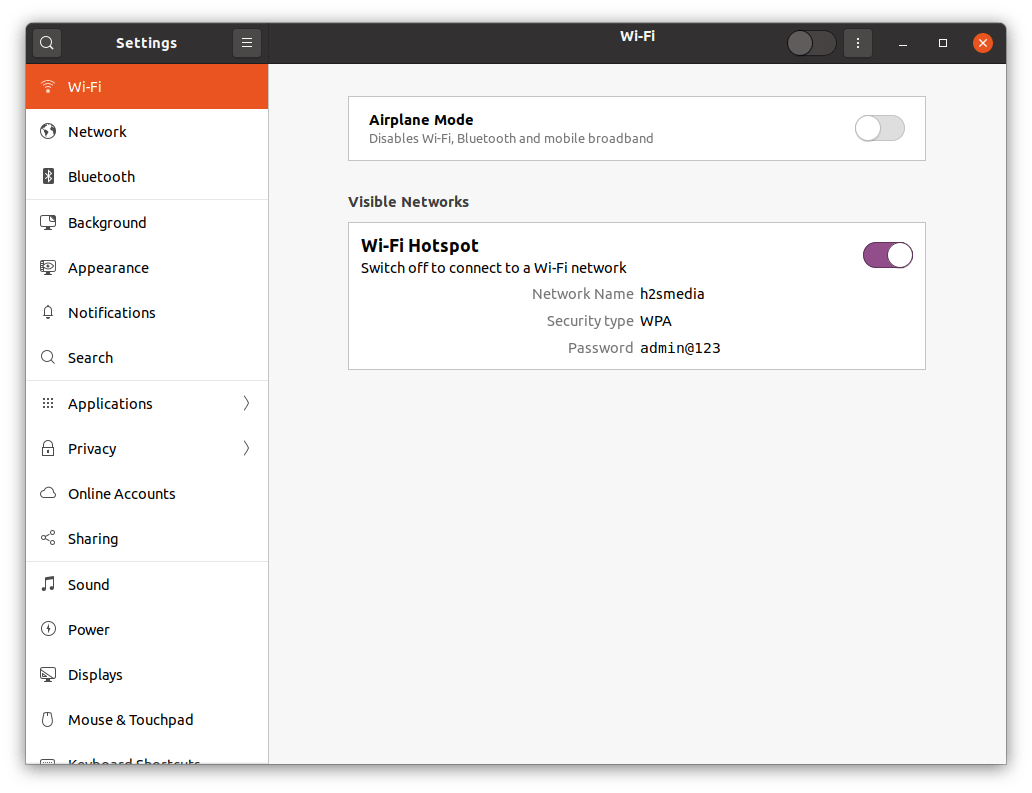
Visible networks
Under the WiFi settings, you will find the created WiFi hotspot along with all details of this new connection and a toggle button, that we can use to Switch on or off the same.

Method 2nd: Using the GNOME NM Connection editor
Open NM Connection Editor in Ubuntu 20.04
Go to the Command Terminal of Ubuntu 20.04 and type the below command:
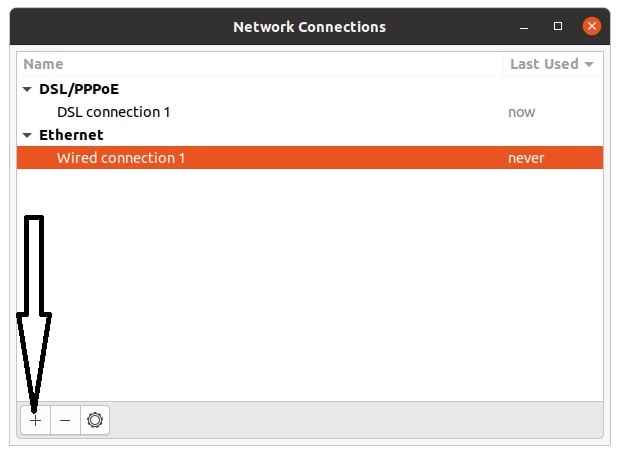
The above command will open the GNOME Network Connections manager. There click on the + icon given at the bottom to create a new connection.
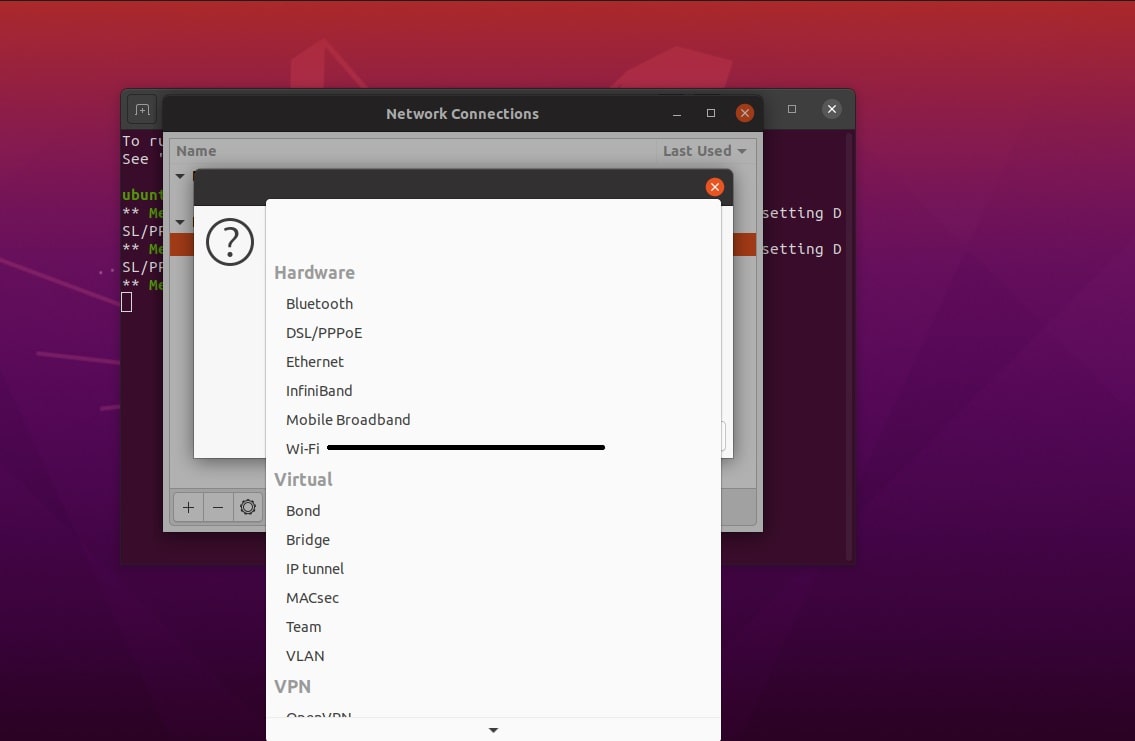
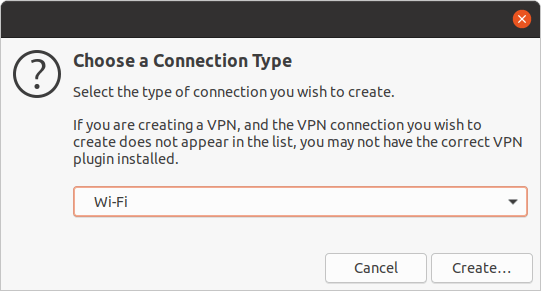
Select the type of connection you want to create
From connection type, click on the drop-down box and select the WiFi connection as we want to create a hotspot.
Create SSID and select connection Mode
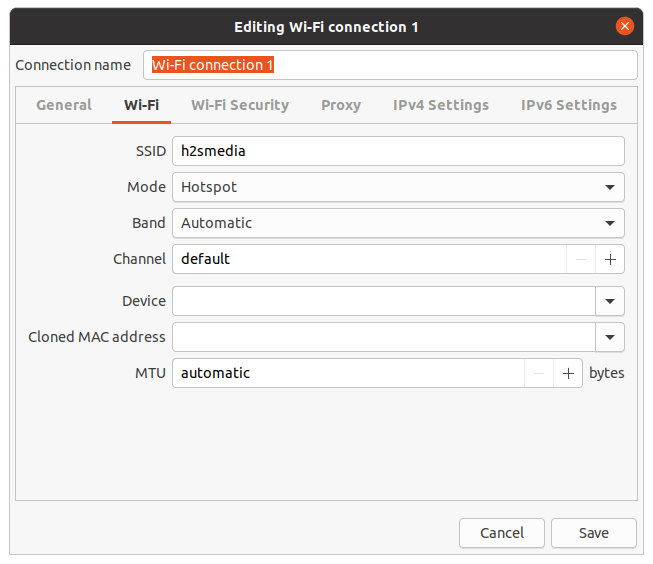
Here, we have to give some name to our Wi-Fi connection which works as SSID, we have given “h2smedia”, you can type whatever you would like to have. The next important thing is the MODE, here select the Hotspot from the dropdown box, otherwise, it will not create a Wi-Fi hotspot at all.
Set Wi-Fi hotspot security in Ubuntu 20.04
Now, click on the Wi-Fi Security tab, select WPS & WPS2 Personal security type and then in the next column enter the password which you want to use with the created hotspot. Save it.

Turn off or On Wi-Fi hotspot on Ubuntu 20.04
Finally, under the Wi-Fi settings, you will find your created connection with all detail required to connect it with other devices such as your Android smartphone or laptop. Toggle button can be used to switch it ON or OFF, in case you want to connect to some Wi-Fi network.
So, this was the quick tutorial on creating a Wi-Fi hotspot in Ubuntu Linux.
Other Articles: