- Limited Wi-Fi Access in Windows 10 and 8.1 – Troubleshooting
- Delete your Wi-Fi Network Profile
- Disable Power Save Mode of the Wi-Fi Adapter
- Reset the TCP/IP Stack Settings
- Disable TCP/IP Autotuning
- Update the Wi-Fi Adapter Driver
- Downgrade (Rollback) the Wi-Fi Adapter Driver
- Disable the antivirus (firewall)
- FIPS Compatibility Mode
Limited Wi-Fi Access in Windows 10 and 8.1 – Troubleshooting
In this article we’ll try to find a solution to a common problem of Wi-Fi connection in Windows 10 / 8.1, namely, the limited Internet connectivity and periodic disconnections from a Wi-Fi access point.
The problem shows up in the following:
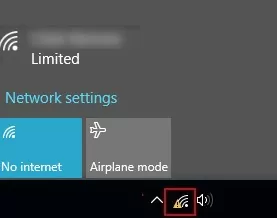
Windows 10 recognizes the Wi-Fi access point (hotspot) and connects to it without any problem, the computer can access the Internet, but after a few minutes of normal functioning the Internet access getting lost, the yellow exclamation mark appears on the network icon and the message about a limited connectivity comes out in the network connection box (“No internet access” / “The connection is limited”). When trying to reconnect to the access point, the Internet access becomes available only for a short period of time.
After you’ve upgraded your system to Windows 8.1, or installed new Windows 10 build, the message “Unidentified network. No Internet access” appears in Wi-Fi connection properties.
Note. Similar problems can occur not only with the hardware, but also with a software access Wi-Fi point based on Windows 10.
You can face the same problem while updating the Wi-Fi adapter driver. In both cases, any other devices (smartphones, computers, laptops) can connect to the same wireless access point and access the Internet without any problems or restrictions (you have to make sure that the problem is not in the access point).

If there are any Wi-Fi connectivity issues in Windows 10 or Windows 8.1, the system can’t find Wi-Fi network, or user facing with Internet access problems via Wi-Fi or the Internet access is periodically getting lost, these steps in turn are worth following:
Delete your Wi-Fi Network Profile
Perhaps the problem is that on the Wi-Fi router, the settings and / or the WEP/WPA2 key have simply been changed. Your computer is trying to connect to the access point with old settings stored in the Windows wireless network profile. Try to delete the saved Wi-Fi network profile (as described in the post: How to Delete a Wi-Fi Network Profile).
netsh wlan delete profile name=[profile_name]
After you have deleted the profile, try to connect to the access point again and specify the password.
Disable Power Save Mode of the Wi-Fi Adapter
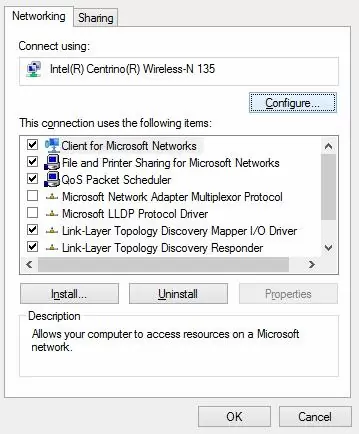
Another possible reason of Win 10/8.1 to lose the connection to the Wi-Fi access point is the incorrect settings of the Power Save Mode of your Wi-Fi adapter. It makes Windows automatically turn off the Wi-Fi adapter if it is not used for some time to save power. Check if this mode is enabled in the wireless device settings. Open the properties of the wireless connection and press the Configure button.
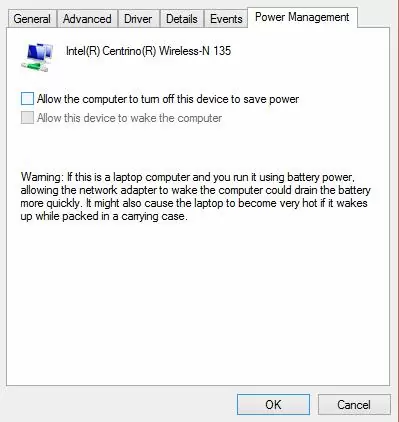
Go to the Power Management tab and make sure that the option Allow the computer to turn off this device to save power is not checked.
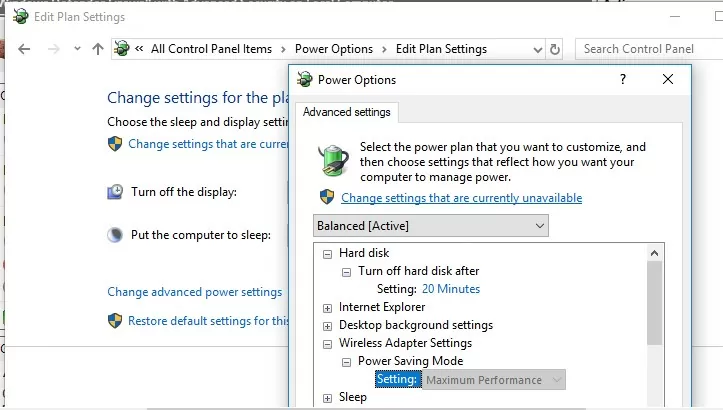
Also, change the power saving mode settings in the system setting. Go to the Control Panel -> Power Options -> for the current power scheme select Change plan settings -> Change advanced power settings -> Wireless Adapter Settings -> Power Saving Mode-> Choose Maximum Performance.
Reset the TCP/IP Stack Settings
You should also make sure that the TCP/IP stack with standard settings is used on this computer. To do it, reset the settings of the TCP/IP stack to default with netsh:
netsh int ip reset C:\resetlog.log
If you receive an error “Access is denied” for any of the components when you perform a reset, you need to give your account Full Control in the properties of the following registry key HKLM\SYSTEM\CurrentControlSet\Control\Nsi\ \26. After that, run the command again.
After the command has been run, restart the system, connect to the Wi-Fi access point and try to access the Internet.
Disable TCP/IP Autotuning
In Windows Vista / Windows Server 2008 a new feature, TCP Receive Window Auto-Tuning, was introduced to dynamically resize the size of the acceptor’s memory buffer (due to this feature, the maximum size of the transfer window can be increased to 16MB). In theory, this one should improve the efficiency of using network bandwidth and optimize the performance of the network subsystem. But in practice, autotuning of the Receive Window (RWIN) size results in many network issues. In Windows 10, as in Windows 8.1, TCP RWIN Auto-Tuning was preserved and sometimes the TCP autotuning means conflict with the settings of network equipment or firewalls (it doesn’t support or prohibit TCP Window scaling) causing package loss and the speed of the local network or the Internet decreases or even the completely access lost.
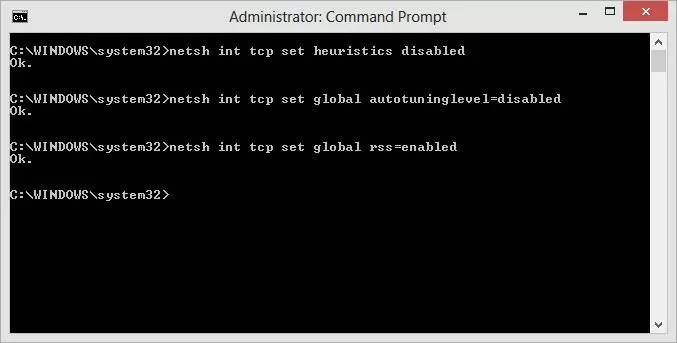
So we recommend to disable the TCP/IP autotuning. To do it, open the command prompt with the administrator privileges and run the following commands one by one:
Tip. These commands are usually 100% effective on devices with Windows RT (including Surface), but can also help on desktop versions of Windows 10 / 8.1.
netsh int tcp set heuristics disabled netsh int tcp set global autotuninglevel=disabled netsh int tcp set global rss=enabled
To check if the TCP/IP autotuning is disabled, use the following command:
netsh int tcp show global
After you run all the commands, restart your computer.
Update the Wi-Fi Adapter Driver
Troubles with Wi-Fi adapter drivers can be another source of problems. Try to update the drivers to the latest version available on the manufacturer’s website. If the issue of the limited Internet connection is not solved this way, try to use the older version of the driver. More on this in the next section.
Downgrade (Rollback) the Wi-Fi Adapter Driver
Another effective technique for troubleshooting a Wi-Fi connection is the rollback to the older version of the wireless adapter driver.
Tip. The option of rolling back to the previous version of the adapter helps almost in 100% of cases when the problem with a limited Wi-Fi connection for users appeared after upgrade to the next Windows 10 build, especially for the devices with Wi-Fi adapters Broadcom 802.11 and Qualcomm Atheros AR9003WB. Most likely, the cause of the issue is an incorrect version of the new wireless drivers in the new builds of Windows 10.
To roll back to the older version of the Wi-Fi adaptor driver in Windows 10 / 8:
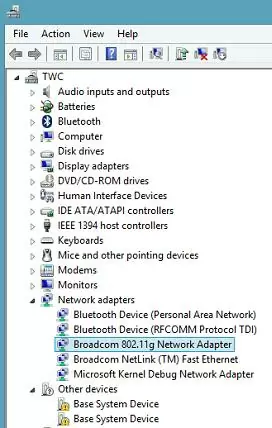
- Open the Device Manager (devmgmt.msc).
- Expand the branch Network Adapters and find your Wi-Fi card (Broadcom 802.11g in our example).

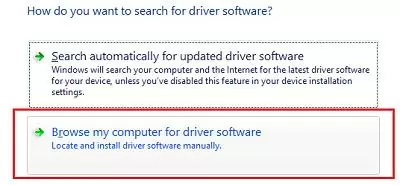
- Right-click your adapter and select Update Driver Software. In this window, click Browse my computer for driver software.

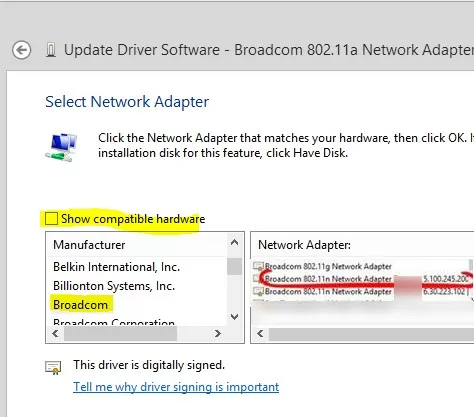
- Uncheck Show compatible hardware. Then find Broadcom in the list, choose the older version of the driver and press Next (the less number corresponds to the older driver version). In our example the older version of the driver is Broadcom 802.11n Adapter version: 5.100.245.200 (the newer one has the index 6.30.223.102).

Note. If you use the built-in Microsoft Wi-Fi (WLAN) driver, we strongly recommend that you install the manufacturer’s “native” driver. Universal drivers may see compatibility issues with some wireless network cards.
Disable the antivirus (firewall)
The problem can also be caused by the features of the firewalls, built into most popular antivirus software. In particular, in such behavior were caught Check Point and McAfee Internet Security. We recommend that you try to temporarily disable this anti-virus functionality and check whether there is a problem.
FIPS Compatibility Mode
In some cases, for the stable operation of a Wi-Fi network in Windows 10, you need to check whether the FIPS (Federal Information Processing Standard) is enabled.
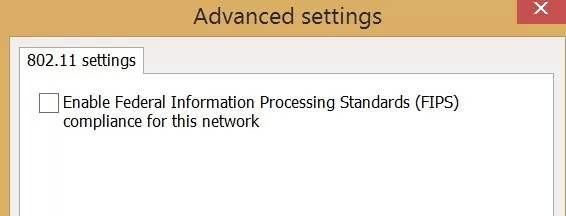
- Open the properties of the wireless network.
- Go to the Security tab and click the Advanced Settings button.
- Check the optionEnableFederal Information Processing Standard (FIPS) compliance for this network on the 802.11 tab.
- Save the changes and try to reconnect to the wireless network. If the problem persists, remove the checkbox.
Here are a few general recommendations that should be also checked:
- Check the IP settings of your Wi-Fi adapter. In most cases, the IP address in the adapter properties in the section “Internet Protocol version 4 (TCP / IPv4)” should not be set. In this case, your device must receive the IP address automatically from DHCP service on the Wi-Fi router
- Check which DNS server is used. Try to specify the Google DNS address: 8.8.8.8
- Check maybe you have configured a system proxy server to connect to the Internet. Try to reset it: Netsh winhttp reset proxy.
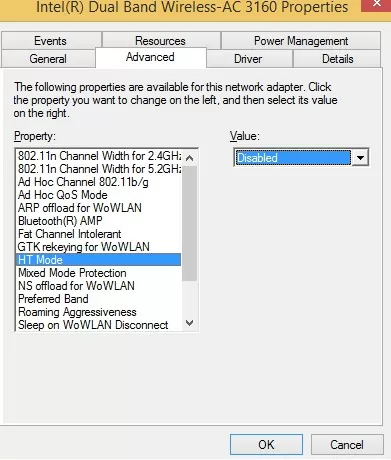
- Try to disable the HT Hight Throughput mode in the Wi-Fi adapter settings, which means that there are no old 802.11 b/g access points in the coverage area. If this mode is enabled and there are old clients around (neighbors, offices), then the network card can periodically lose the signal, and the network connection will be unstable. In the adapter driver settings, this function is called HT Mode. Switch it to the “Disable” or “Non HT“.
- Check the types of 802.11 standards supported by the driver of your wireless card and access point.
The specified methods should help to solve problems with the limited Wi-Fi connection in Windows 10 and Windows 8.1. If you have found some other ways to handle the issue, please, describe it in the comments.