- How to Use Your Android Phone as a Wi-Fi Hotspot
- In This Article
- What to Know
- How to Make a Hotspot on Your Samsung Smartphone
- How to Make a Hotspot on a Google Pixel or Stock Android
- Find and Connect to the New Wi-Fi Hotspot
- Enable Wi-Fi Hotspot for Free on Carrier-Restricted Plans
- Tips and Considerations
- Create a WiFi hotspot from Android which is already connected to WiFi
- How does it work
- Installing and Configuring NetShare
- Share WiFi from Android to Windows
- Share WiFi from Android to Android
- Share WiFi from Android to macOS
- Share WiFi from Android to iOS
- Wrapping Up: Using your Android as a WiFi repeater
How to Use Your Android Phone as a Wi-Fi Hotspot
Former Lifewire writer Melanie Uy has 5+ years’ experience writing about consumer-oriented technology and is an expert telecommuter.
Ryan Perian is a certified IT specialist who holds numerous IT certifications and has 12+ years’ experience working in the IT industry support and management positions.
In This Article
What to Know
- On Samsung, go to Settings >Connections >Mobile Hotspot and Tethering and turn on Mobile Hotspot.
- On other Androids, go to Settings >Network & Internet >Hotspot & tethering >Wi-Fi hotspot.
- When the hotspot is activated, connect your other devices to it as you would any other Wi-Fi network.
This article shows how to enable and use the Android hotspot feature on Samsung and Google Pixel smartphones as examples. The instructions should apply to most current Android phones and software versions.
How to Make a Hotspot on Your Samsung Smartphone
To turn on the Wi-Fi hotspot on a Samsung smartphone, follow these steps:
On some Samsung devices, go to Settings > Wireless & networks > Connections > Mobile Hotspot and Tethering.
:max_bytes(150000):strip_icc()/androidmobilehotspottethering-2ce8a385ce8d4fe393e7d30f44733bc7.jpg)
Turn on the Mobile Hotspot toggle switch. The phone becomes a wireless access point and displays a message in the notification bar when it’s activated.
Be selective when sharing your Wi-Fi hotspot with other people. Also, data processed through this Wi-Fi feature counts against your monthly allotment of mobile data.
How to Make a Hotspot on a Google Pixel or Stock Android
Follow these steps to enable a hotspot on a Pixel or stock Android:
:max_bytes(150000):strip_icc()/Hotspottethering_Wi-Fihotspot-c9b0f6a79d52462683fd3abbd7fbfec7.jpg)
Tap Hotspot & tethering >Wi-Fi hotspot.
![]()
Turn on the Wi-Fi hotspot toggle switch.
Find and Connect to the New Wi-Fi Hotspot
When the hotspot is activated, connect your other devices to it as you would any other Wi-Fi network:
- On your device, find the Wi-Fi hotspot. It might notify you that new wireless networks are available.
To find the wireless networks, use your Android phone and go to Settings > Wireless & networks > Wi-Fi settings. Then, follow the general Wi-Fi connection instructions for most computers.
Enable Wi-Fi Hotspot for Free on Carrier-Restricted Plans
You might not get internet access on your laptop or tablet after you connect because some wireless carriers restrict Wi-Fi hotspot access only to those who pay for the feature.
In this case, download and use an app like Elixir 2, which toggles the Wi-Fi hotspot on or off on your home screen. This makes it possible to access the hotspot feature directly and without adding extra charges from your wireless provider. If Elixir 2 doesn’t work, try the FoxFi app; it does the same thing.
Be aware that, in many cases, bypassing carrier limitations constitutes a terms-of-service violation in your contract. Use these apps at your discretion.
Tips and Considerations
When using the Wi-Fi hotspot, follow these recommendations:
- Turn off the Wi-Fi hotspot feature when you no longer need it. Leaving the feature activated drains the cellphone battery.
- By default, portable Wi-Fi hotspots are set up with WPA2 security and generic passwords. If you use a hotspot in a public place or are concerned about hackers intercepting your data, change the password before broadcasting your signal.
- Devices and carriers use different methods to activate the mobile hotspot feature. Some carriers require the use of a standalone app. Check the specific instructions for your device and service provider.
It depends on your plan. Some carriers charge $10-$20 per month for a hotspot. With other carriers, a mobile hotspot uses your data plan.
To connect your Android to your computer wirelessly, use AirDroid from Google Play, Bluetooth, or the Microsoft Your Phone app.
Your phone creates a hotspot by turning the cellular network signal into a Wi-Fi signal, essentially functioning like a modem and a router in one device.
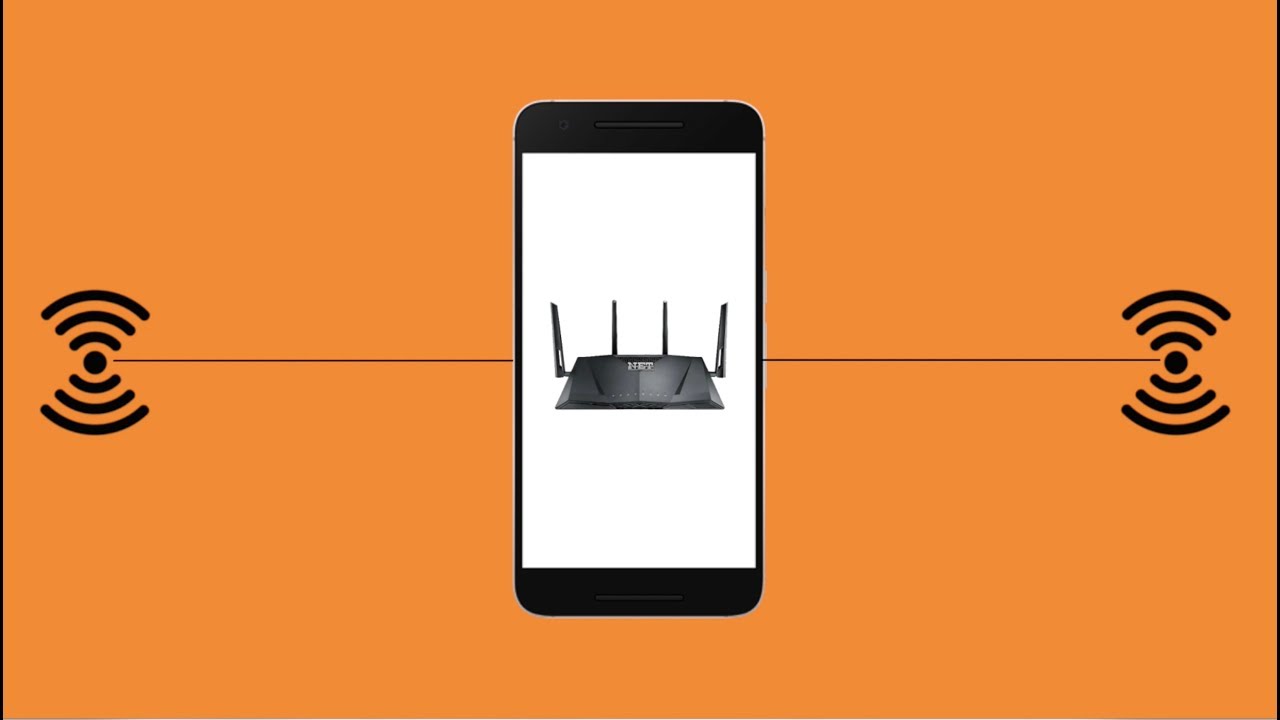
Create a WiFi hotspot from Android which is already connected to WiFi

1. You went to an Airport or Hotel, where one needs a username, and password, to log in to WiFi. Now, if your friends come over, or if you have multiple devices, there is no way for them to have internet access.
2. Your laptop is not getting the proper signal in one part of your house, but your smartphone is, and now you wish to use your Android smartphone as a WiFi repeater.
3. You want to get multiple devices under same WiFi network for file sharing, but you don’t have a router.
All 3 of the problem could be solved if you can just create a WiFi hotspot from an Android, which is already connected to WiFi network. But there is one big problem – due to Android restriction, you can not share WiFi while connected to the WiFi network. Yes, Android does come with a Portable WiFi Hotspot option, which when turned ON, will create a new WiFi hotspot. But the key here is – you can share the internet from your mobile data to WiFi.
Thankfully, there is a way to convert your Android into a WiFi repeater. Meaning, your Android is connected to a WiFi network and you can create a hotspot sharing the same WiFi network. And both devices will be able to use the Internet at the same time. So, next time you visit a Hotel or an Airport, where they give you internet access in only one device, using this workaround you can turn on Android smartphone as a WiFi repeater, and get Internet in multiple devices. No need to rely on mobile data and the speed is pretty fast as well.
Watch the following video or read the article for step by step instruction and screenshots.
How does it work
Well, the trick is pretty simple, all you need is an app and some basic network configuration, and that’s it. But first, let’s understand the problem and how this app is working around it.
The reason why there is no default setting in Android to activate WiFi repeater is because of the limitation of the network adapter of Android, it does not let you create two connection at the same time, i.e. if you try to create a hotspot while the WiFi is ON, the Android system will automatically turn OFF the WiFi.
And the app called NetShare no root tethering works smartly around this restriction. It first creates a workgroup, which takes the other devices on the same network. Do note, that as of now, the other device doesn’t have access to the internet. Now, in order to share the internet, the app creates a VPN in Android , which you’ll have to connect to from another device. Once you enter the proxy settings in the second device, it’ll redirect all the internet traffic through your device thereby having internet access.
Let’s see how to setup and get it working.
Installing and Configuring NetShare
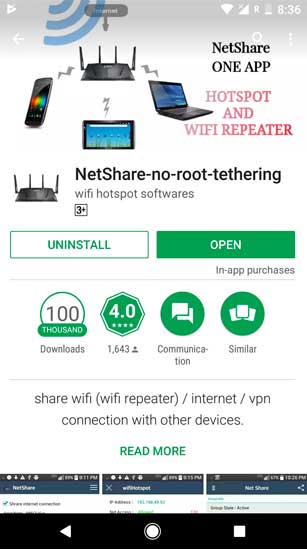
1. From your Android smartphone, head over to Google Play store and download NetShare no root tethering. This app is freemium and as the name suggests doesn’t require ROOT access.
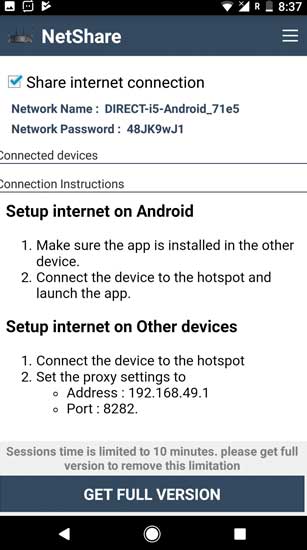
2. Next, open up the app and turn it on and that’s it. It’ll create a new wifi network with a complicated name and WiFi password. Most of you’ll think about changing the network name and password but unfortunately, you can not do that. Due to Android restriction, you cannot change the WiFi name or password (like you do for WiFi hotspot). Take a note of WiFi name and password, we’ll have to connect to it, from other devices.
Now, the steps are a bit different on the different platforms – let’s start with Windows first.
Share WiFi from Android to Windows
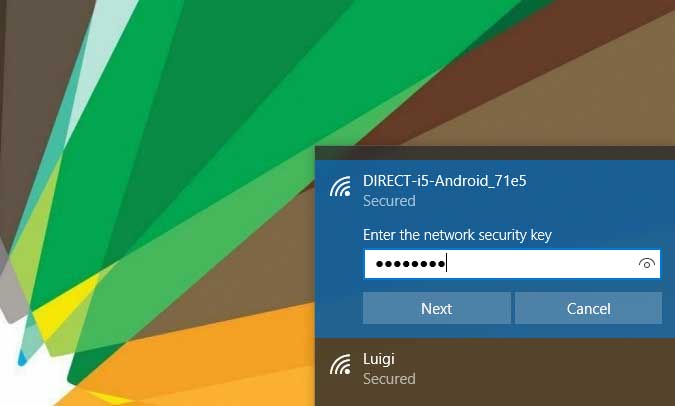
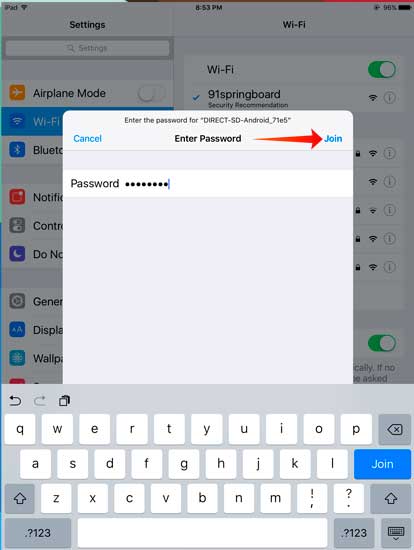
1. Open up your Windows PC, and connect to the WiFi hotspot that says – DIRECT-Android and enters the password that you saw on the app in step 2. If you open up the browser now, you won’t see get internet access even though you are connected to the network. To fix that, you need to set up a proxy IP.
2. Head over to the Control Panel > Network and Internet > Internet Option,
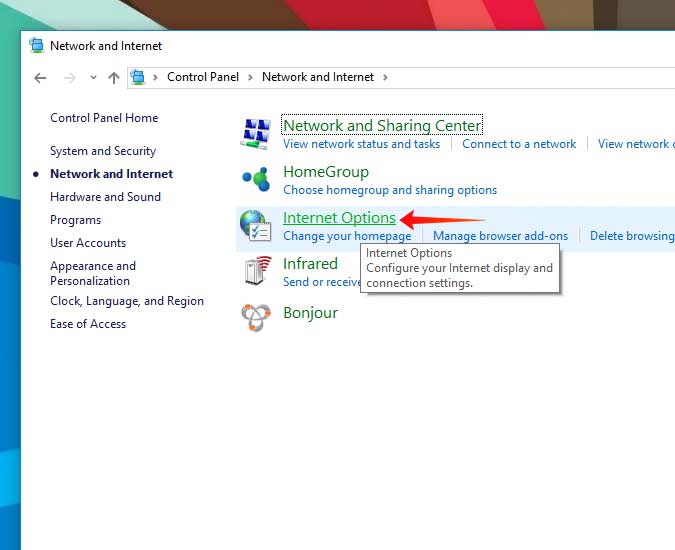
3. Next click on the Connection tab and then LAN settings.
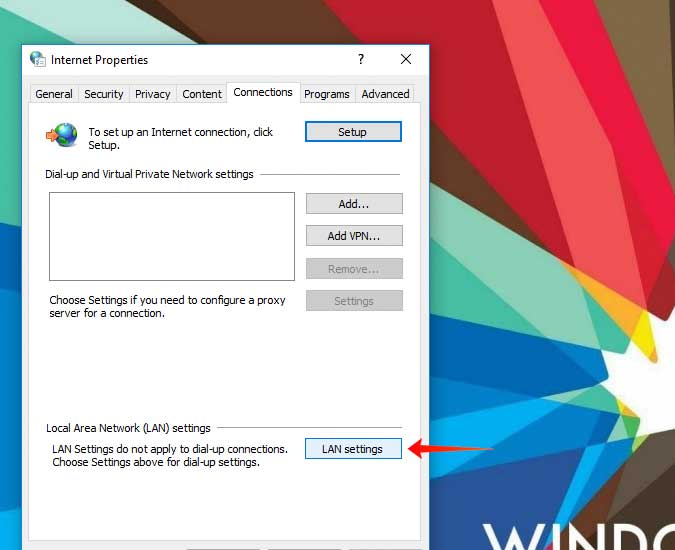
4. Check ‘Use a proxy server for your LAN’ and then enter the proxy IP address and port number.
Server: 192.168.49.1
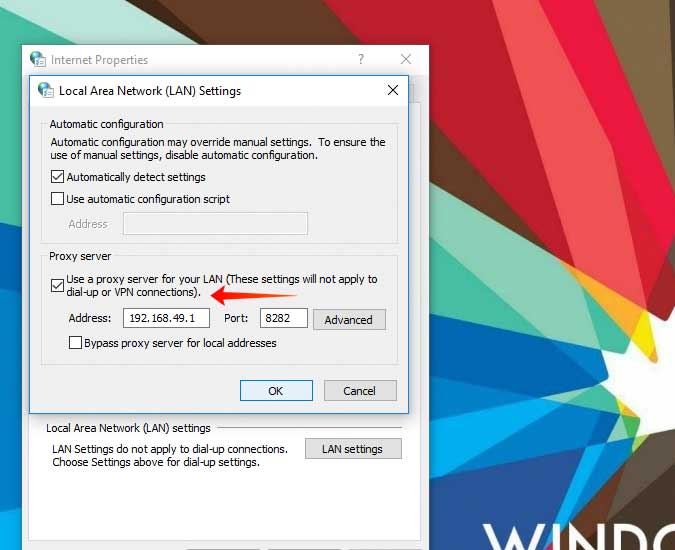
5. Save changes and close the windows. Now, if you go to the browser and search for anything, you’ll have full internet access. The speed you get here will be the original speed of your wifi and you’ll be able to use internet on both devices at the same time.
Share WiFi from Android to Android
1. Bring in your second Android device, and install the same Netshare app in it.

2. Now connect to the WiFi hotspot created by the first Android device
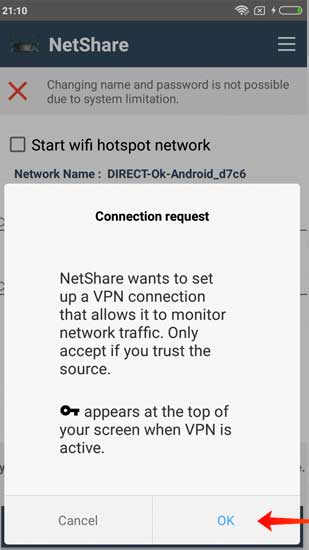
3. Once you connect to the WiFi hotspot, launch the Netshare app. You’ll see a pop up asking for VPN connection. Tap on Ok, and that’s it. The second device will be connected to the WiFi network and have internet access as well. The app will take care of setting up the proxy address, you don’t have to do anything.
Share WiFi from Android to macOS
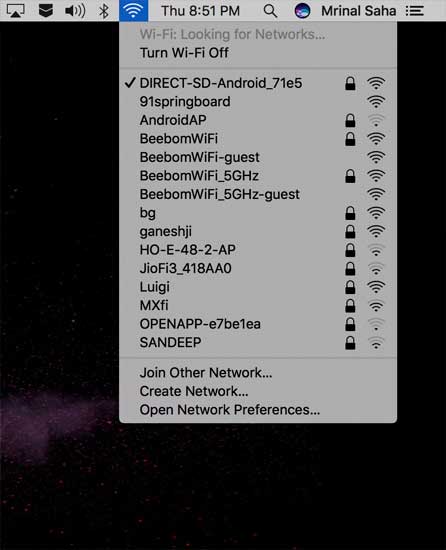
1. Open up your Mac computer, and connect to the WiFi hotspot created by the Netshare app.
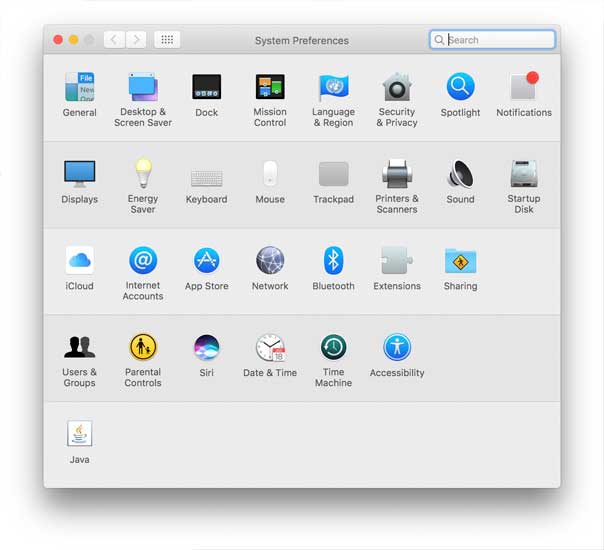
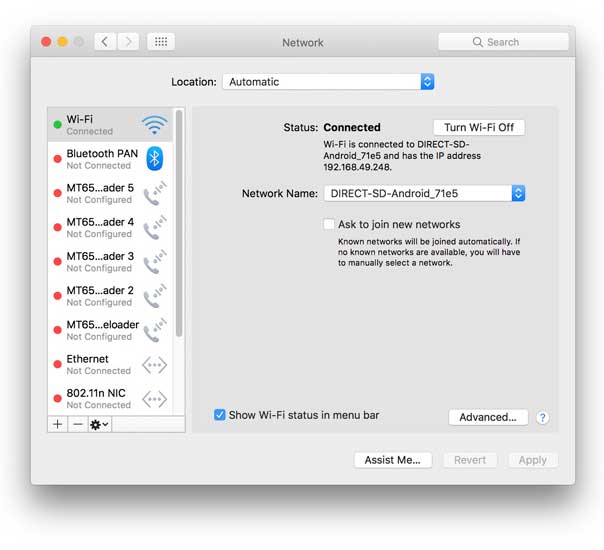
2. Go to System Preferences > Network
3. On the left click on WiFi and then click on Advanced. Make sure the padlock at the bottom left of the screen is unlocked or you won’t be able to make any changes in the next screen. To unlock the padlock, click on it and enter your login password.
4. A new window will pop open, click on the Proxies tab. Check the box that says WEb proxy (HTTP) and type in the following IP address and port number.
‘192.168.49.1’ and ‘8282’
Do the same for Secure Web Proxy (HTTPS)
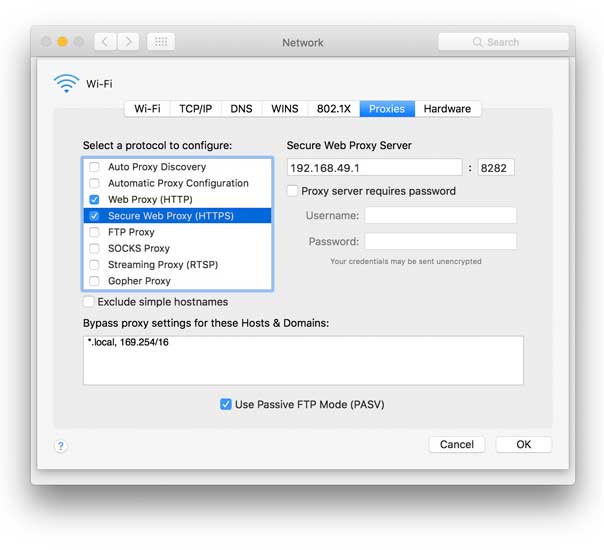
5. Once done, click on OK and save changes. Now you’ll be able to share your Android WiFi hotspot to your macOS
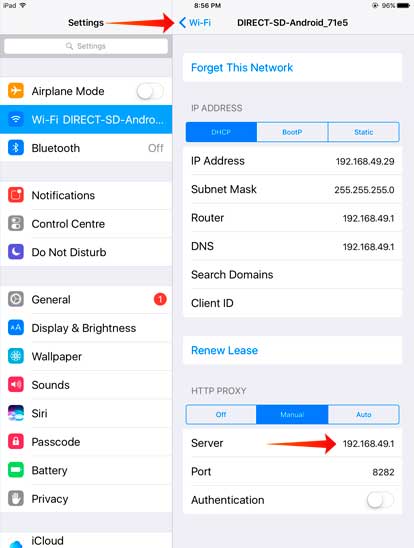
Share WiFi from Android to iOS
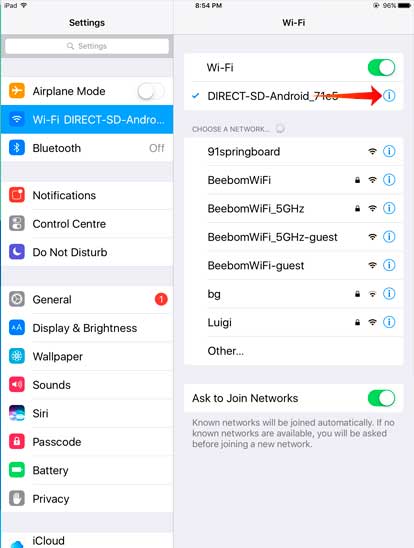
1. Go to the Setting app and go to WiFi setting. Start with connecting to the WiFi hotspot created by the Netshare app on Android
2. Tap on the WiFi setting and then tap on the ‘icon’ next to the WiFi network to access the specific settings of the wireless connection.
3. Tap on the Manual option at the bottom half of the screen and type in the following under the HTTP proxy option
Server: 192.168.49.1
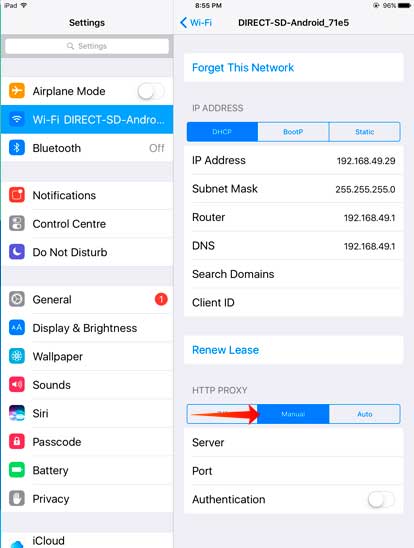
5. Once done, tap on the WiFi network button and then go back to your Home Screen to save changes. And that’s it, now you’ll be able to share your Android WiFi hotspot to your iOS
Wrapping Up: Using your Android as a WiFi repeater
I’ve tried the Netshare app on my Google Pixel and Redmi 4, as my regular Internet source to my workstation, it works flawlessly. The battery drain was also minimal. If you ever saw a connection issue, just restart the app and it should start working fine again. However looking for play store comments it does look like the apps don’t work on some low-end Android smartphone.
And the biggest bomb is, after the trial period, the app will stop working for https traffic, and since Google runs on https only, it effectively means you internet will stop working after using some data. And the only way to fix that is by upgrading to pro plan, which can cost somewhere around $6. And that’s a lot, do keep in mind that for $20, you can buy a physical wifi repeater.
Update: The developer of Netshare contacted us and they are considering giving out 10 free minutes of HTTPS connection per session. See the screenshot below.
Mrinal Saha
Mrinal is a tech geek who spends half of his day reading and writing about tech. While the nights are spent on shooting or editing YouTube videos. Feel free to geek out with him on-