- Setting up a wireless network in Windows
- Get the right equipment
- Setting up the modem and Internet connection
- Positioning the wireless router
- Securing your wireless network
- Connect a PC to your wireless network
- Connect to a Wi-Fi network in Windows
- 7 Best Ways To Enable WiFi on Laptop Windows 10 PC 2023
- How to Turn on or Enable WiFi on Laptop PC Windows 7, 8, 8.1, & 10
- How to Turn on or Enable WiFi on Windows 10 Laptop PC
- #1. Using the WiFi button
- #2. Using the Fn key and function key
- #3. Enable WiFi in Windows 8
- #4. Enable WiFi in Windows 10
- #5. Enable the WiFi adapter on the laptop
- #6. Reinstall the WiFi driver on the laptop
- #7. Perform a system restore when the methods above are not successful
- Conclusion:
Setting up a wireless network in Windows
A wireless network at home lets you get online from more places in your house. This article describes the basic steps for setting up a wireless network and starting to use it.
Get the right equipment
Before you can set up your wireless network, here’s what you’ll need:
Broadband Internet connection and modem. A broadband Internet connection is a high-speed Internet connection. Digital Subscriber Line (DSL) and cable are two of the most common broadband connections. You can get a broadband connection by contacting an Internet service provider (ISP). Typically, ISPs that provide DSL are telephone companies and ISPs that provide cable are cable TV companies. ISPs frequently offer broadband modems. Some ISPs also offer combination modem/wireless routers. You can also find these at computer or electronics stores, and online.
Wireless router. A router sends info between your network and the Internet. With a wireless router, you can connect PCs to your network using radio signals instead of wires. There are several different kinds of wireless network technologies, which include 802.11a, 802.11b, 802.11g, 802.11n, 802.11ac, and 802.11ax.
Wireless network adapter. A wireless network adapter is a device that connects your PC to a wireless network. To connect your portable or desktop PC to your wireless network, the PC must have a wireless network adapter. Most laptops and tablets—and some desktop PCs—come with a wireless network adapter already installed.
To check whether your PC has a wireless network adapter:
- Select Start , type device manager in the search box, and then select Device Manager.
- Expand Network adapters.
- Look for a network adapter that might have wireless in the name.
Setting up the modem and Internet connection
After you have all the equipment, you’ll need to set up your modem and Internet connection. If your modem wasn’t set up for you by your Internet service provider (ISP), follow the instructions that came with your modem to connect it to your PC and the Internet. If you’re using Digital Subscriber Line (DSL), connect your modem to a phone jack. If you’re using cable, connect your modem to a cable jack.
Positioning the wireless router
Put your wireless router somewhere where it will receive the strongest signal with the least amount of interference. For better results, follow these tips:
Place your wireless router in a central location. Place the router as close to the center of your home as possible to increase the strength of the wireless signal throughout your home.
Position the wireless router off the floor and away from walls and metal objects, such as metal file cabinets. The fewer physical obstructions between your PC and the router’s signal, the more likely that you’ll be using the router’s full signal strength.
Reduce interference. Some networking equipment uses a 2.4 gigahertz (GHz) radio frequency. This is the same frequency as most microwaves and many cordless phones. If you turn on the microwave or get a call on a cordless phone, your wireless signal might be temporarily interrupted. You can avoid most of these issues by using a cordless phone with a higher frequency, such as 5.8 GHz.
Securing your wireless network
Security is always important; with a wireless network, it’s even more important because your network’s signal could be broadcast outside your home. If you don’t help secure your network, people with PCs nearby could access info stored on your network PCs and use your Internet connection.
To help make your network more secure:
Change the default user name and password. This helps protect your router. Most router manufacturers have a default user name and password on the router and a default network name (also known as the SSID). Someone could use this info to access your router without you knowing it. To help avoid that, change the default user name and password for your router. See the documentation for your device for instructions.
Set up a security key (password) for your network. Wireless networks have a network security key to help protect them from unauthorized access. We recommend using Wi-Fi Protected Access 3 (WPA3) security if your router and PC support it. See the documentation for your router for more detailed info, including what type of security is supported and how to set it up.
Some routers support Wi-Fi Protected Setup (WPS). If your router supports WPS and it’s connected to the network, follow these steps to set up a network security key:
- Do one of the following, depending on which version of Windows is running on your PC:
- In Windows 7 or Windows 8.1, select Start, start typing Network and Sharing Center, and then choose it in the list.
- In Windows 10, select Start , then select Settings >Network & Internet >Status >Network and Sharing Center.
- In Windows 11, select Start, type control panel, then select Control Panel >Network and Internet >Network and Sharing Center.
- Select Set up a new connection or network.
- Select Set up a new network, then choose Next.
The wizard will walk you through creating a network name and a security key. If your router supports it, the wizard will default to Wi‑Fi Protected Access (WPA2 or WPA3) security. We recommend that you use WPA3 if you can, because it offers better security than WPA2, WPA, or Wired Equivalent Privacy (WEP) security. With WPA3, WPA2 or WPA you can also use a passphrase, so you don’t have to remember a cryptic sequence of letters and numbers.
Write down your security key and keep it in a safe place. You can also save your security key on a USB flash drive by following the instructions in the wizard. (Saving your security key to a USB flash drive is available in Windows 8 and Windows 7, but not in Windows 10 or Windows 11.)
Use a firewall. A firewall is hardware or software that can help protect your PC from unauthorized users or malicious software (malware). Running a firewall on each PC on your network can help control the spread of malicious software on your network, and help protect your PCs when you’re accessing the Internet. Windows Firewall is included with this version of Windows.
Connect a PC to your wireless network
- Select the Network or Wifi icon in the notification area.
- In the list of networks, choose the network that you want to connect to, and then select Connect.
- Type the security key (often called the password).
- Follow additional instructions if there are any.
If you have problems with your Wi-Fi network when using Windows 10, see Fix Wi-Fi problems in Windows for advanced troubleshooting info.
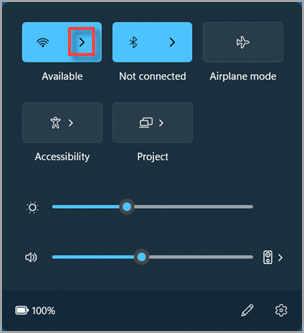
- Select the Network icon in the notification area, then select the > icon next to the Wi-Fi quick setting to see a list of available networks.
- Choose the network that you want to connect to, and then select Connect.
- Type the security key (often called the password).
- Follow additional instructions if there are any.
If you have problems with your Wi-Fi network when using Windows 11, see Fix Wi-Fi problems in Windows for advanced troubleshooting info.
Connect to a Wi-Fi network in Windows
Whether you’re at home, work, or out and about, chances are you’ll find a Wi-Fi network that you can connect to for internet access.
- Select the Network, Sound, or Battery icons ( ) on the far right side of the taskbar to open quick settings.
The Disconnected icon appears when you’re not connected.

On the Wi-Fi quick setting, select Manage Wi-Fi connections .
Whether you’re at home, work, or out and about, chances are you’ll find a Wi-Fi network that you can connect to for internet access.
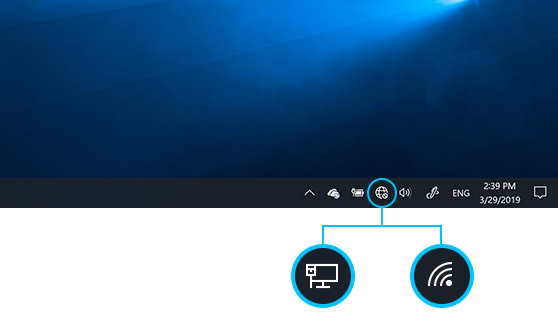
- Select the Network icon on the taskbar. The icon that appears depends on your current connection state. If you don’t see one of the network icons (or a similar one) shown in the following image, select the Up arrow to see if it appears there.
- Choose the Wi-Fi network you want, then select Connect.
- Type the network password, and then select Next.
- Choose Yes or No, depending on the type of network you’re connecting to and if you want your PC to be discoverable by other PCs and devices on the network.
7 Best Ways To Enable WiFi on Laptop Windows 10 PC 2023
7 Best Ways To Enable WiFi on Laptop Windows 10 PC – Before discussing how can I activate fast and easy wifi on a laptop, let’s discuss it first. New laptops are definitely equipped with a built-in WiFi adapter. If not, who wants to buy it considering that currently, WiFi is a necessity for the majority of people.
How to Turn on or Enable WiFi on Laptop PC Windows 7, 8, 8.1, & 10
Our laptops are not always connected to WiFi. Usually, we have to turn it on manually to activate it. This is useful when we want to save the laptop battery. If you are still confused about how to activate WiFi, let’s follow these seven steps!
How to Turn on or Enable WiFi on Windows 10 Laptop PC
#1. Using the WiFi button

The easiest way to activate Wi-Fi on your laptop is by pressing the WiFi button. Some laptops provide a dedicated WiFi button at the top of the keyboard. Just press the button with the signal icon, and your connection will immediately turn on.
In addition, the button is usually equipped with indicator light. So you know whether WiFi is active or not. If you don’t find it, then follow the next steps.
#2. Using the Fn key and function key
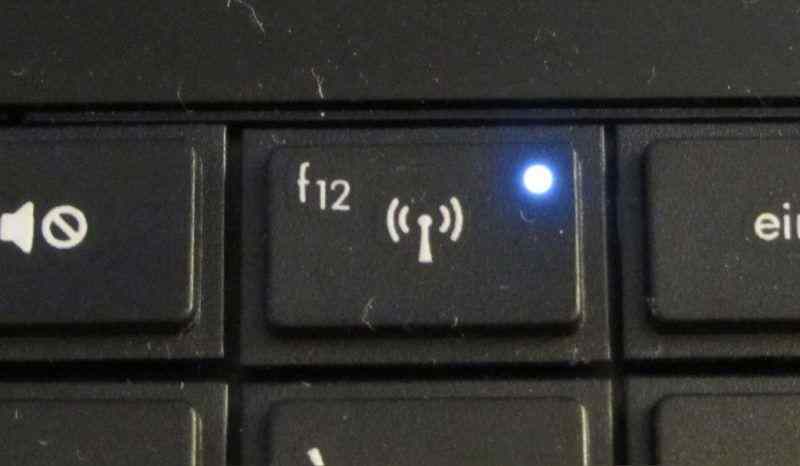
Try observing the function keys (F1-F12) on your laptop keyboard. Is there an icon like the image above? It is a button to turn on WiFi. On some laptops, we can immediately press it to activate WiFi. While for others, we have to press Fn followed by the function key.
#3. Enable WiFi in Windows 8
If your laptop doesn’t have a WiFi button and function key, try turning it on through the settings. Here are the steps:
- Click Start, look for Settings ;
- Click the Change PC Settings option, click Network ;
- In the Wireless devices column, turn on WiFi until the On sign appears ;
- Don’t forget to turn off Airplane Mode if it’s still on.
#4. Enable WiFi in Windows 10
For those of you who use Windows 10, WiFi settings are easier to access. Follow the steps below:
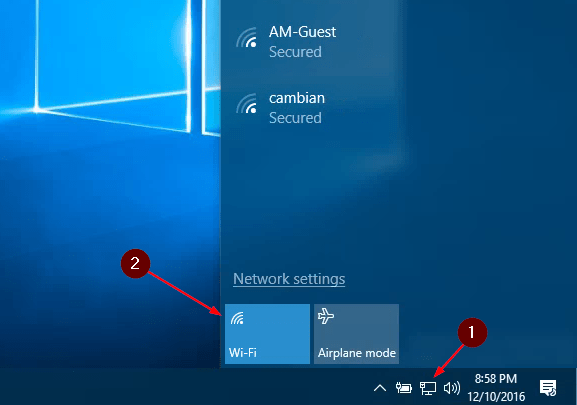
- On the taskbar, click the network icon ;
- Click WiFi until the box turns blue;
- Select the network you want to connect to, click Connect ;
- After that, you only need to enter the WiFi password.
#5. Enable the WiFi adapter on the laptop
If the methods above have not turned on your WiFi connection, try checking whether your WiFi adapter is turned on or not. You can apply it in Windows 7, 8, and 10. Here’s how:
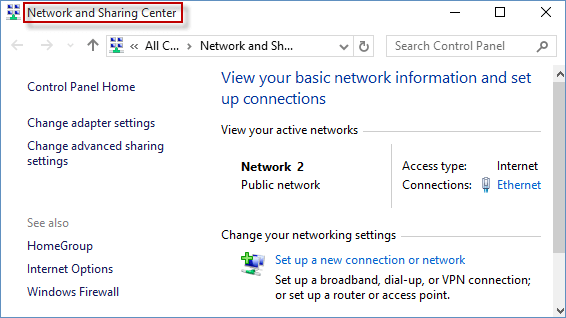
- Go to Control Panel ;
- Open Network and Internet, then click Network and Sharing Center ;
- Click Change adapter settings ;
- Right-click on the WiFi you are currently using, and click Enable.
#6. Reinstall the WiFi driver on the laptop
If you reach this stage, you cannot connect to WiFi, then try reinstalling the WiFi driver. To do this, you need an ethernet or LAN cable. Here are the steps:
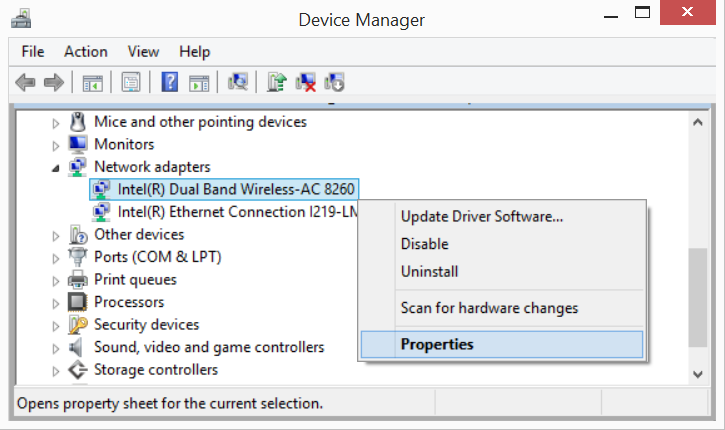
- Open Device Manager or press Windows + R then type devmgmt.msc;
- Open Network adapters, find which WiFi connection you want to connect;
- Right-click on the WiFi name, click Properties ;
- Select the Driver tab, click Uninstall ;
- Then connect the laptop to an ethernet or LAN cable;
- Restart the laptop;
- When turned on, Windows will install the adapter automatically;
- Click Run when the command box appears;
- After the install process is complete, open WiFi via the taskbar ;
- At this stage, the laptop should be able to connect to WiFi.
#7. Perform a system restore when the methods above are not successful
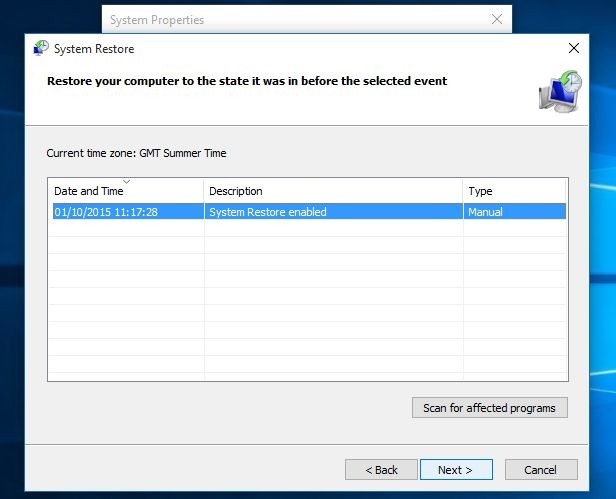
Before doing a system restore, you need to know that this method should be done when the situation is urgent. System restore can restore the state of the laptop to the date you choose. All files, settings, and changes you made after that date will be deleted. Follow the steps below:
- Open the Start menu ;
- Locate and select System Restore (Windows 7 and Vista) or Recovery (Windows 8 and 10);
- Click Open System Restore, click Next ;
- Choose the restore date you want;
- You can check the changes that will be made by clicking Scan for affected programs ;
- If you are sure, click Next, then Finish ;
- After that, Windows will reboot ;
- Try testing your WiFi connection, in general, this method has high success.
Conclusion:
So, friends, This is an explanation of the 7 best ways To enable WiFi on laptop windows 10 PC, Know the steps above because you will need them from time to time.
Don’t forget to bookmark and always visit every day Technadvice.com because here you can find the latest technology information such as How-to Guide Tips and Tricks Blogging Digital Marketing Windows Android Root Social Media games, ETC. Best of luck.