- Raspberry Pi в качестве Wi-Fi моста
- Самые популярные материалы в блоге
- За все время
- За сегодня
- 1 комментарий . Оставить новый
- Добавить комментарий Отменить ответ
- Поиск по блогу
- 3D печать пластиковых корпусов для ваших прототипов
- Популярные записи
- Рубрики блога
- cellularmitosis / README.md
- Raspberry Pi 4 Model B WiFi Ethernet Bridge
- Option 1 — Same Subnet
- Option 2 — Separate Subnet
- Conclusion
Raspberry Pi в качестве Wi-Fi моста
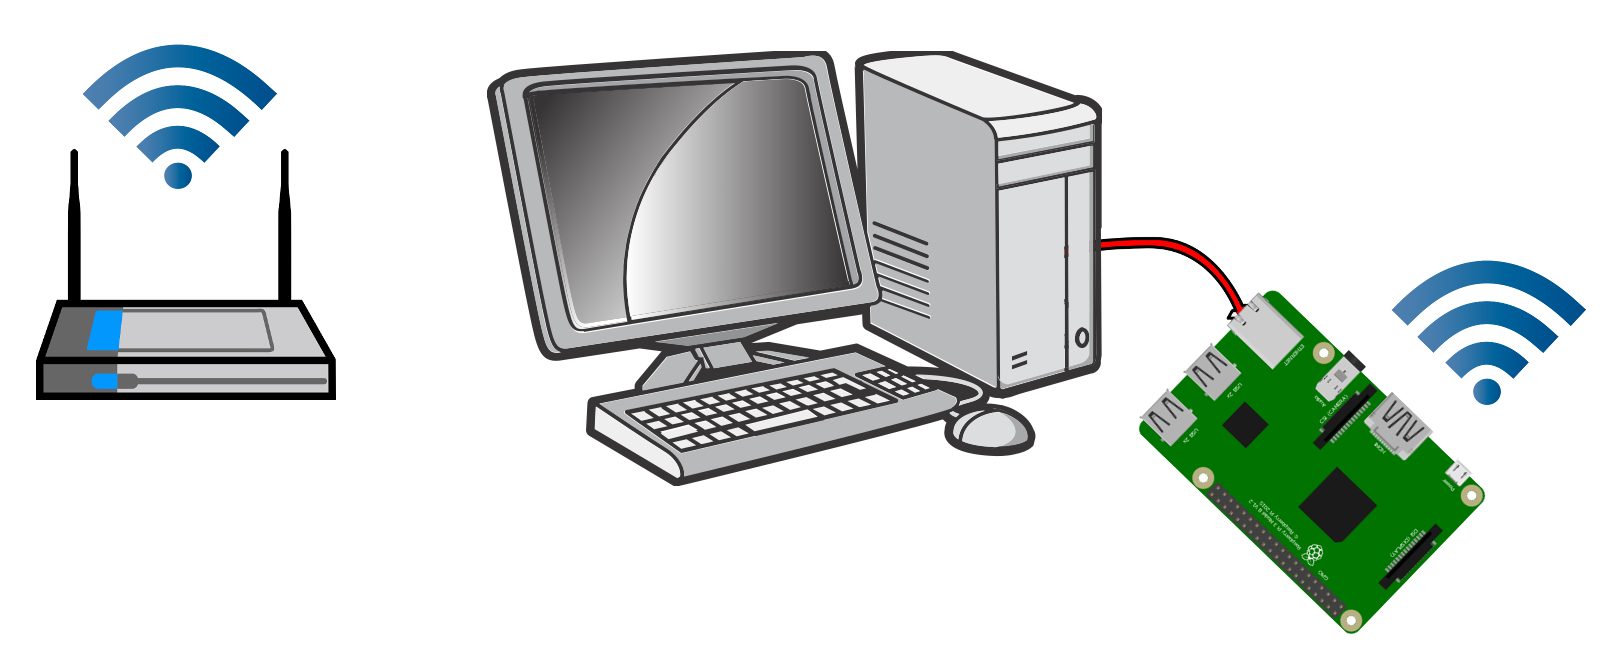
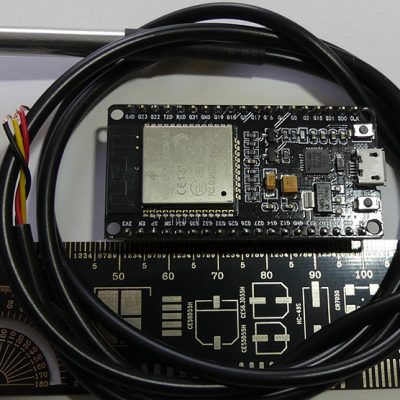
Это руководство для продвинутых пользователей, которые хотят на основе платы Raspberry Pi построить WiFi-мост между точкой доступа и портом Ethernet. Каждый шаг инструкции необходимо выполнять внимательно. Создайте резервные копии своих рабочих материалов и файлов из платы Raspberry Pi, если необходимо, перед тем как приступить к выполнению руководства.
В первую очередь нужно загрузить последние обновления для Raspberry Pi. Используйте для этого следующие команды:
Надеемся, вы не превратили свою плату Raspberry Pi в кирпич 🙂 Задавайте свои вопросы в комментариях, постараемся ответить на каждый!
Самые популярные материалы в блоге
За все время
За сегодня
Вольтик — это слаженная команда амбициозных и заядлых инженеров. Мы создали этот проект с целью вовлечения вас, талантливых и начинающих профессионалов, в увлекательный мир мейкерской микроэлектроники!
1 комментарий . Оставить новый
Добрый день, есть машина_1, подключена к малинке по eth0, малина подключена к интернету по wlan0, в недрах интернета есть vpn server в роутере_1, не OpenVPN, к нему через интернет подключается малинка, по pptp, и создает интерфейс ppp0, в роутере это соединение получает статичный ip. К роутеру_1 также подключена машина_2. Как сделать так, что бы машина_1 видела все машину_2 в локальной сети роутера, на котором запущен vpn server, так будто они подключены к одному роутеру.
Добавить комментарий Отменить ответ
Поиск по блогу
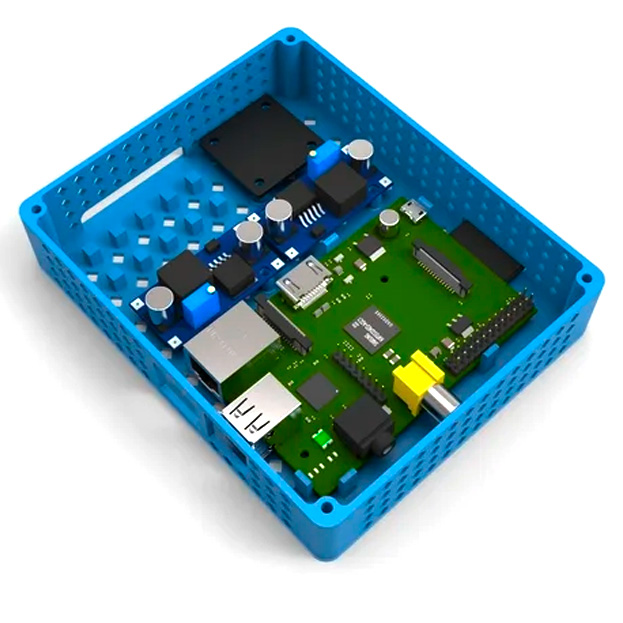
3D печать пластиковых корпусов для ваших прототипов
Качественная недорогая 3D печать корпусов и другой мелкосерийной продукции. 6 видов пластика на выбор. Гарантия качества и соблюдения сроков. Наличный и безналичный расчет.
Популярные записи
Рубрики блога
- Arduino для начинающих (33)
- Arduino своими руками (3)
- PADI (7)
- Raspberry Pi (5)
- Все о 3D печати (3)
- Инструкции и решения проблем (78)
- Интернет вещей (22)
- Механика (2)
- Модули, датчики и сенсоры (47)
- Новости магазина (4)
- Новости микроэлектроники (11)
- Обзоры плат Arduino (4)
- Программирование в Arduino IDE (15)
- Проекты на Arduino (21)
- Проекты на ESP8266 / EPS32 (35)
- Разное (17)
- Сопутствующие программы (6)
- Умный дом на Arduino (7)
cellularmitosis / README.md
This is a tutorial on how to use a Raspberry Pi to make an existing ethernet network visible to wifi clients. This is known as an access point, which bridges an ethernet network to a wifi network.
Note: The Raspberry Pi will act strictly as a bridge. DHCP will be handled by the existing DHCP server on the ethernet network.

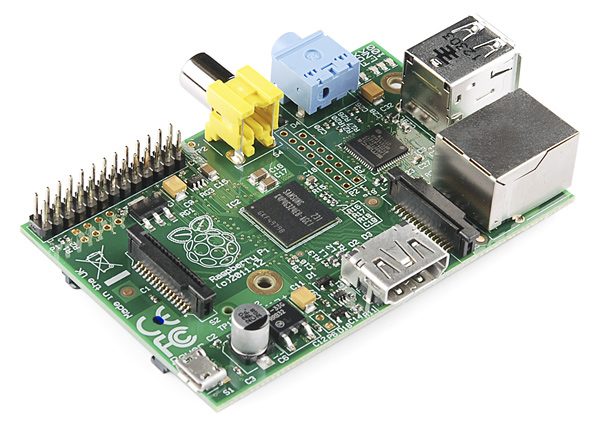
This tutorial is using a Raspberry Pi 1 Model B and a RaLink RT5370-based USB-Wifi dongle.

(Search amazon.com for «rt5370».)
Note: plugging in the Wifi dongle may reboot the Pi. I recommend you insert the dongle before booting up your Pi.
Note: this tutorial was previously based on a RTL8188CUS-based USB-Wifi dongle (sold as an Edimax EW-7811Un on amazon.com), but I ran into stability and performance problems.
Grab the latest Raspbian Lite from https://www.raspberrypi.org/downloads/ and burn it to an SD card.
On my Linux box, that’s pv 2019-09-26-raspbian-buster-lite.img > /dev/mmcblk0 .
- Boot the Pi
- Login as pi , password raspberry
- sudo raspi-config
- Localisation Options -> Change Locale (to en_US.UTF-8)
- Localisation Options -> Change Timezone (to America / Chicago)
- Localisation Options -> Keyboard Layout (to Generic 104, Other -> English US)
- Interfacing Options -> SSH (enable)
apt-get update apt-get install bridge-utilssystemctl disable dhcpcd.serviceNote: on systems which predated systemd , this would have been update-rc.d dhcpcd disable .
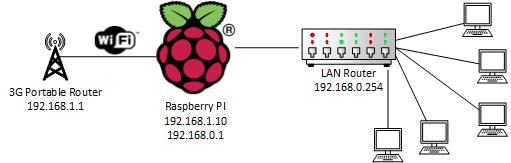
Bridge eth0 and wlan0 together, and give the Pi a static IP address (in my case, 192.168.4.254 ).
iface eth0 inet manual iface wlan0 inet manual iface br0 inet static bridge_ports eth0 wlan0 address 192.168.4.254 broadcast 192.168.4.255 netmask 255.255.255.0 gateway 192.168.4.1 auto br0For some reason, adding wlan0 to the bridge fails initially, but succeeds a short time later. As a work-around, add this to /etc/rc.local (before the exit 0 line):
# Adding wlan0 to the bridge fails initially. # Keep trying until it succeeds. attempt=0 while [ $attempt -lt 30 ] do if brctl show br0 | grep -q wlan0 then if [ $attempt > 1 ] then echo "Successfully added wlan0 to br0." fi break else attempt=$(( $attempt + 1 )) echo "Adding wlan0 to br0 (attempt $attempt of 30)." brctl addif br0 wlan0 > /dev/null 2>&1 || true sleep 1 fi done
Reboot, then log back in via ssh root@192.168.4.254 .
# the interface used by the AP interface=wlan0 # g simply means 2.4GHz band hw_mode=g # limit the frequencies used to those allowed in the country ieee80211d=1 # the country code country_code=US # 802.11n support ieee80211n=1 # QoS support wmm_enabled=1 # 1=wpa, 2=wep, 3=both auth_algs=1 # WPA2 only wpa=2 wpa_key_mgmt=WPA-PSK rsn_pairwise=CCMP # work-around for "deauthenticated due to inactivity" errors: disassoc_low_ack=0 # edit these values as needed: channel=11 ssid=somename wpa_passphrase=somepasswordEdit the Wifi channel, SSID name, and WPA passphrase as needed.
systemctl unmask hostapd.service systemctl enable hostapd.service systemctl start hostapd.servicesystemctl disable avahi-daemonThis will save a bit of wear-and-tear on your SD card. Add this to /etc/sysctl.conf :
apt-get update apt-get dist-upgrade rebootRaspberry Pi 4 Model B WiFi Ethernet Bridge
The goal is to connect a non-WiFi computer to a WiFI network via a Raspberry Pi. We will use a Raspberry Pi 4 Model B as a bridge between the non-WiFi computer and the WiFi network. The Raspberry Pi connects to WiFi and shares its connection with other computers using Ethernet.

I have two separate guides below. Follow either the Same Subnet steps or the Separate Subnet steps below based on the configuration you would prefer. My process has evolved over time and I prefer the Same Subnet approach as it is meant to be a seamless bridge for clients.
These instructions were only tested and verified on a fresh install of 2022-01-28-raspios-bullseye-armhf-lite.img , which is the headless version of Raspberry Pi OS. It is recommended to use a fresh install of Raspberry Pi OS or to back up your Pi before attempting this. Some routers and networks will not allow these instructions to work. Some networks will actively block devices from sharing network access. Your mileage may vary. If one option fails to work reliably, please try the other.
Option 1 — Same Subnet
This option is complex, but provides a more seamless experience. Bridged clients connected to the Pi should behave as if they were connected directly to the upstream network.
The following script configures everything in one go for a Pi with a standard Raspberry Pi OS install. This script is based off a very helpful Stack Overflow answer .
Step 0: Connect to WiFi on the Pi like you normally would.
Step 1: Save this script as a file named bridge.sh on your Pi.
#!/usr/bin/env bash set -e [ $EUID -ne 0 ] && echo "run as root" >&2 && exit 1 ########################################################## # You should not need to update anything below this line # ########################################################## # parprouted - Proxy ARP IP bridging daemon # dhcp-helper - DHCP/BOOTP relay agent apt update && apt install -y parprouted dhcp-helper systemctl stop dhcp-helper systemctl enable dhcp-helper # Enable ipv4 forwarding. sed -i'' s/#net.ipv4.ip_forward=1/net.ipv4.ip_forward=1/ /etc/sysctl.conf # Service configuration for standard WiFi connection. Connectivity will # be lost if the username and password are incorrect. systemctl restart wpa_supplicant.service # Enable IP forwarding for wlan0 if it's not already enabled. grep '^option ip-forwarding 1$' /etc/dhcpcd.conf || printf "option ip-forwarding 1\n" >> /etc/dhcpcd.conf # Disable dhcpcd control of eth0. grep '^denyinterfaces eth0$' /etc/dhcpcd.conf || printf "denyinterfaces eth0\n" >> /etc/dhcpcd.conf # Configure dhcp-helper. cat > /etc/default/dhcp-helper # I have to admit, I do not understand ARP and IP forwarding enough to explain # exactly what is happening here. I am building off the work of others. In short # this is a service to forward traffic from WiFi to Ethernet. cat /usr/lib/systemd/system/parprouted.service [Unit] Description=proxy arp routing service Documentation=https://raspberrypi.stackexchange.com/q/88954/79866 Requires=sys-subsystem-net-devices-wlan0.device dhcpcd.service After=sys-subsystem-net-devices-wlan0.device dhcpcd.service [Service] Type=forking # Restart until wlan0 gained carrier Restart=on-failure RestartSec=5 TimeoutStartSec=30 # clone the dhcp-allocated IP to eth0 so dhcp-helper will relay for the correct subnet ExecStartPre=/bin/bash -c '/sbin/ip addr add $(/sbin/ip -4 -br addr show wlan0 | /bin/grep -Po "\\d+\\.\\d+\\.\\d+\\.\\d+")/32 dev eth0' ExecStartPre=/sbin/ip link set dev eth0 up ExecStartPre=/sbin/ip link set wlan0 promisc on ExecStart=-/usr/sbin/parprouted eth0 wlan0 ExecStopPost=/sbin/ip link set wlan0 promisc off ExecStopPost=/sbin/ip link set dev eth0 down ExecStopPost=/bin/bash -c '/sbin/ip addr del $(/sbin/ip -4 -br addr show wlan0 | /bin/grep -Po "\\d+\\.\\d+\\.\\d+\\.\\d+")/32 dev eth0' [Install] WantedBy=wpa_supplicant.service EOF systemctl daemon-reload systemctl enable parprouted systemctl start parprouted dhcp-helperStep 2: Execute the script on your Pi like so.
Step 3: Reboot.
It may take a moment for your Pi to connect to WiFi, but once it does (and on subsequent reboots) it should be able to start forwarding traffic over the ethernet port.
Option 2 — Separate Subnet
This option is simpler than the first option. However, this option results in a more limited setup.
Bridged clients will be on a separate subnet so the network configuration may not work like you expect. This option is fine if all you can about is connecting a bridged client to the Internet. Note that this script is a bit opinionated and chooses DNS servers and the subnet IP range for you. Update the script as needed.
Step 0: Connect to WiFi on the Pi like you normally would.
Step 1: Save this script as a file named bridge.sh on your Pi.
#!/usr/bin/env bash set -e [ $EUID -ne 0 ] && echo "run as root" >&2 && exit 1 apt update && \ DEBIAN_FRONTEND=noninteractive apt install -y \ dnsmasq netfilter-persistent iptables-persistent # Create and persist iptables rule. iptables -t nat -A POSTROUTING -o wlan0 -j MASQUERADE netfilter-persistent save # Enable ipv4 forwarding. sed -i'' s/#net.ipv4.ip_forward=1/net.ipv4.ip_forward=1/ /etc/sysctl.conf # The Ethernet adapter will use a static IP of 10.1.1.1 on this new subnet. cat /etc/network/interfaces.d/eth0 auto eth0 allow-hotplug eth0 iface eth0 inet static address 10.1.1.1 netmask 255.255.255.0 gateway 10.1.1.1 EOF # Create a dnsmasq DHCP config at /etc/dnsmasq.d/bridge.conf. The Raspberry Pi # will act as a DHCP server to the client connected over ethernet. cat /etc/dnsmasq.d/bridge.conf interface=eth0 bind-interfaces server=8.8.8.8 domain-needed bogus-priv dhcp-range=10.1.1.2,10.1.1.254,12h EOF systemctl mask networking.serviceStep 2: Execute the script on your Pi like so.
Step 3: Reboot.
It may take a moment for your Pi to connect to WiFi, but once it does (and on subsequent reboots) it should be able to start forwarding traffic over the ethernet port.
Conclusion
You should now be able to connect a device to the ethernet port on the Raspberry Pi and receive an IP address.
I ran some very basic speed tests for my desktop connected through the Raspberry Pi bridge and was pleasantly surprised by the results.
I cannot guarantee how reliable this is for every possible use case, but it works well for me.
$ iperf3 --reverse --format m --version4 --client iperf.he.net Connecting to host iperf.he.net, port 5201 Reverse mode, remote host iperf.he.net is sending [ 6] local 10.1.1.187 port 52264 connected to 216.218.227.10 port 5201 [ ID] Interval Transfer Bitrate [ 6] 0.00-1.00 sec 2.06 MBytes 17.3 Mbits/sec [ 6] 1.00-2.00 sec 7.57 MBytes 63.5 Mbits/sec [ 6] 2.00-3.00 sec 8.46 MBytes 71.0 Mbits/sec [ 6] 3.00-4.00 sec 8.48 MBytes 71.2 Mbits/sec [ 6] 4.00-5.00 sec 8.49 MBytes 71.2 Mbits/sec [ 6] 5.00-6.00 sec 6.32 MBytes 53.0 Mbits/sec [ 6] 6.00-7.00 sec 8.54 MBytes 71.6 Mbits/sec [ 6] 7.00-8.00 sec 8.06 MBytes 67.6 Mbits/sec [ 6] 8.00-9.00 sec 6.92 MBytes 58.0 Mbits/sec [ 6] 9.00-10.00 sec 7.73 MBytes 64.9 Mbits/sec - - - - - - - - - - - - - - - - - - - - - - - - - [ ID] Interval Transfer Bitrate Retr [ 6] 0.00-10.00 sec 77.6 MBytes 65.1 Mbits/sec 809 sender [ 6] 0.00-10.00 sec 72.6 MBytes 60.9 Mbits/sec receiver iperf Done.