- Install Docker Desktop on Windows
- System requirements
- WSL 2 backend
- Hyper-V backend and Windows containers
- About Windows containers
- Install Docker Desktop on Windows
- Install interactively
- Install from the command line
- Start Docker Desktop
- Where to go next
- Docker Desktop WSL 2 backend on Windows
- Prerequisites
- Turn on Docker Desktop WSL 2
- Enabling Docker support in WSL 2 distros
Install Docker Desktop on Windows
Welcome to Docker Desktop for Windows. This page contains information about Docker Desktop for Windows system requirements, download URL, instructions to install and update Docker Desktop for Windows.
Docker Desktop terms
Commercial use of Docker Desktop in larger enterprises (more than 250 employees OR more than $10 million USD in annual revenue) requires a paid subscription.
System requirements
You must meet the following requirements to successfully install Docker Desktop on Windows:
WSL 2 backend
- WSL version 1.1.3.0 or above.
- Windows 11 64-bit: Home or Pro version 21H2 or higher, or Enterprise or Education version 21H2 or higher.
- Windows 10 64-bit: Home or Pro 21H2 (build 19044) or higher, or Enterprise or Education 21H2 (build 19044) or higher.
- Enable the WSL 2 feature on Windows. For detailed instructions, refer to the Microsoft documentation.
- The following hardware prerequisites are required to successfully run WSL 2 on Windows 10 or Windows 11:
- 64-bit processor with Second Level Address Translation (SLAT)
- 4GB system RAM
- BIOS-level hardware virtualization support must be enabled in the BIOS settings. For more information, see Virtualization.
Hyper-V backend and Windows containers
- Windows 11 64-bit: Pro version 21H2 or higher, or Enterprise or Education version 21H2 or higher.
- Windows 10 64-bit: Pro 21H2 (build 19044) or higher, or Enterprise or Education 21H2 (build 19044) or higher. For Windows 10 and Windows 11 Home, see the system requirements in the WSL 2 backend tab.
- Hyper-V and Containers Windows features must be enabled.
- The following hardware prerequisites are required to successfully run Client Hyper-V on Windows 10:
- 64 bit processor with Second Level Address Translation (SLAT)
- 4GB system RAM
- BIOS-level hardware virtualization support must be enabled in the BIOS settings. For more information, see Virtualization.
Note
Docker only supports Docker Desktop on Windows for those versions of Windows that are still within Microsoft’s servicing timeline.
Containers and images created with Docker Desktop are shared between all user accounts on machines where it is installed. This is because all Windows accounts use the same VM to build and run containers. Note that it is not possible to share containers and images between user accounts when using the Docker Desktop WSL 2 backend.
Running Docker Desktop inside a VMware ESXi or Azure VM is supported for Docker Business customers. It requires enabling nested virtualization on the hypervisor first. For more information, see Running Docker Desktop in a VM or VDI environment.
About Windows containers
Looking for information on using Windows containers?
- Switch between Windows and Linux containers describes how you can toggle between Linux and Windows containers in Docker Desktop and points you to the tutorial mentioned below.
- Getting Started with Windows Containers (Lab) provides a tutorial on how to set up and run Windows containers on Windows 10, Windows Server 2016 and Windows Server 2019. It shows you how to use a MusicStore application with Windows containers.
- Docker Container Platform for Windows articles and blog posts on the Docker website.
Note
To run Windows containers, you need Windows 10 or Windows 11 Professional or Enterprise edition. Windows Home or Education editions will only allow you to run Linux containers.
Install Docker Desktop on Windows
Install interactively
- Double-click Docker Desktop Installer.exe to run the installer. If you haven’t already downloaded the installer ( Docker Desktop Installer.exe ), you can get it from Docker Hub. It typically downloads to your Downloads folder, or you can run it from the recent downloads bar at the bottom of your web browser.
- When prompted, ensure the Use WSL 2 instead of Hyper-V option on the Configuration page is selected or not depending on your choice of backend. If your system only supports one of the two options, you will not be able to select which backend to use.
- Follow the instructions on the installation wizard to authorize the installer and proceed with the install.
- When the installation is successful, click Close to complete the installation process.
- If your admin account is different to your user account, you must add the user to the docker-users group. Run Computer Management as an administrator and navigate to Local Users and Groups >Groups >docker-users. Right-click to add the user to the group. Log out and log back in for the changes to take effect.
Install from the command line
After downloading Docker Desktop Installer.exe, run the following command in a terminal to install Docker Desktop:
$ "Docker Desktop Installer.exe" installIf you’re using PowerShell you should run it as:
Start-Process 'Docker Desktop Installer.exe' -Wait installIf using the Windows Command Prompt:
start /w "" "Docker Desktop Installer.exe" installThe install command accepts the following flags:
- —quiet : Suppresses information output when running the installer
- —accept-license : Accepts the Docker Subscription Service Agreement now, rather than requiring it to be accepted when the application is first run
- —no-windows-containers : Disables the Windows containers integration
- —allowed-org= : Requires the user to sign in and be part of the specified Docker Hub organization when running the application
- —backend= : Selects the default backend to use for Docker Desktop, hyper-v , windows or wsl-2 (default)
- —installation-dir= : Changes the default installation location ( C:\Program Files\Docker\Docker )
- —admin-settings : Automatically creates an admin-settings.json file which is used by admins to control certain Docker Desktop settings on client machines within their organization. For more information, see Settings Management.
- It must be used together with the —allowed-org= flag.
- For example: —allowed-org= —admin-settings=’>’
If your admin account is different to your user account, you must add the user to the docker-users group:
$ net localgroup docker-users /addStart Docker Desktop
Docker Desktop does not start automatically after installation. To start Docker Desktop:

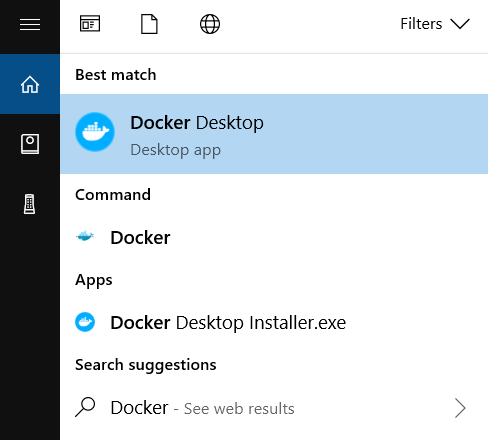
- Search for Docker, and select Docker Desktop in the search results.
- The Docker menu () displays the Docker Subscription Service Agreement window. Here’s a summary of the key points:
- Docker Desktop is free for small businesses (fewer than 250 employees AND less than $10 million in annual revenue), personal use, education, and non-commercial open source projects.
- Otherwise, it requires a paid subscription for professional use.
- Paid subscriptions are also required for government entities.
- The Docker Pro, Team, and Business subscriptions include commercial use of Docker Desktop.
- Select Accept to continue. Docker Desktop starts after you accept the terms. Note that Docker Desktop will not run if you do not agree to the terms. You can choose to accept the terms at a later date by opening Docker Desktop. For more information, see Docker Desktop Subscription Service Agreement. We recommend that you also read the FAQs.
Where to go next
- Get started with Docker is a tutorial that teaches you how to deploy a multi-service stack.
- Troubleshooting describes common problems, workarounds, and how to get support.
- FAQs provide answers to frequently asked questions.
- Release notes lists component updates, new features, and improvements associated with Docker Desktop releases.
- Back up and restore data provides instructions on backing up and restoring data related to Docker.
Docker Desktop WSL 2 backend on Windows
Windows Subsystem for Linux (WSL) 2 is a full Linux kernel built by Microsoft, which lets Linux distributions run without managing virtual machines. With Docker Desktop running on WSL 2, users can leverage Linux workspaces and avoid maintaining both Linux and Windows build scripts. In addition, WSL 2 provides improvements to file system sharing and boot time.
Docker Desktop uses the dynamic memory allocation feature in WSL 2 to improve the resource consumption. This means Docker Desktop only uses the required amount of CPU and memory resources it needs, while allowing CPU and memory-intensive tasks such as building a container, to run much faster.
Additionally, with WSL 2, the time required to start a Docker daemon after a cold start is significantly faster.
Prerequisites
Before you turn on the Docker Desktop WSL 2 feature, ensure you have:
- At a minimum WSL version 1.1.3.0., but ideally the latest version of WSL to avoid Docker Desktop not working as expected.
- Windows 10, version 21H2 or later, or Windows 11, version 21H2 or later. For more information, see System requirements.
- Installed the WSL 2 feature on Windows. For detailed instructions, refer to the Microsoft documentation.
Turn on Docker Desktop WSL 2
Important
To avoid any potential conflicts with using WSL 2 on Docker Desktop, you must uninstall any previous versions of Docker Engine and CLI installed directly through Linux distributions before installing Docker Desktop.
- Download and install the latest version of Docker Desktop for Windows.
- Follow the usual installation instructions to install Docker Desktop. Depending on which version of Windows you are using, Docker Desktop may prompt you to turn on WSL 2 during installation. Read the information displayed on the screen and turn on the WSL 2 feature to continue.
- Start Docker Desktop from the Windows Start menu.
- Navigate to Settings.
- From the General tab, select Use WSL 2 based engine.. If you have installed Docker Desktop on a system that supports WSL 2, this option is turned on by default.
- Select Apply & Restart.
Now docker commands work from Windows using the new WSL 2 engine.
Enabling Docker support in WSL 2 distros
WSL 2 adds support for “Linux distros” to Windows, where each distro behaves like a VM except they all run on top of a single shared Linux kernel.
Docker Desktop does not require any particular Linux distros to be installed. The docker CLI and UI all work fine from Windows without any additional Linux distros. However for the best developer experience, we recommend installing at least one additional distro and enable Docker support:
- Ensure the distribution runs in WSL 2 mode. WSL can run distributions in both v1 or v2 mode. To check the WSL mode, run:
$ wsl.exe --set-version (distro name) 2