- Как интегрировать Linux-машину в среду домена Windows AD (Active Directory)
- Шаг 1. Установка пакетов и подготовка
- Шаг 2. Настройка DNS
- Шаг 3. Обнаружение домена, присоединение к нему и проверка результата.
- Шаг 4. Последние настройки и авторизация.
- Integrate Linux Mint 19.1 to Windows Server 2019 Active Directory Domain Controller
Как интегрировать Linux-машину в среду домена Windows AD (Active Directory)
В этой статье будет описан процесс добавления Linux-машины (Ubuntu 20.04) в домен Windows AD.
Шаг 1. Установка пакетов и подготовка
После этого установите требуемые пакеты.
sudo apt -y install realmd sssd sssd-tools libnss-sss libpam-sss adcli samba-common-bin oddjob oddjob-mkhomedir packagekit
Далее мы настроим все инструменты. Вам требуется знать:
Шаг 2. Настройка DNS
Откройте конфигурационный файл netplan:
Если вы видите там «dhcp4: true», то есть ваш DHCP-сервер настроен корректно, переходите к следующему шагу. Если вы настраиваете параметры сетевого подключения вручную, ознакомьтесь с примером настройки:
network:ethernets:enp0s3:addresses:- 192.168.0.15/24gateway4: 192.168.0.10nameservers:addresses: [192.168.0.1, 192.168.0.2]search:- office.localoptional: trueversion: 2
- addresses — это IP, назначаемый сетевой карте;
- gateway4 — IP роутера;
- nameservers — DNS-сервера;
- search — целевой домен.
Шаг 3. Обнаружение домена, присоединение к нему и проверка результата.
В первую очередь требуется обнаружить домен:
Вы увидите что-то подобное. Это означает, что настройки сети верны и машина получила ответ от домена. Если нет, вам необходимо проверить настройки сети, домен и работоспособность DNS.
Затем присоединитесь к домену AD. Замените admin1 на имя администратора и укажите пароль.
Проверьте, возможен ли прием информации о пользователе AD. Замените user1 на имя пользователя вашего домена.
id user1@office.localuid=687821651(user1@office.local) gid=687800512(user1@office.local) groups=687800512(domain users@office.local)
Шаг 4. Последние настройки и авторизация.
Необходимо произвести настройку, чтобы в будущем каждый раз не добавлять имя домена к имени пользователя.
Измените значение use_fully_qualified_names на False. Перезагрузите и проверьте:
sudo systemctl restart sssdid useruid=687821651(user1@office.local) gid=687800512(user1@office.local) groups=687800512(domain users@office.local)
Теперь нужно настроить создание домашних каталогов для пользователей AD при входе в систему.
sudo nano /etc/pam.d/common-session#add this line in the end of filesession optional pam_mkhomedir.so skel=/etc/skel umask=077
Войдите в систему как пользователь AD.
Это означает, что вы успешно вошли в систему как пользователь AD.
Также вы можете разрешить авторизацию для некоторых пользователей и групп AD или же ограничить других. В приведенном ниже примере настроен запрет для всех пользователей, кроме user0, user1 и группы Main Admins.
sudo realm deny –allsudo realm permit user0@office.local user1@office.localsudo realm permit -g ‘Main Admins’
Настройка пользователей AD для получения root-прав такая же, как и для локальных, но выполняется в другом файле.
Добавьте к нему нужные строки. Например:
Integrate Linux Mint 19.1 to Windows Server 2019 Active Directory Domain Controller

This tutorial will describe how you can join machines that run Linux Mint 17.1 OS to Windows 2012 Active Directory Domain Controller in order to authenticate remote accounts from AD back end identity provider to local Linux workstations with the help of SSSD service and Realmd system DBus service.
The System Security Services Daemon (SSSD) is a relative new service which provides cross-domain compatible methods for Active Directory users to authenticate to local machines using a combination of usernames and domain back end name to create the login identity, even if the Domain Controller goes offline (SSSD caches credentials).
REQUIREMENTS
- Windows Server 2012 configured as an Active Directory Domain Controller
- A Linux Mint 17.1 client machine which will be integrated to Windows PDC
Domain Settings:
- Domain Name: caezsar.lan
- Windows Server 2012 AD FQDN: server.caezsar.lan
- Windows Server 2012 AD IP Address: 192.168.1.130
- Linux Mint Hostname: mint-desktop
- Linux Mint IP Address: automatically assigned by DHCP
- Linux Mint first DNS IP Address: Manually assigned to point to AD PDC – 192.168.1.130
STEP ONE – Linux Mint Network Configuration
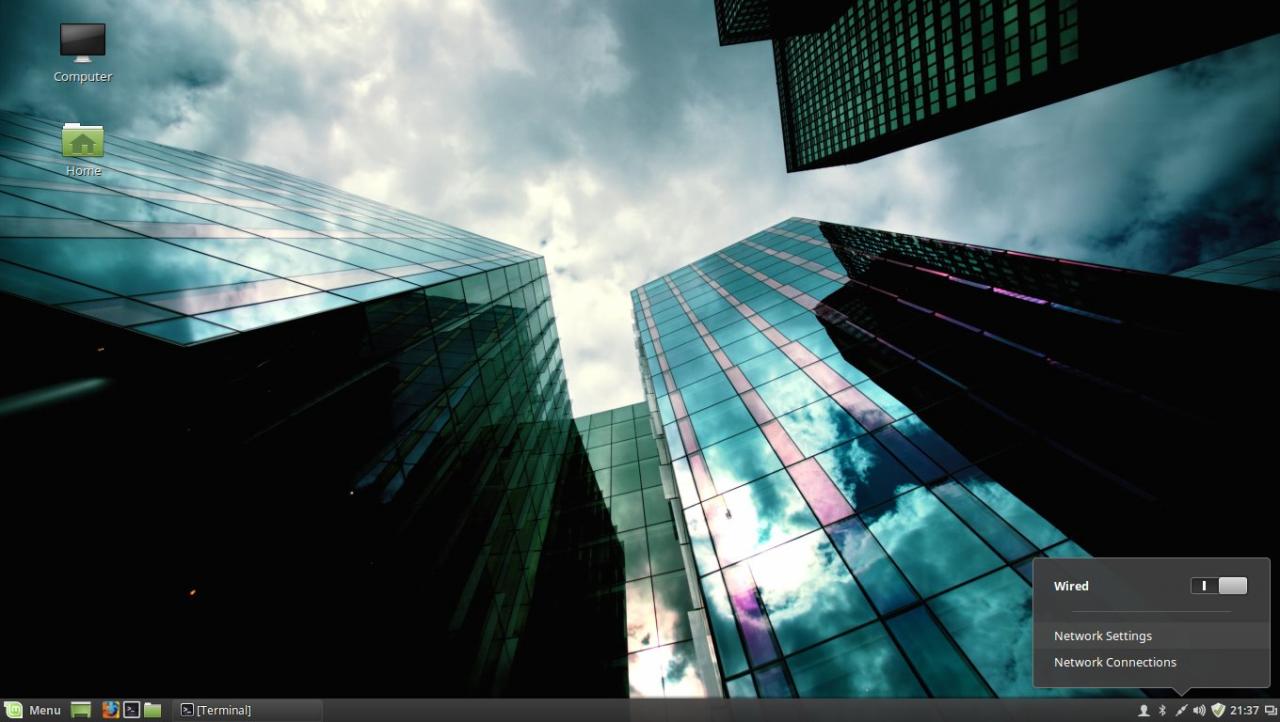
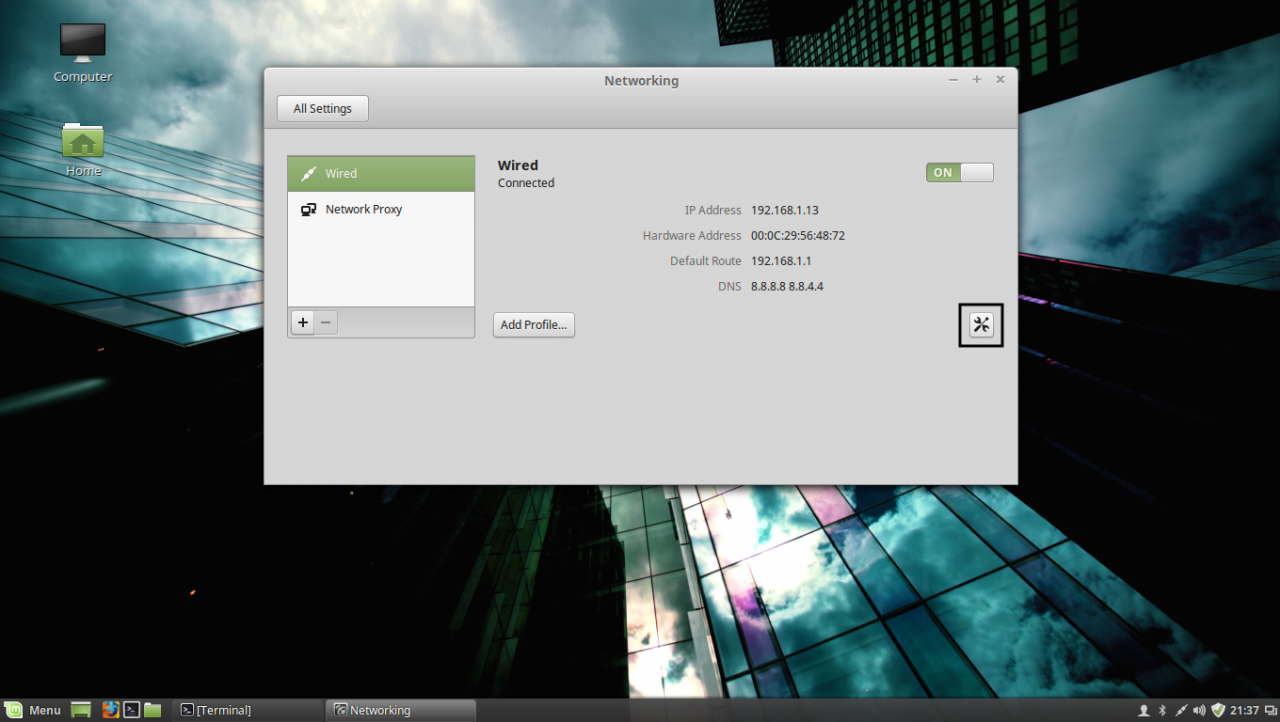
1. Before starting with installing the required services in order to integrate the local machine to the PDC Server, first we need to assure that Windows Domain Controller is reachable through DNS resolution on Linux Mint host by adding the DNS PDC IP Address on our Network Configuration. To achieve this goal, first open Network Settings , go to the Network Interface Card (in this case is the Wired Connection , but you can use a Wireless Connection also) , open it for editing (hit the settings icon from bottom right) and add your PDC IP Address on IPv4 DNS filed (switch Automatic DNS to OFF ) as illustrated in the following screenshots:
edit network interface settings
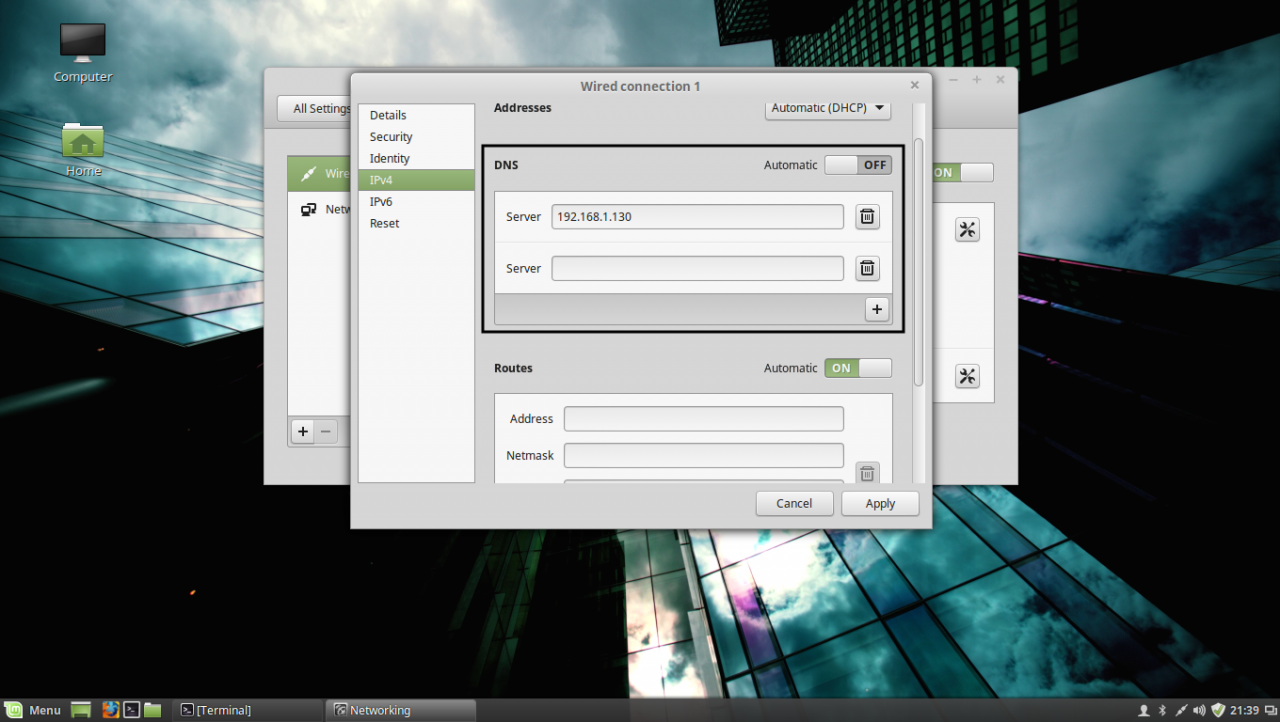
If multiple Domain Controllers machines exists on your network then you can also add their IP Addresses on IPv4 DNS settings fields.
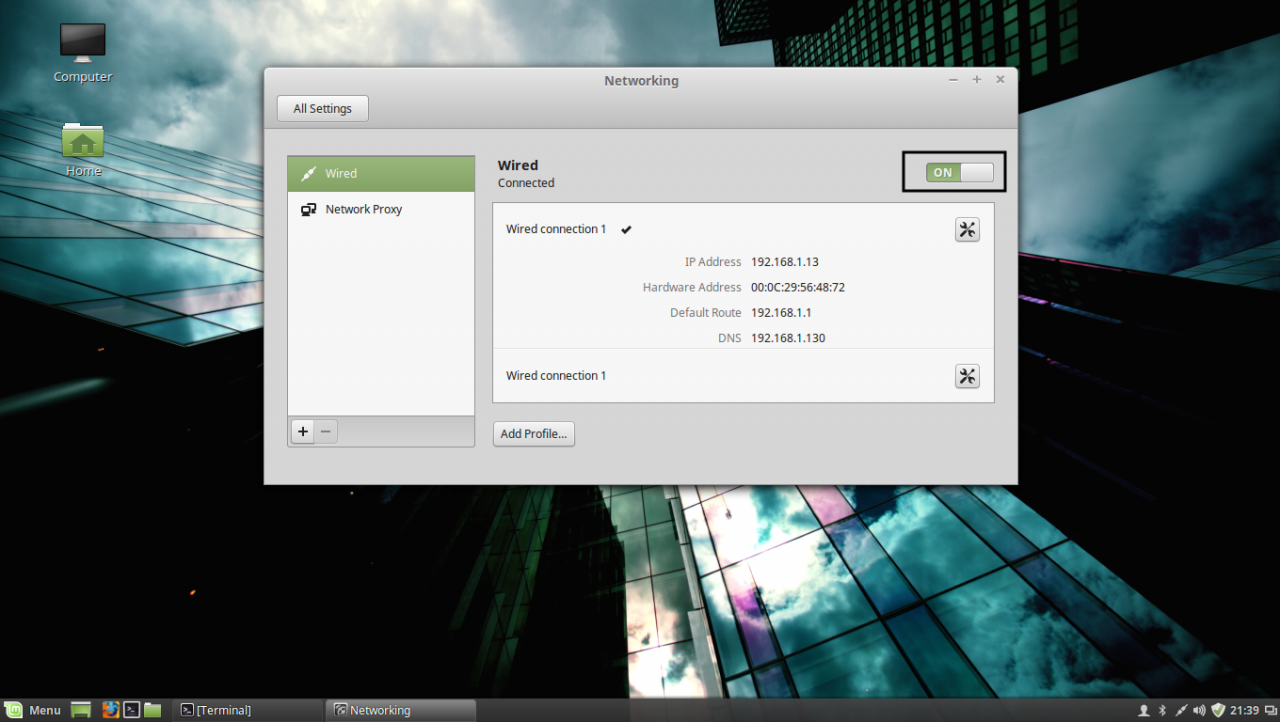
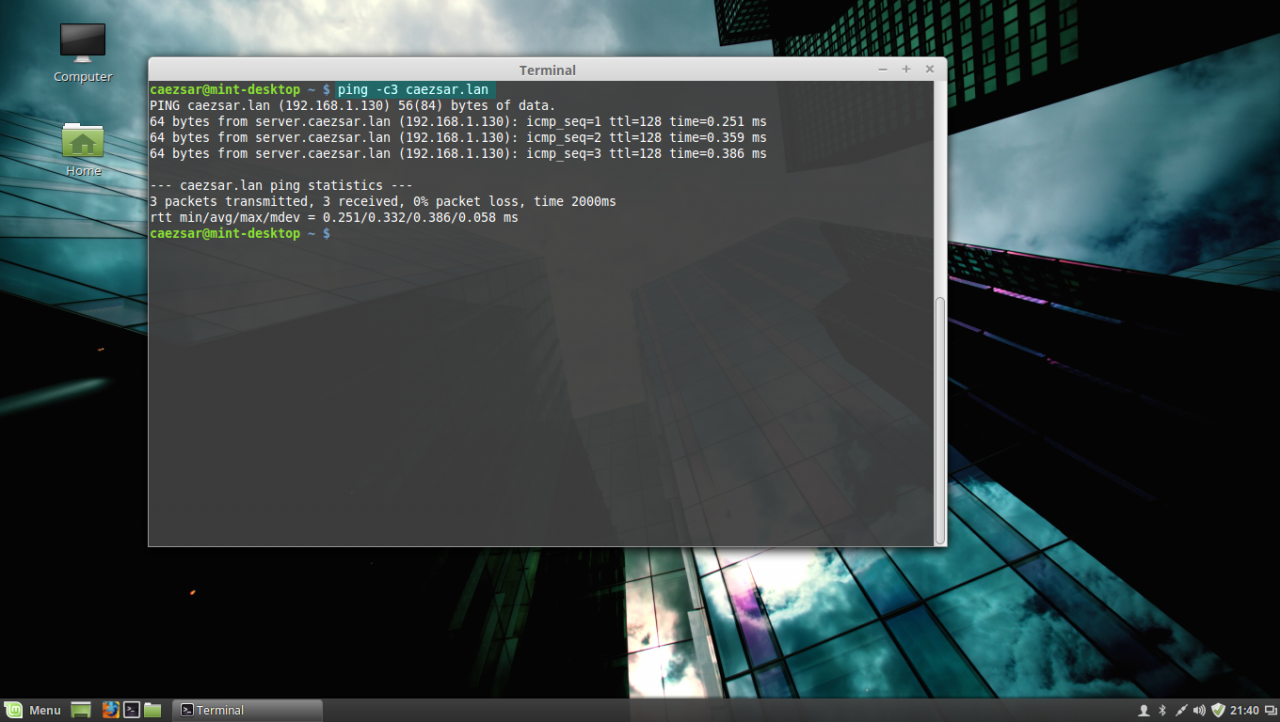
2. After you’re done, hit on Apply button and switch the edited Network Interface from ON to OFF and then back to ON in order to apply the new settings. After the network interface is started again, open a Terminal console and issue a ping command against your PDC domain name in order to verify if the settings are successfully applied and the domain name responds with the correct IP Address and FQDN of the PDC.
If you want to avoid all this manual settings, then configure a DHCP server at your premises to automatically assign network settings, especially DNS entries, that will point to your Windows PDC IP Addresses needed for DNS resolution in order to reach the AD PDC.
STEP TWO – Install Required Software Packages
As presented at the beginning of this tutorial, in order to integrate a Linux Mint machine to an Active Directory Domain Controller you need to install the SSSD service along with the following software packages and dependency:
– SSSD service (responsible with back end realm authentication) with the following dependencies: sssd-tools (optional, but useful for sssd cache, user and groups manipulation), libpam-sss (PAM modules for local authentication) and libnss-sss (NSS modules for local DNS resolution)
– Realmd (system DBus service which manages domain integration and local resources permissions)
– The following Samba Modules : samba-common-bin and samba-libs (File sharing compatibility between Windows and Linux machines)
– Krb5-user (Client network authentication and communication with the PDC server)
– ADcli (Tools for joining domain and perform other actions on an AD)
– PackageKit (Linux cross-platform packages management for interoperabillity and user privileges for software installations)
3. Now, let’s start installing the above enumerated packages by opening a Terminal console on Linux Mint and issuing the following commands with sudo privileges:
First install Realmd and SSSD service:
sudo apt-get install realmd sssd sssd-tools libpam-sss libnss-sss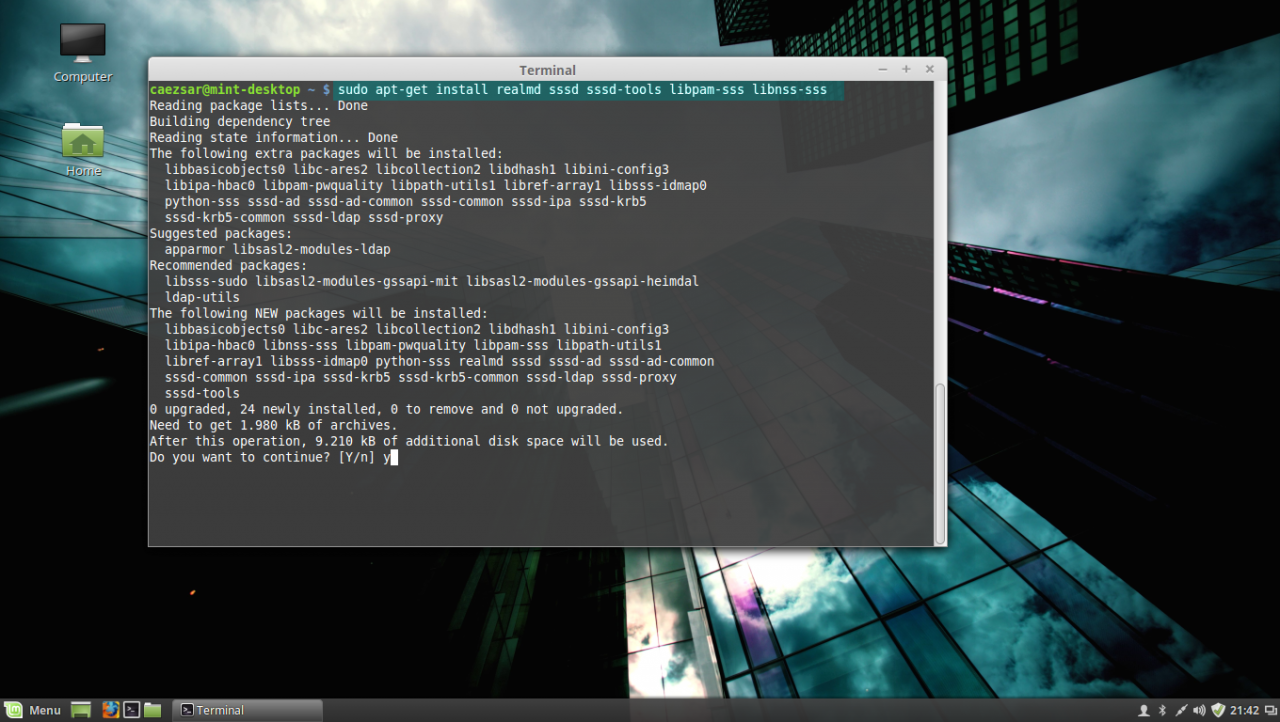
install realmd and sssd service
4. Next install Samba modules (by default this modules might be already installed on your system):
sudo apt-get install samba-libs samba-common-bin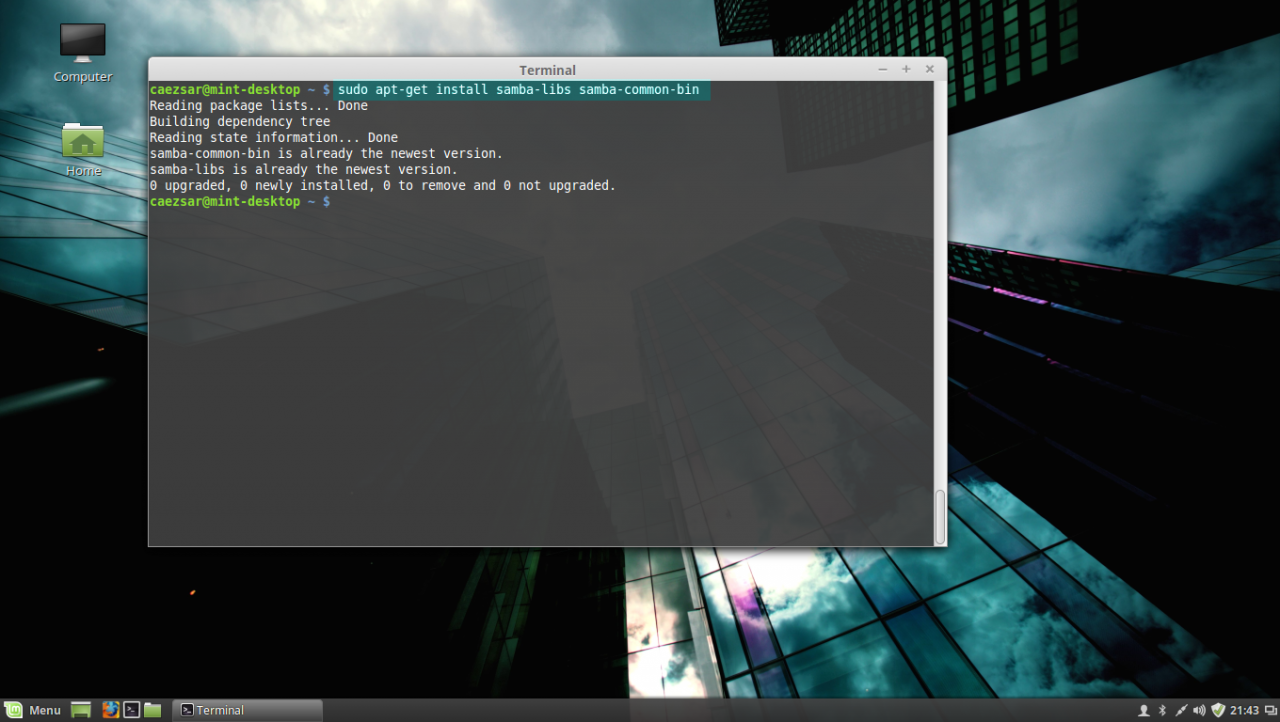
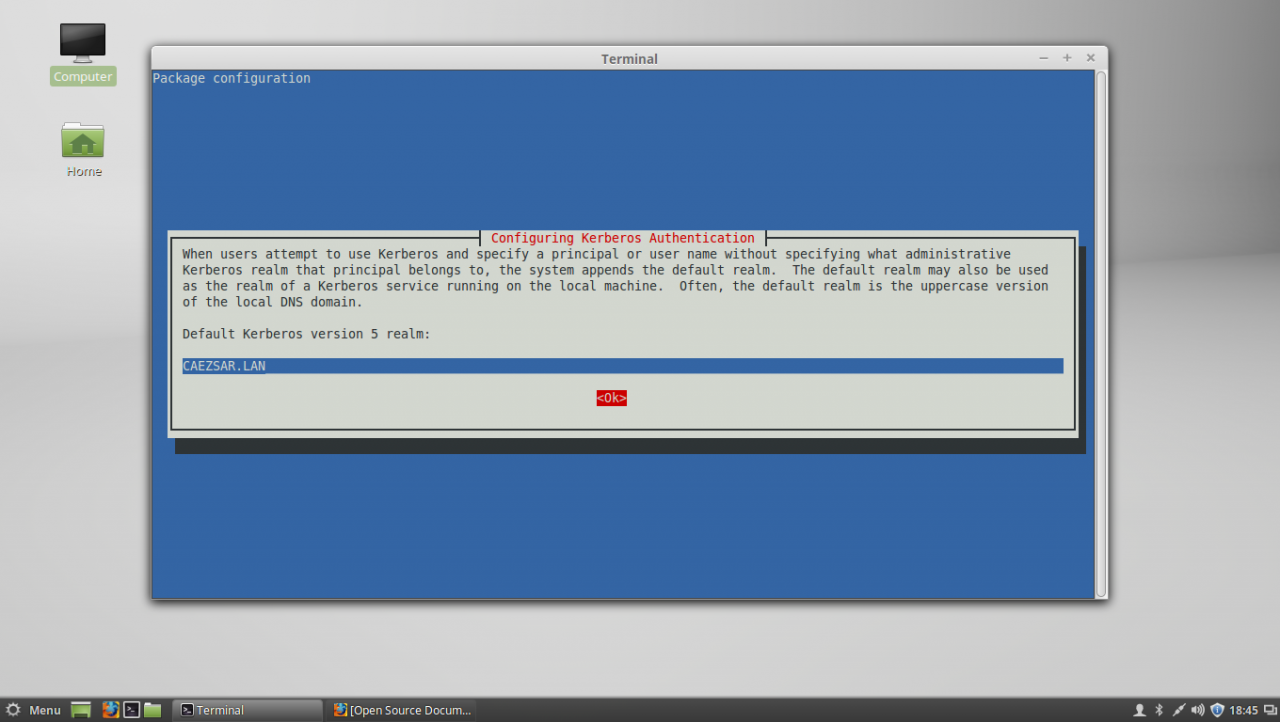
5. Last, install the other remained packages: krb5-user , adcli and packagekit . On krb5-user package, the installer will prompt you to enter the realm that will be used for Kerberos authentication. Use the name of the domain configured for your PDC with UPPERCASE (in this case the domain is CAEZSAR.LAN ), then hit Enter key to continue further with the installation packages.
sudo apt-get install krb5-user adcli packagekit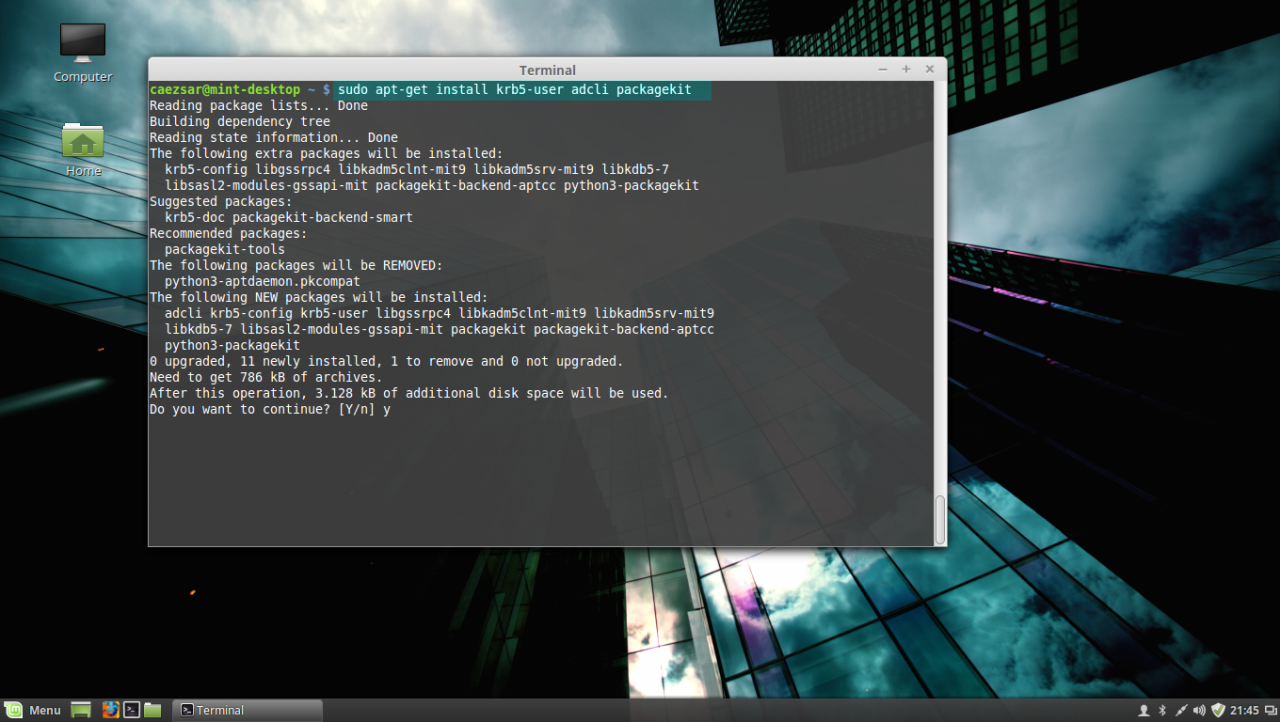
install kerberos, adcli and packagekit packages
STEP THREE – Edit Configuration Files for SSSD, Realmd and PAM
6. Next step before starting joining Linux Mint to Windows Server AD PDC is to configure the local services for AD network authentication. By default the SSSD service has no configuration file defined on /etc/sssd/ path. In order to create a default configuration file for SSSD service, issue the following command to create and simultaneous edit the file:
sudo nano /etc/sssd/sssd.confSSSD configuration file excerpt:
[nss] filter_groups = root filter_users = root reconnection_retries = 3 [pam] reconnection_retries = 3 [sssd] domains = CAEZSAR.LAN config_file_version = 2 services = nss, pam [domain/CAEZSAR.LAN] ad_domain = CAEZSAR.LAN krb5_realm = CAEZSAR.LAN realmd_tags = manages-system joined-with-adcli cache_credentials = True id_provider = ad krb5_store_password_if_offline = True default_shell = /bin/bash ldap_id_mapping = True use_fully_qualified_names = False fallback_homedir = /home/%d/%u access_provider = ad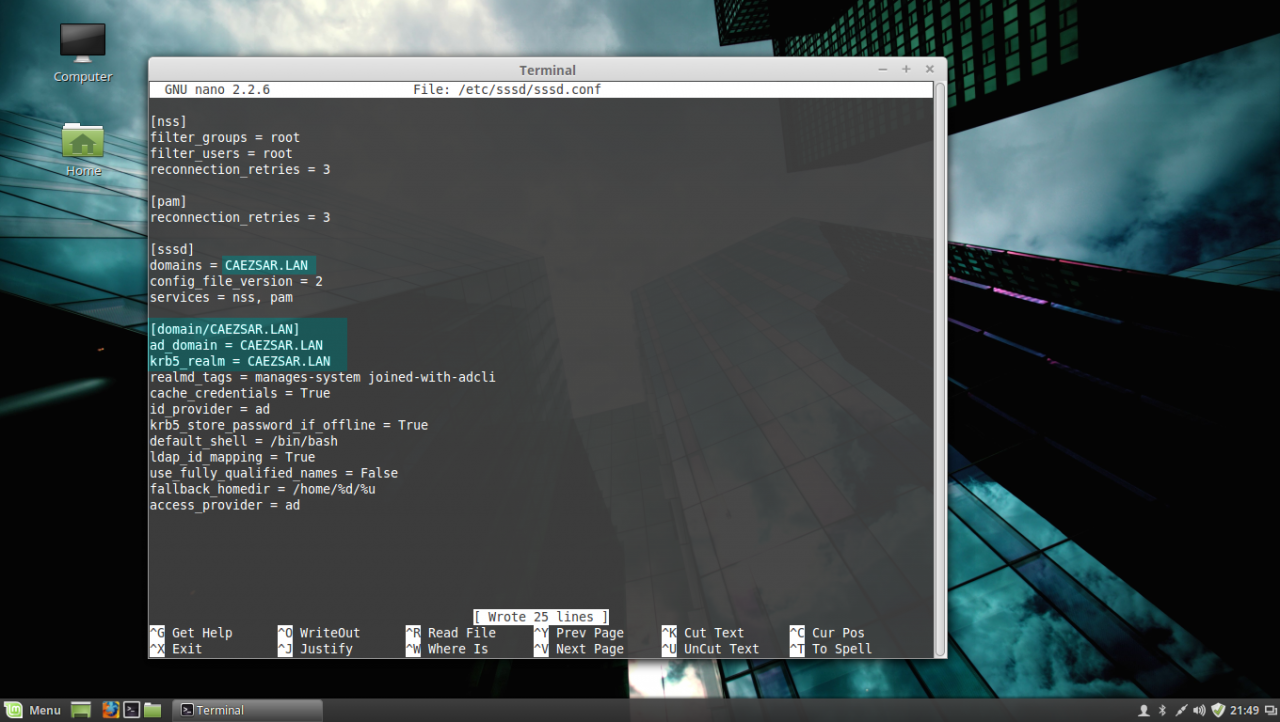
While editing the file make sure you replace domains , [domain/] , ad_domain and krb5_realm parameters accordingly. Use the UPPERCASES as the above file excerpt suggests.
The fallback_homedir = /home/%d/%u parameter will cause the system to create home directories for all domain logged in users with the following path: /home/domain_name/domain_user , so practically all your domain users homes will be stored into a single directory named after your domain name on /home path. If you want to change this behavior so all domain users homes should be created as normal system users, /home/username , just remove %d variable and you’re done.
For other options and parameters concerning sssd.conf file run man sssd command.
After you finish editing the file, save it with CTRL+O , close it with CTRL+X and proceed further with the below instructions.
7. The next step is to create and edit a configuration file for Realmd in order to avoid some eventual package dependency problems by issuing the following command:
Use the following configurations for realmd file: