- How to Install Samba on Ubuntu for File Sharing on Windows
- Install and Configure Samba in Ubuntu
- Check Windows Machine WorkGroup Settings
- Anonymous Samba File Sharing
- Testing Anonymous Samba File Sharing
- Secure Samba File Sharing
- Testing Secure Samba File Sharing
- Enable Samba in UFW Firewall in Ubuntu
- Samba as a file server
- Install Samba
- Configure Samba as a file server
- Create the directory
- Enable the new configuration
- Further reading
How to Install Samba on Ubuntu for File Sharing on Windows
Samba is a free/open source and popularly used software for sharing files and print services between Unix-like systems including Linux and Windows hosts on the same network.
In this guide, we will show how to setup Samba4 for basic file sharing between a Ubuntu systems and Windows machines. We will cover two possible scenarios: anonymous (unsecure) as well as secure file sharing.
Note that starting from version 4.0, Samba can be used as an Active Directory (AD) domain controller (DC). We have organized a special series for setting up Samba4 Active Directory Domain Controller, which comprises of key topics under Ubuntu, CentOS, and Windows.
Install and Configure Samba in Ubuntu
Samba server is available to install from the default Ubuntu repositories using the apt package manager tool as shown.
$ sudo apt install samba samba-common python-dnspython
Once samba server installed, now its time to configure samba server as: unsecure anonymous and secure file sharing.
For this, we need to edit the main Samba configuration file /etc/samba/smb.conf (which explain various configuration directives).
First backup the original samba configuration file as follows.
$ sudo cp /etc/samba/smb.conf /etc/samba/smb.conf.orig
Afterwards, we’ll proceed to configure samba for anonymous and secure file sharing services as explained below.
Important: Before moving any further, ensure that the Windows machine is in the same workgroup which will be configured on the Ubuntu server.
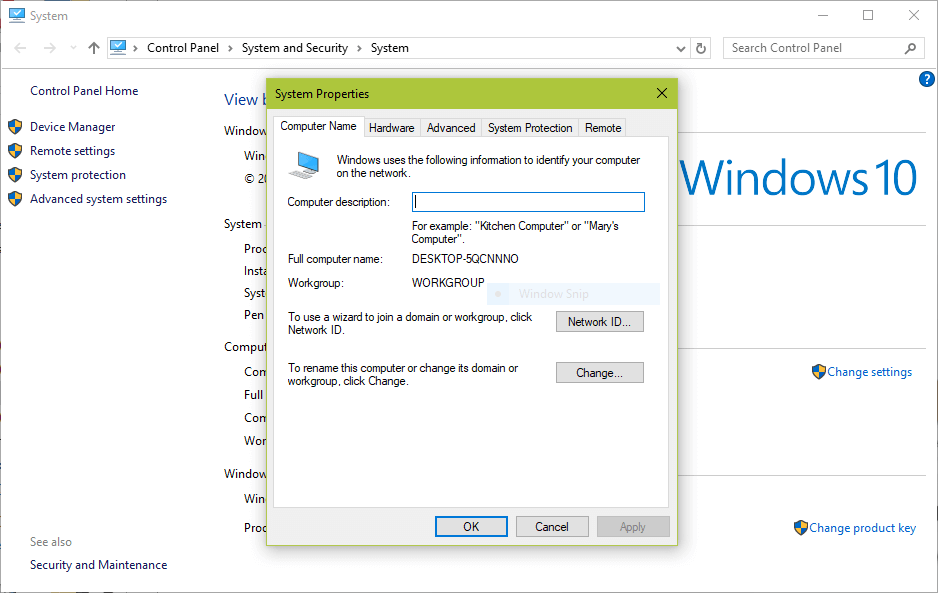
Check Windows Machine WorkGroup Settings
Login into your Windows machine, right click on “This PC” or “My Computer” → Properties → Advanced System Settings → Computer Name to verify the workgroup.
Alternatively, open the command prompt and view it by running the command below and look for “workstation domain”.
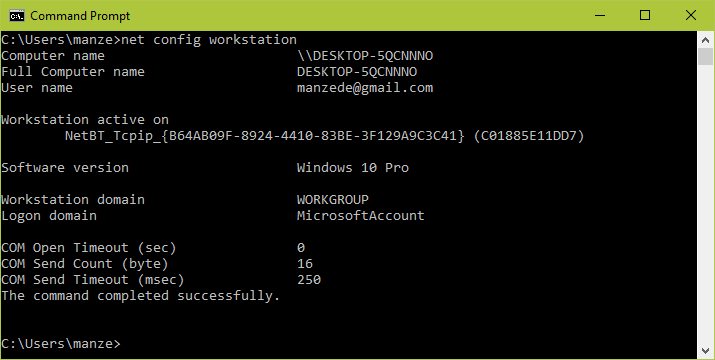
Once you know your Windows workgroup its time to move ahead and configure samba server for file sharing.
Anonymous Samba File Sharing
First start by creating a shared samba directory where the files will be stored.
$ sudo mkdir -p /srv/samba/anonymous_shares
Then set the appropriate permissions on the directory.
$ sudo chmod -R 0775 /srv/samba/anonymous_shares $ sudo chown -R nobody:nogroup /srv/samba/anonymous_shares
Now open the configuration file.
$ sudo vi /etc/samba/smb.conf OR $ sudo nano /etc/samba/smb.conf
Next edit or modify the directive settings as described below.
global] workgroup = WORKGROUP netbios name = ubuntu security = user [Anonymous] comment = Anonymous File Server Share path = /srv/samba/anonymous_shares browsable =yes writable = yes guest ok = yes read only = no force user = nobody
Now verify current samba settings by running the command below.
Load smb config files from /etc/samba/smb.conf rlimit_max: increasing rlimit_max (1024) to minimum Windows limit (16384) WARNING: The "syslog" option is deprecated Processing section "[printers]" Processing section "[print$]" Processing section "[Shares]" Loaded services file OK. Server role: ROLE_STANDALONE Press enter to see a dump of your service definitions # Global parameters [global] netbios name = UBUNTU server string = %h server (Samba, Ubuntu) server role = standalone server map to guest = Bad User obey pam restrictions = Yes pam password change = Yes passwd program = /usr/bin/passwd %u passwd chat = *Enter\snew\s*\spassword:* %n\n *Retype\snew\s*\spassword:* %n\n *password\supdated\ssuccessfully* . unix password sync = Yes syslog = 0 log file = /var/log/samba/log.%m max log size = 1000 dns proxy = No usershare allow guests = Yes panic action = /usr/share/samba/panic-action %d idmap config * : backend = tdb [printers] comment = All Printers path = /var/spool/samba create mask = 0700 printable = Yes [print$] comment = Printer Drivers path = /var/lib/samba/printers browseable = No [Anonymous] comment = Anonymous File Server Share path = /srv/samba/anonymous_shares force user = nobody read only = No guest ok = Yes
Then restart Samba services to effect the above changes.
$ sudo systemctl restart smbd [Systemd] $ sudo service smbd restart [Sys V]
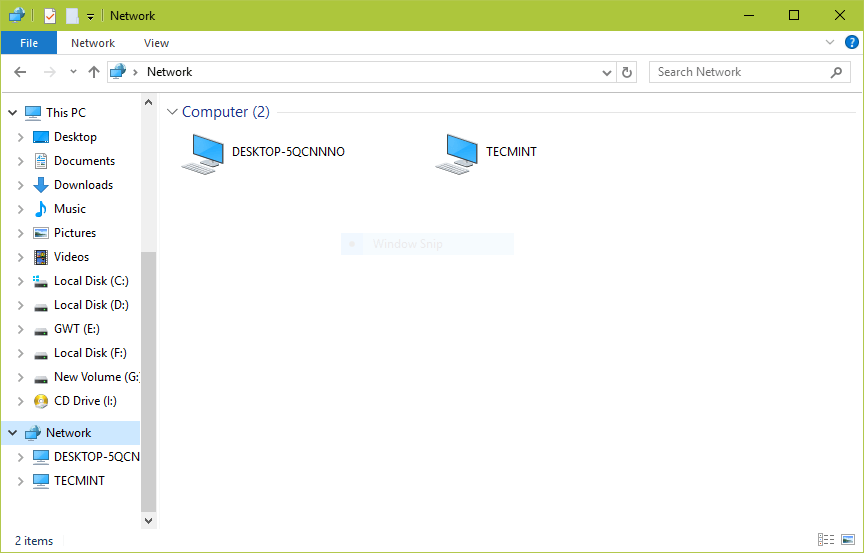
Testing Anonymous Samba File Sharing
Go to the Windows machine, and open “Network” from a Windows Explorer window. Click on the Ubuntu host (TECMINT for our case), or else try to access the samba server using its IP address.
Note: Use the ifconfig command to get your Ubuntu server IP address.
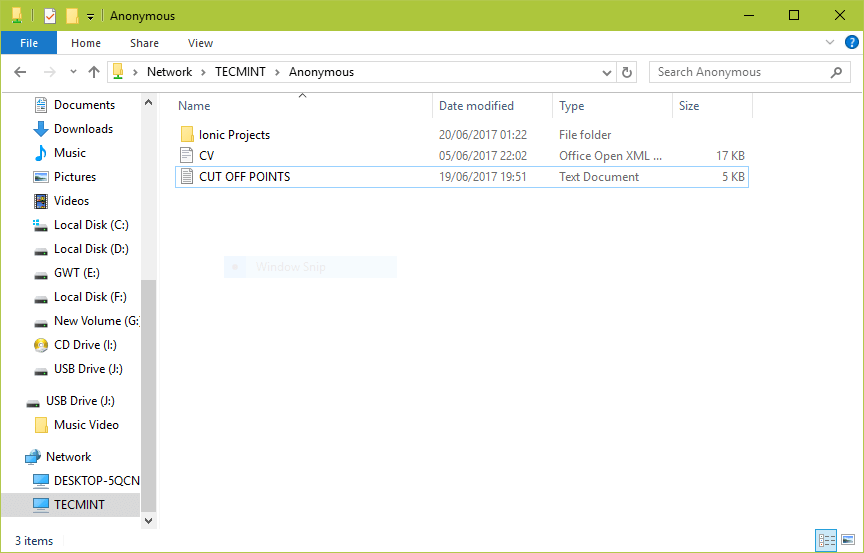
Then open the Anonymous directory and try to add files in there to share with other users.
Secure Samba File Sharing
To password-protect a samba share, you need to create a group “smbgrp” and set a password for each user. In this example I use aaronkilik as user and password as “tecmint“.
$ sudo addgroup smbgrp $ sudo usermod aaronkilik -aG smbgrp $ sudo smbpasswd -a aaronkilik
Note: The samba security mode: security = user requires clients to enter a username and password to connect to shares.
Samba user accounts are separate from system accounts, however, you can optionally install the libpam-winbind package which is used to sync system users and passwords with the samba user database.
$ sudo apt install libpam-winbind
Then create the secure directory where the shared files will be kept.
$ sudo mkdir -p /srv/samba/secure_shares
Next, set the appropriate permissions on the directory.
$ sudo chmod -R 0770 /srv/samba/secure_shares $ sudo chown -R root:smbgrp /srv/samba/secure_shares
Now open the configuration file.
$ sudo vi /etc/samba/smb.conf OR $ sudo nano /etc/samba/smb.conf
Next edit or modify the directive settings as described below.
[Secure] comment = Secure File Server Share path = /srv/samba/secure_shares valid users = @smbgrp guest ok = no writable = yes browsable = yes
Just like before, run this command to see your current samba settings.
Load smb config files from /etc/samba/smb.conf rlimit_max: increasing rlimit_max (1024) to minimum Windows limit (16384) WARNING: The "syslog" option is deprecated Processing section "[printers]" Processing section "[print$]" Processing section "[Shares]" Loaded services file OK. Server role: ROLE_STANDALONE Press enter to see a dump of your service definitions # Global parameters [global] netbios name = UBUNTU server string = %h server (Samba, Ubuntu) server role = standalone server map to guest = Bad User obey pam restrictions = Yes pam password change = Yes passwd program = /usr/bin/passwd %u passwd chat = *Enter\snew\s*\spassword:* %n\n *Retype\snew\s*\spassword:* %n\n *password\supdated\ssuccessfully* . unix password sync = Yes syslog = 0 log file = /var/log/samba/log.%m max log size = 1000 dns proxy = No usershare allow guests = Yes panic action = /usr/share/samba/panic-action %d idmap config * : backend = tdb [printers] comment = All Printers path = /var/spool/samba create mask = 0700 printable = Yes [print$] comment = Printer Drivers path = /var/lib/samba/printers browseable = No [Anonymous] comment = Anonymous File Server Share path = /srv/samba/anonymous_shares force user = nobody read only = No guest ok = Yes [Secure] comment = Secure File Server Share path = /srv/samba/secure_shares valid users = @smbgrp read only = No
Once you done with the above configurations, restart Samba services to apply the changes.
$ sudo systemctl restart smbd [Systemd] $ sudo service smbd restart [Sys V]
Testing Secure Samba File Sharing
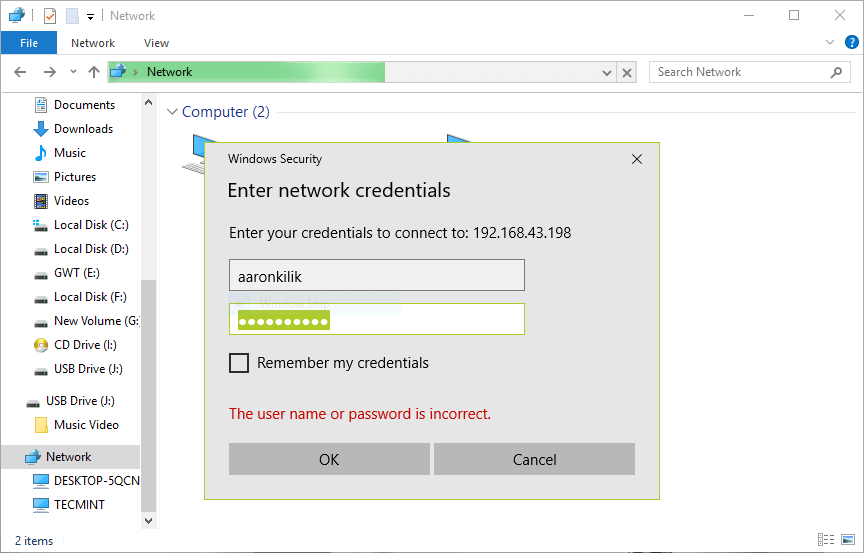
As before, in the Windows machine, and open “Network” from a Windows Explorer window. Click on the Ubuntu host (TECMINT for our case). You may get the error below, if not proceed to the next step.

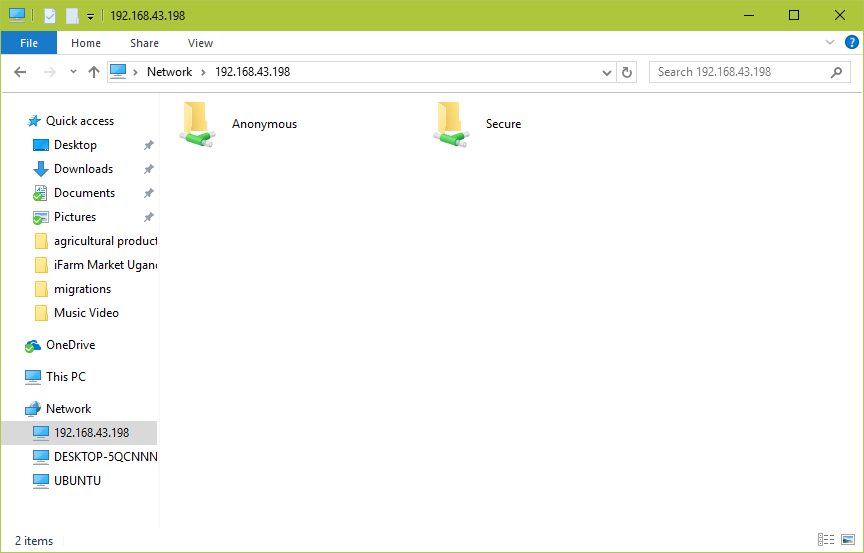
Try to access the server using its IP address, e.g. \\192.168.43.168 like this. Then enter the credentials (username and password) for user aaronkilik and click OK.
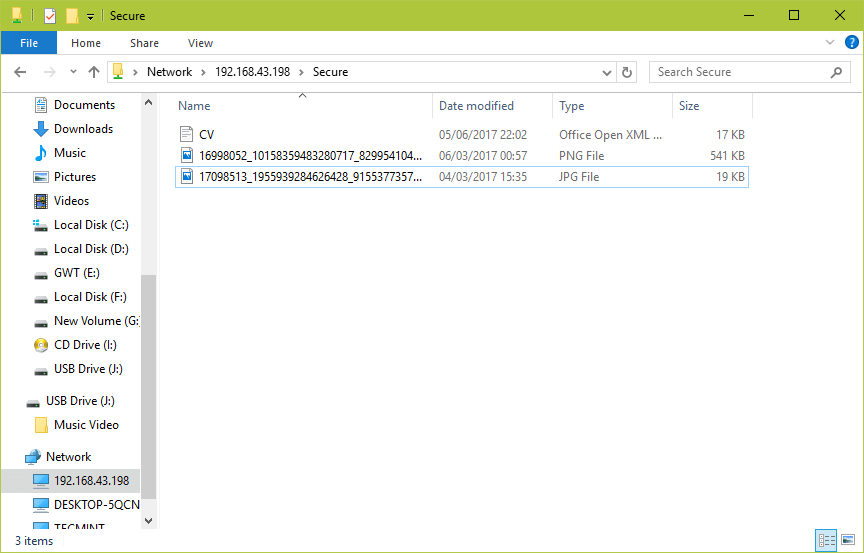
You’ll now view all the shared directories, click on Secure to open it.
You can securely share some files with other permitted users on the network by dropping them in this directory.
Enable Samba in UFW Firewall in Ubuntu
If you have UFW firewall enabled/active on your system, you must add the rules to allow Samba to pass through your firewall.
To test this, we’ve used the 192.168.43.0 network scheme. Run the commands below specifying your network address.
$ sudo ufw allow proto udp to any port 137 from 192.168.43.0/24 $ sudo ufw allow proto udp to any port 138 from 192.168.43.0/24 $ sudo ufw allow proto tcp to any port 139 from 192.168.43.0/24 $ sudo ufw allow proto tcp to any port 445 from 192.168.43.0/24
You can also check out these useful articles concerning Samba file sharing on a network.
That’s all! In this guide, we showed you how to setup Samba4 for anonymous and secure file sharing between Ubuntu and Windows machines. Use the feedback form below to share any thoughts with us.
Samba as a file server
One of the most common ways to network Ubuntu and Windows computers is to configure Samba as a file server. It can be set up to share files with Windows clients, as we’ll see in this section.
The server will be configured to share files with any client on the network without prompting for a password. If your environment requires stricter Access Controls see Share Access Control.
Install Samba
The first step is to install the samba package. From a terminal prompt enter:
That’s all there is to it; you are now ready to configure Samba to share files.
Configure Samba as a file server
The main Samba configuration file is located in /etc/samba/smb.conf . The default configuration file contains a significant number of comments, which document various configuration directives.
Note:
Not all available options are included in the default configuration file. See the smb.conf man page or the Samba HOWTO Collection for more details.
First, edit the workgroup parameter in the [global] section of /etc/samba/smb.conf and change it to better match your environment:
Create a new section at the bottom of the file, or uncomment one of the examples, for the directory you want to share:
[share] comment = Ubuntu File Server Share path = /srv/samba/share browsable = yes guest ok = yes read only = no create mask = 0755 - comment
A short description of the share. Adjust to fit your needs. - path
The path to the directory you want to share.
Note:
This example uses /srv/samba/sharename because, according to the Filesystem Hierarchy Standard (FHS), /srv is where site-specific data should be served. Technically, Samba shares can be placed anywhere on the filesystem as long as the permissions are correct, but adhering to standards is recommended.
Create the directory
Now that Samba is configured, the directory needs to be created and the permissions changed. From a terminal, run the following commands:
sudo mkdir -p /srv/samba/share sudo chown nobody:nogroup /srv/samba/share/ The -p switch tells mkdir to create the entire directory tree if it doesn’t already exist.
Enable the new configuration
Finally, restart the Samba services to enable the new configuration by running the following command:
sudo systemctl restart smbd.service nmbd.service Warning:
Once again, the above configuration gives full access to any client on the local network. For a more secure configuration see Share Access Control.
From a Windows client you should now be able to browse to the Ubuntu file server and see the shared directory. If your client doesn’t show your share automatically, try to access your server by its IP address, e.g. \\192.168.1.1 , in a Windows Explorer window. To check that everything is working try creating a directory from Windows.
To create additional shares simply create new [sharename] sections in /etc/samba/smb.conf , and restart Samba. Just make sure that the directory you want to share actually exists and the permissions are correct.
The file share named [share] and the path /srv/samba/share used in this example can be adjusted to fit your environment. It is a good idea to name a share after a directory on the file system. Another example would be a share name of [qa] with a path of /srv/samba/qa .
Further reading
- For in-depth Samba configurations see the Samba HOWTO Collection
- The guide is also available in printed format.
- O’Reilly’s Using Samba is another good reference.
- The Ubuntu Wiki Samba page.