- How to Create a Bootable Windows 10 USB in Linux
- Creating a Bootable Windows 10 USB in Linux
- Prerequisite: Get Microsoft Windows 10 ISO and a USB of at least 8 GB in size
- Step 3: Copy the content of the ISO to USB
- Method 2: Create bootable Windows 10 USB using Ventoy
- Step 1: Prepare your USB drive
- Step 2: Download and install Ventoy on Linux
- Step 3: Use Ventoy to create bootable Windows 10 USB disk
- Step 4: Using the bootable Windows 10 disk
- Step 4: Using Windows 10 bootable USB
- Создание загрузочной флешки Windows 10 в Linux
- Загрузочная флешка Windows 10 с помощью WoeUSB
- Создание загрузочной флешки Windows 10 в Linux без программ
How to Create a Bootable Windows 10 USB in Linux
I have talked a lot about creating bootable USB of Linux in Windows. How about the other way round? How about creating a bootable Windows 10 USB in Linux?
If you are uninstalling Linux from dual boot or if you want to reinstall Windows completely or you simply want to have a Windows installation disk ready, you’ll need a bootable Windows 10 USB or DVD.
In this tutorial, I am going to show you how to create a Windows 10 bootable USB in Linux. I am using Ubuntu for this tutorial but the steps should be valid for other Linux distributions as well.
There are two ways to do that and I have discussed both in this tutorial.
- The first method is mounting the ISO image of Windows to a USB disk formatted in ExFAT system. This works most of the times but there could be instances where it wouldn’t boot.
- The second method is to use a tool like Ventoy. It creates a UEFI compatible bootable disk.
Creating a Bootable Windows 10 USB in Linux
Prerequisite: Get Microsoft Windows 10 ISO and a USB of at least 8 GB in size
You can download Windows 10 ISO from Microsoft’s website. You have to specify the Windows 10 version, language and then you should see the link to download Windows 10.
Note that the Windows 10 ISO download link is valid for 24 hours only. So use a download manager in Linux to download the ~5-6 GB file and finish it within 24 hours.
Since the ISO and its content are more than 4 GB in size, I recommend a USB of at least 8 GB in size.
I have also made a video of this tutorial so that you can see the steps in action.

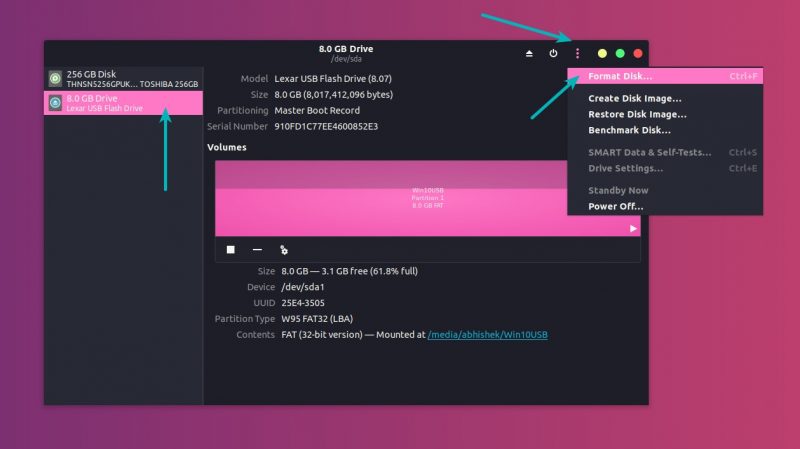
In the Disks tool, make sure to select your USB drive and hit format.
It will ask to choose a partitioning scheme. It could be either MBR or GPT. Select one of them and hit Format.
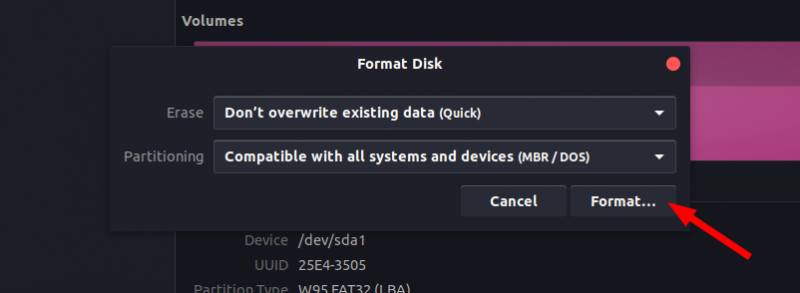
It will show you a warning that you data will be erased.

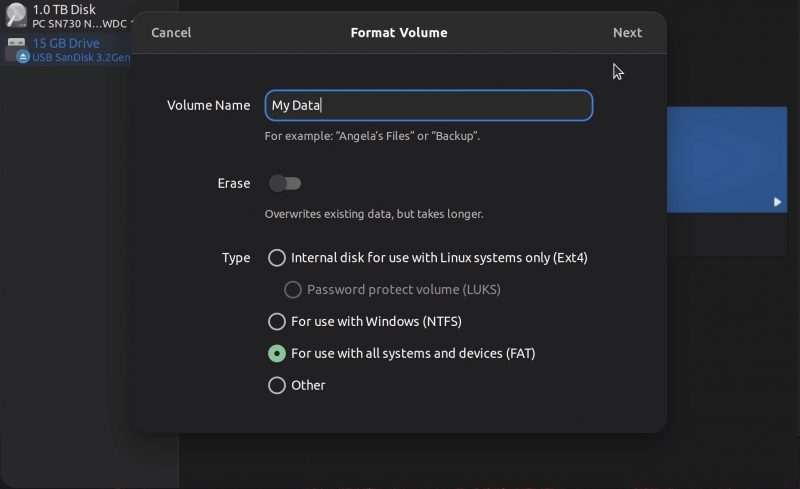
The formatting of USB is not over yet. Now, you need to create a partition on the newly formatted USB.
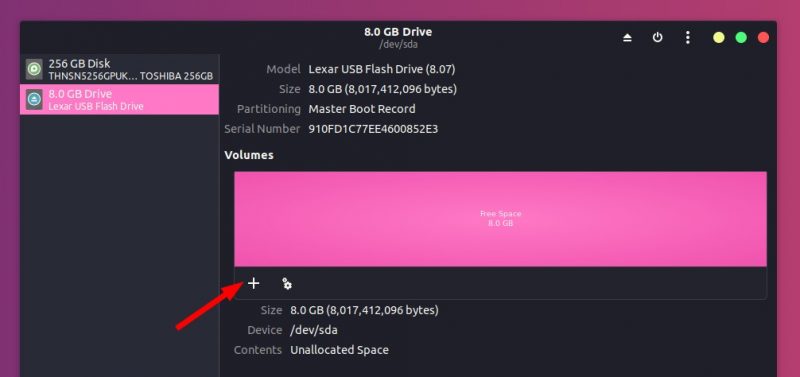
Select the entire USB disk as the partition size.
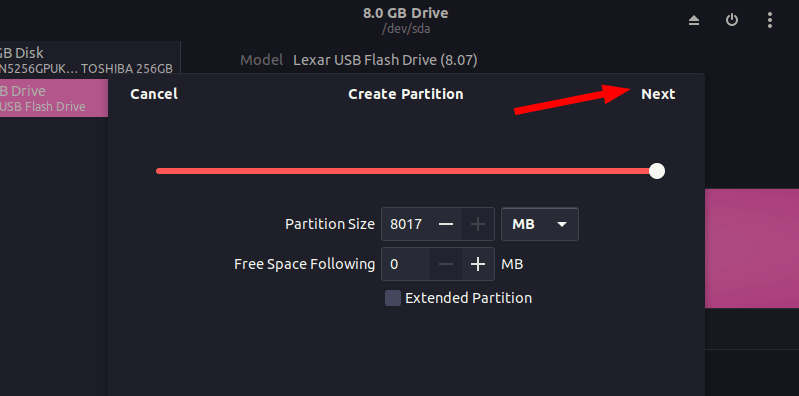
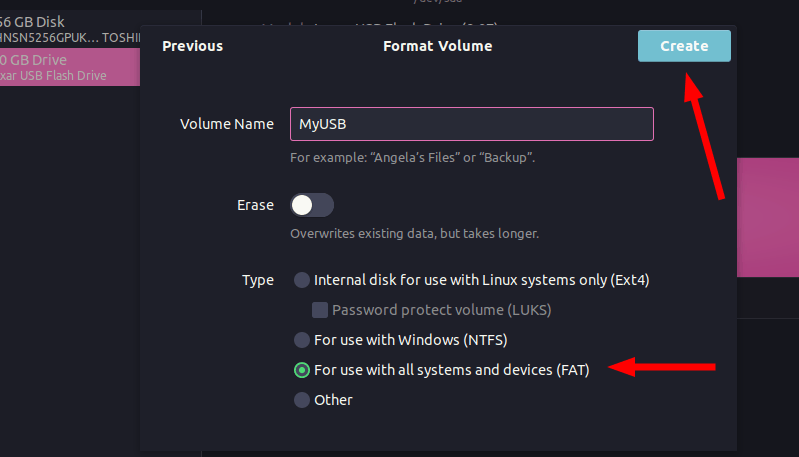
Give a name to your USB and hit Create button.
Once done, your USB should be automatically mounted. It is now ready for creating bootable Windows 10 USB disk.
Tip: Files larger than 4 GB?
Newer Windows 10 ISO might have files larger than 4 GB. In that case, FAT filesystem won’t work as it doesn’t allow a single file of size greater than 4 GB.You should then format the USB in ExFAT format.
This newer format allows files bigger than 4 GB. Use this tutorial to learn how to format a USB in ExFAT format in Linux.
Step 3: Copy the content of the ISO to USB
Now it’s time to copy the content of the Windows 10 ISO to the newly formatted USB.
You may ask, Abhishek, there is only one file and that is the ISO file itself. What are you talking about?
ISO is basically an archive format and you can see it’s content like any zip file in Linux. But to do that, you need to use ‘Disk Image Mounter’ tool that is installed by default in Ubuntu.
Go to your Windows 10 ISO, select it and right click on it. Now select ‘Open with other application’.
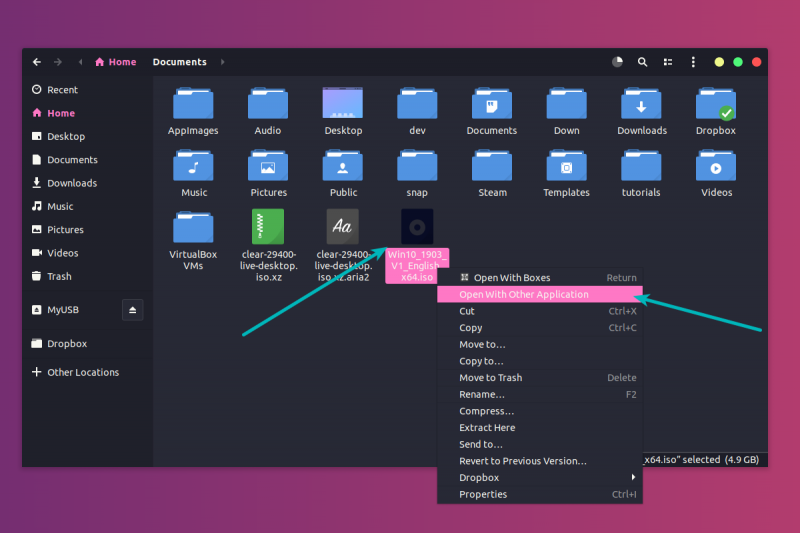
In the applications list, select Disk Image Mounter:
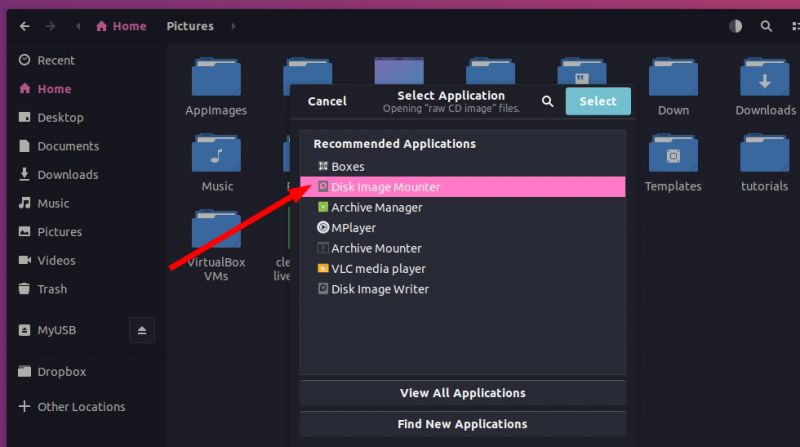
The ISO will be mounted. You may not see it in the left sidebar but if you click on the Other Locations, you should see it. Click on it to enter this mounted ISO folder.
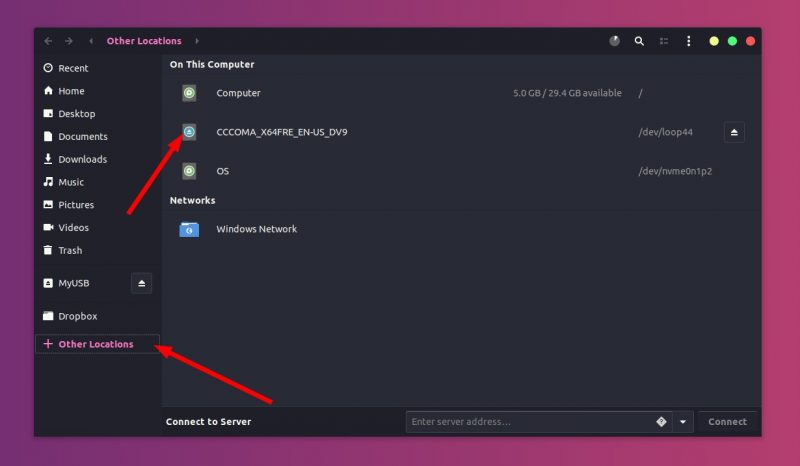
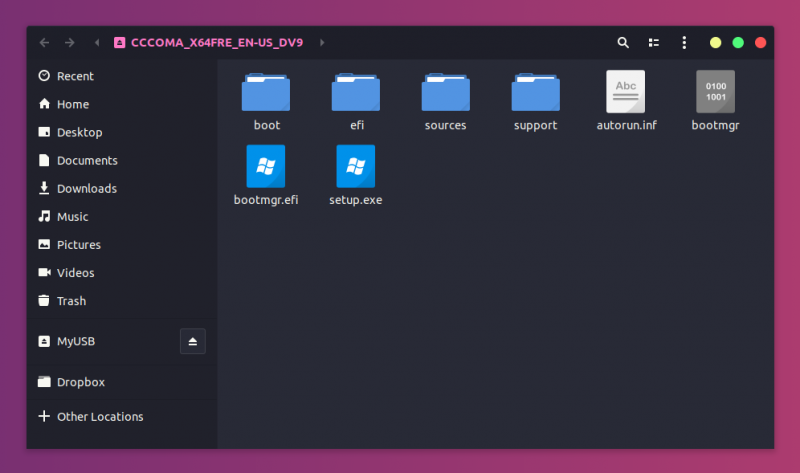
You’ll see its content. All you need to do is to select all the files (Ctrl+A), copy it (Ctrl+C) and paste it in the USB drive (Ctrl+V).
Wait for the copying process to finish as it may take some time in copying 4-5 GB of data. Once it’s done, you have a bootable Windows 10 USB in your hand. Take out the USB and use it to any system you want, restart the system and change the boot settings to boot from the USB.
Method 2: Create bootable Windows 10 USB using Ventoy
Ventoy is an open source tool for making live USBs. You can use it to create a multi-boot USB, persistent Linux live USB and bootable Windows USB.
I find Ventoy an unorthodox tool. It is slightly tricky to use and this is the reason I am writing this step-by-step tutorial.
Step 1: Prepare your USB drive
Ventoy formats the USB disk while creating the bootable disk. However, I noticed it failed to do so for an already bootable Linux disk. For this reason, I advise you to format the USB disk before you proceed further.
Plug in and then format the USB disk. You can do that by right-clicking on the mounted disk and then selecting the format option.

It doesn’t matter which filesystem you choose during formatting. It will be formatted again by Ventoy in the later steps.
Once it is formatted, keep it plugged in and go on to the next step of installing Ventoy.
Step 2: Download and install Ventoy on Linux
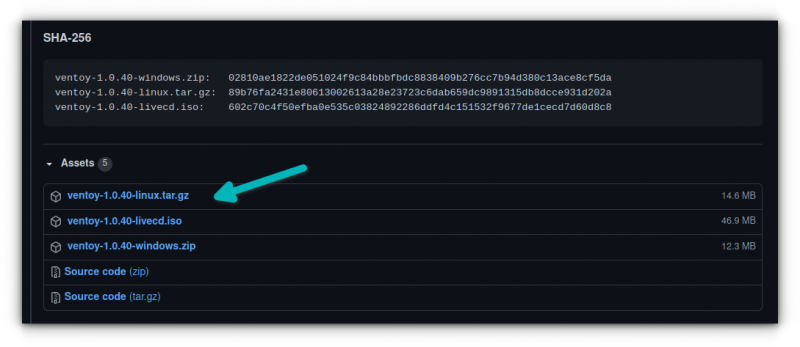
Ventoy is a mix of GUI and CLI tool. It can be used on any Linux distribution. Download Ventoy for Linux from the release page of its GitHub repository.
You’ll find the .tar.gz file with Linux in its name. This is the file you should download.
Once downloaded, extract the tar gz file. Simply right click on it and extract it.

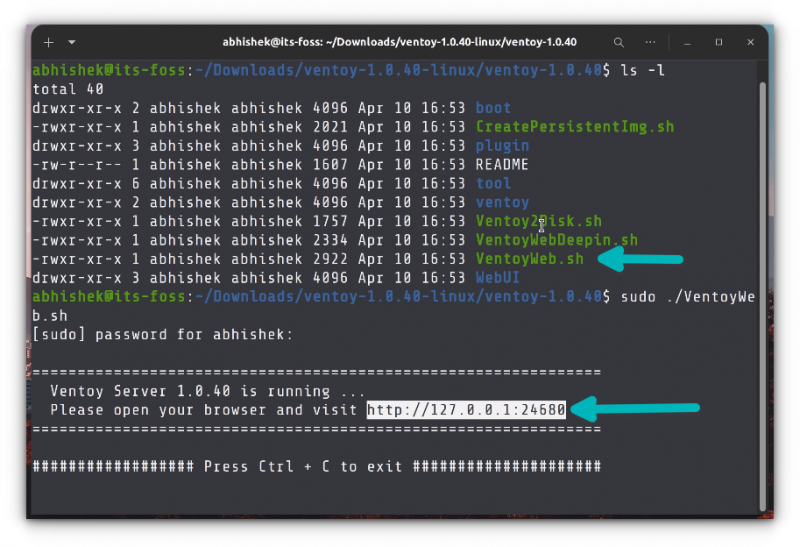
Go inside the extracted folder, and you’ll find a few scripts in it. You need to run one named VentoyWeb.sh. To do that, you’ll have to use the command line.
Now if you are familiar with Linux command line, I presume that you can easily find your way to the file by using the cd command.
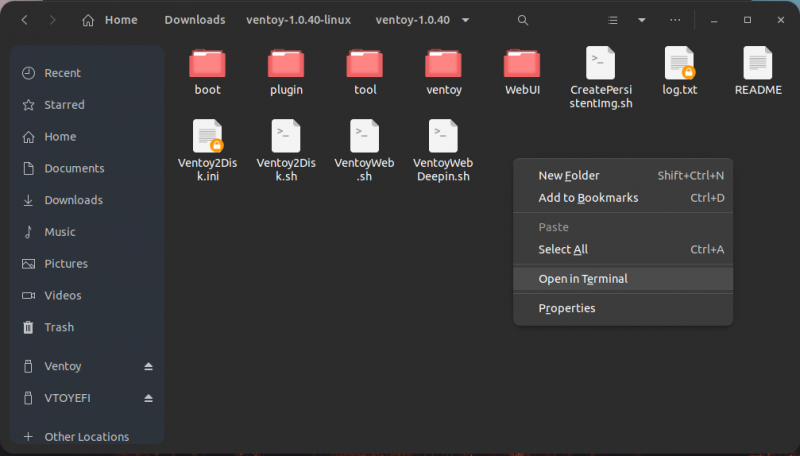
Alternatively, you can use the “open in terminal” feature of the file manager to open the location in a terminal.
Once you are in the correct directory in the terminal, use the following command to run Ventoy:
Ventoy runs inside a browser. It will give you the URL when you run it. Copy this URL and paste it in a browser.
It will open a web page with Ventoy running in it and if the USB is already plugged in, it should recognize it. If not, press the refresh button.
Step 3: Use Ventoy to create bootable Windows 10 USB disk
Though Ventoy has the option to create a bootable disk with secure boot, it is experimental and may not work.
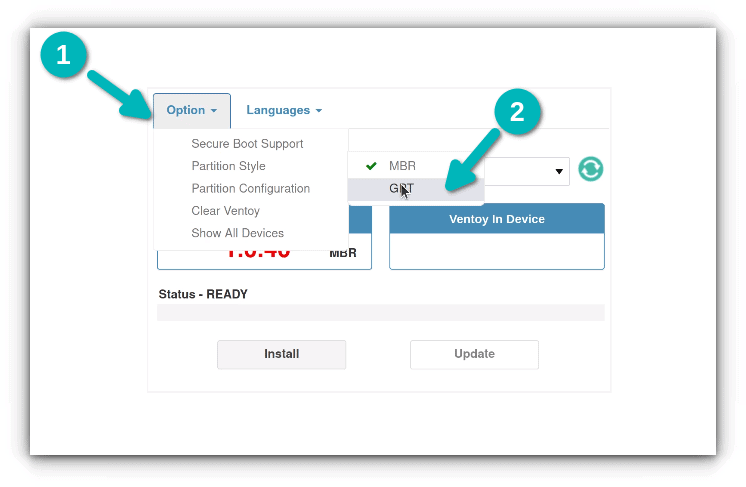
Considering you are going for a UEFI installation, it will be wise use GPT for partitioning scheme.
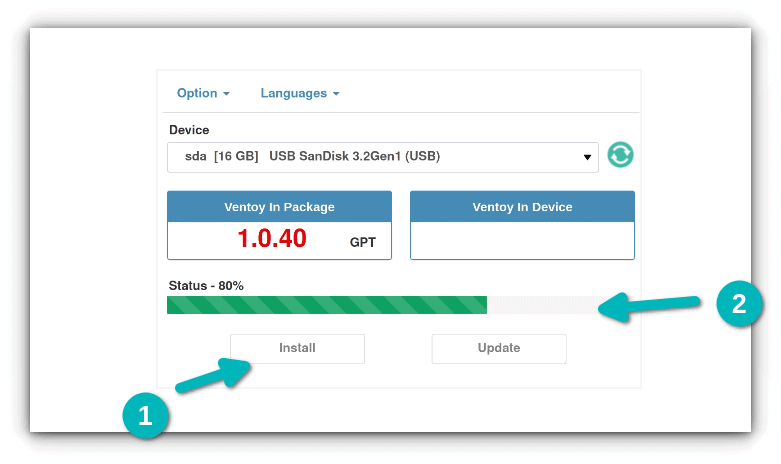
Once things are set, hit the install button. It will show you a couple of obligatory warnings. If the installation completes successfully, you should see a success message.
Note: If you do not see Ventoy disk mounted after the successful installation, please plug out the USB and then plug it in again.
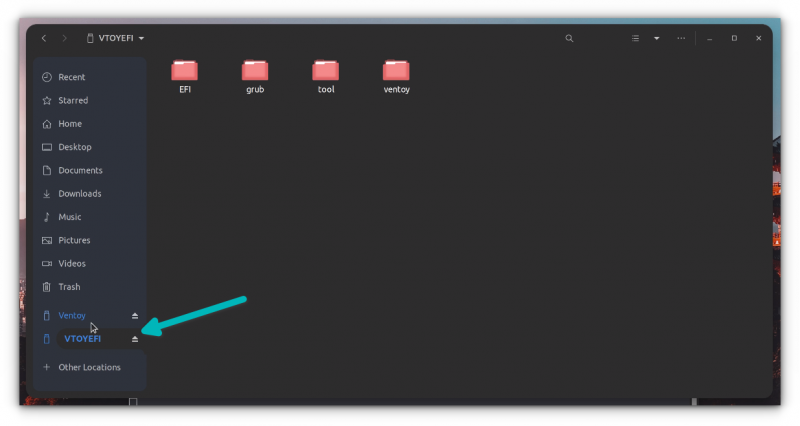
When you hit the install button, it creates two partitions on the USB disk.
- VTOYEFI: A small partition for the UEFI files.
- Ventoy: A big, empty partition in ExFAT format where you’ll copy the ISO image.
Yes. That’s what you need to do. Copy the ISO image of the Windows 10 into the bigger ExFAT partition on the USB disk.
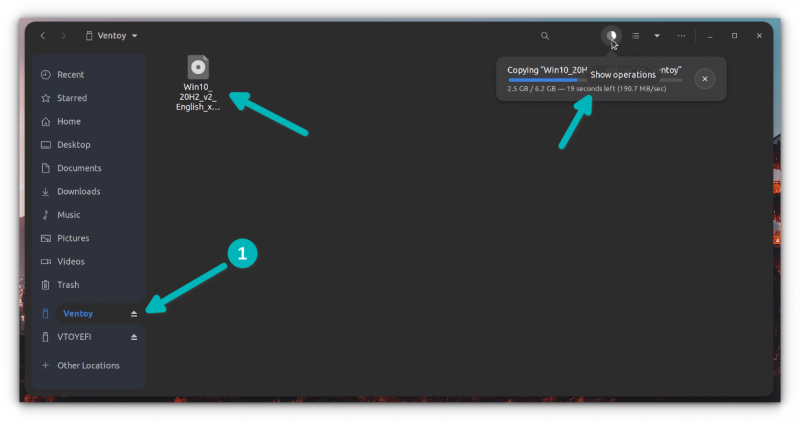
Once the copying finishes, DO NOT RUSH to plug out the USB just yet. Click on the unmount option from the file manager. Chances are that some files are still being written and it may show an error message.

Wait for a few more minutes and you should see a message that it is safe to remove the disk. Now you can unplug it and use it on whichever system you want.
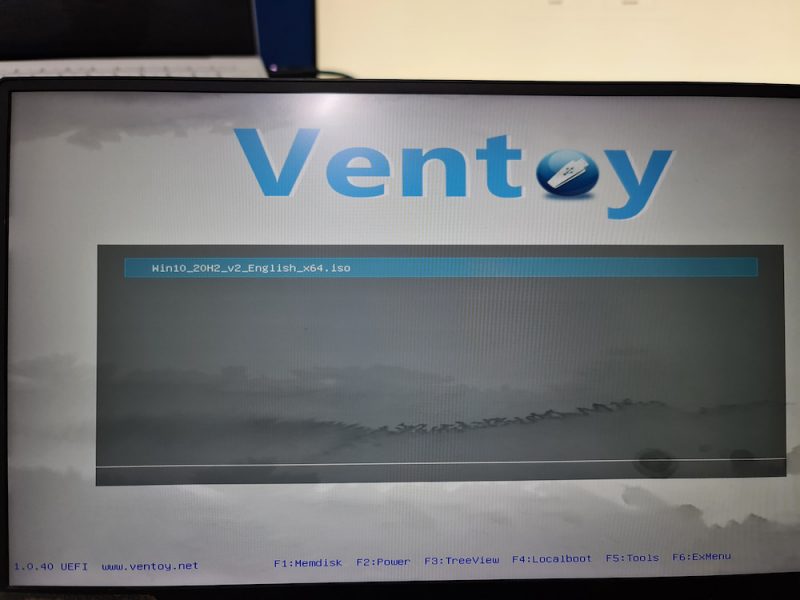
Step 4: Using the bootable Windows 10 disk
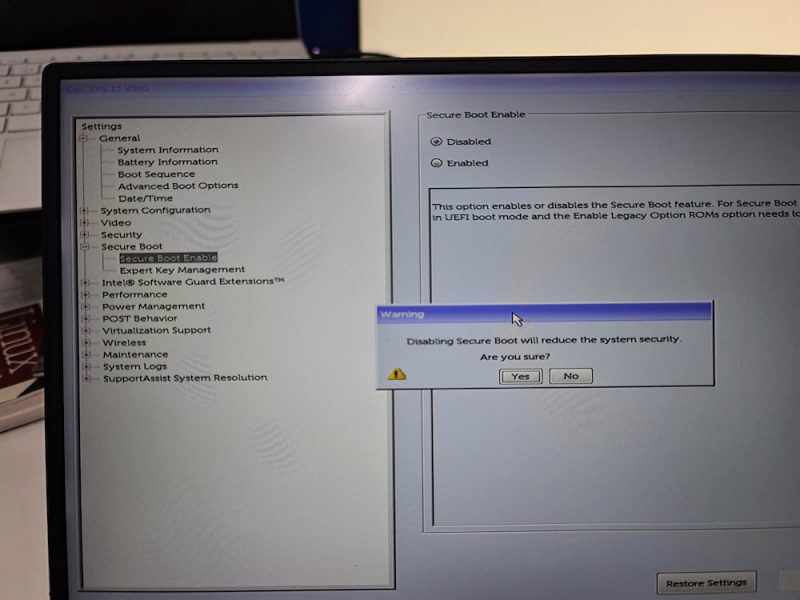
Alright! You are almost there. Plug in your bootable Windows USB you created in the previous section. Start the computer and go to the BIOS setting by using the F2/F10 or F12 key at the time you see the logo of your computer’s manufacturer.
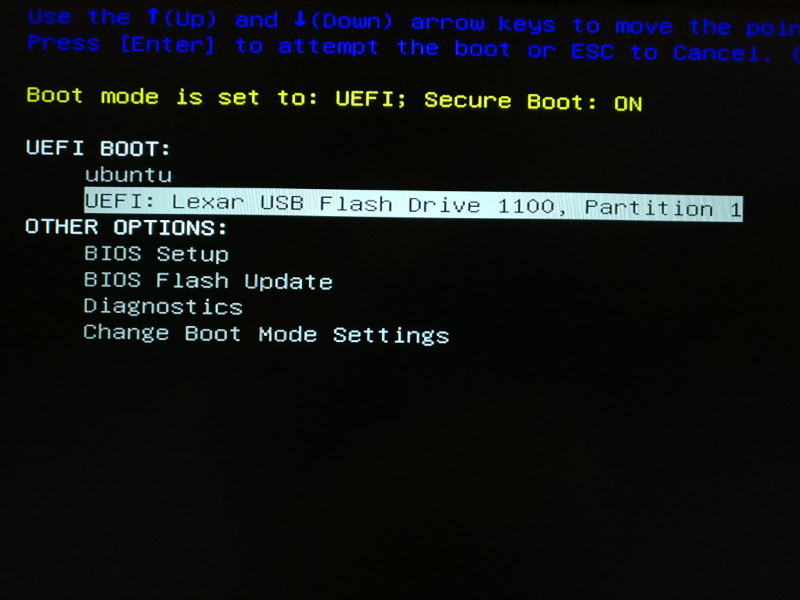
In here, look for the secure boot settings and disable it. If the secure boot is enabled, chances are that your system won’t allow you to boot from the USB disk (to secure your system and data at boot time).
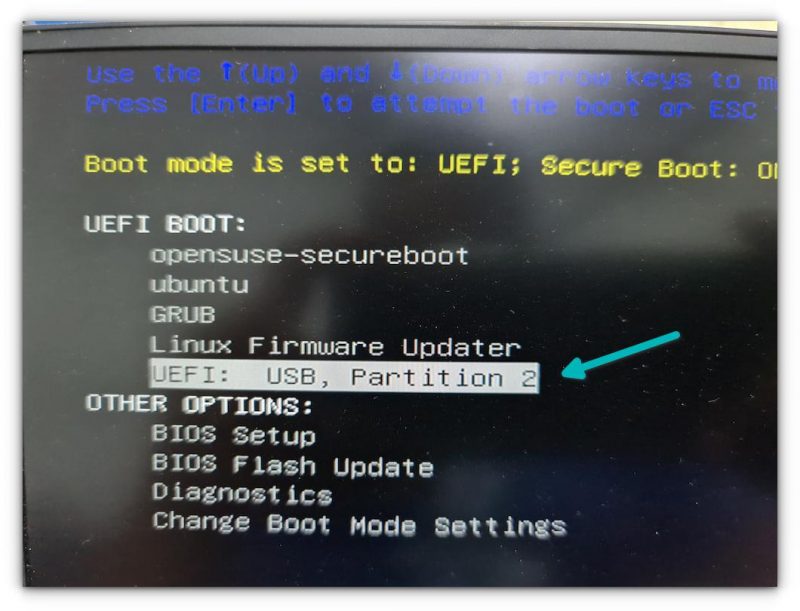
After disabling the secure boot, go into the boot order and then choose the UEFI USB Disk to boot from. Some systems will give this option after you press F12 or F10 button.
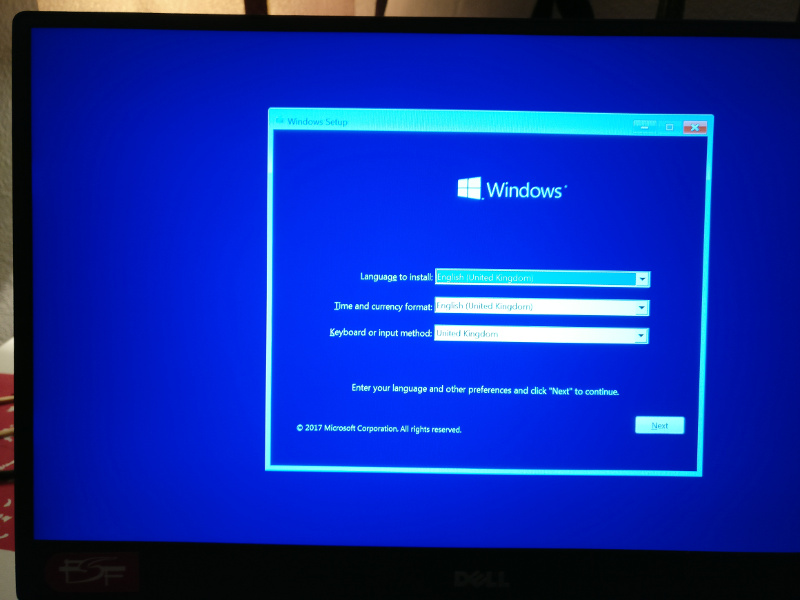
It takes a couple of minutes to start the Windows disk. You should see a screen like this and it will give you the option to repair boot or install Windows.
I think you can take things from here. Enjoy it 🙂
There is another popular tool WoeUSB that can also be used for this purpose.
Step 4: Using Windows 10 bootable USB
Once the bootable USB is ready, restart your system. At boot time, press F2 or F10 or F12 repeatedly to go to the boot settings. In here, select to boot from USB.
You’ll see that Windows 10 is being booted and it gives you the option to install or repair your system. You know what to do now from here.
I hope you find this tutorial useful for creating bootable USB of Windows 10 in Linux . If you have questions or suggestions, please feel free to leave a comment.
Создание загрузочной флешки Windows 10 в Linux

Если вам по той или иной причине потребовалась загрузочная флешка Windows 10 (или другой версии ОС), при этом на имеющемся компьютере в наличии только Linux (Ubuntu, Mint, другие дистрибутивы), вы сравнительно легко можете записать её.
Загрузочная флешка Windows 10 с помощью WoeUSB
Первый способ создания загрузочной флешки Windows 10 в Linux — использование бесплатной программы WoeUSB. Созданный с её помощью накопитель работает и в UEFI и в Legacy режиме.
Для установки программы используйте следующие команды в терминале
sudo add-apt-repository ppa:nilarimogard/webupd8 sudo apt update sudo apt install woeusb
Если эти команды не сработали, попробуйте такой вариант:
wget mirrors.kernel.org/ubuntu/pool/universe/w/wxwidgets3.0/libwxgtk3.0-0v5_3.0.4+dfsg-3_amd64.deb sudo dpkg -i libwxgtk*_amd64.deb sudo apt update sudo apt --fix-broken install sudo apt install woeusb
После установки порядок действий будет следующим:
- Запустите программу.
- Выберите ISO образ диска в разделе «From a disk image» (также, при желании, можно сделать загрузочную флешку с оптического диска или смонтированного образа).
- В разделе «Target device» укажите флешку, на которую будет записан образ (данные с неё будут удалены).

- Нажмите кнопку Install и дождитесь завершения записи загрузочной флешки.
- При появлении ошибки с кодом 256 «Source media is currently mounted», размонтируйте образ ISO с Windows 10.
- При ошибке «Target device is currently busy», размонтируйте и отключите флешку, затем снова подключите её, обычно помогает. Если не сработало, попробуйте предварительно отформатировать её.


На этом процесс записи завершен, можно использовать созданный USB накопитель для установки системы.
Создание загрузочной флешки Windows 10 в Linux без программ
Этот способ, пожалуй, ещё проще, но подойдет только в том случае, если вы планируете загружаться с созданного накопителя на UEFI-системе и устанавливать Windows 10 на GPT диск.
- Отформатируйте флешку в FAT32, например, в приложении «Диски» в Ubuntu.
- Смонтируйте образ ISO с Windows 10 и просто скопируйте всё его содержимое на отформатированную флешку.


Загрузочная флешка Windows 10 для UEFI готова и с неё можно без проблем загрузиться в EFI-режиме.
А вдруг и это будет интересно:
- Лучшие бесплатные программы для Windows
- Не работают Ctrl+C и Ctrl+V — варианты решения
- Интерфейс не поддерживается при открытии файлов в Windows 11 и Windows 10 — варианты решения
- RustDesk — удобная работа с удаленными рабочими столами
- Unable to load library dbdata.dll — как исправить?
- Как включить Сетевое обнаружение в Windows 11 и Windows 10
- Windows 11
- Windows 10
- Android
- Загрузочная флешка
- Лечение вирусов
- Восстановление данных
- Установка с флешки
- Настройка роутера
- Всё про Windows
- В контакте
- Одноклассники