How to Access Shares on Windows 11 from Ubuntu
This post shows students and new users how to connect to shares on Windows 11 from the Ubuntu desktop.
By default, when you open the Ubuntu file manager, it should find network shares automatically advertised across the local Network. Similar to Windows systems, Ubuntu uses SMB protocol to connect to Windows shares that are advertised and shared.
Remote users can connect over the Network, and access shared files and folders as if they were directly connected to the local machines. This is a convenient way to make files and folders available to others on your local Network.
When shares are advertised, Ubuntu and other desktop computers should be able to view and connect to the shared resources.
However, if the shares are not advertised, users on the same Network must manually connect to the shares by typing the resource network address. The steps below will show you how to do that.
Ubuntu and Windows 11 should work seamlessly regarding filing sharing since both will still use SMB protocol. Some things and settings have changed so much that folks must learn new ways of using Windows.
Despite all these new changes in Windows 11, filesharing between Windows and Ubuntu should still work.
Enable Network Discovery in Windows 11
As mentioned above, shares must be advertised for other devices to view or access. In Windows, Network Discovery needs to be turned for advertising of shares to be viewed from other devices.
If your Windows devices cannot see or discover each other on your private Network, it might likely be that Network Discovery is disabled.
To enable Network Discovery, continue below.
Windows 11 has a centralized location for the majority of its settings. Everything can be done, from system configurations to creating new users and updating Windows from its System Settings pane.
To get to System Settings, you can use the Windows key + I shortcut or click on Start ==> Settings, as shown in the image below:
Alternatively, you can use the search box on the taskbar and search for Settings. Then select to open it.
Windows Settings pane should look similar to the image below. In Windows Settings, click Network & internet , then select Ethernet on the right pane of your screen shown in the image below.
In the Ethernet settings pane, under Network profile type, choose Private. This profile will allow devices in your Network to be discovered. This profile should also be selected if you need file sharing or use apps that communicate over this Network.
The private profile is suitable for homes, workplaces, and trusted networks.
If you have other networks like Wi-Fi (if you’re connected to a wireless network) or Ethernet (if you’re connected to a network using a network cable), you can also set the profile type to Private.
When you’re done, exit and network discovery should be enabled.
Turn on Public Folder Sharing in Windows 11
Use the steps below to set up file sharing.
Windows 11 has a centralized location for the majority of its settings. Everything can be done, from system configurations to creating new users and updating Windows from its System Settings pane.
However, changing the account username is still done in the old Control Panel. To get to Control Panel, you can click on Start and start typing Control Panel as shown in the image below:
In the Control Panel, select Network and Internet, as highlighted in the image below.
Select Network and Sharing Center on the next page, as highlighted below.
Next, select Change advanced sharing settings as highlighted below.
Select Private (current profile) and Turn on File and printer sharing in the Advanced sharing center.
Save your changes and exit.
On the same Advance sharing options page, scroll down All networks.
You should see settings for Public folder sharing, Media streaming, File sharing connections, and Password protected sharing. Windows should automatically turn on File and printer sharing in private networks. However, in some instances, this will not be enabled.
If you can not automatically find printers and shared resources in your private Network, then the File sharing option may be disabled.
If you enable password-protected sharing, only people with accounts on the local computer or in the domain environment can access shared files and printers.
Make your changes and save, then exit.
The settings above can easily be done using the commands below as administrator.
netsh advfirewall firewall set rule group="File and Printer Sharing" new enable=Yes netsh advfirewall firewall set rule group="Network Discovery" new enable=Yes
It would be best to open the command prompt as administrator to run the above commands.
Access shares on Windows 11 from Ubuntu
Now that Network Discovery and file sharing are enabled, you can connect to Ubuntu and view shares on Windows devices.
To browse Windows files over the Network, open the File Manager application from the Activities overview (top left corner), click File Manager on the dock, and click Other Locations in the sidebar.
You should see shared files and folders in the Windows Network folder above if Network Discovery is enabled and file sharing enable.
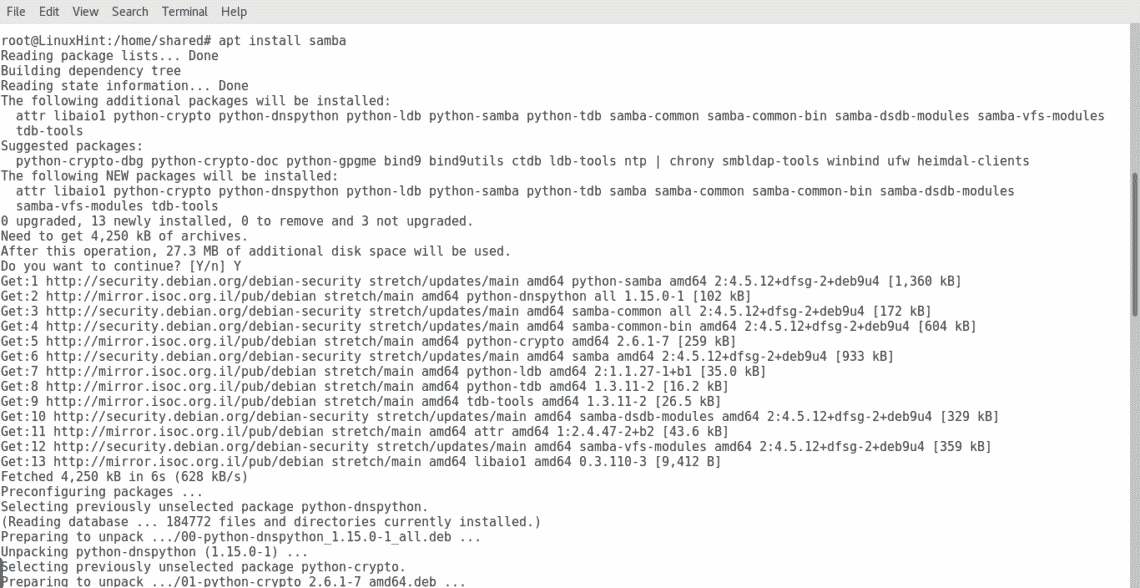
If not, run the commands below to install Samba.
sudo apt update sudo apt install samba
In the file manager, click Other Locations in the sidebar. In Connect to Server, enter the server’s address as a URL. Details on supported URLs are listed below. If you have connected to the server before, you can select it from the Recent Servers list.
Then click the Connect button when you’re ready to connect.
Another format with multiple shared folders:
smb://10.0.2.18/users/Richard/Documents
Windows computers use a proprietary protocol to share files over a local area network. Computers on a Windows network are sometimes grouped into domains for organization and to better control access. If you have the right permissions on the remote computer, you can connect to a Windows share from the file manager.
You should see Windows shares if you have access to them.
If accessing the shares and you’re prompted for login name and password, type in the Windows account login info. This account must have access to view the shared content.
How to access Ubuntu files from Windows
We’ll want to create a folder to share with Windows systems on the Ubuntu machine. Run the commands below to create a Samba folder in the system root directory.
After that, set the group ownership to sambashare and permission to allow group members to access the folder.
sudo chgrp sambashare /samba sudo chmod 2770 /samba
After changing the folder permission to allow sharing, run the commands below to add your Ubuntu account to allow access via Samba.
Replace yourusername with your Ubuntu account.
sudo smbpasswd -a yourusername
Next, set Samba’s Password and enable your Ubuntu account to access Samba shares.
sudo smbpasswd -a yourusername sudo smbpasswd -e yourusername
Next, add your user account to the sambashare group.
sudo usermod -a -G sambashare yourusername
After that, open the Samba configuration file by running the commands below.
sudo nano /etc/samba/smb.conf
Then add these lines at the bottom of the File and save.
[share] path = /samba browseable = yes read only = no force create mode = 0660 force directory mode = 2770 valid users = @sambashare
After saving the File, restart Samba by running the commands below.
sudo systemctl restart smbd sudo systemctl restart nmbd
You should be able to access the /samba folder on the Ubuntu system using your account. When prompted, type in your Ubuntu username and Password.
This post showed you how to enable Windows Network Discovery and enable File sharing to access shared content from Ubuntu. If you find any error above, please use the comment form below to report.
Richard W
I love computers; maybe way too much. What I learned I try to share at geekrewind.com.
How to join a Windows network with your Linux device
![]()
The network used for this tutorial does not assign IP automatically by using DHCP, we’ll assign everything manually. In this tutorial I assume your Linux device is a Debian or Ubuntu based distribution, it may be useful for other distributions too but some commands may be different, for example when restarting services like Samba.
The first step is to remove all previous data belonging to old connections or networks by executing the command “dhclient -r”
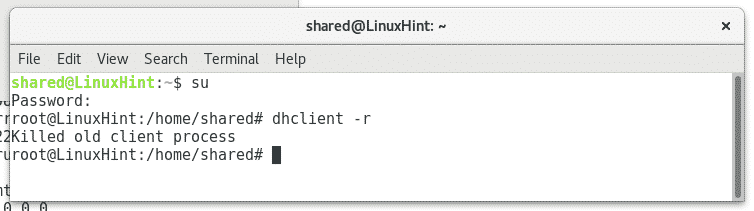
Where “dhclient” makes mention to the dhcp client and “-r” is similar to the “release” used in Windows (ipconfig /release) .
Next we need to learn what network device will interact with the network by running “ifconfig”, similar to the Windows command “ipconfig”, in this case the wired network device is “enp2s0” as shown in the screenshot below.

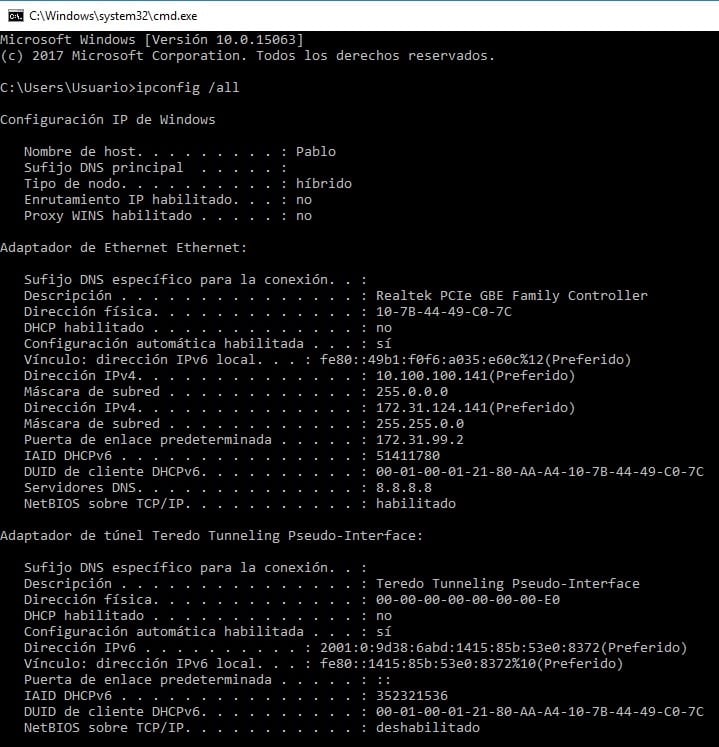
Then we’ll check information on the network from a Windows workstation by running the equivalent command “ipconfig” to see the IP range and gateway address.
We can see the network device has assigned two IP addressed, in this case I know one IP address (10.100.100.141) is limited by a switch to a little portion of the network without internet access while the second (172.31.124.141) has total access. I apologize but the network belongs to a Latin American company and all workstation are in Spanish. Where “Direcciòn” means “address” and “Puerta de enlace determinada” means “gateway”.
From the Windows workstation we’ll ping IP addresses belonging to the same range in order to get an unassigned, or free IP to assign our device (remember within a network IP addresses can’t be repeated, and each device must an unique address). In this case I did ping to the IP 172.31.124.142 and it was unresponsive, therefore it was free.
The next step is to assign to our Linux device it’s own IP and enroute it through the proper gateway by executing “ifconfig enp2s0 X.X.X.X” to assign the IP address and “route add default gw X.X.X.X¨ to determine the gateway.
Remember to replace “X.X.X.X” for the proper addresses according to your Windows network information as shown in the following image.

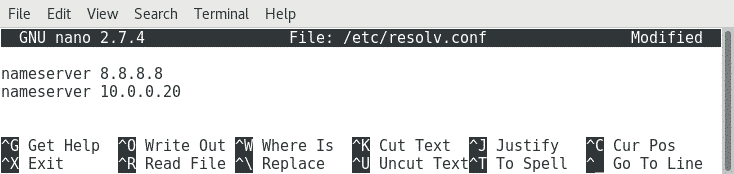
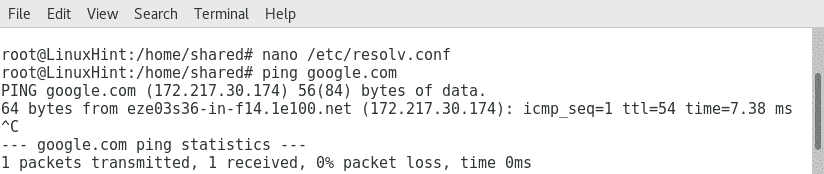
Then we need to edit the file /etc/resolv.conf which stores the DNS addresses (Domain Name Server) to add Domain Name Servers capable to translate domain names like www.linuxhint.com to IP address. To edit the file we’ll use the text editor Nano by running “nano /etc/resolv.conf”

We’ll use Google’s Domain Name Server 8.8.8.8, you can use the same DNS for your network if you are looking for Internet access too.
After editing the file we’ll save it by pressing CTRL+X and confirm by pressing Y.
Next we’ll test our internet access by pinging an internet address like google.com
If we want more than internet access and need to interact with other devices within the same network we need to install Samba, a service which allows us to interact with Windows services.
After Samba was installed we’ll need to add the Workgroup, in this tutorial I assume you know to use Windows graphically, you can check the Workgroup by pressing on “This Computer” with a right click and then checking the Properties. In this case the Workgroup is “Modernizacion”, we’ll edit our Samba configuration file stored at /etc/samba by using Nano again:
We’ll see the same file shown below, and among the first uncommented lines the parameter “workgroup”, the one we need to edit in order to add our device to the Windows workgroup.
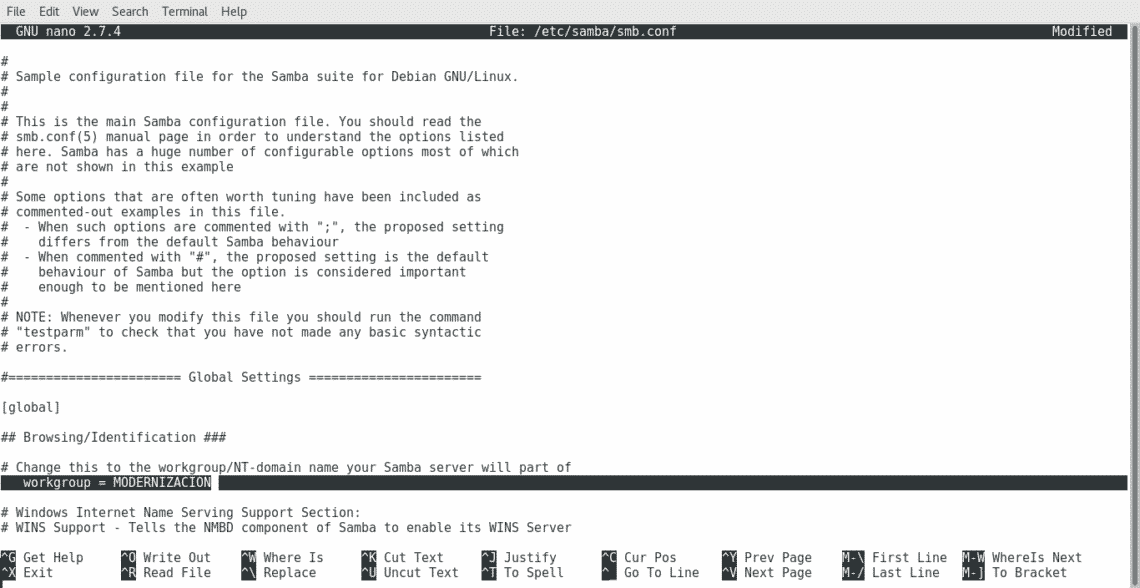
Again to save the file press CTRL+X and then Y when asked if you want to save it.
After making changes on samba´s configuration file we’ll need to restart the service to apply the changes by running “/etc/init.d/smbd restart”

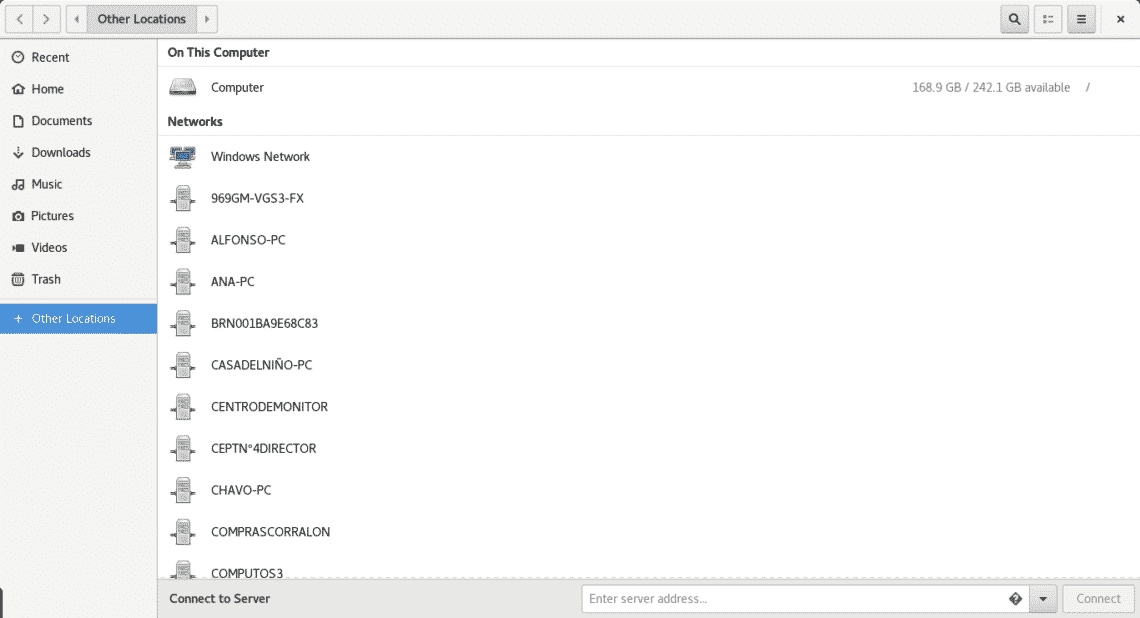
Now we can check with our file manager new locations and printers belonging to the network.
Adding a Linux device to a Windows network is really easy, it may even be easier than in this tutorial if the network assigned IP addresses automatically with the DHCP server.
I hope this tutorial was helpful. Have a great day and keep enjoying by reading LinuxHint.
About the author
David Adams
David Adams is a System Admin and writer that is focused on open source technologies, security software, and computer systems.